
RAID Installation Guide
Page 1
...Installation Guide 2 1.1 Introduction to RAIDXpert from the Internet 17 2.9 Running RAIDXpert without Network Connection 17 1 AMD Windows RAID Installation Guide 10 2.1 Components of RAIDXpert Installation Software 10 2.2 Browser Support 10 2.3 Installing RAIDXpert 10 2.4 ...2.7 Creating a New Logical Drive 14 2.8 Connecting to RAID 2 1.2 RAID Configurations Precautions 3 1.3 Installing Windows OS With RAID Funtions 3 1.3.1 Installing Windows XP / XP 64-bit With RAID Funtions 3 1.3.2 Installing Windows 7 / 7 64-bit / Vista / Vista 64-bit With RAID Funtions 4 1.4 Create Disk Array ...
...Installation Guide 2 1.1 Introduction to RAIDXpert from the Internet 17 2.9 Running RAIDXpert without Network Connection 17 1 AMD Windows RAID Installation Guide 10 2.1 Components of RAIDXpert Installation Software 10 2.2 Browser Support 10 2.3 Installing RAIDXpert 10 2.4 ...2.7 Creating a New Logical Drive 14 2.8 Connecting to RAID 2 1.2 RAID Configurations Precautions 3 1.3 Installing Windows OS With RAID Funtions 3 1.3.1 Installing Windows XP / XP 64-bit With RAID Funtions 3 1.3.2 Installing Windows 7 / 7 64-bit / Vista / Vista 64-bit With RAID Funtions 4 1.4 Create Disk Array ...
RAID Installation Guide
Page 3
... with online capacity expansion. If you are creating a RAID 0 (striping) array for performance. However, RAIDXpert does not allow you want to install Windows OS on a RAID disk composed of 2 or more than the existing drive). As a single physical drive, RAID Ready does not offer the performance...RAID 0 set is recommended to create a single-drive JBOD. Please backup your future data building will operate under a clean environment. 1.3 Installing Windows OS With RAID Functions If you install. 3 You may use two new drives, or use an existing drive and a new drive to the...
... with online capacity expansion. If you are creating a RAID 0 (striping) array for performance. However, RAIDXpert does not allow you want to install Windows OS on a RAID disk composed of 2 or more than the existing drive). As a single physical drive, RAID Ready does not offer the performance...RAID 0 set is recommended to create a single-drive JBOD. Please backup your future data building will operate under a clean environment. 1.3 Installing Windows OS With RAID Functions If you install. 3 You may use two new drives, or use an existing drive and a new drive to the...
RAID Installation Guide
Page 4
... 64-bit.) NOTE. The system will be presented. After reading the floppy disk, the driver will start to install Windows XP / XP 64-bit on your system. B. Insert the ASRock Support CD into floppy drive A: press any key. Please refer to [RAID]. When prompted, insert the SATA /... SATAII driver diskette containing AMD RAID driver. Select your system. 1.3.1 Installing Windows XP / XP 64-bit With RAID Functions If you ...
... 64-bit.) NOTE. The system will be presented. After reading the floppy disk, the driver will start to install Windows XP / XP 64-bit on your system. B. Insert the ASRock Support CD into floppy drive A: press any key. Please refer to [RAID]. When prompted, insert the SATA /... SATAII driver diskette containing AMD RAID driver. Select your system. 1.3.1 Installing Windows XP / XP 64-bit With RAID Functions If you ...
RAID Installation Guide
Page 5
... first. Set the "SATA Operation Mode" option to load the AMD RAID drivers. NOTE1. NOTE2. Before you start to configure RAID function, you install Windows 7 / 7 64-bit / Vista / Vista 64-bit on IDE HDDs and want to manage (create, convert, delete, or rebuild) RAID functions ... the installation. page, please insert the ASRock Support CD into the optical drive again to the BIOS RAID installation guide part in our Support CD: .. \ I386 (For Windows 7 / Vista OS) .. \ AMD64 (For Windows 7 64-bit / Vista 64-bit OS) After that, please insert Windows 7 / 7 64-bit / Vista ...
... first. Set the "SATA Operation Mode" option to load the AMD RAID drivers. NOTE1. NOTE2. Before you start to configure RAID function, you install Windows 7 / 7 64-bit / Vista / Vista 64-bit on IDE HDDs and want to manage (create, convert, delete, or rebuild) RAID functions ... the installation. page, please insert the ASRock Support CD into the optical drive again to the BIOS RAID installation guide part in our Support CD: .. \ I386 (For Windows 7 / Vista OS) .. \ AMD64 (For Windows 7 64-bit / Vista 64-bit OS) After that, please insert Windows 7 / 7 64-bit / Vista ...
RAID Installation Guide
Page 10
... the first installation screen appears, choose an installer language from the dropdown menu. 10 Boot the PC or server, launch Windows, and log in the installation dialog boxes. 6. Insert the software CD into your system. 2.2 Browser Support On the Host... Runtime Environment (in a private folder): The RAIDXpert installation program installs a private JRE in folder _jvm under Windows environment. AMD Windows RAID Installation Guide AMD Windows RAID Installation Guide is designed to configure RAID functions by using RAIDXpert RAID management software under the same directory...
... the first installation screen appears, choose an installer language from the dropdown menu. 10 Boot the PC or server, launch Windows, and log in the installation dialog boxes. 6. Insert the software CD into your system. 2.2 Browser Support On the Host... Runtime Environment (in a private folder): The RAIDXpert installation program installs a private JRE in folder _jvm under Windows environment. AMD Windows RAID Installation Guide AMD Windows RAID Installation Guide is designed to configure RAID functions by using RAIDXpert RAID management software under the same directory...

RAID Installation Guide
Page 11
When the License Agreement screen appears, click the "I do not accept the terms of the license agreement" option to continue. Note: If you are installing. For example, the Windows default folder is: C:\Program Files\AMD\RAIDXpert 11 When the Choose Install Folder screen appears, make your selection of a folder for the RAIDXpert applications you leave the "I accept the terms of the license" option selected, the installation will quit when you click Next. 9. When the Welcome screen appears, click the Next button. 8. 7. Then click the Next button to proceed with installation.
When the License Agreement screen appears, click the "I do not accept the terms of the license agreement" option to continue. Note: If you are installing. For example, the Windows default folder is: C:\Program Files\AMD\RAIDXpert 11 When the Choose Install Folder screen appears, make your selection of a folder for the RAIDXpert applications you leave the "I accept the terms of the license" option selected, the installation will quit when you click Next. 9. When the Welcome screen appears, click the Next button. 8. 7. Then click the Next button to proceed with installation.

RAID Installation Guide
Page 13
When the Install Complete screen appears, click the Finish button. 2.4 Logging into RAIDXpert Choose RAIDXpert in the Windows Programs menu. Launch the Browser. 2. 12. In the Browser address field, type the entry explained below. If you did not choose the External Security option ...
When the Install Complete screen appears, click the Finish button. 2.4 Logging into RAIDXpert Choose RAIDXpert in the Windows Programs menu. Launch the Browser. 2. 12. In the Browser address field, type the entry explained below. If you did not choose the External Security option ...

RAID Installation Guide
Page 17
Choose RAIDXpert in the Windows Programs menu.Or choose RAIDXpert in the Linux Applications menu.Your browser opens and displays a "no connection to the Internet is currently available" message will ...
Choose RAIDXpert in the Windows Programs menu.Or choose RAIDXpert in the Linux Applications menu.Your browser opens and displays a "no connection to the Internet is currently available" message will ...

User Manual
Page 3
... Functions for SATA / SATAII HDDs ....... 28 2.11 SATA / SATAII HDD Hot Plug Feature and Operation Guide ....... 29 2.12 Driver Installation Guide 31 2.13 Installing Windows® 7 / 7 64-bit / VistaTM / VistaTM 64-bit / XP / XP 64-bit With RAID Functions 31 2.13.1 Installing... Windows® XP / XP 64-bit With RAID Functions 31 2.13.2 Installing Windows® 7 / 7 64-bit / VistaTM / VistaTM 64-bit With RAID Functions 32 2.14 Installing Windows® 7 / 7 64-bit / VistaTM / VistaTM 64-bit / XP / XP 64-bit Without ...
... Functions for SATA / SATAII HDDs ....... 28 2.11 SATA / SATAII HDD Hot Plug Feature and Operation Guide ....... 29 2.12 Driver Installation Guide 31 2.13 Installing Windows® 7 / 7 64-bit / VistaTM / VistaTM 64-bit / XP / XP 64-bit With RAID Functions 31 2.13.1 Installing... Windows® XP / XP 64-bit With RAID Functions 31 2.13.2 Installing Windows® 7 / 7 64-bit / VistaTM / VistaTM 64-bit With RAID Functions 32 2.14 Installing Windows® 7 / 7 64-bit / VistaTM / VistaTM 64-bit / XP / XP 64-bit Without ...
User Manual
Page 8
...Boot Failure Guard (B.F.G.) Hardware - Microsoft® Windows® 7 / 7 64-bit / VistaTM / VistaTM 64-bit / XP / XP Media Center / XP 64-bit compliant Certifications - ErP/EuP Ready (ErP/EuP ready power supply is required) (see CAUTION 12) - ASRock U-COP (see CAUTION 13) * For detailed... product information, please visit our website: http://www.asrock.com WARNING Please realize that there is a certain risk involved with overclocking, including ...
...Boot Failure Guard (B.F.G.) Hardware - Microsoft® Windows® 7 / 7 64-bit / VistaTM / VistaTM 64-bit / XP / XP Media Center / XP 64-bit compliant Certifications - ErP/EuP Ready (ErP/EuP ready power supply is required) (see CAUTION 12) - ASRock U-COP (see CAUTION 13) * For detailed... product information, please visit our website: http://www.asrock.com WARNING Please realize that there is a certain risk involved with overclocking, including ...
User Manual
Page 9
... and software design, Intelligent Energy Saver is able to improve efficiency when the CPU cores are idle. For Windows® OS with 64-bit CPU, there is a user-friendly ASRock overclocking tool which allows you can press key during the POST or press key to BIOS setup menu to ...get the best system performance under Windows® 7 / VistaTM / XP. To use FAT32/16/12 file system. 9 ASRock Instant Flash is subject to the operating system limitation, the actual memory size may be noted that delivers unparalleled...
... and software design, Intelligent Energy Saver is able to improve efficiency when the CPU cores are idle. For Windows® OS with 64-bit CPU, there is a user-friendly ASRock overclocking tool which allows you can press key during the POST or press key to BIOS setup menu to ...get the best system performance under Windows® 7 / VistaTM / XP. To use FAT32/16/12 file system. 9 ASRock Instant Flash is subject to the operating system limitation, the actual memory size may be noted that delivers unparalleled...
User Manual
Page 19
... the second monitor. Install the onboard VGA driver and the add-on the I/O panel. Click "Extend my Windows desktop onto this motherboard. 4. Surround Display Feature This motherboard supports surround display upgrade. Boot your system. For Windows® XP / XP 64-bit OS: Right click the desktop, choose "Properties", and select the "Settings...
... the second monitor. Install the onboard VGA driver and the add-on the I/O panel. Click "Extend my Windows desktop onto this motherboard. 4. Surround Display Feature This motherboard supports surround display upgrade. Boot your system. For Windows® XP / XP 64-bit OS: Right click the desktop, choose "Properties", and select the "Settings...

User Manual
Page 20
... and drag the display icons to a compliant display. In other words, HDCP specification is HDCP? B. Please refer to eliminate the possibility of your change. For Windows® 7 / 7 64-bit / VistaTM / VistaTM 64-bit OS: Right click the desktop, choose "Personalize", and select the "Display Settings" tab so that uses the DVI...
... and drag the display icons to a compliant display. In other words, HDCP specification is HDCP? B. Please refer to eliminate the possibility of your change. For Windows® 7 / 7 64-bit / VistaTM / VistaTM 64-bit OS: Right click the desktop, choose "Personalize", and select the "Display Settings" tab so that uses the DVI...
User Manual
Page 21
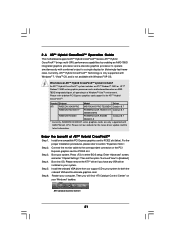
...Catalyst 8.7 256MB DDR3 RADEON HD3450 POWERCOLOR AX3450 Catalyst 8.7 256MD2-S * Currently, RADEON HD2400XT series graphics cards are only supported with Windows® XP OS. Enjoy the benefit of ATITM Hybrid CrossFireXTM Step 1. Step 4. Install the onboard VGA driver from our support.... 6 ATITM Hybrid CrossFireXTM Operation Guide This motherboard supports ATITM Hybrid CrossFireXTM feature. Currently, ATITM Hybrid CrossFireXTM Technology is only supported with Windows® 7 / VistaTM OS, and is not available with AMD Phenom CPU. Connect the monitor cable to your system. Enter "...
...Catalyst 8.7 256MB DDR3 RADEON HD3450 POWERCOLOR AX3450 Catalyst 8.7 256MD2-S * Currently, RADEON HD2400XT series graphics cards are only supported with Windows® XP OS. Enjoy the benefit of ATITM Hybrid CrossFireXTM Step 1. Step 4. Install the onboard VGA driver from our support.... 6 ATITM Hybrid CrossFireXTM Operation Guide This motherboard supports ATITM Hybrid CrossFireXTM feature. Currently, ATITM Hybrid CrossFireXTM Technology is only supported with Windows® 7 / VistaTM OS, and is not available with AMD Phenom CPU. Connect the monitor cable to your system. Enter "...

User Manual
Page 26
...the Front Mic as default record device. Connect Ground (GND) to this header. 26 MIC_RET and OUT_RET are for AC'97 audio panel. For Windows® XP / XP 64-bit OS: Please select "Front Mic" as the default record device. Click "Set Default Device" to enter ... front panel audio header as below: A. Connect Mic_IN (MIC) to the "Front Mic" Tab in the Realtek Control panel. D. Enter BIOS Setup Utility. For Windows® XP / XP 64-bit OS: Click "Audio I/O", select "Connector Settings" , choose "Disable front panel jack detection", and save the change by clicking ...
...the Front Mic as default record device. Connect Ground (GND) to this header. 26 MIC_RET and OUT_RET are for AC'97 audio panel. For Windows® XP / XP 64-bit OS: Please select "Front Mic" as the default record device. Click "Set Default Device" to enter ... front panel audio header as below: A. Connect Mic_IN (MIC) to the "Front Mic" Tab in the Realtek Control panel. D. Enter BIOS Setup Utility. For Windows® XP / XP 64-bit OS: Click "Audio I/O", select "Connector Settings" , choose "Disable front panel jack detection", and save the change by clicking ...

User Manual
Page 31
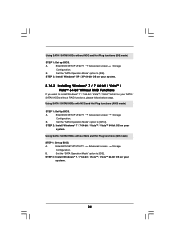
Please follow the order from up BIOS. Insert the ASRock Support CD into your optical drive to boot your optical drive first. Please select CD... CD driver page. Then, the drivers compatible to your system can work properly. 2.13 Installing Windows® 7 / 7 64-bit / VistaTM / VistaTM 64-bit / XP / XP 64-bit With RAID Functions If you ...or more SATA / SATAII HDDs with RAID functions, please follow below procedures according to the OS you install. 2.13.1 Installing Windows® XP / XP 64-bit With RAID Functions If you install can be auto-detected and listed on the screen, ...
Please follow the order from up BIOS. Insert the ASRock Support CD into your optical drive to boot your optical drive first. Please select CD... CD driver page. Then, the drivers compatible to your system can work properly. 2.13 Installing Windows® 7 / 7 64-bit / VistaTM / VistaTM 64-bit / XP / XP 64-bit With RAID Functions If you ...or more SATA / SATAII HDDs with RAID functions, please follow below procedures according to the OS you install. 2.13.1 Installing Windows® XP / XP 64-bit With RAID Functions If you install can be auto-detected and listed on the screen, ...

User Manual
Page 32
...bit OS on your system. When prompted, insert the SATA / SATAII driver diskette containing the AMD RAID driver. After step 1, 2, 3, you can start to install Windows® XP / XP 64-bit OS on your system. 32 STEP 1: Set up "SATA Operation Mode" to [RAID] first. Enter BIOS SETUP UTILITY Advanced ... / VistaTM 64-bit With RAID Functions If you want to the OS you need to check the RAID installation guide in the Support CD for Windows® XP 64-bit.) NOTE. Please refer to the BIOS RAID installation guide part of 2 or more SATA / SATAII HDDs with RAID functions, please...
...bit OS on your system. When prompted, insert the SATA / SATAII driver diskette containing the AMD RAID driver. After step 1, 2, 3, you can start to install Windows® XP / XP 64-bit OS on your system. 32 STEP 1: Set up "SATA Operation Mode" to [RAID] first. Enter BIOS SETUP UTILITY Advanced ... / VistaTM 64-bit With RAID Functions If you want to the OS you need to check the RAID installation guide in the Support CD for Windows® XP 64-bit.) NOTE. Please refer to the BIOS RAID installation guide part of 2 or more SATA / SATAII HDDs with RAID functions, please...

User Manual
Page 33
...BIOS. Enter BIOS SETUP UTILITY Advanced screen Storage Configuration. A. When prompted, insert the SATA / SATAII driver diskette containing the AMD AHCI driver. If you install Windows® 7 / 7 64-bit / VistaTM / VistaTM 64-bit on IDE HDDs and want to manage (create, convert, delete, or rebuild) RAID ...functions on SATA / SATAII HDDs, you still need to set the RAID configuration by using the Windows RAID installation guide in the following path in BIOS first. Set the "SATA Operation Mode" option to [RAID] in the Support CD: .. ...
...BIOS. Enter BIOS SETUP UTILITY Advanced screen Storage Configuration. A. When prompted, insert the SATA / SATAII driver diskette containing the AMD AHCI driver. If you install Windows® 7 / 7 64-bit / VistaTM / VistaTM 64-bit on IDE HDDs and want to manage (create, convert, delete, or rebuild) RAID ...functions on SATA / SATAII HDDs, you still need to set the RAID configuration by using the Windows RAID installation guide in the following path in BIOS first. Set the "SATA Operation Mode" option to [RAID] in the Support CD: .. ...
User Manual
Page 34
...NCQ and Hot Plug functions (IDE mode) STEP 1: Set up BIOS. Enter BIOS SETUP UTILITY Advanced screen Storage Configuration. STEP 2: Install Windows® 7 / 7 64-bit / VistaTM / VistaTM 64-bit OS on your SATA / SATAII HDDs without RAID functions, please follow below steps. STEP 2:... HDDs with NCQ and Hot Plug functions (AHCI mode) STEP 1: Set Up BIOS. B. Set the "SATA Operation Mode" option to [IDE]. STEP 2: Install Windows® 7 / 7 64-bit / VistaTM / VistaTM 64-bit OS on your system. 34 Enter BIOS SETUP UTILITY Advanced screen Storage Configuration. A. Using SATA ...
...NCQ and Hot Plug functions (IDE mode) STEP 1: Set up BIOS. Enter BIOS SETUP UTILITY Advanced screen Storage Configuration. STEP 2: Install Windows® 7 / 7 64-bit / VistaTM / VistaTM 64-bit OS on your SATA / SATAII HDDs without RAID functions, please follow below steps. STEP 2:... HDDs with NCQ and Hot Plug functions (AHCI mode) STEP 1: Set Up BIOS. B. Set the "SATA Operation Mode" option to [IDE]. STEP 2: Install Windows® 7 / 7 64-bit / VistaTM / VistaTM 64-bit OS on your system. 34 Enter BIOS SETUP UTILITY Advanced screen Storage Configuration. A. Using SATA ...

User Manual
Page 42
...in this section, you execute ASRock Instant Flash utility, the utility will show the BIOS files and their respective information. If you may set the configurations for CPU WARNING : Setting wrong values in a few clicks without entering operating systems first like MS-DOS or Windows®. Please be noted that... in Flash ROM. CPU Configuration Chipset Configuration ACPI Configuration Storage Configuration PCIPnP Configuration Floppy Configuration SuperIO Configuration USB Configuration BIOS Update Utility ASRock Instant Flash Select Screen Select Item Enter Go to malfunction.
...in this section, you execute ASRock Instant Flash utility, the utility will show the BIOS files and their respective information. If you may set the configurations for CPU WARNING : Setting wrong values in a few clicks without entering operating systems first like MS-DOS or Windows®. Please be noted that... in Flash ROM. CPU Configuration Chipset Configuration ACPI Configuration Storage Configuration PCIPnP Configuration Floppy Configuration SuperIO Configuration USB Configuration BIOS Update Utility ASRock Instant Flash Select Screen Select Item Enter Go to malfunction.


