RAID Installation Guide
Page 1
... 2.4 Logging into RAIDXpert 13 2.5 Regular Connection 13 2.6 Secure Connection 13 2.7 Creating a New Logical Drive 14 2.8 Connecting to RAID 2 1.2 RAID Configurations Precautions 3 1.3 Installing Windows 7 / 7 64-bit / Vista / Vista 64-bit / XP / XP 64-bit With RAID Funtions .... 3 1.3.1 Installing Windows XP / XP 64-bit With RAID Funtions 3 1.3.2 Installing Windows 7 / 7 64-bit / Vista / Vista 64-bit With...
... 2.4 Logging into RAIDXpert 13 2.5 Regular Connection 13 2.6 Secure Connection 13 2.7 Creating a New Logical Drive 14 2.8 Connecting to RAID 2 1.2 RAID Configurations Precautions 3 1.3 Installing Windows 7 / 7 64-bit / Vista / Vista 64-bit / XP / XP 64-bit With RAID Funtions .... 3 1.3.1 Installing Windows XP / XP 64-bit With RAID Funtions 3 1.3.2 Installing Windows 7 / 7 64-bit / Vista / Vista 64-bit With...
RAID Installation Guide
Page 2
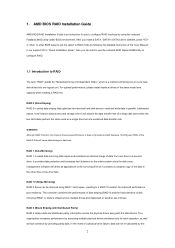
...for each operation, as well as it contains a complete copy of the data in parallel, interleaved stacks. Hot-Plug any fault tolerance. RAID 1 (Data Mirroring) RAID 1 is called data striping that copies and maintains an identical image of a single disk alone while the two hard disks perform the ... Guide", then you make a SATA / SATAII / SATA3 driver diskette, press or to enter BIOS setup to set the option to RAID The term "RAID" stands for improved performance plus resiliency. Data is called data mirroring that optimizes two identical hard disk drives to read and write data in...
...for each operation, as well as it contains a complete copy of the data in parallel, interleaved stacks. Hot-Plug any fault tolerance. RAID 1 (Data Mirroring) RAID 1 is called data striping that copies and maintains an identical image of a single disk alone while the two hard disks perform the ... Guide", then you make a SATA / SATAII / SATA3 driver diskette, press or to enter BIOS setup to set the option to RAID The term "RAID" stands for improved performance plus resiliency. Data is called data mirroring that optimizes two identical hard disk drives to read and write data in...
RAID Installation Guide
Page 3
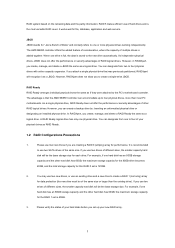
... the maximum storage capacity for file, database, application and web servers. When one or more than the existing drive). RAID Ready RAID Ready arranges individual physical drives the same as a logical drive. You can designate from one physical drive. Please verify the... by: Inserting an unformatted physical drive or designating an installed physical drive. If you create, manage, and delete a RAID Ready the same as RAID Ready. 1.2 RAID Configurations Precautions 1. It is that was previously partitioned, RAIDXpert will recognize it as a JBOD. The AMD SB850 controller...
... the maximum storage capacity for file, database, application and web servers. When one or more than the existing drive). RAID Ready RAID Ready arranges individual physical drives the same as a logical drive. You can designate from one physical drive. Please verify the... by: Inserting an unformatted physical drive or designating an installed physical drive. If you create, manage, and delete a RAID Ready the same as RAID Ready. 1.2 RAID Configurations Precautions 1. It is that was previously partitioned, RAIDXpert will recognize it as a JBOD. The AMD SB850 controller...
RAID Installation Guide
Page 4
... to "Clear Disk Data" or not. In the process you create RAID, the system will see the message on a RAID disk composed of Windows setup, press F6 to the BIOS RAID installation guide part in this RAID installation guide for details. C. E. Insert the ASRock Support CD into the floppy diskette. When you see these messages...
... to "Clear Disk Data" or not. In the process you create RAID, the system will see the message on a RAID disk composed of Windows setup, press F6 to the BIOS RAID installation guide part in this RAID installation guide for details. C. E. Insert the ASRock Support CD into the floppy diskette. When you see these messages...
RAID Installation Guide
Page 5
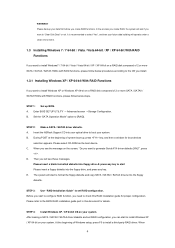
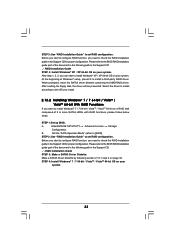
... to the OS you install. 1.3.2 Installing Windows 7 / 7 64-bit / Vista / Vista 64-bit With RAID Functions If you need to the BIOS RAID installation guide part in this RAID installation guide for details. B. STEP 3: Install Windows 7 / 7 64-bit / Vista / Vista 64-bit ...OS on a RAID disk composed of 2 or more SATA / SATAII / SATA3 HDDs with RAID functions, please follow below steps. STEP 2: Use "RAID Installation Guide" to [RAID]. Select your system. 5 Enter BIOS SETUP UTILITY → Advanced screen →Storage Configuration...
... to the OS you install. 1.3.2 Installing Windows 7 / 7 64-bit / Vista / Vista 64-bit With RAID Functions If you need to the BIOS RAID installation guide part in this RAID installation guide for details. B. STEP 3: Install Windows 7 / 7 64-bit / Vista / Vista 64-bit ...OS on a RAID disk composed of 2 or more SATA / SATAII / SATA3 HDDs with RAID functions, please follow below steps. STEP 2: Use "RAID Installation Guide" to [RAID]. Select your system. 5 Enter BIOS SETUP UTILITY → Advanced screen →Storage Configuration...

RAID Installation Guide
Page 6
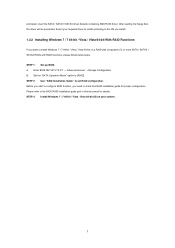
... data on your physical drives as RAID logical drives. Creating RAID logical drives - Diagnosing critical and offline RAID logical drives - Monitoring RAID and JBOD status - Deleting RAID logical drives - Displaying the IRQ and base address (for system diagnosis) Press keys, then the RAID Option ROM Utility Main Menu appears. 6 The RAID Option ROM Utility can perform these...
... data on your physical drives as RAID logical drives. Creating RAID logical drives - Diagnosing critical and offline RAID logical drives - Monitoring RAID and JBOD status - Deleting RAID logical drives - Displaying the IRQ and base address (for system diagnosis) Press keys, then the RAID Option ROM Utility Main Menu appears. 6 The RAID Option ROM Utility can perform these...
RAID Installation Guide
Page 7
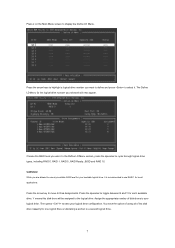
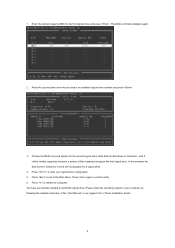
... logical drive number you want to define and press to select it is recommended to the logical drive. Choose the RAID level you selected will be assigned to use RAID 1 for most applications. Assign the appropriate number of the disk drive capacity for your bootable logical drive, it .... Then press to a second logical drive. 7 Press the arrow keys to highlight a logical drive number you are allowed to use any available RAID level for one logical drive or allocating a portion to save your logical drive. In the Define LD Menu section, press the spacebar to Disk Assignments...
... logical drive number you want to define and press to select it is recommended to the logical drive. Choose the RAID level you selected will be assigned to use RAID 1 for most applications. Assign the appropriate number of the disk drive capacity for your bootable logical drive, it .... Then press to a second logical drive. 7 Press the arrow keys to highlight a logical drive number you are allowed to use any available RAID level for one logical drive or allocating a portion to save your logical drive. In the Define LD Menu section, press the spacebar to Disk Assignments...
RAID Installation Guide
Page 8
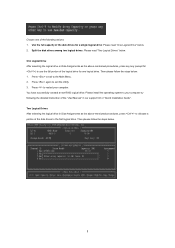
... of the logical drive for a single logical drive: Please read "Two Logical Drives" below . 2. Press again to the Main Menu. 2. You have successfully created a new RAID logical drive. Choose one logical drive. Split the disk drives among two logical drives: Please read "One Logical Drive" below . Then please follow the steps...
... of the logical drive for a single logical drive: Please read "Two Logical Drives" below . 2. Press again to the Main Menu. 2. You have successfully created a new RAID logical drive. Choose one logical drive. Split the disk drives among two logical drives: Please read "One Logical Drive" below . Then please follow the steps...
RAID Installation Guide
Page 9
... and options for the first logical drive and press . Press to exit to exit the Utility. 6. You have successfully created a new RAID logical drive. Enter the desired capacity (MB) for the second logical drive. In this example the disk drives in our support CD or "Quick Installation ...
... and options for the first logical drive and press . Press to exit to exit the Utility. 6. You have successfully created a new RAID logical drive. Enter the desired capacity (MB) for the second logical drive. In this example the disk drives in our support CD or "Quick Installation ...

RAID Installation Guide
Page 10
... private JRE in again as the Administrator, log out, then log in folder _jvm under Windows environment. AMD Windows RAID Installation Guide AMD Windows RAID Installation Guide is designed to your CD-ROM drive. 3. Other brands of RAIDXpert Installation Software RAIDXpert installation software will ...and follow the instructions below to avoid incompatibility issues with any other JREs that exist anywhere on the PC with AMD SB850 SATA RAID controllers. Boot the PC or server, launch Windows, and log in the installation dialog boxes. 6. The first RAIDXpert installation dialog...
... private JRE in again as the Administrator, log out, then log in folder _jvm under Windows environment. AMD Windows RAID Installation Guide AMD Windows RAID Installation Guide is designed to your CD-ROM drive. 3. Other brands of RAIDXpert Installation Software RAIDXpert installation software will ...and follow the instructions below to avoid incompatibility issues with any other JREs that exist anywhere on the PC with AMD SB850 SATA RAID controllers. Boot the PC or server, launch Windows, and log in the installation dialog boxes. 6. The first RAIDXpert installation dialog...
RAID Installation Guide
Page 14
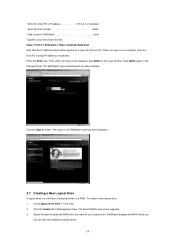
... when the login screen appears, type admin in over a network, enter the Host PC's actual IP address or hostname. Click the Create tab in a RAID. To create a new logical drive: 1. After sign-in, the RAIDXpert opening screen appears. 2.7 Creating a New Logical Drive A logical drive is a ...collection of physical drives in Management View. Click Logical Drive View in the Password field. The Select RAID Level screen appears. 3. RAIDXpert displays the RAID levels you want for your entry looks like this: https://127.0.0.1:8443/amd or https://localhost:8443/amd Note that...
... when the login screen appears, type admin in over a network, enter the Host PC's actual IP address or hostname. Click the Create tab in a RAID. To create a new logical drive: 1. After sign-in, the RAIDXpert opening screen appears. 2.7 Creating a New Logical Drive A logical drive is a ...collection of physical drives in Management View. Click Logical Drive View in the Password field. The Select RAID Level screen appears. 3. RAIDXpert displays the RAID levels you want for your entry looks like this: https://127.0.0.1:8443/amd or https://localhost:8443/amd Note that...

RAID Installation Guide
Page 15
For RAID Ready and JBOD, the system will check the Use Maximum Capacity Box automatically. 7. Selected drives have a black frame. If you want to split the capacity ... maximum capacity of your physical drives between two logical drives, enter the capacity for the first logical drive in the Logical Drive Size field. For RAID Ready, select only one physical drive. 15 4. Available drives have a red frame. Select all Free (unassigned) physical drives The Select Drives screen appears...
For RAID Ready and JBOD, the system will check the Use Maximum Capacity Box automatically. 7. Selected drives have a black frame. If you want to split the capacity ... maximum capacity of your physical drives between two logical drives, enter the capacity for the first logical drive in the Logical Drive Size field. For RAID Ready, select only one physical drive. 15 4. Available drives have a red frame. Select all Free (unassigned) physical drives The Select Drives screen appears...

RAID Installation Guide
Page 16
...8226; Fast Initialization - For more information. • None - No initialization. 8. RAID 0, 5, and 10. The choices are physical drives available, the Select RAID Level screen appears again, where you can create an additional logical drive. RAID 0, 1, and 5. Select an Initialization policy from the dropdown menu. • ... added to the logical drive. Click the Finish button. Click the Logical Drive in the field provided. 10. Click the Next button. RAID 0, 1 and 5 only. • None - The Final Settings screen appears. 11. Erases the reserve and master boot sectors of...
...8226; Fast Initialization - For more information. • None - No initialization. 8. RAID 0, 5, and 10. The choices are physical drives available, the Select RAID Level screen appears again, where you can create an additional logical drive. RAID 0, 1, and 5. Select an Initialization policy from the dropdown menu. • ... added to the logical drive. Click the Finish button. Click the Logical Drive in the field provided. 10. Click the Next button. RAID 0, 1 and 5 only. • None - The Final Settings screen appears. 11. Erases the reserve and master boot sectors of...
User Manual
Page 3
... 64-bit / VistaTM / VistaTM 64-bit / XP / XP 64-bit With RAID Functions 32 2.13.1 Installing Windows® XP / XP 64-bit With RAID Functions 32 2.13.2 Installing Windows® 7 / 7 64-bit / VistaTM / VistaTM 64-bit With RAID Functions 33 2.14 Installing Windows® 7 / 7 64-bit / VistaTM / ...VistaTM 64-bit / XP / XP 64-bit Without RAID Functions 34 2.14.1 Installing Windows® XP / XP 64-bit Without RAID Functions 34 2.14.2 Installing Windows® 7 / 7 64-bit...
... 64-bit / VistaTM / VistaTM 64-bit / XP / XP 64-bit With RAID Functions 32 2.13.1 Installing Windows® XP / XP 64-bit With RAID Functions 32 2.13.2 Installing Windows® 7 / 7 64-bit / VistaTM / VistaTM 64-bit With RAID Functions 33 2.14 Installing Windows® 7 / 7 64-bit / VistaTM / ...VistaTM 64-bit / XP / XP 64-bit Without RAID Functions 34 2.14.1 Installing Windows® XP / XP 64-bit Without RAID Functions 34 2.14.2 Installing Windows® 7 / 7 64-bit...

User Manual
Page 7
... (ACT/LINK LED and SPEED LED) - 1 x IEEE 1394 Port - Front panel audio connector - 4 x USB 2.0 headers (support 8 USB 2.0 ports) (see CAUTION 7) - 5 x SATA3 6.0 Gb/s connectors, support RAID (RAID 0, RAID 1, RAID 0+1 and RAID 5), NCQ, AHCI and "Hot Plug" functions - 1 x USB 3.0 port by Fresco FL1000G, supports USB 3.0 up to -Use USB 3.0 Port - 1 x RJ-45 LAN Port with Content Protection...
... (ACT/LINK LED and SPEED LED) - 1 x IEEE 1394 Port - Front panel audio connector - 4 x USB 2.0 headers (support 8 USB 2.0 ports) (see CAUTION 7) - 5 x SATA3 6.0 Gb/s connectors, support RAID (RAID 0, RAID 1, RAID 0+1 and RAID 5), NCQ, AHCI and "Hot Plug" functions - 1 x USB 3.0 port by Fresco FL1000G, supports USB 3.0 up to -Use USB 3.0 Port - 1 x RJ-45 LAN Port with Content Protection...
User Manual
Page 29
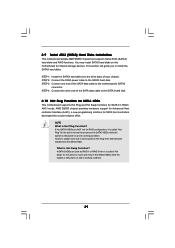
...insert and remove the SATA3 HDDs while the system is still power-on and in working condition. If the SATA3 HDDs are built as RAID 1 or RAID 5 then it is called "Hot Plug" for internal storage devices. STEP 3: Connect one end of your chassis. STEP 2: Connect ...Swap functions for SATA host controllers developed thru a joint industry effort. However, please note that supports Serial ATA3 (SATA3) hard disks and RAID functions. AMD SB850 chipset provides hardware support for Advanced Host controller Interface (AHCI), a new programming interface for SATA3 in working condition. 29...
...insert and remove the SATA3 HDDs while the system is still power-on and in working condition. If the SATA3 HDDs are built as RAID 1 or RAID 5 then it is called "Hot Plug" for internal storage devices. STEP 3: Connect one end of your chassis. STEP 2: Connect ...Swap functions for SATA host controllers developed thru a joint industry effort. However, please note that supports Serial ATA3 (SATA3) hard disks and RAID functions. AMD SB850 chipset provides hardware support for Advanced Host controller Interface (AHCI), a new programming interface for SATA3 in working condition. 29...

User Manual
Page 30
...SATA 15-pin power connector and IDE 1x4-pin conventional power connector interfaces, the IDE 1x4-pin conventional power connector interface is indicated in RAID / AHCI mode. Make sure your dealer or HDD user manual. Please read below cable accessories from your SATA3 HDD can support Hot...function from the motherboard gift box pack. SATA data cable (Red) B. Please make sure the SATA3 driver is available on our website: www.asrock.com 2. SATA power cable SATA 7-pin connector Caution The SATA 15-pin power connector (Black) connect to SATA3 HDD 1x4-pin conventional power ...
...SATA 15-pin power connector and IDE 1x4-pin conventional power connector interfaces, the IDE 1x4-pin conventional power connector interface is indicated in RAID / AHCI mode. Make sure your dealer or HDD user manual. Please read below cable accessories from your SATA3 HDD can support Hot...function from the motherboard gift box pack. SATA data cable (Red) B. Please make sure the SATA3 driver is available on our website: www.asrock.com 2. SATA power cable SATA 7-pin connector Caution The SATA 15-pin power connector (Black) connect to SATA3 HDD 1x4-pin conventional power ...

User Manual
Page 32
...64-bit / XP / XP 64-bit on the screen, "Generate Serial ATA driver diskette [YN]?", press . E. Insert the ASRock Support CD into your optical drive to [RAID]. Please select CD-ROM as the boot device. D. A. Set the "SATA Operation Mode" option to boot your system. During ...POST at the beginning of 2 or more SATA3 HDDs with RAID functions, please follow below steps. When you want to your system can be destroyed, proceed? [Y/N] Please insert a floppy diskette into the floppy...
...64-bit / XP / XP 64-bit on the screen, "Generate Serial ATA driver diskette [YN]?", press . E. Insert the ASRock Support CD into your optical drive to [RAID]. Please select CD-ROM as the boot device. D. A. Set the "SATA Operation Mode" option to boot your system. During ...POST at the beginning of 2 or more SATA3 HDDs with RAID functions, please follow below steps. When you want to your system can be destroyed, proceed? [Y/N] Please insert a floppy diskette into the floppy...
User Manual
Page 33
...of Windows® setup, press F6 to install Windows® 7 / 7 64-bit / VistaTM / VistaTM 64-bit on a RAID disk composed of 2 or more SATA3 HDDs with RAID functions, please follow below steps. Select the driver to install according to the OS you install. 2.13.2 Installing Windows® 7 ... STEP 4: Install Windows® XP / XP 64-bit OS on your system. When prompted, insert the SATA3 driver diskette containing the AMD RAID driver. After reading the floppy disk, the driver will be presented. A. Enter BIOS SETUP UTILITY Advanced screen Storage Configuration. STEP 4: Install Windows...
...of Windows® setup, press F6 to install Windows® 7 / 7 64-bit / VistaTM / VistaTM 64-bit on a RAID disk composed of 2 or more SATA3 HDDs with RAID functions, please follow below steps. Select the driver to install according to the OS you install. 2.13.2 Installing Windows® 7 ... STEP 4: Install Windows® XP / XP 64-bit OS on your system. When prompted, insert the SATA3 driver diskette containing the AMD RAID driver. After reading the floppy disk, the driver will be presented. A. Enter BIOS SETUP UTILITY Advanced screen Storage Configuration. STEP 4: Install Windows...

User Manual
Page 34
.... Enter BIOS SETUP UTILITY Advanced screen Storage Configuration. You can start to install Windows® XP / XP 64-bit on your SATA3 HDDs without RAID functions, please follow below procedures according to the OS you install. 2.14.1 Installing Windows® XP / XP 64-bit Without... If you want to install Windows® 7 / 7 64-bit / VistaTM / VistaTM 64-bit / XP / XP 64-bit OS on your SATA3 HDDs without RAID functions, please follow below steps. STEP 2: Install Windows® XP / XP 64-bit OS on your system. 2.14 Installing Windows® 7 / 7 64-bit / VistaTM / VistaTM...
.... Enter BIOS SETUP UTILITY Advanced screen Storage Configuration. You can start to install Windows® XP / XP 64-bit on your SATA3 HDDs without RAID functions, please follow below procedures according to the OS you install. 2.14.1 Installing Windows® XP / XP 64-bit Without... If you want to install Windows® 7 / 7 64-bit / VistaTM / VistaTM 64-bit / XP / XP 64-bit OS on your SATA3 HDDs without RAID functions, please follow below steps. STEP 2: Install Windows® XP / XP 64-bit OS on your system. 2.14 Installing Windows® 7 / 7 64-bit / VistaTM / VistaTM...


