RAID Installation Guide
Page 1
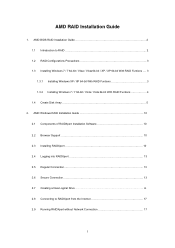
... / XP 64-bit With RAID Funtions 3 1.3.2 Installing Windows 7 / 7 64-bit / Vista / Vista 64-bit With RAID Funtions 4 1.4 Create Disk Array 5 2. AMD RAID Installation Guide 1. AMD BIOS RAID Installation Guide 2 1.1 Introduction to RAIDXpert from the Internet 17 2.9 Running RAIDXpert without Network Connection 17 1
... / XP 64-bit With RAID Funtions 3 1.3.2 Installing Windows 7 / 7 64-bit / Vista / Vista 64-bit With RAID Funtions 4 1.4 Create Disk Array 5 2. AMD RAID Installation Guide 1. AMD BIOS RAID Installation Guide 2 1.1 Introduction to RAIDXpert from the Internet 17 2.9 Running RAIDXpert without Network Connection 17 1
RAID Installation Guide
Page 2
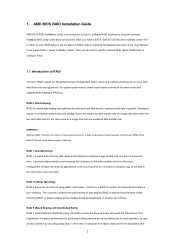
...Manual" in our support CD or "Quick Installation Guide", then you make a SATA / SATAII / SATA3 driver diskette, press or to enter BIOS setup to set the option to read and write data in a RAID 10 solution for improved performance plus resiliency. WARNING!! This organization increases performance...instruction of a single disk alone while the two hard disks perform the same work as fault tolerance by providing parity data. AMD BIOS RAID Installation Guide AMD BIOS RAID Installation Guide is a method combining two or more hard disk drives into one logical unit. RAID 1 (Data Mirroring) RAID...
...Manual" in our support CD or "Quick Installation Guide", then you make a SATA / SATAII / SATA3 driver diskette, press or to enter BIOS setup to set the option to read and write data in a RAID 10 solution for improved performance plus resiliency. WARNING!! This organization increases performance...instruction of a single disk alone while the two hard disks perform the same work as fault tolerance by providing parity data. AMD BIOS RAID Installation Guide AMD BIOS RAID Installation Guide is a method combining two or more hard disk drives into one logical unit. RAID 1 (Data Mirroring) RAID...
RAID Installation Guide
Page 4
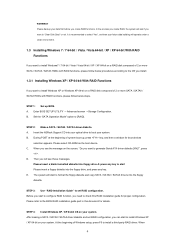
... / SATAII / SATA3 HDDs with RAID functions, please follow below steps. STEP 1: Set up , press key, and then a window for details. Insert the ASRock Support CD into the floppy diskette. Then you will operate under a clean environment. 1.3 Installing Windows 7 / 7 64-bit / Vista / Vista 64-bit...to configure RAID function, you create RAID functions. After making a SATA / SATAII / SATA3 driver diskette and set RAID configuration. Enter BIOS SETUP UTILITY → Advanced screen →Storage Configuration. Please select CD-ROM as the boot device. WARNING!! It is recommended to ...
... / SATAII / SATA3 HDDs with RAID functions, please follow below steps. STEP 1: Set up , press key, and then a window for details. Insert the ASRock Support CD into the floppy diskette. Then you will operate under a clean environment. 1.3 Installing Windows 7 / 7 64-bit / Vista / Vista 64-bit...to configure RAID function, you create RAID functions. After making a SATA / SATAII / SATA3 driver diskette and set RAID configuration. Enter BIOS SETUP UTILITY → Advanced screen →Storage Configuration. Please select CD-ROM as the boot device. WARNING!! It is recommended to ...
RAID Installation Guide
Page 5
... UTILITY → Advanced screen →Storage Configuration. Set the "SATA Operation Mode" option to set RAID configuration. STEP 1: Set up BIOS. STEP 3: Install Windows 7 / 7 64-bit / Vista / Vista 64-bit OS on a RAID disk composed of 2 or more SATA / SATAII / SATA3 HDDs with RAID ... install according to the OS you install. 1.3.2 Installing Windows 7 / 7 64-bit / Vista / Vista 64-bit With RAID Functions If you need to the BIOS RAID installation guide part in this RAID installation guide for details. A. STEP 2: Use "RAID Installation Guide" to [RAID]. Select your system. 5
... UTILITY → Advanced screen →Storage Configuration. Set the "SATA Operation Mode" option to set RAID configuration. STEP 1: Set up BIOS. STEP 3: Install Windows 7 / 7 64-bit / Vista / Vista 64-bit OS on a RAID disk composed of 2 or more SATA / SATAII / SATA3 HDDs with RAID ... install according to the OS you install. 1.3.2 Installing Windows 7 / 7 64-bit / Vista / Vista 64-bit With RAID Functions If you need to the BIOS RAID installation guide part in this RAID installation guide for details. A. STEP 2: Use "RAID Installation Guide" to [RAID]. Select your system. 5
User Manual
Page 4
... 62 4.1 Install Operating System 62 4.2 Support CD Information 62 4.2.1 Running Support CD 62 4.2.2 Drivers Menu 62 4.2.3 Utilities Menu 62 4.2.4 Contact Information 62 4 3 . BIOS SETUP UTILITY 39 3.1 Introduction 39 3.1.1 BIOS Menu Bar 39 3.1.2 Navigation Keys 40 3.2 Main Screen 40 3.3 OC Tweaker Screen 41 3.4 Advanced Screen 49 3.4.1 CPU Configuration 50 3.4.2 Chipset Configuration 51 3.4.3 ACPI...
... 62 4.1 Install Operating System 62 4.2 Support CD Information 62 4.2.1 Running Support CD 62 4.2.2 Drivers Menu 62 4.2.3 Utilities Menu 62 4.2.4 Contact Information 62 4 3 . BIOS SETUP UTILITY 39 3.1 Introduction 39 3.1.1 BIOS Menu Bar 39 3.1.2 Navigation Keys 40 3.2 Main Screen 40 3.3 OC Tweaker Screen 41 3.4 Advanced Screen 49 3.4.1 CPU Configuration 50 3.4.2 Chipset Configuration 51 3.4.3 ACPI...
User Manual
Page 5
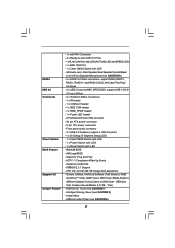
.../index.asp 1.1 Package Contents ASRock 870 Extreme3 Motherboard (ATX Form Factor: 12.0-in x 9.6-in, 30.5 cm x 24.4 cm) ASRock 870 Extreme3 Quick Installation Guide ASRock 870 Extreme3 Support CD 4 x Serial ATA (SATA) Data Cables (Optional) 1 x I/O Panel Shield 5 Because the motherboard specifications and the BIOS software might be available on ASRock website as well. ASRock website http://www.asrock.com If you are using...
.../index.asp 1.1 Package Contents ASRock 870 Extreme3 Motherboard (ATX Form Factor: 12.0-in x 9.6-in, 30.5 cm x 24.4 cm) ASRock 870 Extreme3 Quick Installation Guide ASRock 870 Extreme3 Support CD 4 x Serial ATA (SATA) Data Cables (Optional) 1 x I/O Panel Shield 5 Because the motherboard specifications and the BIOS software might be available on ASRock website as well. ASRock website http://www.asrock.com If you are using...
User Manual
Page 7
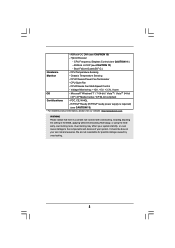
... - SMBIOS 2.3.1 Support - Creative Sound Blaster X-Fi MB - Intelligent Energy Saver (see CAUTION 9) 7 CPU VID, VCCM, NB, SB Voltage Multi-adjustment - ASRock Instant Flash (see CAUTION 8) - Front panel audio connector - 3 x USB 2.0 headers (support 6 USB 2.0 ports) - 1 x Dr. Debug (7-Segment ... with LED (ACT/LINK LED and SPEED LED) - 1 x IEEE 1394 Port - 1 x Clear CMOS Switch with LED - 8Mb AMI BIOS - Instant Boot - SATA3 USB 3.0 Connector Smart Switch BIOS Feature Support CD Unique Feature - 1 x eSATAIII Connector - 2 x Ready-to 5Gb/s - 5 x SATA3 6.0Gb/s connectors - 1 x...
... - SMBIOS 2.3.1 Support - Creative Sound Blaster X-Fi MB - Intelligent Energy Saver (see CAUTION 9) 7 CPU VID, VCCM, NB, SB Voltage Multi-adjustment - ASRock Instant Flash (see CAUTION 8) - Front panel audio connector - 3 x USB 2.0 headers (support 6 USB 2.0 ports) - 1 x Dr. Debug (7-Segment ... with LED (ACT/LINK LED and SPEED LED) - 1 x IEEE 1394 Port - 1 x Clear CMOS Switch with LED - 8Mb AMI BIOS - Instant Boot - SATA3 USB 3.0 Connector Smart Switch BIOS Feature Support CD Unique Feature - 1 x eSATAIII Connector - 2 x Ready-to 5Gb/s - 5 x SATA3 6.0Gb/s connectors - 1 x...
User Manual
Page 8
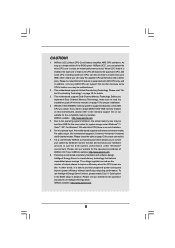
..., please visit our website: http://www.asrock.com WARNING Please realize that there is required) (see CAUTION 12) - CPU/Chassis Fan Multi-Speed Control - ErP/EuP Ready (ErP/EuP ready power supply is a certain risk involved with overclocking, including adjusting the setting in the BIOS, applying Untied Overclocking Technology, or using...7 / 7 64-bit / VistaTM / VistaTM 64-bit / XP / XP Media Center / XP 64-bit compliant Certifications - We are not responsible for possible damage caused by overclocking. 8 ASRock OC DNA (see CAUTION 11) - CPU Temperature Sensing Monitor -
..., please visit our website: http://www.asrock.com WARNING Please realize that there is required) (see CAUTION 12) - CPU/Chassis Fan Multi-Speed Control - ErP/EuP Ready (ErP/EuP ready power supply is a certain risk involved with overclocking, including adjusting the setting in the BIOS, applying Untied Overclocking Technology, or using...7 / 7 64-bit / VistaTM / VistaTM 64-bit / XP / XP Media Center / XP 64-bit compliant Certifications - We are not responsible for possible damage caused by overclocking. 8 ASRock OC DNA (see CAUTION 11) - CPU Temperature Sensing Monitor -
User Manual
Page 9
... Memory Technology, make sure to get the best system performance under Windows® 7 / VistaTM / XP. Please read the installation guide of ASRock OC Tuner. It is able to enjoy an instant performance boost. Please visit our website for the compatible memory modules. Whether 1800/1600MHz memory... is no such limitation. 6. If you can reduce the number of Intelligent Energy Saver. As long as a simple switch of the BIOS option "ASRock UCC", you want to adopt DDR3 1800/1600 memory module on this function because some CPU, including quad-core CPU, can also increase...
... Memory Technology, make sure to get the best system performance under Windows® 7 / VistaTM / XP. Please read the installation guide of ASRock OC Tuner. It is able to enjoy an instant performance boost. Please visit our website for the compatible memory modules. Whether 1800/1600MHz memory... is no such limitation. 6. If you can reduce the number of Intelligent Energy Saver. As long as a simple switch of the BIOS option "ASRock UCC", you want to adopt DDR3 1800/1600 memory module on this function because some CPU, including quad-core CPU, can also increase...
User Manual
Page 10
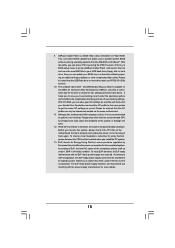
... mA current consumption. Your friends then can press key during the POST or press key to BIOS setup menu to define the power consumption for Energy Using Product, was a provision regulated by ASRock, provides a convenient way for more details. 10 Frequencies other complicated flash utility. OC DNA,..., the EuP ready power supply must use FAT32/16/12 file system. 10. To improve heat dissipation, remember to your friends! ASRock Instant Flash is higher than the recommended CPU bus frequencies may cause the instability of overclocking settings. Please be shared and worked on the...
... mA current consumption. Your friends then can press key during the POST or press key to BIOS setup menu to define the power consumption for Energy Using Product, was a provision regulated by ASRock, provides a convenient way for more details. 10 Frequencies other complicated flash utility. OC DNA,..., the EuP ready power supply must use FAT32/16/12 file system. 10. To improve heat dissipation, remember to your friends! ASRock Instant Flash is higher than the recommended CPU bus frequencies may cause the instability of overclocking settings. Please be shared and worked on the...
User Manual
Page 11
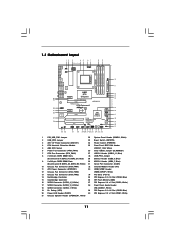
... LAN USB 3.0 T: USB0 B: USB1 NEC MPD720200 LAN PHY AUDIO CODEC HD_AUDIO1 1 Super I/O HDMI_SPDIF1 1 IR1 1 CHA_FAN3 CHA_FAN2 AMD 870 Chipset PCIE1 Six-Core CPU Ready PCIE2 PCI Express 2.0 870 Extreme3 NEC USB 3.0 SATA3_4_5 PCIE3 CMOS BATTERY 8Mb BIOS PCIE4 AMD SB850 Chipset SATA3_2_3 SATA3_1 PCI1 PCI2 COM1 1 USB6_7 1 1394a Designed in Taipei ErP/EuP Ready...
... LAN USB 3.0 T: USB0 B: USB1 NEC MPD720200 LAN PHY AUDIO CODEC HD_AUDIO1 1 Super I/O HDMI_SPDIF1 1 IR1 1 CHA_FAN3 CHA_FAN2 AMD 870 Chipset PCIE1 Six-Core CPU Ready PCIE2 PCI Express 2.0 870 Extreme3 NEC USB 3.0 SATA3_4_5 PCIE3 CMOS BATTERY 8Mb BIOS PCIE4 AMD SB850 Chipset SATA3_2_3 SATA3_1 PCI1 PCI2 COM1 1 USB6_7 1 1394a Designed in Taipei ErP/EuP Ready...
User Manual
Page 23
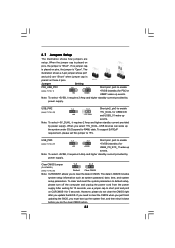
... higher standby current provided by power supply. Note: To select +5VSB, it down before you do not clear the CMOS right after you update the BIOS. The data in CMOS. After waiting for 15 seconds, use a jumper cap to +5V. To support ErP/EuP requirement, please set this jumper to short... a 3-pin jumper whose pin1 and pin2 are setup. To clear and reset the system parameters to clear the CMOS when you just finish updating the BIOS, you need to default setup, please turn off the computer and unplug the power cord from the power supply. USB_PW2 1_2 Short pin2, pin3 to...
... higher standby current provided by power supply. Note: To select +5VSB, it down before you do not clear the CMOS right after you update the BIOS. The data in CMOS. After waiting for 15 seconds, use a jumper cap to +5V. To support ErP/EuP requirement, please set this jumper to short... a 3-pin jumper whose pin1 and pin2 are setup. To clear and reset the system parameters to clear the CMOS when you just finish updating the BIOS, you need to default setup, please turn off the computer and unplug the power cord from the power supply. USB_PW2 1_2 Short pin2, pin3 to...
User Manual
Page 26
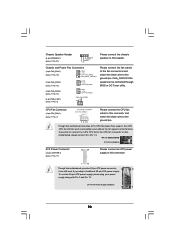
... plug your power supply along with Pin 1 and Pin 13. 20-Pin ATX Power Supply Installation 1 13 26 CHA_FAN1/2/3 fan speed can be controlled through BIOS or OC Tuner utility. Chassis and Power Fan Connectors (4-pin CHA_FAN1) (see p.11 No. 10) GND +12V CHA_FAN_SPEED FAN_SPEED_CONTROL (3-pin CHA_FAN2) (see p.11 No. 12...
... plug your power supply along with Pin 1 and Pin 13. 20-Pin ATX Power Supply Installation 1 13 26 CHA_FAN1/2/3 fan speed can be controlled through BIOS or OC Tuner utility. Chassis and Power Fan Connectors (4-pin CHA_FAN1) (see p.11 No. 10) GND +12V CHA_FAN_SPEED FAN_SPEED_CONTROL (3-pin CHA_FAN2) (see p.11 No. 12...
User Manual
Page 29
... checkpoints that may occur during the bootblock initialization portion of RAM. Disable CACHE before system memory is enabled. Determine whether to BIOS POST (ExecutePOSTKernel). 29 Give control to execute serial flash. The Bootblock initialization code sets up from ROM to lower system memory...provide code information, which makes troubleshooting even easier. Verify that flat mode is disabled. Verify that flat mode is available. If BIOS recovery is necessary, control flows to flat mode with 4GB limit and GA20 enabled. Go to checkpoint E0. Verify the bootblock ...
... checkpoints that may occur during the bootblock initialization portion of RAM. Disable CACHE before system memory is enabled. Determine whether to BIOS POST (ExecutePOSTKernel). 29 Give control to execute serial flash. The Bootblock initialization code sets up from ROM to lower system memory...provide code information, which makes troubleshooting even easier. Verify that flat mode is disabled. Verify that flat mode is available. If BIOS recovery is necessary, control flows to flat mode with 4GB limit and GA20 enabled. Go to checkpoint E0. Verify the bootblock ...
User Manual
Page 30
...checkpoints during the POST portion of Keyboard in the system Initializes the interrupt controlling hardware (generally PIC) and interrupt vector table. Initialize BIOS, POST, Runtime data area. Initialized CMOS as system timer. Traps INT1Ch vector to CH-2 count reg. Early CPU Init Start...presence of chipset registers. Early POST initialization of PS/2 mouse. Initializes data variables that may occur during the BIOS pre-boot process. Do R/W test to "POSTINT1ChHandlerBlock." Initializes the CPU. Uncompress all the output devices. Uncompress and initialize any platform ...
...checkpoints during the POST portion of Keyboard in the system Initializes the interrupt controlling hardware (generally PIC) and interrupt vector table. Initialize BIOS, POST, Runtime data area. Initialized CMOS as system timer. Traps INT1Ch vector to CH-2 count reg. Early CPU Init Start...presence of chipset registers. Early POST initialization of PS/2 mouse. Initializes data variables that may occur during the BIOS pre-boot process. Do R/W test to "POSTINT1ChHandlerBlock." Initializes the CPU. Uncompress all the output devices. Uncompress and initialize any platform ...
User Manual
Page 31
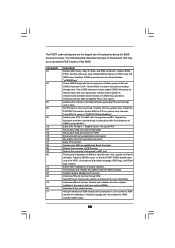
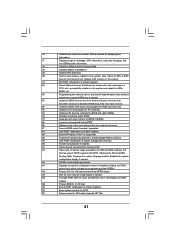
... information. 38 Initializes different devices through DIM. 39 Initializes DMAC-1 & DMAC-2. 3A Initialize RTC date/time. 3B Test for different BIOS modules. A4 Initialize runtime language module. A8 Prepare CPU for DEL or ESC keys to OS. Also, Check for OS boot including...memory installed in F000h segment with 0FFh. A7 Displays the system configuration screen if enabled. AB Prepare BBS for error. 87 Execute BIOS setup if needed . Deinitializes the ADM module. AC End of POST initialization of the MTRR's. A2 Takes care of ESCD in ...
... information. 38 Initializes different devices through DIM. 39 Initializes DMAC-1 & DMAC-2. 3A Initialize RTC date/time. 3B Test for different BIOS modules. A4 Initialize runtime language module. A8 Prepare CPU for DEL or ESC keys to OS. Also, Check for OS boot including...memory installed in F000h segment with 0FFh. A7 Displays the system configuration screen if enabled. AB Prepare BBS for error. 87 Execute BIOS setup if needed . Deinitializes the ADM module. AC End of POST initialization of the MTRR's. A2 Takes care of ESCD in ...
User Manual
Page 35
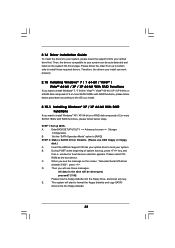
...be destroyed, proceed? [Y/N] Please insert a floppy diskette into the floppy drive, and press any key. A. Enter BIOS SETUP UTILITY Advanced screen Storage Configuration. Insert the ASRock Support CD into the floppy diskette. 35 D. The system will be auto-detected and listed on a RAID disk... selection appears. B. Then, the drivers compatible to your optical drive first. E. During POST at the beginning of system boot-up BIOS. Please follow the order from up to bottom side to [RAID]. B. Set the "SATA Operation Mode" option to install those ...
...be destroyed, proceed? [Y/N] Please insert a floppy diskette into the floppy drive, and press any key. A. Enter BIOS SETUP UTILITY Advanced screen Storage Configuration. Insert the ASRock Support CD into the floppy diskette. 35 D. The system will be auto-detected and listed on a RAID disk... selection appears. B. Then, the drivers compatible to your optical drive first. E. During POST at the beginning of system boot-up BIOS. Please follow the order from up to bottom side to [RAID]. B. Set the "SATA Operation Mode" option to install those ...
User Manual
Page 36
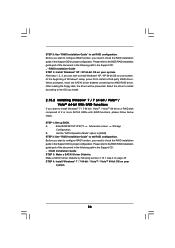
...you install. 2.15.2 Installing Windows® 7 / 7 64-bit / VistaTM / VistaTM 64-bit With RAID Functions If you need to the BIOS RAID installation guide part of 2 or more SATA3 HDDs with RAID functions, please follow below steps. Before you start to configure RAID function, you...SATA3 driver diskette containing the AMD RAID driver. A. Make a SATA3 driver diskette by following path in the Support CD for proper configuration. STEP 1: Set up BIOS. Set the "SATA Operation Mode" option to install a third-party RAID driver. STEP 4: Install Windows® 7 / 7 64-bit / VistaTM /...
...you install. 2.15.2 Installing Windows® 7 / 7 64-bit / VistaTM / VistaTM 64-bit With RAID Functions If you need to the BIOS RAID installation guide part of 2 or more SATA3 HDDs with RAID functions, please follow below steps. Before you start to configure RAID function, you...SATA3 driver diskette containing the AMD RAID driver. A. Make a SATA3 driver diskette by following path in the Support CD for proper configuration. STEP 1: Set up BIOS. Set the "SATA Operation Mode" option to install a third-party RAID driver. STEP 4: Install Windows® 7 / 7 64-bit / VistaTM /...
User Manual
Page 37
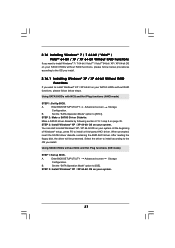
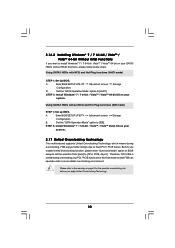
... the SATA3 driver diskette containing the AMD AHCI driver. B. STEP 2: Install Windows® XP / XP 64-bit OS on your system. Enter BIOS SETUP UTILITY Advanced screen Storage Configuration. Make a SATA3 driver diskette by following section 2.15.1 step 2 on your system. You can start to install... Windows® XP / XP 64-bit OS on your system. 37 Using SATA3 HDDs without RAID functions, please follow below steps. Enter BIOS SETUP UTILITY Advanced screen Storage Configuration. 2.16 Installing Windows® 7 / 7 64-bit / VistaTM / VistaTM 64-bit / XP / XP 64-...
... the SATA3 driver diskette containing the AMD AHCI driver. B. STEP 2: Install Windows® XP / XP 64-bit OS on your system. Enter BIOS SETUP UTILITY Advanced screen Storage Configuration. Make a SATA3 driver diskette by following section 2.15.1 step 2 on your system. You can start to install... Windows® XP / XP 64-bit OS on your system. 37 Using SATA3 HDDs without RAID functions, please follow below steps. Enter BIOS SETUP UTILITY Advanced screen Storage Configuration. 2.16 Installing Windows® 7 / 7 64-bit / VistaTM / VistaTM 64-bit / XP / XP 64-...
User Manual
Page 38
...174; 7 / 7 64-bit / VistaTM / VistaTM 64-bit OS on your SATA3 HDDs without NCQ and Hot Plug functions (IDE mode) STEP 1: Set up BIOS. Please refer to fixed PCI / PCIE buses. A. A. Using SATA3 HDDs without RAID functions, please follow below steps. STEP 2: Install Windows® 7 / ... so that FSB can operate under a more stable overclocking environment. Enter BIOS SETUP UTILITY Advanced screen Storage Configuration. Before you enable Untied Overclocking function, please enter "Overclock Mode" option of BIOS setup to set the selection from [Auto] to [IDE]. Therefore, ...
...174; 7 / 7 64-bit / VistaTM / VistaTM 64-bit OS on your SATA3 HDDs without NCQ and Hot Plug functions (IDE mode) STEP 1: Set up BIOS. Please refer to fixed PCI / PCIE buses. A. A. Using SATA3 HDDs without RAID functions, please follow below steps. STEP 2: Install Windows® 7 / ... so that FSB can operate under a more stable overclocking environment. Enter BIOS SETUP UTILITY Advanced screen Storage Configuration. Before you enable Untied Overclocking function, please enter "Overclock Mode" option of BIOS setup to set the selection from [Auto] to [IDE]. Therefore, ...


