User Manual
Page 2
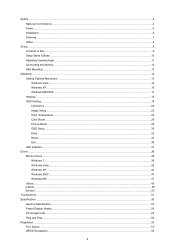
Safety...4 National Conventions...4 Power ...5 Installation...6 Cleaning ...7 Other...8 Setup ...9 Contents in Box ...9 Setup Stand & Base...10 Adjusting Viewing Angle...11 Connecting the Monitor...12 Wall Mounting ...13 Adjusting ...14 Setting Optimal Resolution ...14 Windows Vista ...14 Windows XP ...16 Windows ME/2000...17 Hotkeys ...18 OSD Setting...19 Luminance ...20 Image ...
Safety...4 National Conventions...4 Power ...5 Installation...6 Cleaning ...7 Other...8 Setup ...9 Contents in Box ...9 Setup Stand & Base...10 Adjusting Viewing Angle...11 Connecting the Monitor...12 Wall Mounting ...13 Adjusting ...14 Setting Optimal Resolution ...14 Windows Vista ...14 Windows XP ...16 Windows ME/2000...17 Hotkeys ...18 OSD Setting...19 Luminance ...20 Image ...
User Manual
Page 6
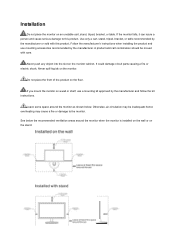
...monitor. Leave some space around the monitor as shown below the recommended ventilation areas around the monitor when the monitor is installed on the wall or on an unstable cart, stand, tripod, bracket, or table. Never spill liquids on the monitor cabinet. Do not place the ...front of the product on a wall or shelf, use mounting accessories recommended by the manufacturer and follow the kit instructions. A product and cart combination should be inadequate hence overheating may cause a fire...
...monitor. Leave some space around the monitor as shown below the recommended ventilation areas around the monitor when the monitor is installed on the wall or on an unstable cart, stand, tripod, bracket, or table. Never spill liquids on the monitor cabinet. Do not place the ...front of the product on a wall or shelf, use mounting accessories recommended by the manufacturer and follow the kit instructions. A product and cart combination should be inadequate hence overheating may cause a fire...
User Manual
Page 13
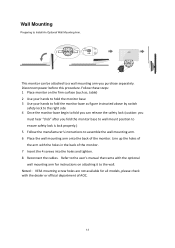
..."click" after you purchase separately. Line up the holes of the arm with the optional wall mounting arm for all models, please check with the dealer or official department of AOC. 13 Refer to the wall. Noted : VESA mounting screw holes are not available for instructions on the firm surface (such as, table) ...instructed above by switch safety lock to the right side 4 Once the monitor base begin to fold you can be attached to Install An Optional Wall Mounting Arm. Follow these steps: 1 Place monitor on attaching it to the user's manual that came with the holes in the back of the ...
..."click" after you purchase separately. Line up the holes of the arm with the optional wall mounting arm for all models, please check with the dealer or official department of AOC. 13 Refer to the wall. Noted : VESA mounting screw holes are not available for instructions on the firm surface (such as, table) ...instructed above by switch safety lock to the right side 4 Once the monitor base begin to fold you can be attached to Install An Optional Wall Mounting Arm. Follow these steps: 1 Place monitor on attaching it to the user's manual that came with the holes in the back of the ...
