AIWA CT-X409 Support and Manuals
Get Help and Manuals for this AIWA item
View All Support Options Below
Free AIWA CT-X409 manuals!
Problems with AIWA CT-X409?
Ask a Question
Free AIWA CT-X409 manuals!
Problems with AIWA CT-X409?
Ask a Question
Popular AIWA CT-X409 Manual Pages
Operating Instructions - Page 1

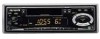
CFX409 ,"
STEREO CAR CASSEITE RECEIVER RADIO-CASSETTE ESTEREOFONICO PARA AUTOMOVIL
OWNER'S RECORD
For your convenience, record the model number and serial number (you contact your AIWA dealer in case of yourset) inthespace provided below. ICT-X409 Serial No. ~ Model No. Please referto them when you will find them ontheright side of difficulty.
Operating Instructions - Page 2

...installation. Reorient or relocate the receiving antenna.
-
q When replacing the fuse, be sure to refer to cool off
and on the transit protection pad The unit is encouraged to try to Part... the separate installation and connections manuals as any cassette from the playback head. Caution on , the user is shipped with built- In addition to this operating instructions manual, be sure...
Operating Instructions - Page 3

... AND ATTACHING THE FRONT PANEL 4
SETTING THE BEEP TONE
5
SETTING THE CLOCK ...5
RADIO OPERATION ...6
PRESETTING STATIONS
.
7
MY INFORMATION SWITCH
.
......8
TAPE PLAYBACK ...10
SOUND ADJUSTMENTS
.
.
.11
CONNECTING A PORTABLE CD/MD PLAYER OR OTHER EQUIPMENT 12
MAINTENANCE
...13
SPECIFICATIONS ...
.. 13
This unit can be operated using the AIWA RC-SW1 or RC-CD1 remote...
Operating Instructions - Page 5

... the panel. Before detaching the front panel, remove the cassette to prevent possible damage to the unit.
1 Press PWR to turn the unit off.
2 While supporting the front panel with
one hand, press & to release one side of the front panel, as a security alarm, so there are limitations to its ef...
Operating Instructions - Page 6

... following the procedure below. The "BEEP indication appears.
EEwI=
3 Press TUNE Y to set the minute.
4 Press DISP to set the hour. Press TUNE A to start working the clock
from O second. The beep ... the clock displayed while in Radio or Tape Play mode Press DISP. SETTING THE CLOCK 3
1 With the unit off . SETTING THE BEEP TONE
The unit is activated when the "BEEP indication appears ...
Operating Instructions - Page 8

... this function, press A.ME again or press any of the pressed preset station button appears next to the frequency indication.
PRESETTING STATIONS 12
You can manually preset stations that you wish to check the preset stations, press
A.ME forlessthan 2seconds.
Operating Instructions - Page 9

...on in automatic blending circuit mixes the
left and right channel signals according to set the minute. The number of the pressed preset station button is displayed next to...3
1
1 With the unit off, press and hold MY INFO for a daily radio program. Timer indication flashes.
3 Set the time you wish the unit to reduce noise.
mm
ENGLISH 8 q if the reception becomes even weaker, the unit ...
Operating Instructions - Page 10

...again so that you switch modes with this function, pressing the following buttons switches the unit to set the hour. q Even if you wish the unit to Tape
Play mode. - Pressing TAPE changes the... unit to turn off . Timer indication flashes.
8 Set the time you are listening to a radio program with these buttons, the unit does not turn
off...
Operating Instructions - Page 12

... current source mode.
2 Press +/-
Adjust each mode referring to temporarily Iowerthevolume. Press it again to adjust the level. i I ENGLISH
inserting a Play mode
To prevent tape problems Before inserting a cassette into the spindle hole and winding. 90-minute or longer tapes are no slack in Radio mode, cassette switches the unit to...
Operating Instructions - Page 13

... lights up. Note Be sure to press CD/MD IN after you cannot listen using the connected equipment.
A Press CD/MD IN to the operating instructions for the equipment. The "CD indication appears.
Each time you press H-BASS, this function turns on . via the CD/MD IN jack (3.5-mm dia.) on...
Operating Instructions - Page 14

...4 Q
Tone Control:
Bass* 10dBat 100 Hz
Treble f 10 dB at 10 kHz
Preamp Output Voltage (load impedance):
2.2 V (10 kQ)
Installation size:
182 (W) X 53 (H) X
155 (D) mm
(7 '/4 (W) X 2 '/, (H) X
6 '/8 (D) inches)
Accessory supplied: Carrying case (1)
q Specifications and external appearance are subject to change without notice due to clean the playback head and capstans approximately once...
Operating Instructions - Page 44

8Z-KTG-903-01 981 OO9ATM-OX
Printed in China
AIWA CO,,LTD.
AIWA CT-X409 Reviews
We have not received any reviews for AIWA yet.