3Com 7700R - Switch Starter Kit Support and Manuals
Get Help and Manuals for this 3Com item
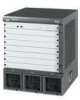
Popular 3Com 7700R Manual Pages
Installation Guide - Page 1
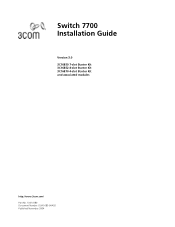
Switch 7700 Installation Guide
Version 3.0 3C16850 7-slot Starter Kit 3C16852 8-slot Starter Kit 3C16870 4-slot Starter Kit and associated modules
http://www.3com.com/ Part No. 10014180 Document Number: DUA1685-0AA02 Published November 2004
Installation Guide - Page 4
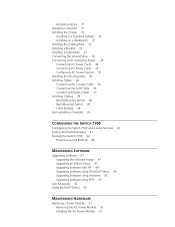
... 38 Bench-Mounted Switch 38 Rack-Mounted Switch 38 Cable Binding 38 Post-installation Checklist 39
CONFIGURING THE SWITCH 7700
Configuring the Switch 7700 and a Local Terminal 41 Setting Terminal Parameters 41 Booting the Switch 7700 44
Powering up and Booting 45
MAINTAINING SOFTWARE
Upgrading Software 47 Upgrading the Software Image 47 Upgrading an 8-Slot Chassis 47 Upgrading Software with FTP...
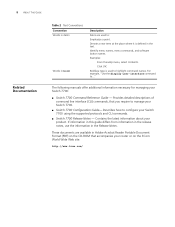
Installation Guide - Page 7

.... Do not press Return or Enter when an instruction simply says "type." It assumes a working knowledge of data or potential damage to interconnect LANs.
This guide also provides troubleshooting and support information for configuring, using, and managing the switches. Caution Warning
Information that alerts you to install hardware, configure and boot software, and maintain software and...
Installation Guide - Page 8
... 7700 using the supported protocols and CLI commands.
■ Switch 7700 Release Notes - Identify menu names, menu commands, and software button names.
Click OK. The following manuals offer additional information necessary for managing your Switch 7700:
■ Switch 7700 Command Reference Guide - These documents are used to manage your Switch 7700.
■ Switch 7700 Configuration Guide...
Installation Guide - Page 29

... and cables of the Switch 7700: ■ Preparing to Install ■ General Site Requirements ■ Installation Checklist ■ Installing the Chassis ■ Installing the Cabling Rack ■ Installing a Module ■ Installing a Submodule ■ Connecting the Ground Wire ■ Connecting and Configuring Power ■ Installing the Fan Assembly ■ Installing Cables ■...
Installation Guide - Page 32

...; Ethernet 100BASE-T Hub or LAN switch ■ Channel service unit/data service unit (CSU/DSU) or other data communications equipment (DCE) equipment (such as a modem) ■ Configuration terminal, such as a PC ■ Additional equipment for the selected interface modules
Installing the Chassis You can install the Switch 7700 in the cabinet: Cabinet
1 Carry the switch to the left side of...
Installation Guide - Page 34

... of the cabinet. The power module in the 4-slot chassis has two power cords. If you install the switch in a cabinet, 3Com recommends that the ground wire of the switch be channelled through an external protection device into the Switch 7700. Connecting and Configuring Power
The 7-slot and 8-slot chassis offers power modules with either AC or DC power...
Installation Guide - Page 36

... terminal where the switch is used to connect the Switch 7700 to the Switch 7700.
See "Console Cable" on page 63 for connection to the serial port of the virtual
modem. Installing Cables
This section describes how to connect console and AUX cables to a modem in a remote dial-up Cable configuration. The other part of the switch. WARNING: To...
Installation Guide - Page 38

...chassis panel. For parallel cabling, the space between a power cord and a signal cable should be no tie binds the bent part of any cables to prevent the core of the cable from breaking.
■ Do not tie power cables to the guides...in mind as you have installed your Switch 7700.
Although different types of cable may cross over each other end of the chassis and on the network.
MT...
Installation Guide - Page 41
... PC or the terminal where the switch will be configured.
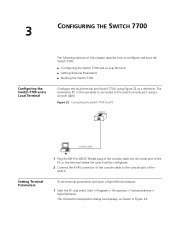
2 Connect the RJ-45 connector of the console cable to the console port of this example) is connected to configure and boot the Switch 7700: ■ Configuring the Switch 7700 and a Local Terminal ■ Setting Terminal Parameters ■ Booting the Switch 7700
Configure the local terminal and Switch 7700, using Figure 22 as shown...
Installation Guide - Page 42

... dropdown menu. Figure 24 Properties Dialog Box
3 After selecting serial ports, click OK. The dialog box, shown in Figure 25 displays and you can set serial port parameters. 42 CHAPTER 3: CONFIGURING THE SWITCH 7700 Figure 23 Connection Description Dialog Box
2 Enter the name of the new connection in the Name field and click OK...
Installation Guide - Page 44

44 CHAPTER 3: CONFIGURING THE SWITCH 7700 Figure 27 Settings Tab
Booting the Switch 7700
Before powering on the Switch 7700, verify that: ■ Power cords have been properly connected. ■ The voltage of power supply can meet the requirements on the switch. ■ The console cable has been connected properly. ■ The PC or terminal for configuration has been started. ■...
Installation Guide - Page 46

Press Enter and the terminal screen displays:
You can now begin the configuration for the Switch 7700. 46 CHAPTER 3: CONFIGURING THE SWITCH 7700
The display of these messages indicates the completion of the switch auto-booting.
Installation Guide - Page 57

...upgraded to disconnect the power supply AC connectors from the AC power module.
5 Loosen and remove the 4 screws at the corners of the Switch 7700 can be performed by trained service personnel only. Installing the AC Power To install the new power module, do the following topics:
■ Replacing a Power Module ■ Replacing a Power Supply ■ Replacing I/O Modules ■ Replacing...
Installation Guide - Page 68
... SUPPORT FOR YOUR SWITCH
Software Upgrades are correct at the time of the package, will be returned to the sender unopened, at the sender's expense. To access these services for assistance, please have the following e-mail: apr_technical_support@3com.com
Or request a repair authorization number (RMA) by fax using the following information ready:
■ Product model name, part number...
3Com 7700R Reviews
We have not received any reviews for 3Com yet.