

Getting Started Guide
Page 1
SuperStack® 3 Switch 4200 Series Getting Started Guide 3C17300 3C17302 3C17304 http://www.3com.com/ Part No. DUA1730-0AAA02 Published October 2002
SuperStack® 3 Switch 4200 Series Getting Started Guide 3C17300 3C17302 3C17304 http://www.3com.com/ Part No. DUA1730-0AAA02 Published October 2002

Getting Started Guide
Page 2
...under a license agreement included with , this User Guide. All rights reserved. If you are unable to locate a copy, please contact 3Com and a copy will be registered in , or delivered to provide notification of Novell Incorporated. UNITED STATES GOVERNMENT LEGEND If you in ...or conditions of Adobe Systems Incorporated. Novell and NetWare are registered trademarks of merchantability, satisfactory quality, and fitness for a particular purpose. 3Com may not be provided to you subject to you . Software is delivered as "Commercial Computer Software" as defined in DFARS 252.227...
...under a license agreement included with , this User Guide. All rights reserved. If you are unable to locate a copy, please contact 3Com and a copy will be registered in , or delivered to provide notification of Novell Incorporated. UNITED STATES GOVERNMENT LEGEND If you in ...or conditions of Adobe Systems Incorporated. Novell and NetWare are registered trademarks of merchantability, satisfactory quality, and fitness for a particular purpose. 3Com may not be provided to you subject to you . Software is delivered as "Commercial Computer Software" as defined in DFARS 252.227...
Getting Started Guide
Page 3
Rear View Detail 17 Power Socket 17 Redundant Power System Socket 17 Console Port 17 Default Settings 18 2 INSTALLING THE SWITCH Package Contents 20 Choosing a Suitable Site 20 Rack-mounting 21 Placing Units On Top of Hardware Features 12 Switch 4200 Series - Front View Detail 13 10BASE-T/ 100BASE-TX Ports 14 10/100/1000BASE-T Ports 14 GBIC Ports 14 LEDs 15 Switch 4200 Series - CONTENTS ABOUT THIS GUIDE Conventions 8 Related Documentation 9 Accessing Online Documentation 10 Product Registration 10 Documentation Comments 10 1 INTRODUCING THE SUPERSTACK 3 SWITCH 4200 SERIES About the Switch...
Rear View Detail 17 Power Socket 17 Redundant Power System Socket 17 Console Port 17 Default Settings 18 2 INSTALLING THE SWITCH Package Contents 20 Choosing a Suitable Site 20 Rack-mounting 21 Placing Units On Top of Hardware Features 12 Switch 4200 Series - Front View Detail 13 10BASE-T/ 100BASE-TX Ports 14 10/100/1000BASE-T Ports 14 GBIC Ports 14 LEDs 15 Switch 4200 Series - CONTENTS ABOUT THIS GUIDE Conventions 8 Related Documentation 9 Accessing Online Documentation 10 Product Registration 10 Documentation Comments 10 1 INTRODUCING THE SUPERSTACK 3 SWITCH 4200 SERIES About the Switch...
Getting Started Guide
Page 4
... 34 Manually Configuring IP Information 35 Connecting to a Front Panel Port 35 Connecting to the Console Port 38 Viewing Automatically Configured IP Information 42 Using 3Com Network Supervisor 42 Connecting to the Console Port 42 Methods of Managing a Switch 45 Command Line Interface Management 45 Web Interface Management 46 SNMP Management...
... 34 Manually Configuring IP Information 35 Connecting to a Front Panel Port 35 Connecting to the Console Port 38 Viewing Automatically Configured IP Information 42 Using 3Com Network Supervisor 42 Connecting to the Console Port 42 Methods of Managing a Switch 45 Command Line Interface Management 45 Web Interface Management 46 SNMP Management...
Getting Started Guide
Page 5
... 69 C TECHNICAL SPECIFICATIONS Switch 4226T (3C17300) 71 Switch 4250T (3C17302) 73 Switch 4228G (3C17304) 74 D TECHNICAL SUPPORT Online Technical Services 75 World Wide Web Site 75 3Com Knowledgebase Web Services 76 3Com FTP Site 76 Support from Your Network Supplier 76 Support from 3Com 77 Internet Support 77 Telephone Support 77 Returning Products for...
... 69 C TECHNICAL SPECIFICATIONS Switch 4226T (3C17300) 71 Switch 4250T (3C17302) 73 Switch 4228G (3C17304) 74 D TECHNICAL SUPPORT Online Technical Services 75 World Wide Web Site 75 3Com Knowledgebase Web Services 76 3Com FTP Site 76 Support from Your Network Supplier 76 Support from 3Com 77 Internet Support 77 Telephone Support 77 Returning Products for...

Getting Started Guide
Page 6
INDEX REGULATORY NOTICES
INDEX REGULATORY NOTICES
Getting Started Guide
Page 7
...shipped with all Switch 4200 Series models: ■ Switch 4226T (3C17300) - 24 10BASE-T/100BASE-TX ports, 2 10/100/1000BASE-T ports ■ Switch 4250T (3C17302) - 48 10BASE-T/100BASE-TX ports, 2 10/100/1000BASE-T ports ■ Switch 4228G (3C17304) - 24 10BASE-T/100BASE-TX ports, 2 10/100/1000BASE-T ports... described in this guide, follow the instructions in Adobe Acrobat Reader Portable Document Format (PDF) or HTML on the 3Com World Wide Web site: http://www.3com.com/ consequently, it assumes a basic working knowledge of LANs (Local Area Networks). ABOUT THIS GUIDE This guide provides...
...shipped with all Switch 4200 Series models: ■ Switch 4226T (3C17300) - 24 10BASE-T/100BASE-TX ports, 2 10/100/1000BASE-T ports ■ Switch 4250T (3C17302) - 48 10BASE-T/100BASE-TX ports, 2 10/100/1000BASE-T ports ■ Switch 4228G (3C17304) - 24 10BASE-T/100BASE-TX ports, 2 10/100/1000BASE-T ports... described in this guide, follow the instructions in Adobe Acrobat Reader Portable Document Format (PDF) or HTML on the 3Com World Wide Web site: http://www.3com.com/ consequently, it assumes a basic working knowledge of LANs (Local Area Networks). ABOUT THIS GUIDE This guide provides...

Getting Started Guide
Page 8
Table 1 Notice Icons Icon Notice Type Description Information note Information that describes important features or instructions Caution Information that alerts you to potential loss of data or potential damage to an application, system, or device Warning Information that alerts you to : ■ Emphasize a point. ■ Denote a new term at the place where it appears on the screen. Commands appear in angle brackets. If you must type something, and then press Return or Enter. Examples: From the Help menu, select Contents. Syntax The word "syntax" means that you ...
Table 1 Notice Icons Icon Notice Type Description Information note Information that describes important features or instructions Caution Information that alerts you to potential loss of data or potential damage to an application, system, or device Warning Information that alerts you to : ■ Emphasize a point. ■ Denote a new term at the place where it appears on the screen. Commands appear in angle brackets. If you must type something, and then press Return or Enter. Examples: From the Help menu, select Contents. Syntax The word "syntax" means that you ...
Getting Started Guide
Page 9
... web interface and command line interface that enable you may find useful, such as: ■ Documentation accompanying the Advanced Redundant Power system. ■ Documentation accompanying 3Com Network Supervisor.
... web interface and command line interface that enable you may find useful, such as: ■ Documentation accompanying the Advanced Redundant Power system. ■ Documentation accompanying 3Com Network Supervisor.
Getting Started Guide
Page 10
If the online documentation is to maintain the structure of the CD-ROM. 3Com recommends that you . Product Registration You can register your SuperStack 3 Switch 4200 on the CD-ROM. They will need to access ...to a suitable directory. ■ The HTML Reference Guide is stored in the Docs/reference directory on the 3Com Web site: http://3com.com/register Documentation Comments Your suggestions are very important to 3Com at: pddtechpubs_comments@3com.com Please include the following online Documentation documentation: ■ SuperStack 3 Switch Implementation Guide (PDF format) &#...
If the online documentation is to maintain the structure of the CD-ROM. 3Com recommends that you . Product Registration You can register your SuperStack 3 Switch 4200 on the CD-ROM. They will need to access ...to a suitable directory. ■ The HTML Reference Guide is stored in the Docs/reference directory on the 3Com Web site: http://3com.com/register Documentation Comments Your suggestions are very important to 3Com at: pddtechpubs_comments@3com.com Please include the following online Documentation documentation: ■ SuperStack 3 Switch Implementation Guide (PDF format) &#...
Getting Started Guide
Page 11
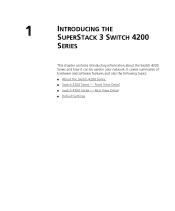
Rear View Detail ■ Default Settings 1 INTRODUCING THE SUPERSTACK 3 SWITCH 4200 SERIES This chapter contains introductory information about the Switch 4200 Series and how it can be used in your network. Front View Detail ■ Switch 4200 Series - It covers summaries of hardware and software features and also the following topics: ■ About the Switch 4200 Series ■ Switch 4200 Series -
Rear View Detail ■ Default Settings 1 INTRODUCING THE SUPERSTACK 3 SWITCH 4200 SERIES This chapter contains introductory information about the Switch 4200 Series and how it can be used in your network. Front View Detail ■ Switch 4200 Series - It covers summaries of hardware and software features and also the following topics: ■ About the Switch 4200 Series ■ Switch 4200 Series -
Getting Started Guide
Page 12
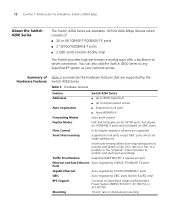
Traffic Prioritization Supported (IEEE 802.ID): 2 queues per port Ethernet and Fast Ethernet Auto-negotiating 10BASE-T/100BASE-TX ports Ports Gigabit Ethernet Auto-negotiating 10/100/1000BASE-T ports GBIC Auto-negotiating GBIC ports (Switch 4228G only) RPS Support Connects to another port and react accordingly. 12 CHAPTER 1: INTRODUCING THE SUPERSTACK 3 SWITCH 4200 SERIES About the Switch 4200 Series The Switch 4200 Series are stackable 10/100/1000 Mbps devices which are supported Smart Auto-sensing Supported on all 10/100 ports. Smart auto-sensing allows auto-...
Traffic Prioritization Supported (IEEE 802.ID): 2 queues per port Ethernet and Fast Ethernet Auto-negotiating 10BASE-T/100BASE-TX ports Ports Gigabit Ethernet Auto-negotiating 10/100/1000BASE-T ports GBIC Auto-negotiating GBIC ports (Switch 4228G only) RPS Support Connects to another port and react accordingly. 12 CHAPTER 1: INTRODUCING THE SUPERSTACK 3 SWITCH 4200 SERIES About the Switch 4200 Series The Switch 4200 Series are stackable 10/100/1000 Mbps devices which are supported Smart Auto-sensing Supported on all 10/100 ports. Smart auto-sensing allows auto-...
Getting Started Guide
Page 13
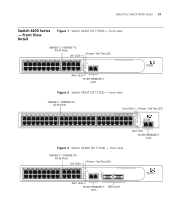
... 23 12 24 Power/ Self Test 1 25 / Up 26 / Down 2 3 Alert 4 Unit Alert LED 10/100/1000BASE-T ports 3C17300 Superstack 3 Switch 4226T Figure 2 Switch 4250T (3C17302) - front view 10BASE-T / 100BASE-TX RJ-45 Ports Unit LEDs Power / Self Test LED 1 25 2 26 3 27 4 28 5 29 6 30 7 31 8 32 9 33 10 34... 11 35 12 36 13 37 14 38 15 39 16 40 17 41 18 42 19 43 3C17302 Superstack 3 Switch 4250T 20 44 21 45 22 46 23 47 24 48 Power/ Self Test 1 Up Down 2 3 Alert 4 Unit 49 50 Alert LED 10...
... 23 12 24 Power/ Self Test 1 25 / Up 26 / Down 2 3 Alert 4 Unit Alert LED 10/100/1000BASE-T ports 3C17300 Superstack 3 Switch 4226T Figure 2 Switch 4250T (3C17302) - front view 10BASE-T / 100BASE-TX RJ-45 Ports Unit LEDs Power / Self Test LED 1 25 2 26 3 27 4 28 5 29 6 30 7 31 8 32 9 33 10 34... 11 35 12 36 13 37 14 38 15 39 16 40 17 41 18 42 19 43 3C17302 Superstack 3 Switch 4250T 20 44 21 45 22 46 23 47 24 48 Power/ Self Test 1 Up Down 2 3 Alert 4 Unit 49 50 Alert LED 10...
Getting Started Guide
Page 14
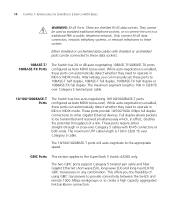
While auto-negotiation is enabled, these ports can be connected to these sockets. These ports require either straight-through or cross-over Category 5 cable. GBIC Ports This section applies to a traditional PBX or public telephone network. They cannot be transmitted and received simultaneously which, in any combination. While auto-negotiation is enabled, these ports can manually set these data sockets. 10BASE-T/ 100BASE-TX Ports The Switch has 24 or 48 auto-negotiating 10BASE-T/100BASE-TX ports configured as Auto MDIX (cross-over ). Full duplex allows packets to be ...
While auto-negotiation is enabled, these ports can be connected to these sockets. These ports require either straight-through or cross-over Category 5 cable. GBIC Ports This section applies to a traditional PBX or public telephone network. They cannot be transmitted and received simultaneously which, in any combination. While auto-negotiation is enabled, these ports can manually set these data sockets. 10BASE-T/ 100BASE-TX Ports The Switch has 24 or 48 auto-negotiating 10BASE-T/100BASE-TX ports configured as Auto MDIX (cross-over ). Full duplex allows packets to be ...
Getting Started Guide
Page 15
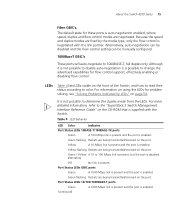
LEDs Table 4 lists LEDs visible on the port. For information on using the LEDs for problem solving, see "Solving Problems Indicated by the media type, only the flow control is negotiated with the Switch. For more detailed information, refer to change the advertised capabilities for these ports is disabled. alternating Off No link is enabled. Alternatively, auto-negotiation can be disabled and the flow control setting can be manually configured. 1000BaseT GBIC's These ports will auto-negotiate to disable auto-negotiation it is supplied with the link partner. ...
LEDs Table 4 lists LEDs visible on the port. For information on using the LEDs for problem solving, see "Solving Problems Indicated by the media type, only the flow control is negotiated with the Switch. For more detailed information, refer to change the advertised capabilities for these ports is disabled. alternating Off No link is enabled. Alternatively, auto-negotiation can be disabled and the flow control setting can be manually configured. 1000BaseT GBIC's These ports will auto-negotiate to disable auto-negotiation it is supplied with the link partner. ...
Getting Started Guide
Page 16
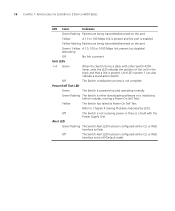
Power/Self Test LED Green The Switch is present. alternating Off No link is powered-up and operating normally. Off The Switch Alert LED has been configured via the CLI or Web Interface to flash. Green / Yellow A 10, 100 or 1000 Mbps link present but disabled. Unit LEDs 1-4 Green When the Switch forms a stack with the Power Supply Unit. Green flashing The Switch is either downloading software or is not complete. Yellow flashing Packets are being transmitted/received on the port. Refer to be off (Default state). Alert LED Green flashing The Switch Alert LED...
Power/Self Test LED Green The Switch is present. alternating Off No link is powered-up and operating normally. Off The Switch Alert LED has been configured via the CLI or Web Interface to flash. Green / Yellow A 10, 100 or 1000 Mbps link present but disabled. Unit LEDs 1-4 Green When the Switch forms a stack with the Power Supply Unit. Green flashing The Switch is either downloading software or is not complete. Yellow flashing Packets are being transmitted/received on the port. Refer to be off (Default state). Alert LED Green flashing The Switch Alert LED...

Getting Started Guide
Page 17
The console port uses a standard null modem cable and is set to any supply voltage in the range 90-240 VAC. See "Connecting a Redundant Power System" on page 25. Redundant Power To protect against internal power supply failure, you to a SuperStack Advanced Redundant Power System (RPS). Rear View Detail Supply Data Warning Label Console (max) 19200,8,1,N Power Socket Redundant Power System Socket Console Port Power Socket The Switch automatically adjusts its power setting to auto-baud, 8 data bits, no parity and 1 stop bit. About the Switch 4200 Series 17 Switch 4200 ...
The console port uses a standard null modem cable and is set to any supply voltage in the range 90-240 VAC. See "Connecting a Redundant Power System" on page 25. Redundant Power To protect against internal power supply failure, you to a SuperStack Advanced Redundant Power System (RPS). Rear View Detail Supply Data Warning Label Console (max) 19200,8,1,N Power Socket Redundant Power System Socket Console Port Power Socket The Switch automatically adjusts its power setting to auto-baud, 8 data bits, no parity and 1 stop bit. About the Switch 4200 Series 17 Switch 4200 ...
Getting Started Guide
Page 18
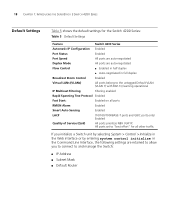
18 CHAPTER 1: INTRODUCING THE SUPERSTACK 3 SWITCH 4200 SERIES Default Settings Table 5 shows the default settings for all ports RMON Alarm Enabled Smart Auto-Sensing Enabled LACP (10/100/1000BASE-T ports and GBIC ports only) Enabled Quality of Service (QoS) All ports prioritize NBX VoIP IP. If you initialize a Switch unit by selecting System > Control > Initialize in the Web interface or by entering system control initialize in the Command Line Interface, the following settings are auto-negotiated Flow Control ■ Enabled in half duplex ■ Auto-negotiated in full ...
18 CHAPTER 1: INTRODUCING THE SUPERSTACK 3 SWITCH 4200 SERIES Default Settings Table 5 shows the default settings for all ports RMON Alarm Enabled Smart Auto-Sensing Enabled LACP (10/100/1000BASE-T ports and GBIC ports only) Enabled Quality of Service (QoS) All ports prioritize NBX VoIP IP. If you initialize a Switch unit by selecting System > Control > Initialize in the Web interface or by entering system control initialize in the Command Line Interface, the following settings are auto-negotiated Flow Control ■ Enabled in half duplex ■ Auto-negotiated in full ...
Getting Started Guide
Page 19
It covers the following topics: ■ Package Contents ■ Choosing a Suitable Site ■ Rack-mounting ■ Placing Units On Top of this guide. Avant d'installer ou d'enlever tout composant du Switch 4200 ou d'entamer une procédure de maintenance, lisez les informations relatives à la sécurité qui se trouvent dans l'Appendice A de ce guide. Bevor Sie Komponenten aus dem Switch 4200 entfernen oder dem Switch 4200 hinzufuegen oder Instandhaltungsarbeiten verrichten, lesen Sie die Sicherheitsanweisungen, die in Appendix A (Anhang A) in Appendix A of Each Other...
It covers the following topics: ■ Package Contents ■ Choosing a Suitable Site ■ Rack-mounting ■ Placing Units On Top of this guide. Avant d'installer ou d'enlever tout composant du Switch 4200 ou d'entamer une procédure de maintenance, lisez les informations relatives à la sécurité qui se trouvent dans l'Appendice A de ce guide. Bevor Sie Komponenten aus dem Switch 4200 entfernen oder dem Switch 4200 hinzufuegen oder Instandhaltungsarbeiten verrichten, lesen Sie die Sicherheitsanweisungen, die in Appendix A (Anhang A) in Appendix A of Each Other...
Getting Started Guide
Page 20
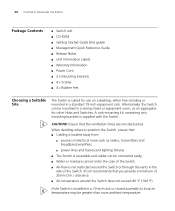
... greater than room ambient temperature. When deciding where to position the Switch, ensure that: ■ Cabling is located away from: ■ sources of the Switch. 3Com recommends that the ventilation holes are not obstructed. 20 CHAPTER 2: INSTALLING THE SWITCH Package Contents ■ Switch unit ■ CD-ROM ■ Getting Started Guide...
... greater than room ambient temperature. When deciding where to position the Switch, ensure that: ■ Cabling is located away from: ■ sources of the Switch. 3Com recommends that the ventilation holes are not obstructed. 20 CHAPTER 2: INSTALLING THE SWITCH Package Contents ■ Switch unit ■ CD-ROM ■ Getting Started Guide...