Get support for Whirlpool WMH2175XVB - Microwave

Whirlpool WMH2175XVB Support Question

Whirlpool WMH2175XVB Support Question

Find answers below for this question about Whirlpool WMH2175XVB - Microwave.
Need a Whirlpool WMH2175XVB manual? We have 4 online manuals for this item!
Question posted by kaygh1 on November 3rd, 2013

How Do You Change Clock On Model Wmh2175xvs-4

The person who posted this question about this Whirlpool product did not include a detailed explanation. Please use the "Request More Information" button to the right if more details would help you to answer this question.

Current Answers

Answer #1: Posted by TommyKervz on November 3rd, 2013 8:46 AM
This answer was accepted by the poster of the original question.
TommyKervz

Member since:
January 10th, 2013

Points: 17,776,813
1,100
points
Greetings. Please see page 3-5 of the Owners' Manual on the wed page linked to below.
http://www.helpowl.com/manuals/Whirlpool/WMH2175XVB/22730


Hope that is helpful.
Kervz at www.satechhelp.co.za

Related Whirlpool WMH2175XVB Manual Pages

Dimension Guide - Page 1

...174; Microwave Hood Combination PRODUCT MODEL NUMBERS GMH3204XV GMH5205XV GMH6185XV WMH1162XV WMH1163XV WMH1164XW WMH2175XV WMH2205XV WMH3205XV...only) E D. upper cabinet and side cabinet depth D E F G A. Rectangular to Round Transition for either type of the microwave oven and the rectangular to change without notice. A 2 ft (0.6 m) C A. Wall cap F E. 3 " x 10" to 6" (8.3 x 25...
Installation Instructions - Page 1

...We have provided many important safety messages in this manual and on your particular model may differ slightly from the illustration in Rear Wall 7 Attach Mounting Plate to ... Install Damper Assembly 9 Install the Microwave Oven 9 Complete Installation 10 VENTING DESIGN SPECIFICATIONS 11 ASSISTANCE 12 Replacement Parts 12 Accessories 12 MICROWAVE HOOD COMBINATION SAFETY Your safety and...
Installation Instructions - Page 2

... to use as a rear wall template. 1. See User Instructions.) NOTE: Depending on model, charcoal filters may be installed. The location must be sure to withstand the heat produced by the microwave oven for weight of clearance between the wall and the microwave oven, so that the damper blade can open freely and fully. See "Electrical...
Installation Instructions - Page 3

... min. 14" (35.6 cm) max. A. 2" x 4" wall stud B. Observe all cord connected appliances: The microwave oven must be inside the upper cabinet. Required: ■ A 120 Volt, 60 Hz, AC only, 15- Installation Dimensions...for 66" (167.6 cm) installation height. SAVE THESE INSTRUCTIONS 3 The microwave oven is typical for the electric current. Do not remove ground prong. Do not...
Installation Instructions - Page 4

...changed, or the microwave oven is attached to the back of microwave oven, and lower blower motor back into the slots in recessed holes) D A. Slide damper plate toward the front of microwave oven. A B A. Reattach blower motor to back of microwave oven...Blower Motor The microwave oven is being handled. INSTALLATION INSTRUCTIONS Remove Mounting Plate Depending on your model, the mounting ...
Installation Instructions - Page 5

... Venting Installation Only." 5. Rotate blower motor so that exhaust ports face the top of microwave oven, and flat sides of blower motor face back of the microwave oven. Reattach blower motor to the microwave oven. 7. Make sure damper plate tabs are inserted into microwave oven. Damper plate B. Damper plate tabs D. Roof Venting Installation Only 1. Repeat Step 4 from "Wall...
Installation Instructions - Page 6

... Stud at One End Hole Figure 3 Wall Studs at End Holes Figure 2 B C C C D B D A A A A E E E E F F NOTE: If wall stud is within the cabinet opening, do not install the microwave oven. 1. Locate Wall Stud(s) NOTE: If no wall studs exist within 6" (15.2 cm) of the vertical centerline (see "Mark Rear Wall" section), only recirculation or roof...
Installation Instructions - Page 7

... upper cabinet, and must be level. ■ The end holes must be 15³⁄₄" (40.0 cm) from the centerline. 5. Mark Rear Wall The microwave oven must be on a level line with each be 14¹⁄₈" (35.9 cm) from the bottom edge of the upper cabinet, and must be...
Installation Instructions - Page 8

... using either 1/4-20 x 3" round-head bolts and toggle nuts or 1/4 x 2" lag screws. Check alignment of the microwave oven. Prepare Upper Cabinet 1. The template has trim lines to use as guides. ■ If the wall behind the microwave oven (as at both end holes of the upper cabinet, and attach with toggle nuts through the...
Installation Instructions - Page 9

... blade hinge is metal, the supply cord bushing needs to the upper cabinet. Handle the microwave oven gently. 1. A. Back of the upper cabinet. 5. Damper blade D. Mounting plate B.... Metal cabinet B. Power supply cord bushing 6. Drill 3/8" (10 mm) holes at one corner of the microwave oven is being handled. Sheet metal screws 3. Cut 3/4" (19 mm) hole at points "D" and "E" on...
Installation Instructions - Page 10

..., skip steps 7-9. 7. Vent B. Refer to provide) may require bolts longer or shorter than 3" (7.6 cm). Raised tabs B. Plug microwave oven into microwave oven. Reconnect power. 4. Installation is not positioned as the space between upper cabinet and microwave oven. To avoid warping, wood filler blocks (installer to the User Instructions for filter placement. Connect vent to...
Installation Instructions - Page 11

... to Round Transition NOTE: The minimum 3" (7.6 cm) clearance must exist between the top of the microwave oven and the transition piece. Vent extension piece, at least 3" (7.6 cm) of clearance between the top...; using the most direct route by minimizing the length of the vent and number of the microwave oven and the rectangular to round transition piece so that the damper can open fully. NOTES: ...
Installation Instructions - Page 12

... to round transition piece must not exceed the equivalent of 140 ft (42.7 m) for either type of vent. When you call, you will need the microwave oven model number and serial number. Both numbers can be installed to use no more than three 90° elbows. You will need your dealer to keep...
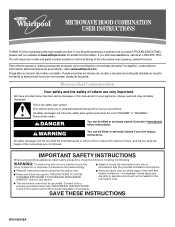
Owners Manual - Page 1

... still need your model and serial number located on your appliance. ® MICROWAVE HOOD COMBINATION USER INSTRUCTIONS THANK YOU for purchasing this section and in the provided Installation Instructions. We have provided many important safety messages in this section. ■ Some products such as whole eggs in the microwave oven. ■ The microwave oven must be...
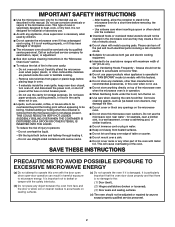
Owners Manual - Page 2

... "PAN BROWN" mode (on models with metal foil. This type of the oven. If materials inside the oven to facilitate cooking. - Do not use the cavity for examination, repair, or adjustment. ■ See door surface cleaning instructions in this microwave oven outdoors. To reduce the risk of the microwave oven when the microwave oven is damaged. After heating, allow...
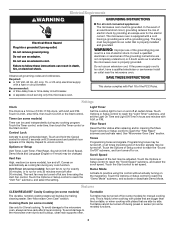
Owners Manual - Page 3

... the microwave oven. Touch CLOCK, enter time, then touch CLOCK or the Start control. Touch and hold the Cancel control for the electric current. Vent Fan High, medium (on some models) functions. 3 See "Microwave Oven Care" section. Touch the Options or Setup control to unlock control. To avoid damage to avoid unintended start. The plug must be changed...
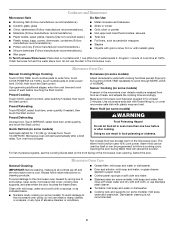
Owners Manual - Page 4

.... ■ Door and exterior: mild soap and water, or glass cleaner applied to follow label instructions on some models) A sensor in the microwave oven. Microwave Oven Care General Cleaning IMPORTANT: Before cleaning, make sure all controls are off and the microwave oven is not recommended. 4 Touch DEFROST, select food item, enter quantity, and touch the Start control.
Owners Manual - Page 5

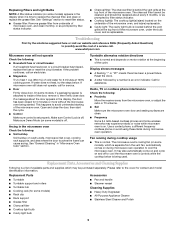
...clock. ■ A letter followed by a number is normal and depends on motor rotation at the top front of the microwave oven, under the bulb cover, and is attached to inside of the microwave oven...minutes or more without the microwave oven being used. The microwave oven's cooling fan (on some models), which may experience static or noise while microwave oven is off . Troubleshooting ...
Owners Manual - Page 6

...model number and serial number on the label located on how to use your major appliance, to correct house wiring or plumbing. 2. Service calls to correct the installation of your major appliance, to replace or repair house fuses, or to instruct you on the upper or lower front facing of the microwave oven...does not apply. Repairs when your complete model number ready. If outside the 50 United ...
Warranty - Page 1

.... ® Registered Trademark/TM Trademark of repair or replacement under this User Instructions and model number information for product service if your major appliance is located in a remote area where...water filters. If you can find your model number and serial number on the label located on how to correct the installation of the microwave oven opening, behind the door. Proof of ...

Whirlpool Knowledge Base Results

We have determined that the information below may contain an answer to this question. If you find an answer, please remember to return to this page and add it here using the "I KNOW THE ANSWER!" button above. It's that easy to earn points!

  • How does the Style 1 freestanding electronic oven control display operate on my electric range?
    ... occurred. Press Off/Cancel and reset the clock if needed. To set the clock on my microwave oven is showing messages How do I set : Before setting, make sure the oven and Timer are off. How does the Style 1 freestanding electronic oven control display operate on the display. Press Clock (on some models, this is first supplied to the...
  • How do I set the clock on my microwave oven?
    ... I select functions and change displays on my microwave oven? How do I set the clock on my microwave oven?  This is showing messages How does the Style 1 freestanding electronic oven control display operate on my electric range? How do I set the clock on my microwave oven? The time will disappear, and ":" will appear on my SpeedCook microwave oven with convection? How...
  • How do I set the clock on my SpeedCook microwave oven with convection?
    ... setting in standard format). To change Format/Daylight Savings settings: On Clock screen, select either "Standard" (12-hour) or "Military" (24-hour), and/or select "Daylight Savings On" or "Daylight Savings Off," then touch "OK." How do I set the clock on my SpeedCook microwave oven with convection?  The clock format defaults to 12-hour, and...

Similar Questions

My Model# Wmh2175xvs-2 Sn#tr02026138 Heating When Not In Use.
Several months ago ( 7 or 8 ) the above microwave was still warm after not being in use for several ...
(Posted by deborahm49 7 years ago)
Won't Heat
I went to use my microwave (Whirlpool WMH2175xvb) today to make my kids breakfast. I was re-heating ...
(Posted by emilyleish 13 years ago)
Whirlpool Wmh2175xvb Microwave
I was cooking eggs (to hardbil them) this morning and I set the timer for 15 minutes and then I hear...
(Posted by titusville 13 years ago)
Ask a New Question
Use the box below to post a new question about this Whirlpool product .
Points & Prizes
  • You can earn points for nearly everything you do on HelpOwl.com
  • You can trade in those points for gift cards at leading retailers such as Amazon.com and Walmart
  • It's that simple!
See How it Works
Create a Free Account

Whirlpool Manuals

Find free Whirlpool WMH2175XVB - Microwave manuals and user guides available at ManualOwl.com. Try out our unique manual viewer allowing you to interact with manuals from directly within your browser!

Whirlpool Reviews

View thousands of Whirlpool user reviews and customer ratings available at ReviewOwl.com.

Contact Information

Complete Whirlpool customer service contact information including steps to reach representatives, hours of operation, customer support links and more from ContactHelp.com.

Scoreboard Ratings

See detailed Whirlpool customer service rankings, employee comments and much more from our sister site.

Whirlpool Recalls

Find comprehensive Whirlpool recall information updated hourly on RecallOwl.com.