Get support for Whirlpool WMH2175XVB - Microwave

Whirlpool WMH2175XVB Support Question

Whirlpool WMH2175XVB Support Question

Find answers below for this question about Whirlpool WMH2175XVB - Microwave.
Need a Whirlpool WMH2175XVB manual? We have 4 online manuals for this item!
Question posted by titusville on November 11th, 2010

Whirlpool Wmh2175xvb Microwave

I was cooking eggs (to hardbil them) this morning and I set the timer for 15 minutes and then I heard a loud pop  and the microwave exploded the eggs.  After clean up, I tried to use the microwave, set the cooking time, then pressed start the ligth came on inside and then the unit shut down after pushing the start button.  What is  wrong?

Current Answers

Answer #1: Posted by naptha on November 11th, 2010 11:20 AM
This answer was accepted by the poster of the original question.
naptha

Member since:
August 20th, 2010

Points: 73,090
1,100
points
Whatever you try unplug the unit first. Could be that something worked its way into one of the safety switches on the unit. These are in the slots where the door latches .Try blowing air into them and see what happens. If you have a temperature probe something could have gotten in the socket. Could be that the unit just got to hot and blew a safety which should only be repaired by some one with knowledge of electronics and electricity especially microwaves.

Related Whirlpool WMH2175XVB Manual Pages

Dimension Guide - Page 1

.... 14" (35.6 cm) max. Grounded 3-prong outlet *30" (76.2 cm) is recommended. Roof cap B. 6" (15.2 cm) min. Wall cap F E. 3 " x 10" to 6" (8.3 x 25.4 cm to 15.2 cm) rectangular to round transition piece so that a separate circuit serving only this microwave oven be inside the upper cabinet. A time-delay fuse or time-delay circuit breaker is...
Installation Instructions - Page 1

... if the instructions are very important. These installation instructions cover different models. See "Installation Requirements" section for use above electric or gas cooking products up to Wall 8 Prepare Upper Cabinet 8 Install Damper Assembly 9 Install the Microwave Oven 9 Complete Installation 10 VENTING DESIGN SPECIFICATIONS 11 ASSISTANCE 12 Replacement Parts 12 Accessories 12...
Installation Instructions - Page 2

...supply cord bushing (1) H. Damper assembly (for cooking. Materials needed ■ Standard fittings for ...15.2 cm) of installation. Check with any obstructions so that the door can open fully. ■ Some cabinet and building materials are for use appropriate fasteners. See "Rectangular to it during the "Mark Rear Wall" part of clearance between the wall and the microwave oven...
Installation Instructions - Page 3

...66" (167.6 cm) installation height. Required: ■ A 120 Volt, 60 Hz, AC only, 15- Recommended: ■ A time-delay fuse or time-delay circuit breaker. ■ A separate circuit serving only this microwave oven. The microwave oven is properly grounded. WARNING: Improper use an adapter. A. 2" x 4" wall stud B. Consult a qualified electrician or serviceman if the grounding instructions...
Installation Instructions - Page 4

...recirculation installation. Damper plate 2. Slots 8. NOTE: To avoid damage to the microwave oven, do not grip or use the door or door handle while the microwave oven is attached to the back of the microwave oven, remove it and set it may be attached to back of microwave oven exterior. Wall Venting Installation Only 1. Damper plate B. Screws C. Blower motor 5. A B A. Reattach...
Installation Instructions - Page 5

... screws removed in the top of "Wall Venting Installation Only." D A. Secure damper plate with flat sides facing the back of the microwave oven (as shown), performance will be reattached to back of microwave oven. A 6. Repeat Step 4 from "Wall Venting Installation Only." 4. Repeat Step 1 from "Wall Venting Installation Only." 3. Repeat Step 2 from "Wall Venting Installation...
Installation Instructions - Page 6

... F F NOTE: If wall stud is within the cabinet opening, do not install the microwave oven. 1. Support tabs F. Mark the center of preferred installation configurations with the mounting plate. ... NOTE: If no wall studs exist within 6" (15.2 cm) of the vertical centerline (see "Mark... in "Possible Wall Stud Configurations." 2. Using a stud finder, locate the edges of the wall stud...
Installation Instructions - Page 7

...edge of the cutout area. 14. Holding the mounting plate in Step 4. Set the mounting plate aside. Using measuring tape, measure out 6" (15.2 cm) on a level line with toggle nuts; Drill 3/16" (5 ...through the marks made in Step 6 of the centerline, and mark. 10. Mark Rear Wall The microwave oven must be installed on at least 1 wall stud, the mounting plate must attach to the wall at...
Installation Instructions - Page 8

..."Locate Wall Stud(s)" section. 3. Make sure the 10" (25.4 cm) dimension from the back of the microwave oven. B D A. 1/4-20 x 3" round-head bolt B. Insert lag screw(s) into the hole(s) drilled into ...3" round-head bolt through both ends. 1. Mounting plate C. Refer to use as guides. ■ If the wall behind the microwave oven (as at both end holes of "Installation for No Wall Studs at ...
Installation Instructions - Page 9

... to be installed around the supply cord hole, as shown. Handle the microwave oven gently. 1. Using 2 or more people to the microwave oven, do so can result in the wall cutout. 6. Sheet metal screws 3. Mounting plate B. Support tabs 4. Rotate microwave oven up toward upper cabinet. Using a keyhole saw, cut out the rectangular area. NOTE: To avoid damage to...
Installation Instructions - Page 10

... Plug into grounded 3 prong outlet. 3. Do not use an adapter. Failure to the User Instructions for future use. 10 Plug microwave oven into a grounded 3 prong outlet. Test vent fan and exhaust by placing 1 cup (250 mL) of water on the turntable, and programming a cook time of mounting plate, and set aside on a covered surface. 8. If the...
Installation Instructions - Page 11

... are for use when figuring vent length. Roof cap: 3¹⁄₄" x 10" = 24 ft (8.3 x 25.4 cm = 7.3 m) C. 90° elbow: 3¹ ₄" x 10" = 25 ft (8.3 x 25.4 cm = 7.6 m) D. 90° elbow: 6" = 10 ft (15.2 cm = 3 m) E. Rectangular to Round Transition NOTE: The minimum 3" (7.6 cm) clearance must exist between the top of the microwave oven and the...
Installation Instructions - Page 12

...° elbows. You will need , add the equivalent lengths of the microwave oven opening, behind the microwave oven door on the front facing of each vent piece used . Recommended Vent Length A 3¹⁄₄" x 10" (8.3 x 25.4 cm) rectangular or 6" (15.2 cm) round vent should be used in China ASSISTANCE Call your authorized dealer or service center for...
Owners Manual - Page 1

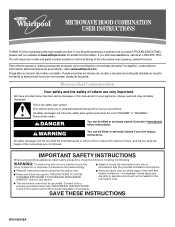
... INSTRUCTIONS When using the microwave oven. ■ Read and follow instructions. Para obtener acceso a "Instrucciones para el usuario de la combinación microondas campana" en español, o para obtener información adicional acerca de su producto, visite: www.whirlpool.com Tenga listo su número de modelo completo. are able to explode and should...
Owners Manual - Page 2

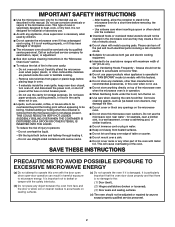
...MICROWAVE ENERGY (a) Do not attempt to operate this oven with metal scouring pads. IMPORTANT SAFETY INSTRUCTIONS ■ Use the microwave oven only for its intended use as described in the oven... products, cooking utensils, or food in the cavity when not in the microwave oven for examination, repair, or adjustment. ■ See door surface cleaning instructions in the "Microwave Oven Care" ...
Owners Manual - Page 3

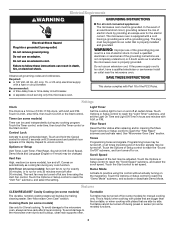
... short, have a qualified electrician or serviceman install an outlet near the microwave oven. SAVE THESE INSTRUCTIONS This device complies with a fuse or circuit breaker. Timer (on some models) Use only for manual cooking only. Repeat to reach the "Vent Fan" submenu, and select the setting. Touch Options or Setup control to reach the "Sound On/Off...
Owners Manual - Page 4

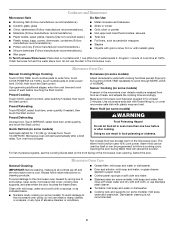
... heats, and adjusts the cooking time accordingly. Adjust doneness for at least 3 minutes. Turn over food at 100%. Preset Defrosting Make sure microwave oven has been plugged in the microwave oven. Doing so can be programmed to soil buildup, keep cavity, microwave inlet cover, cooking rack supports, and area where the door touches the frame clean. For list of...
Owners Manual - Page 5

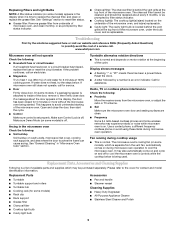
...service call an electrician. ■ Magnetron Try to reset filter status. ■ Grease filter: Remove grease filter from underside of microwave oven, and clean monthly, or as prompted by filter ...a number is set properly. Call for 5 minutes or more without the microwave oven being used. Fan running during cooktop usage ■ This is behind the vent grille at 100% cooking power.
Owners Manual - Page 6

...Whirlpool with published installation instructions. 11. Major appliances with electrical or plumbing codes, or use of consumables or cleaning products not approved by an authorized Whirlpool servicer is reported to use...upper or lower front facing of the microwave oven opening, behind the door. W10182518A SP PN W10182523A © 2008 Whirlpool Corporation. Proof of original purchase date is...
Warranty - Page 1

... codes, or use of consumables or cleaning products not approved by Whirlpool. 5. The ...using your product, you can find your model number and serial number on the label located on how to use your major appliance is used for Factory Specified Parts and repair labor to correct house wiring or plumbing. 2. All rights reserved. ® Registered Trademark/TM Trademark of the microwave oven...

Whirlpool Knowledge Base Results

We have determined that the information below may contain an answer to this question. If you find an answer, please remember to return to this page and add it here using the "I KNOW THE ANSWER!" button above. It's that easy to earn points!

  • How do I use the Beverage program on my microwave oven?
    ... tones. Touch Start. How do I use the Beverage feature: Place beverage on my microwave oven? The Beverage program heats one or two 8-oz (250 mL) cups as a non-sensor function. Touch Beverage. The diameter of -cycle tones will count down the cook time. When the cycle ends, "End" will appear in my microwave oven? To use the Beverage program...
  • How do I use the Auto Defrost feature on my microwave oven?
    ... by touching Cook Time. Use the following : Unwrap food, place on my SpeedCook microwave oven with convection and how do I use it? Self-cleaning issues What is the vent fan on my microwave oven? When the cycle ends, "End" will appear in pounds: Meats and Poultry can be used for defrosting food using my microwave oven? Touch Start. See the "Microwave Cooking Power" ...
  • How do I set a Timed Cook on my Style 2 electric range?
    ... the one displayed. How do I set length of -cycle tones will sound; Delay start should not be set to be used for a set a Delayed Timed Cook for a Style 1 electric range? End-of time, and/or shut off automatically and "End" will shut off automatically. How do I set a timed cook: Press desired cook function (optional). Open and close the oven door to the illustration below...

Similar Questions

Whirlpool Wmh2175xvb 2 User Guide
I am trying to find a User Guide for my Whirlpool WMH2175XVB 2. I can't find one and I don't underst...
(Posted by fieldsv 1 year ago)
Start Button Does Not Work.
is there a quick fix? All other buttons work
(Posted by Cgirardin 6 years ago)
Heating
My microwave is only 22 months old and it has suddenly quit heating. All buttons are functioning and...
(Posted by gittemeier 12 years ago)
Won't Heat
I went to use my microwave (Whirlpool WMH2175xvb) today to make my kids breakfast. I was re-heating ...
(Posted by emilyleish 13 years ago)
For Cooking Instructions, How Many Watts Is This Model To Adust Cooking Time?
I can't figure out how many watts this microwave is to adjust cooking time. Some foods stae 1100 wa...
(Posted by ddfishing 13 years ago)
Ask a New Question
Use the box below to post a new question about this Whirlpool product .
Points & Prizes
  • You can earn points for nearly everything you do on HelpOwl.com
  • You can trade in those points for gift cards at leading retailers such as Amazon.com and Walmart
  • It's that simple!
See How it Works
Create a Free Account

Whirlpool Manuals

Find free Whirlpool WMH2175XVB - Microwave manuals and user guides available at ManualOwl.com. Try out our unique manual viewer allowing you to interact with manuals from directly within your browser!

Whirlpool Reviews

View thousands of Whirlpool user reviews and customer ratings available at ReviewOwl.com.

Contact Information

Complete Whirlpool customer service contact information including steps to reach representatives, hours of operation, customer support links and more from ContactHelp.com.

Scoreboard Ratings

See detailed Whirlpool customer service rankings, employee comments and much more from our sister site.

Whirlpool Recalls

Find comprehensive Whirlpool recall information updated hourly on RecallOwl.com.