Get support for Sony HDR-SR11 - Handycam Camcorder - 1080i

Sony HDR-SR11 Support Question

Sony HDR-SR11 Support Question

Find answers below for this question about Sony HDR-SR11 - Handycam Camcorder - 1080i.
Need a Sony HDR-SR11 manual? We have 1 online manual for this item!
Question posted by peterzim535 on January 3rd, 2012

Sony Hdr-sr11 Went Through The Washing Machine. Now What?

Removed rechagable battery.  Dried it for 7 days.  installed charger cord , but left out battery pack.  No response. Next I want to remove the button lithium battery and put whole camera into mehtanol and let dry.  How do I get to button battery?  Anythjing else I should know?

Current Answers

Answer #1: Posted by BusterDoogen on January 3rd, 2012 7:11 PM
This answer was accepted by the poster of the original question.
BusterDoogen

Member since:
October 30th, 2011

Points: 28,565,397
1,100
points
Here are some go to fixes to try to revive your device. It isn't specifc to just cameras. Hope this helps, good luck!

If you are like me you have dropped your fair share of cell phones, pagers, ipod’s, gameboy’s and camera’s in various bodies of water.  Come on who hasn’t had a pager ride your belt right into the urinal? Okay maybe that was just me. Over the years I have polished some techniques for reviving these electronic items resulting in a fair survival rate.  Frugal Fixes are a new feature here at FiscalGeek (what isn’t at this point) where we’ll publish some useful fixes around the host that could potentially save you a fair amount of money with some of your own elbow grease and ingenuity.

Time Commitment: 2-10 minutes Handiness Skill Level: Beginner Potential Savings: $100′s Materials: Jacked up Electronics Device, Isopropyl or Rubbing Alcohol, Container larger than your electronic device, rice (optional), Dri-Z-Air (optional)


Time Tested Fix

This technique is my go to for waterlogged devices.

  1. Remove the battery from the device.  This is critical, and do it as soon as possible, even if you are not going to follow this technique, this is your best chance for device survival.
  2. Find a container slightly larger than the device that will hold liquid.
  3. Remove battery covers and other compartments so you can be sure to get into all areas of the device.
  4. Place the device in the container and fill with Alcohol completely submerging the device.  The alcohol will displace any water left in your device.  Jiggle the container around a bit to make sure the alcohol is able to drive out the water droplets in your device.  You may need to weight your device to keep it under the water.  I would suggest a 5 minute period of soaking, you can vary the time based on your results and optionally repeat this step if you are not successful.
  5. Remove the device and put it somewhere to dry for an hour or two.  The alcohol will evaporate very quickly but be sure it’s really dry.  Q-tips are helpful as well to make sure you’ve got the item clean.
  6. Reassemble your device and hopefully you are good to go.  If not you can repeat this step or try the Alternate Fix.
Alternate Fixes

These are longer term fixes that take some time but also have been used successfully by many people me included in a pinch.  Give any or all of these a try if you are unsuccessful with the Alcohol Fix.

  1. You can use a commercial product like the Bheestie Bag to remove the moisture.  You can see my real life test results in the FiscalGeek Video Review.  It might be $20 well spent.
  2. Put the electronic device in a large Ziploc bag filled with dry rice.  The rice acts as a desiccant to remove water from the air and aids in drying your device out quicker.  The timeframe for this would be more like overnight than a few minutes.
  3. Put the electronic device in a sealed container with a Dri-Z-Air unit.  These are used often in RV’s and damp areas and are available at the hardware store.  They are essentially a plastic container that holds their special desiccant.  It will remove a tremendous amount of moisture.
  4. The old hair dryer technique, just be sure not to get it to close and melt any components.
  5. Smash it with a hammer and buy a new device.  This one works every time.
  6. Creds to: fiscalgeek.com/2009/

Related Sony HDR-SR11 Manual Pages

Operating Guide - Page 4

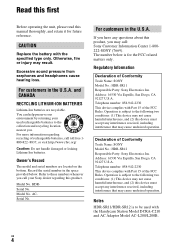
...Replace the battery with the Handycam Station ...batteries, call your used rechargeable batteries to be used with the specified type only. Address: 16530 Via Esprillo, San Diego, CA 92127 U.S.A. Declaration of Conformity Trade Name: SONY Model No.: HDR-SR11 Responsible Party: Sony...HDR-SR11/HDR-SR12 is for future reference. and CANADA RECYCLING LITHIUM-ION BATTERIES Lithium-Ion batteries...
Operating Guide - Page 5

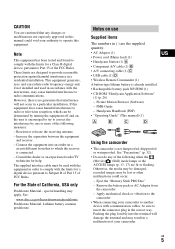
...AC Adaptor (1) • Power cord (Mains lead) (1) • Handycam Station (1) A • Component A/V cable (1) B • A/V connecting cable (1) C • USB cable (1) D • Wireless Remote Commander (1) A button-type lithium battery is connected. - Apply mechanical shock or vibration to which can radiate radio frequency energy and, if not installed and used with the equipment in...
Operating Guide - Page 6

... to the camcorder (1), then rotate it is recommended that appear constantly on the camcorder, due to the protection features of the camcorder being activated in any way. • Remove the insulation...on the LCD screen. • Connect cables to the connectors of the Handycam Station when using your camcorder. • If you repeat recording/deleting images for effective use with this ...
Operating Guide - Page 7

... is not possible due to "Handycam Handbook" (PDF) and "PMB Guide." Note on the country/region. US 7 Other AVCHD format compatible devices which are captured using a digital still camera, and therefore may vary depending on the operating system of the computer. * Refer also to a malfunction of the camcorder, recording media, etc. • TV...
Operating Guide - Page 8

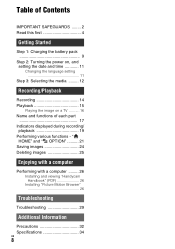
... a computer Performing with a computer ......... 26 Installing and viewing "Handycam Handbook" (PDF 26 Installing "Picture Motion Browser 26 Troubleshooting Troubleshooting 29 Additional Information Precautions 32 Specifications 34 US 8 Table of Contents IMPORTANT SAFEGUARDS ........ 2 Read this first 4 Getting Started Step 1: Charging the battery pack 9 Step 2: Turning the power on, and...
Operating Guide - Page 9

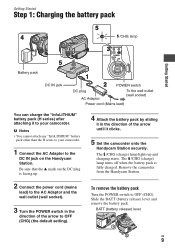
... facing up and charging starts. Be sure that the v mark on the Handycam Station. To remove the battery pack Turn the POWER switch to your camcorder. BATT (battery release) lever US 9 Slide the BATT (battery release) lever and remove the battery pack. Remove the camcorder from the Handycam Station. 2 Connect the power cord (mains lead) to the AC Adaptor and the wall outlet (wall...
Operating Guide - Page 10

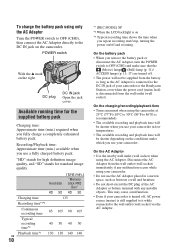
...*2 When the LCD backlight is on the conditions under which you use your camcorder. On the battery pack • When you remove the battery pack or disconnect the AC Adaptor, turn the POWER switch to OFF (CHG) and... from the battery as long as between a wall and furniture. • Do not short-circuit the DC plug of your camcorder or the Handycam Station, even when the power cord (mains lead...
Operating Guide - Page 12

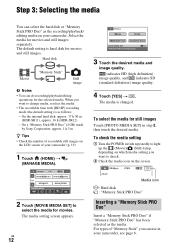
... been selected as the media. For types of "Memory Stick" you want to select the media for movies and still images separately. Hard disk ...HDR-SR11), approx. 36 h (HDR-SR12) - The media is hard disk for the selected media. Step 3: Selecting the media You can select the hard disk or "Memory Stick PRO Duo" as the recording/playback/ editing media on the LCD screen of your camcorder...
Operating Guide - Page 16

... the same time, image disturbance may need to output images, images are output with SD (standard definition) image quality. • Your camcorder and the Handycam Station are equipped with i/B, you can play back on an x.v.Color-compliant TV. Refer to the instruction manual of the TV. If you touch an ...
Operating Guide - Page 17

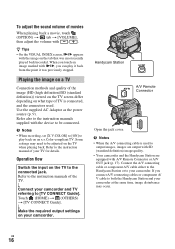
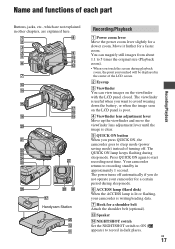
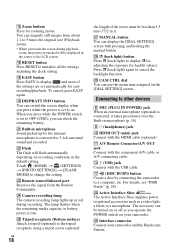
...Your camcorder returns to start recording next time. US 17 wa ws wd wf wg wj wh wk wl qj Handycam Station...Buttons, jacks, etc., which are not explained in other chapters, are explained here. 1 8 2 3 4 9 5 0 6 qa qs 7 qd qf qg qj qk qh ql w; Move it further for a slower zoom. The power turns off . The viewfinder is useful when you want to avoid wearing down the battery...
Operating Guide - Page 18

... backlight function. wf Camera recording lamp The camera recording lamp lights up by connecting the camcorder to OFF (CHG), you touched will flash automatically depending on your camcorder and the Handycam Station. The lamp flashes when the remaining media capacity or battery power is set to 5.1ch surround sound and recorded. wj MANUAL button You can use...
Operating Guide - Page 20

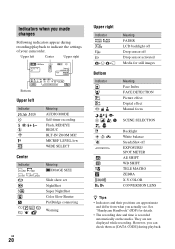
... Upper right Bottom Upper left Indicator Center Indicator 10.2M 7.6M 6.1M E Meaning AUDIO MODE Self-timer ...check them as [DATA CODE] during recording/playback to indicate the settings of your camcorder. Indicators when you made changes Following indicators appear during playback. See "Handycam Handbook" (PDF) for still images Meaning Face Index FACE DETECTION Picture effect Digital ...
Operating Guide - Page 22

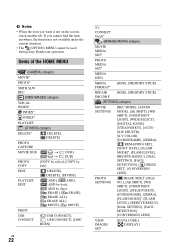
If you want is not available under the current situation. • The (OPTION) MENU cannot be used during Easy Handycam operation. Items of the HOME MENU (CAMERA) category MOVIE* PHOTO* SMTH SLW REC (VIEW IMAGES) category VISUAL INDEX* INDEX* INDEX* PLAYLIST (OTHERS) category DELETE* [ DELETE], [ DELETE] PHOTO CAPTURE MOVIE DUB [ [ t DUB], t DUB] ...
Operating Guide - Page 26

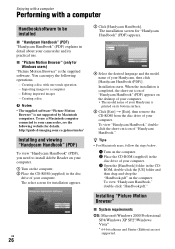
Importing images to be installed x "Handycam Handbook" (PDF) "Handycam Handbook" (PDF) explains in detail about your Handycam, then click [Handycam Handbook (PDF)]. To use . http://guide.d-imaging.sony.co.jp/mac/ms/us/ Installing and viewing "Handycam Handbook" (PDF) To view "Handycam Handbook" (PDF), you need to install Adobe Reader on your computer. 1 Turn on its practical use a Macintosh...
Operating Guide - Page 28

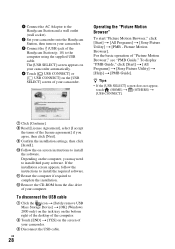
... [I accept the terms of the Handycam Station (p. 18) to install third party software. US 28 qs Remove the CD-ROM from the disc drive of "Picture Motion Browser," see "PMB Guide." Depending on the computer, you agree, then click [Next]. 9 Confirm the installation settings, then click [Install]. 0 Follow the on your camcorder. 3 Connect the (USB) jack...
Operating Guide - Page 29

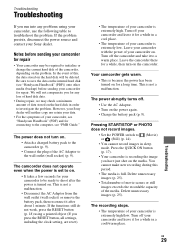
... camcorder, see "Handycam Handbook" (PDF)) onto other media (backup) before sending your Sony dealer will not compensate you for repair • Your camcorder may check a minimum amount of the media. Turn off your camcorder and leave it for your camcorder is not a malfunction. • Disconnect the AC Adaptor from the wall outlet (wall socket) or remove the battery pack...
Operating Guide - Page 30

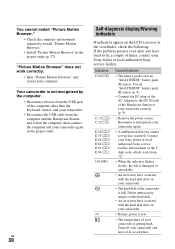
...Contact your computer. You cannot install "Picture Motion Browser." • Check the computer environment required to the DC IN jack of your camcorder securely (p. 9). • Remove the power source. Your camcorder is not an "InfoLITHIUM" battery pack (H series). Inform them of the 5digit code, which starts from the computer and the Handycam Station, and restart the computer...
Operating Guide - Page 32

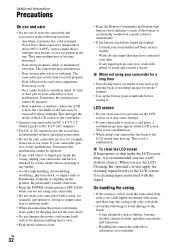
... avoid damage to OFF (CHG) when you are not using your camcorder. • Do not wrap your camcorder with a towel, for example, and operate it. The camcorder may heat up the battery pack completely before operating it any liquid that may malfunction or become deformed. - Wash off any further. • Avoid rough handling, disassembling, modifying, physical...
Operating Guide - Page 34

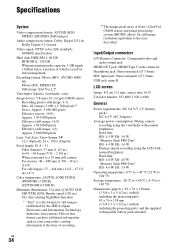
...camera For movies: 40 ~ 480 mm (1 5/8 ~ 19 in.) (16:9) For still images: 37 ~ 444 mm (1 1/2 ~ 17 1/2 in .) (w/h/d) including the projecting parts, and the supplied rechargeable battery pack attached Input/Output connectors A/V Remote Connector: Component/video... have additional information such as your camcorder's setting information at the time of Sony's ClearVid CMOS sensor and image processing...
Operating Guide - Page 35

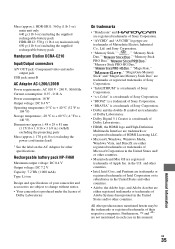
... United States and other specifications. Mass (approx.): HDR-SR11: 560 g (1 lb 3 oz) main unit only 640 g (1 lb 6 oz) including the supplied rechargeable battery pack HDR-SR12: 570 g (1 lb 4 oz) main unit only 650 g (1 lb 6 oz) including the supplied rechargeable battery pack Handycam Station DCRA-C210 Input/Output connectors A/V OUT jack: Component/video and audio output jack USB jack: mini...

Similar Questions

Sony Video Camera Recorder 8 (ccd-fx310) Troubleshooting
I have a Sony Video Camera Recorder 8 (CCD-FX310) which has not been used for years....... I am supp...
(Posted by bobkerestes 1 year ago)
Video Camera Eating Tapes
My video camera Sony DCR-TRV27 started messing up tapes (eating tapes) Any sugestion
(Posted by janosurimb 1 year ago)
Sony Cr2025 Lithium Memory Battery In Sony Hdr-sr11 Camera
How do I go about replacing the lithium memory battery in my Sony HDR-SR11 video camera? Where is it...
(Posted by nxsv 11 years ago)
Ask a New Question
Use the box below to post a new question about this Sony product .
Points & Prizes
  • You can earn points for nearly everything you do on HelpOwl.com
  • You can trade in those points for gift cards at leading retailers such as Amazon.com and Walmart
  • It's that simple!
See How it Works
Create a Free Account

Sony Manuals

Find free Sony HDR-SR11 - Handycam Camcorder - 1080i manuals and user guides available at ManualOwl.com. Try out our unique manual viewer allowing you to interact with manuals from directly within your browser!

Sony Reviews

View thousands of Sony user reviews and customer ratings available at ReviewOwl.com.

Contact Information

Complete Sony customer service contact information including steps to reach representatives, hours of operation, customer support links and more from ContactHelp.com.

Scoreboard Ratings

See detailed Sony customer service rankings, employee comments and much more from our sister site.

Sony Recalls

Find comprehensive Sony recall information updated hourly on RecallOwl.com.