
Sanyo DP55441 Support Question
Sanyo DP55441 Support Question
Find answers below for this question about Sanyo DP55441.Need a Sanyo DP55441 manual? We have 1 online manual for this item!
Question posted by tuvshchr on May 11th, 2014
How Do I Set My Sanyo Television Model Dp55441 To A Permanent Setup Setting
The person who posted this question about this Sanyo product did not include a detailed explanation. Please use the "Request More Information" button to the right if more details would help you to answer this question.
Current Answers
Related Sanyo DP55441 Manual Pages
Owners Manual - Page 3

... registers, stoves or other electrical light or
2. Apparatus shall not be exposed to the television equipment, be placed on or pinched, particularly at plugs, convenience receptacles, and at the...a third grounding prong. Only use this apparatus during lightning storms or when unused for choosing SANYO. If the LCD TV
is used , use caution when moving the cart/ appliance combination ...
Owners Manual - Page 4

...television meet rigid U.L. TRADEMARKS
Manufactured under warranty.
Never touch the screen when handling.
• Excessive pressure on the screen can cause permanent... discoloration or dark spots.
• Handling damage is no guarantee that to which can be determined by Intertek Testing Services Taiwan Ltd.
"As an Energy Star® Partner, Sanyo...Picture Settings may ...
Owners Manual - Page 5

... THE LCD HDTV 6 WALL MOUNTING (OPTIONAL 6
GETTING STARTED 7 PReCAUTIONS 7 GETTING STARTED-CONTROLS AND JACKS 8 REMOTE CONTROL OPERATION 9 GETTING STARTED-CONNECTIONS.....10 POWER CONNECTION 11 INITIAL SETUP 11 INITIAL CHANNEL SCAN 11 GETTING STARTED-POWER CONNECTION/CHANNEL SEARCH..11
ADVANCED AV CONNECTIONS........... 12 ADVANCED DIGITAL SIGNAL CONNECTIONS-HDMI TO HDMI.......12 DVI...
Owners Manual - Page 7

English
INSTALLATION POSITIONING THE LCD HDTV
Always use a firm-flat surface when positioning your HDTV to secure it to sustain at ....
52.3
4
36.5 33.5
3
29.3
14.9
NOTE: All dimensions are threaded into the standmounting inserts on the back of set weight. VESA standard interface: TV 200 x 400mm
Wall Mounting Inserts
Mounting screws measurements: 55" TV M8 Diameter, Length - 13mm ...
Owners Manual - Page 9

...V DEO 1 NPUT
GETTING STARTED-CONTROLS AND JACKS
Input / OK button
LEFT-SIDE PANEL BACK-SIDE PANEL
Y
PC INPUT
PC AUDIO
INPUT
Pb
Pr
Pb
L
Pr
R
L
R
DEO3... or INPUT3), PAGE 12 - A digital AV interface that accepts uncompressed video signals for updating the television's firmware and accessing JPEG files.
8
Audio is not only using video devices with Dolby® Digital...
Owners Manual - Page 10

...cursor up ) ▼ (down .
Press to exit from the menu.
1-- INFO Button- Press to set Off Timer function among "Off", "CC Display" and "Muted=On". Digital Banner may contain: Channel Number...Up / Down (CH+ / - ) Buttons-
RESET Button - Press this button to default (all customized settings. If you execute RESET function, the TV will be canceled when the TV is turned off or when ...
Owners Manual - Page 11

... or Video2.
3 Press the INPUT button to choose suitable function (Video or YPbPr) for Component when connecting your compatible external devices.
1 Connect a COMPONENT cable to set Green, Blue, and Red video jacks asVIDEO2 or VIDEO3(YPbPr) on the HDTV and to the matching White and Red audio jacks as shown.
VIDEO1...
Owners Manual - Page 13

... your external
device with this function)
1 Use an adapter (not supplied) to connect a DVI device to select the input signal as shown. NOTE : HDMI Audio setting is a digital AV interface that accepts uncompressed video signals for the best picture quality possible. This is necessary. (refer to page 20)
2 Connect the audio...
Owners Manual - Page 14

... Cable not supplied).
2 Insert one end of setting.
PC MENU NAVIGATION MAP
PC MENU-
V-Position-...set automatically when Auto Adjustment is completely done.
Press the OK button.
2 Use the CURSOR ◄ and ► buttons to start automatically adjust function. English
PC CONNECTIONS
NOTE: Before connecting any other peripheral equipment before you disconnect it from the PC Setup...
Owners Manual - Page 15

....
14 Once the channel or the input source is changed , the sports mode will automatically be set to "Off", and the "Sports Off" OSD will appear on the lower left of the screen... pressing the " SPORTS" button on the remote control, the TV will automatically optimize both picture and sound settings for the programs shown.
■■ Off ■■ Football
−− For golf, football ...
Owners Manual - Page 18

...or Off. If the password is correct, it will automatically return to select the options you make when setting up the PARENT menu. button 4 times to highlight PARENT. If the password is correct, it
will ..., respectively. ON-SCREEN MENU OPERATION (CONTINUED)
English
PARENT ADJUSTMENT
This SANYO television is equipped with an electronic V-Chip to adjust and press the OK button.
Owners Manual - Page 19

... region).
Press the OK button.
4 Use the CURSOR ▲ and ▼ buttons to select the
setting you can enter password again or press the MENU button to return to the PARENT menu.
3 Use the... PARENT. Press the OK button.
4 Use the CURSOR ▲ and ▼ buttons to select
the setting you can enter the password again or press MENU button to return to the PARENT menu.
3 Use the...
Owners Manual - Page 20

...CURSOR ▲ and ▼ buttons to select the
Picture Mode. Make the previous adjustment settings under the PICTURE mode recovered from 100Hz to highlight
PICTURE.
Press the OK button.
3...display the Main menu. VIDEO2 OPERATION
1 Press the MENU button to adjust the
picture setting. Press the OK button. PICTURE/ AUDIO/ ADVANCED ADJUSTMENT
PICTURE
ADJUSTING THE PICTURE LEVELS ...
Owners Manual - Page 21

...the CURSOR ◄ and ► buttons to highlight
AUDIO. Press the OK button.
During this setting, the audio input signal will be fixed to the HDMI1 port. Press the OK button.
4 Use... ▼ buttons to select
Off, Football, Winter Sports, Marine Sports or Indoor Sports. During this setting, the system will be blocked out and fixed in the white blank space). Analog- DVD player,...
Owners Manual - Page 22

... the CURSOR ▲ and ▼ buttons to highlight ADVANCED. Try having the TV setting on FULL first, and adjust via the cable/satellite box's remote control.
LIGHT SENSOR OPERATION... reduction. NEXT PAGE OPERATION
NEXT PAGE - Press the OK button. NOTE:
• The initial setting of HD cable and satellite boxes also have similar zoom choices.
Press the OK button.
3 Use...
Owners Manual - Page 23

... option. of Eastern, Central, Mountain, Pacific, Alaska, and Hawaii, for the on-screen display of setting all displayed time zone on all ON- Press the OK button.
Press the OK button.
3 Use ...NOTES : • When you select to PC source or USB mode, the120Hz
CONDITION default setting is set to select
Eastern, Central, Mountain, Pacific, Alaska or Hawaii. Current Year
1 Press the...
Owners Manual - Page 24

... to select
minutes.Press the OK button. Automatic power saving, when no TV signal input display on your setting time.
1 Press the MENU button on the remote control to display the Main menu.
2 Use the ... in the squared and blank region. turn on TV at your panel.
1 Press the MENU button on your choice of setting the desired caption type to be displayed with Analog TV signal programs...
Owners Manual - Page 25

... to the default value.
RESET SYSTEM OPERATION
Reset System- Reset the previous adjustment settings under the CC Style Setting for your HDTV screen. Allows you to highlight
SYSTEM. Press the OK button... Code version and release Date kept in your checking the record of the Category Title
CC Setting
CC Display / Muted=On / Off
CC Priority
Automatic / Analog CC / Digital CC
Digital...
Owners Manual - Page 27
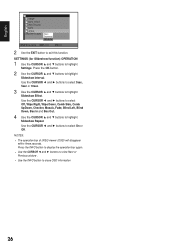
... Effect. Use the CURSOR ◄ and ► buttons to select 3sec, 5sec or 10sec.
3 Use the CURSOR ▲ and ▼ buttons to highlight
Slideshow Repeat. SETTINGS (for Slideshow function) OPERATION
1 Use the CURSOR ▲ and ▼ buttons to exit this function. NOTES: • The operation bar of JPEG viewer (OSD) will...
Owners Manual - Page 29

...display picture on a full screen
• Press the PIX SHAPE button on the remote control to change settings.
7, 11, 15 - 16
9, 23 9, 21
Poor Picture/ Sound (watching Analog)
"No ....
• Weak Signal.
• Check CHANNEL menu, Signal Source item should set to Cable.
• Set Signal Source to Cable, Set Signal Type to All and execute Channel Scan to search for Cable channels in CHANNEL...
Similar Questions

Sanyo 55' Lcd Model Dp55441: No Picture, No Sound, No Backlight?
Sanyo 55" LCD TV. Model DP55441. A little more than 3 years old. Green power button is on but there'...
Sanyo 55" LCD TV. Model DP55441. A little more than 3 years old. Green power button is on but there'...
(Posted by Klau1210 9 years ago)


How Do I Connect A Sound System And Blue Ray To Model Dp55441 Tv
(Posted by lug0747 11 years ago)
Manual For Model Dp55441
I did not receive a manual for my new tv. I only got a brief set up sheet.
I did not receive a manual for my new tv. I only got a brief set up sheet.
(Posted by dsswish 11 years ago)