Lexmark X544 Support Question
Lexmark X544 Support Question
Find answers below for this question about Lexmark X544.Need a Lexmark X544 manual? We have 8 online manuals for this item!
Question posted by DAMMjmc on January 5th, 2014
How To Replace A Photo Conductor Kit In Lexmark X544
The person who posted this question about this Lexmark product did not include a detailed explanation. Please use the "Request More Information" button to the right if more details would help you to answer this question.
Current Answers
Related Lexmark X544 Manual Pages
User's Guide - Page 123
... Defective
OK
Unsupported
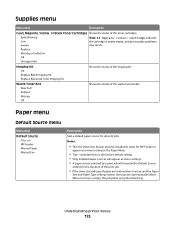
Imaging Kit OK Replace Black Imaging Kit Replace Black and Color Imaging Kit
Shows the status of the imaging kit
Waste Toner Box Near Full Replace Missing OK
Shows the ...; If the same size and type of the toner cartridges
Early Warning Low
Note: 88 Replace Cartridge indicates the cartridge is empty, the job prints using the linked tray.
Understanding printer ...
User's Guide - Page 159
...Center Fit Height/Width Fit Height Fit Width
Orientation Portrait Landscape Rev Portrait Rev Landscape
PictBridge menu
Menu item
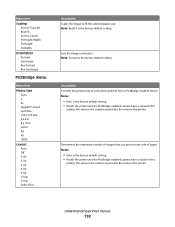
Photo Size Auto L 2L Hagaki Postcard Card Size 100 x 150 mm 4 x 6 in 8 x ...
Determines the maximum number of images that can print on one side of each photo printed from a PictBridge-enabled device Notes:
• Auto is the factory default setting. • If both the...
User's Guide - Page 160
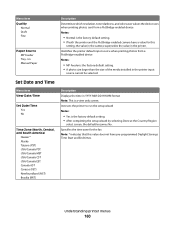
... the setup wizard by selecting Done at the Country/Region
select screen, the default becomes No. Identifies the printer default input source when printing photos from a PictBridge-enabled device Notes:
• Normal is the factory default setting. • If both the printer and the PictBridge-enabled camera have pre-programmed Daylight Savings...
User's Guide - Page 163
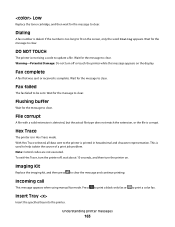
...clear the message and continue printing. Warning-Potential Damage: Do not turn the printer on. Imaging Kit
Replace the imaging kit, and then press
to clear.
Wait for the message to help isolate the source of a print... not match the extension, or the file is corrupt. Low
Replace the toner cartridge, and then wait for the message to the printer is printed in Hex Trace mode.
User's Guide - Page 165
...Convert files to an analog phone line. The photoconductor kit is exhausted, replace it.
When the photoconductor kit is near exhaustion.
Note: When menus are not ...to send a black only fax or 3 Enter the fax number. The printer continues to print until Closest photo size or Fit to normal operating temperature. No recognized file types
Either there are disabled. The printer settings...
User's Guide - Page 168
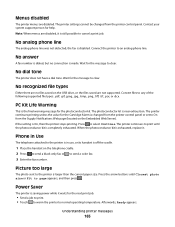
...to clear. Understanding printer messages
168 Reconnect the camera.
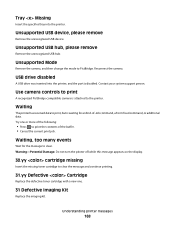
Unsupported USB device, please remove
Remove the unrecognized USB device.
Waiting, too many events
Wait for an End-of the buffer....A USB drive was inserted into the printer. Try one .
31 Defective Imaging Kit
Replace the imaging kit. Contact your system support person.
Tray Missing
Insert the specified tray into the ...
User's Guide - Page 178
..., and X543 series
Not supported
C544, X544, and X546 series
Not supported
Not supported Not supported Not supported Not supported Not supported Not supported
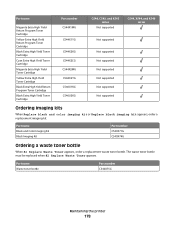
Ordering imaging kits
When Replace black and color imaging kit or Replace black imaging kit appears, order a replacement imaging kit. Part name Black and Color Imaging Kit Black Imaging Kit
Part number C540X71G C540X74G
Ordering a waste...
User's Guide - Page 182

To reduce the risk of the printer might be hot. Replacing a black imaging kit
Replace the black imaging kit when Replace Black Imaging Kit appears.
1 Grasp the front door at the side handholds, and then pull it toward you. Maintaining the printer
182 CAUTION-HOT SURFACE: The inside of injury from a hot component, allow the surface to cool before touching.
2 Open the top door.
User's Guide - Page 184

... the yellow, cyan, and magenta developer units.
9 Unpack the replacement black imaging kit. Leave the packaging on the sides, and then pull the imaging kit out.
Warning-Potential Damage: Do not touch the underside of the imaging kit. 6 Lift the blue levers on the imaging kit, and then pull it toward you.
7 Press down on...
User's Guide - Page 188
... injury from a hot component, allow the surface to open it toward you to cool before touching.
2 Open the top door.
21 Close the front door.
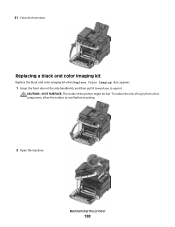
Replacing a black and color imaging kit
Replace the black and color imaging kit when Replace Color Imaging Kit appears.
1 Grasp the front door at the side handholds, and then pull it .
User's Guide - Page 221
If Black and color imaging kit life warning orBlack imaging kit life warning appears, replace the imaging kit. Try one or more of the following:
CHECK THE...positions for the paper size loaded. Troubleshooting
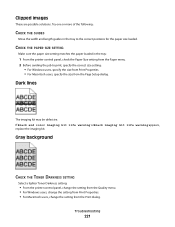
221 Clipped images
These are possible solutions. Dark lines
The imaging kit may be defective. Gray background
CHECK THE TONER DARKNESS SETTING
Select a lighter Toner Darkness setting:
•...
User's Guide - Page 222
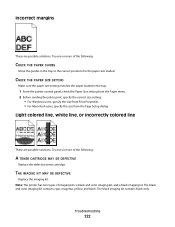
... Paper Size setting from the Paper menu. 2 Before sending the job to the correct positions for the paper size loaded. THE IMAGING KIT MAY BE DEFECTIVE
Replace the imaging kit. CHECK THE PAPER SIZE SETTING
Make sure the paper size setting matches the paper loaded in the tray to print, specify the correct...
User's Guide - Page 225
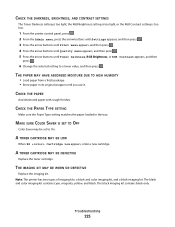
...a lower value, and then press . THE IMAGING KIT MAY BE WORN OR DEFECTIVE
Replace the imaging kit. The black and color imaging kit contains cyan, magenta, yellow, and black.
CHECK ... to On.
Note: The printer has two types of imaging kits: a black and color imaging kit, and a black imaging kit.
The black imaging kit contains black only.
THE PAPER MAY HAVE ABSORBED MOISTURE DUE TO...
User's Guide - Page 227

...
227 THE PRINT CARTRIDGE MAY BE DEFECTIVE OR LOW ON TONER
Replace the used print cartridge with a new one or more information, contact Customer Support. For more of imaging kits: a black and color imaging kit, and a black imaging kit. The black and color imaging kit contains cyan, magenta, yellow, and black. IS THERE TONER IN...
User's Guide - Page 256
...Replace Black Imaging Kit 182 Replace Color Imaging Kit 188 Replace PC Kit 167 Replace Unsupported
Cartridge 169 Scan Document Too Long 167 Scan to USB failed 167 Scanner ADF Cover Open 167 Sending pXX 167 Standard Exit Bin Full 167 Tray Empty 167 Tray Low 167 Tray Missing 168 Unsupported Mode 168 Unsupported USB device...page 34 photos 71 print...recycling 237
Lexmark packaging 47 Lexmark products ...
User's Guide - Page 257
... improving scan quality 112 scanning to a USB flash memory device 111 scanning to an FTP address creating shortcuts using the
...kits 178 toner cartridges 177 waste toner bottle 178
T
telecommunication notices 239, 240, 241, 242 toner cartridges
ordering 177 recycling 47 replacing..., copy copier does not respond 209 partial document or photo copies 211 poor copy quality 210 poor scanned image quality...
Maintenance Manual - Page 5
... Cartridge
Part number C544X1MG
C544X1YG
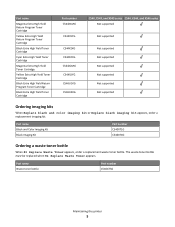
C544X2KG C544X2CG C544X2MG C544X2YG C546U1KG C546U2KG
C540, C543, and X543 series C544, X544, and X546 series Not supported
Not supported
Not supported Not supported Not supported Not supported Not supported Not supported
Ordering imaging kits
When Replace black and color imaging kit or Replace black imaging kit appears, order a replacement imaging kit.
Maintenance Manual - Page 9

Maintaining the printer
9 CAUTION-HOT SURFACE: The inside of injury from a hot component, allow the surface to cool before touching.
2 Open the top door. Replacing a black imaging kit
Replace the black imaging kit when Replace Black Imaging Kit appears.
1 Grasp the front door at the side handholds, and then pull it toward you. To reduce the risk of the printer might be hot.
Maintenance Manual - Page 11
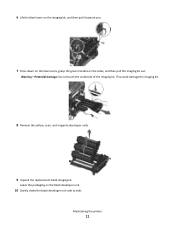
Warning-Potential Damage: Do not touch the underside of the imaging kit.
Leave the packaging on the sides, and then pull the imaging kit out. This could damage the imaging kit.
8 Remove the yellow, cyan, and magenta developer units.
9 Unpack the replacement black imaging kit.
Maintaining the printer
11 6 Lift the blue levers on the imaging...
Maintenance Manual - Page 15

21 Close the front door. Maintaining the printer
15
To reduce the risk of the printer might be hot. Replacing a black and color imaging kit
Replace the black and color imaging kit when Replace Color Imaging Kit appears.
1 Grasp the front door at the side handholds, and then pull it .
CAUTION-HOT SURFACE: The inside of injury...
Similar Questions

Hi Do You Have Instructions For Replacing The Maintenance Kit 480k?
HiDo you have instructions for replacing the maintenance kit 480K?
HiDo you have instructions for replacing the maintenance kit 480K?
(Posted by syeds1 3 years ago)

What Does A Photo Conductor Kit For Lexmark Copier X204n Do
(Posted by tontosforga 10 years ago)

How Often Do You Have To Replace The Imaging Kit In A Lexmark X544 Printer
(Posted by Adwiron 10 years ago)

