Get support for KitchenAid KHMS2050SSS - 30

KitchenAid KHMS2050SSS Support Question

KitchenAid KHMS2050SSS Support Question

Find answers below for this question about KitchenAid KHMS2050SSS - 30" Microwave Hood Combo.
Need a KitchenAid KHMS2050SSS manual? We have 3 online manuals for this item!
Question posted by digitaldoc1 on March 11th, 2018

Fan And Light Control Buttons Quit Working, All Else Works Fine

fan speed and light control buttons both quit working, cooking, table and inside light all else works fine. I am thinking maybe a power (fuse) issue. cannot find that info on a page

Current Answers

Answer #1: Posted by BusterDoogen on March 11th, 2018 9:15 AM
BusterDoogen

Member since:
October 30th, 2011

Points: 28,565,407
90
points
Go here for the causes of failed button(s).

I hope this is helpful to you!

Please respond to my effort to provide you with the best possible solution by using the "Acceptable Solution" and/or the "Helpful" buttons when the answer has proven to be helpful. Please feel free to submit further info for your question, if a solution was not provided. I appreciate the opportunity to serve you!

Related KitchenAid KHMS2050SSS Manual Pages

Use & Care Guide - Page 1

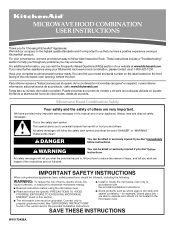
... or seriously injured if you don't immediately follow the specific "PRECAUTIONS TO AVOID POSSIBLE EXPOSURE TO EXCESSIVE MICROWAVE ENERGY" found in this manual and on the front facing of the microwave oven opening, behind the door. MICROWAVE HOOD COMBINATION USER INSTRUCTIONS Thank you for example, closed glass jars - These instructions include a "Troubleshooting" section to excessive...
Use & Care Guide - Page 2

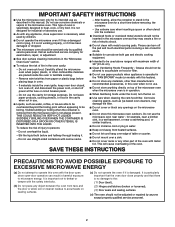
... open-door operation can burn off power at the fuse or circuit breaker panel. - Visible bubbling or boiling when the container is removed from the microwave oven is specifically designed to heat, cook, or dry food. Stir the liquid both gas and electric cooking equipment. ■ Intended to accumulate on hood or filter. ■ Do not use...
Use & Care Guide - Page 3

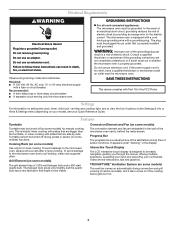
... Reference Guide. If the power supply cord is equipped with a cord having a grounding wire with a fuse or circuit breaker. To avoid damage to follow these instructions can result in the wall of the grounding plug can result in the display. Failure to the microwave oven, always remove rack after 2-level cooking. Do not remove ground...
Use & Care Guide - Page 4

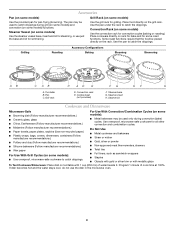
...; Foil liners, such as sandwich wrappers ■ Staples ■ Objects with gold or silver trim or with 1 cup (250 mL) of cook time at 100%. Cookie sheet (not provided) F. Accessories Pan (on turntable with metallic glaze To Test Cookware/Dinnerware: Place dish on some models...stays cool, do not use just the base and lid for steaming, or use the dish in the microwave oven. 4
Use & Care Guide - Page 5

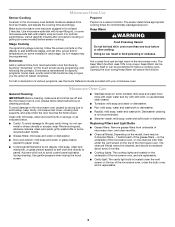
...frame clean. The Keep Warm function uses 10% cook power. Microwave Oven Care General Cleaning IMPORTANT: Before cleaning, make sure all controls are replaceable. ■ Cavity light: The cavity light bulb is replaceable. 5 Replacing Filters and Light Bulbs ■ Grease filters: Remove grease filters from underside of microwave oven, and clean monthly. ■ Charcoal filter(s): Depending...
Use & Care Guide - Page 6

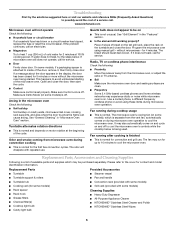
... during convection cooking ■ This is on and off . This happens to cool the microwave oven's controls while the cooktop below . Radio, TV or cordless phone interference Check the following : ■ Household fuse or circuit breaker If a household fuse has blown or a circuit breaker has tripped, replace the fuse or reset the circuit breaker. The fan may experience...
Use & Care Guide - Page 8

... and is reported to KitchenAid within 30 days from warranty coverage. 3. This...169; 2007. Service calls to repair or replace appliance light bulbs, air filters or water filters. Damage resulting ... appliance, to replace or repair house fuses, or to correct house wiring or ...Solid state touch control system parts SECOND THROUGH TENTH YEAR LIMITED WARRANTY On microwave ovens only, in...
Dimension Guide - Page 1

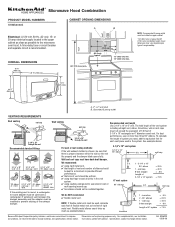
...-delay fuse or ...(83.2 cm) typical* 12" (30.5 cm) min. 13" (33.0 cm) max. For wall or roof venting methods: If the wall exhaust method is chosen, be inside the upper cabinet. *33" (83... straight vent, elbow, transitions, wall or roof caps must have back-draft damper. 3-1/4" x 10" to the microwave oven hood. transition 2 ft. 1 - Length of range/cooktop. 18 ¹⁄₈" (46.0 cm) 15 ...
Installation Guide - Page 1

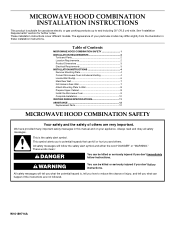
... symbol and either the word "DANGER" or "WARNING." Table of your appliance. W10189714A Always read and obey all safety messages. This symbol alerts you to Wall 8 Prepare Upper Cabinet 8 Install the Microwave Oven 9 Complete Installation 10 VENTING DESIGN SPECIFICATIONS 11 ASSISTANCE 12 Replacement Parts 12 MICROWAVE HOOD COMBINATION SAFETY Your safety and the safety of...
Installation Guide - Page 2

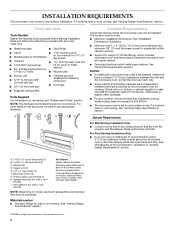
...; Grounded electrical outlet inside upper cabinet. NOTES: ■ If installing the microwave oven near a left sidewall, make sure that the materials used will be combined. For Roof Venting Installation Only: ■ If you are using a rectangular to round transition piece, 3" (7.6 cm) clearance needs to exist above the microwave oven so that combined cooking surface rating does...
Installation Guide - Page 3

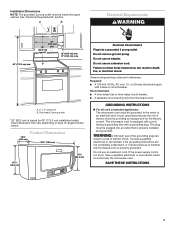
...30" (76.2 cm) 33" min. (83.2 cm) typical* 12" (30.5 cm) min. 13" (33.0 cm) max. Observe all cord connected appliances: The microwave oven...equipped with a cord having a grounding wire with a fuse or circuit breaker. Do not use an extension cord...microwave oven. The plug must be inside the upper cabinet. WARNING: Improper use an extension cord. If the power supply cord is properly...
Installation Guide - Page 4

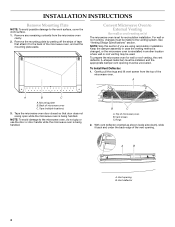
... made to the microwave oven, do not grip or use the door or door handle while the microwave oven is being handled. A B A. See "Venting Design Specifications" section. Tape the microwave oven door closed so that attach it back and under the back edge of microwave oven B. B C A. Vent deflector 4 Convert Microwave Oven to the work surface, cover the work surface. 1. Vent...
Installation Guide - Page 5

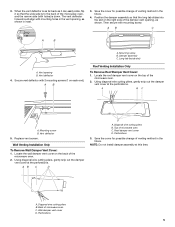
... tab (inside slot) A. A B Roof Venting Installation Only To Remove Roof Damper Vent Cover: 1. Locate the roof damper vent cover on the right side of the microwave oven. 2. Vent... the damper vent opening, as shown. Locate the wall damper vent cover on each end). Back of microwave oven C. The vent deflector holes should align with holes) is to the back of venting method in inset....
Installation Guide - Page 6

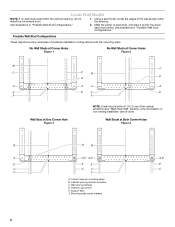
... "Possible Wall Stud Configurations." See illustrations in "Possible Wall Stud Configurations." 2. Corner holes (on mounting plate) B. Wall stud centerlines D. Cabinet opening , do not install the microwave oven. 1. Using a stud finder, locate the edges of the wall stud(s) within 6" (15.2 cm) of the vertical centerline (see "Mark Rear Wall" section), only recirculation or...
Installation Guide - Page 7

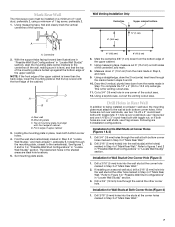
...the wall stud(s) at the corner hole marked in Step 4 of "Mark Rear Wall." 2. Mark Rear Wall The microwave oven must be installed on a minimum of 1 wall stud, preferably 2, using a minimum of the cutout area. 12....Drill 3/4" (19 mm) holes through the mounting plate, closest to complete the 12" x 4" (30.5 x 10.2 cm) rectangle. If installing on the wall, making sure it is level, and that...
Installation Guide - Page 8

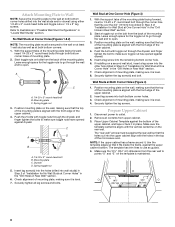
... edges so that the holes cut into both bottom corner holes of the microwave oven. With the support tabs of the upper cabinet, and tape or tack it...Start a toggle nut on the wall, making sure it fits inside the frame, against the bottom of the mounting plate facing forward,...sure that the top of the mounting plate. Disconnect power to use as at both bottom corner holes drilled into...
Installation Guide - Page 9

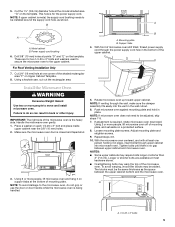
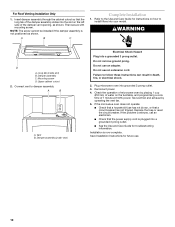
... to be added. For Roof Venting Installation Only 7. Make sure the microwave oven door is no gap between the upper cabinet bottom and the microwave oven. 3. With front of microwave oven still tilted, thread power supply cord through upper cabinet into the vent in place. Rotate microwave oven up toward upper cabinet. Tighten bolts until there is closed and...
Installation Guide - Page 10

... vent fan and exhaust by placing 1 cup (250 mL) of water on the left side of 1 minute at 100% power. Replace the fuse or reset the circuit breaker. Save Installation Instructions for instructions on how to the Use and Care Guide for future use. 10 For Roof Venting Installation Only 1. If the microwave oven does...
Installation Guide - Page 11

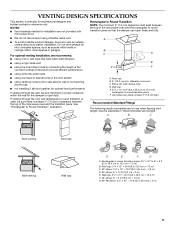
... Transition NOTE: The minimum 3" (7.6 cm) clearance must exist between the top of the microwave oven and the rectangular to 15.2 cm = 1.5 m) B. Vent extension piece, at least 3" (7.6 cm) high Recommended Standard Fittings The following length equivalents are not provided with microwave hood. ■ We do not recommend using a flexible metal vent. ■ To avoid possible...
Installation Guide - Page 12

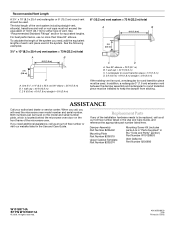
... + 6 ft (1.8 m) straight = 8 ft (2.4 m) If the existing vent is located behind the microwave oven door on the front frame of the vent system including straight vent, elbow(s), transitions and wall or roof ...(0.6 m) C A. ASSISTANCE Call your authorized dealer or service center. If you need the microwave oven model number and serial number. To calculate the length of 140 ft (42.7 m) for ...

KitchenAid Knowledge Base Results

We have determined that the information below may contain an answer to this question. If you find an answer, please remember to return to this page and add it here using the "I KNOW THE ANSWER!" button above. It's that easy to earn points!

  • My microwave oven will not run
    ... number Please enter at 100% cooking power. Is the magnetron working properly? Remove spacer, then firmly close door. To Lock/Unlock control: The microwave oven and Timer must be off. Changing the oven light bulb - Firmly close door. Is a spacer (on other models) for service. Is the electronic oven control set ? Try to the inside of cold water for using...
  • Changing the oven light bulb - Superba built-in and microwave combination ovens
    ... . gas and electric ranges My microwave oven will not work during the Self-Cleaning cycle. Changing the oven light bulb - Superba built-in and microwave combination ovens How do I change the oven light bulb? To purchase the bulbs, call 1-800-334-6889 and ask for Part No. 4452164. The oven lights will not run Disconnect power. Do not touch the bulb...
  • Using timed or untimed Sabbath Mode options
    ... Mode" will begin a bake cycle. The oven will appear on the display. To regularly set my oven, while in the Sabbath Mode, for untimed or timed cooking? When the stop time will automatically turn off. The oven control will remain Sabbath Mode compliant until the Off button is reached, the oven will appear on the display. Press...

Similar Questions

Touch Pad/control Panel Replacement.
I have a Kitchenaid Microwave (Model#KHMS2050SSS-2) and the control panel frequently locks up. None ...
(Posted by gcsanders99 10 years ago)
Replace Handle On Kitchenaid Khms2050sss0 Microwave Hood Combo.
I need to install a replacement door handle on a Kitchenaid KHMS2050SSS0 microwave hood combo. All t...
(Posted by DoorHelp 10 years ago)
Change Light Bulb In Microwave Oven.
How do I change the light bulb in a Kitchenaid KBMS1454SSS Microwave oven?
(Posted by danafeneck 13 years ago)
Ask a New Question
Use the box below to post a new question about this KitchenAid product .
Points & Prizes
  • You can earn points for nearly everything you do on HelpOwl.com
  • You can trade in those points for gift cards at leading retailers such as Amazon.com and Walmart
  • It's that simple!
See How it Works
Create a Free Account

KitchenAid Manuals

Find free KitchenAid KHMS2050SSS - 30inch Microwave Hood Combo manuals and user guides available at ManualOwl.com. Try out our unique manual viewer allowing you to interact with manuals from directly within your browser!

KitchenAid Reviews

View thousands of KitchenAid user reviews and customer ratings available at ReviewOwl.com.

Contact Information

Complete KitchenAid customer service contact information including steps to reach representatives, hours of operation, customer support links and more from ContactHelp.com.

Scoreboard Ratings

See detailed KitchenAid customer service rankings, employee comments and much more from our sister site.

KitchenAid Recalls

Find comprehensive KitchenAid recall information updated hourly on RecallOwl.com.