Dell Vostro 1540 Support Question
Dell Vostro 1540 Support Question
Find answers below for this question about Dell Vostro 1540.Need a Dell Vostro 1540 manual? We have 2 online manuals for this item!
Question posted by jamesesmith1980 on October 27th, 2012
Hdmiport Stopped Working On My Dell Vostro1540 After New Harddrive Fitted By Del
it worked fine until a dell enginear came and fitted a new hard drive! how can i re activate it? thanks James
Current Answers
Answer #1: Posted by RathishC on October 27th, 2012 8:02 PM
RathishC

Member since:
June 19th, 2012 Points: 2,516,090

Member since:
June 19th, 2012 Points: 2,516,090
Hi James,
I am sorry to hear that the HDMI port has stopped working after hard drive replacement, please click the link below which will take you to the driver’s website:
Please choose the Operating System which you are using. Update the latest video card driver and also update the chipset driver.
Once it`s updated, please restart the computer and check for the issue again
Please reply if you have any further questions
Thanks & Regards
Rathish C
#iworkfordell
Related Dell Vostro 1540 Manual Pages
User Manual - Page 1
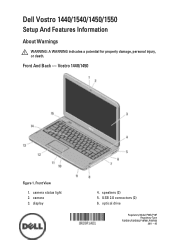
Front And Back - display
4. speakers (2) 5. Dell Vostro 1440/1540/1450/1550
Setup And Features Information
About Warnings
WARNING: A WARNING indicates a potential for property damage, personal injury, or death. camera 3. optical drive
Regulatory Model P22G,P18F Regulatory Type
P22G001,P22G003,P18F001,P18F002 2011 - 05 camera status light 2. Front View
1. USB 2.0 connectors (2) ...
User Manual - Page 2
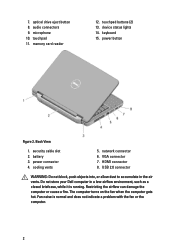
optical drive eject button 8. audio connectors 9. microphone 10. Do not store your Dell computer in the air vents. touchpad 11. memory card reader
12. touchpad buttons (2) 13. HDMI connector 8. Restricting the airflow can damage the computer or cause a ...
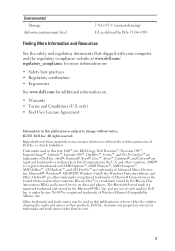
User Manual - Page 4
...connector 8. Do not store your computer. For additional best practices information, see www.dell.com/regulatory_compliance. audio connectors
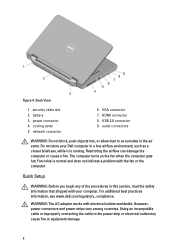
WARNING: Do not block, push objects into, or allow.... Back View
1. cooling vents 5. Fan noise is running. WARNING: The AC adapter works with the fan or the computer.
However, power connectors and power strips vary among countries...
User Manual - Page 9
.... Other trademarks and trade names may be used in this text: Dell™, the DELL logo, Dell Precision™, Precision ON™, ExpressCharge™, Latitude™, Latitude ON™, OptiPlex™, Vostro™, and Wi-Fi Catcher™ are trademarks of Dell Inc. All rights reserved. The Bluetooth® word mark is subject to either...
Owners Manual - Page 2
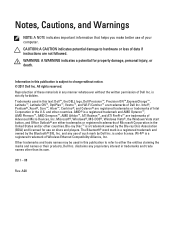
... names other countries. The Bluetooth® word mark is a registered trademark of Intel Corporation in this text: Dell™, the DELL logo, Dell Precision™, Precision ON™,ExpressCharge™, Latitude™, Latitude ON™, OptiPlex™, Vostro™, and Wi-Fi Catcher™ are not followed. disclaims any manner whatsoever without notice. ©...
Owners Manual - Page 3
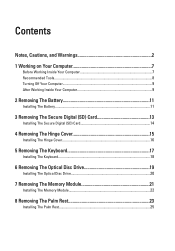
... Your Computer 7 Recommended Tools...8 Turning Off Your Computer 9 After Working Inside Your Computer 9
2 Removing The Battery 11
Installing The Battery...11
3... Cover 16
5 Removing The Keyboard 17
Installing The Keyboard 18
6 Removing The Optical Disc Drive 19
Installing The Optical Disc Drive 20
7 Removing The Memory Module 21
Installing The Memory Module 22
8 Removing The Palm Rest...
Owners Manual - Page 7
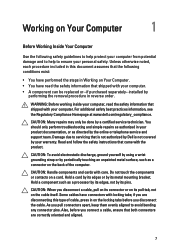
...Homepage at www.dell.com/regulatory_compliance. Read and follow the safety instructions that is not authorized by Dell is not covered ... Some cables have connectors with care. Damage due to servicing that came with the product. Hold a component such as a processor by ...to avoid bending any connector pins. WARNING: Before working inside your personal safety.
CAUTION: When you pull...
Owners Manual - Page 8
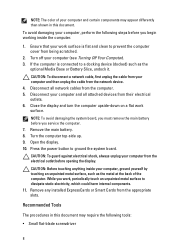
... may appear differently than shown in this document. NOTE: To avoid damaging the system board, you must remove the main battery before you begin working inside your work surface is connected to prevent the computer cover from being scratched.
2. Turn the computer top-side up. 9. Open the display. 10. Press the power...
Owners Manual - Page 9
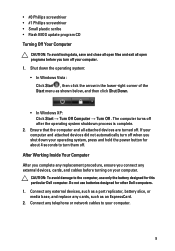
...computer turns off after the operating system shutdown process is complete.
2.
After Working Inside Your Computer After you complete any replacement procedure, ensure you connect .... Do not use only the battery designed for other Dell computers. 1. CAUTION: To avoid damage to the computer, use batteries designed for this particular Dell computer. Connect any cards, such as shown below,...
Owners Manual - Page 11
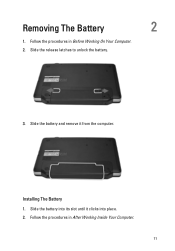
Removing The Battery
2
1. Slide the battery and remove it clicks into its slot until it from the computer.
Follow the procedures in After Working Inside Your Computer.
11 Installing The Battery 1. Slide the battery into place. 2. Slide the release latches to unlock the battery.
3. Follow the procedures in Before Working On Your Computer. 2.
Owners Manual - Page 13
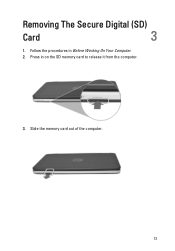
Press in Before Working On Your Computer. 2. Follow the procedures in on the SD memory card to release it from the computer.
3. Slide the memory card out of the computer.
13 Removing The Secure Digital (SD)
Card
3
1.
Owners Manual - Page 14
Follow the procedures in After Working Inside Your Computer.
14 Push the memory card into the compartment until it is fully engaged with a
click sound. 2. Installing The Secure Digital (SD) Card 1.
Owners Manual - Page 15
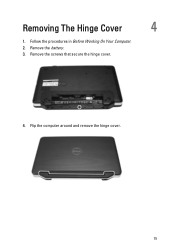
Remove the screws that secure the hinge cover.
4. Flip the computer around and remove the hinge cover.
15 Removing The Hinge Cover
4
1. Follow the procedures in Before Working On Your Computer. 2. Remove the battery. 3.
Owners Manual - Page 29

Removing The Hard Drive
1. Remove the battery. 3. Remove the keyboard. 4. Remove the palm rest. 5. Remove the screws that secure the hard drive bracket and detach it out of the computer.
10
6. Slide the hard drive and lift it from the hard drive.
29 Follow the procedures in Before Working On Your Computer. 2.
Owners Manual - Page 30
Tighten the screws that secure the hard drive bracket. 3. Place the hard drive in After Working Inside Your Computer.
30 Install the palm rest. 5. Follow the procedures in its compartment and slide it towards the SATA
connector to secure it to the hard drive. 2. Installing The Hard Drive 1. Install the hard drive bracket to the system board. 4. Install the keyboard. 6. Install ...
Owners Manual - Page 43
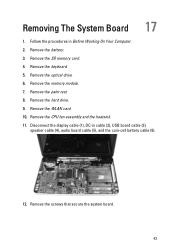
... 10. Remove the memory module. 7. Removing The System Board 17
1. Remove the SD memory card. 4. Remove the hard drive. 9. Remove the CPU fan assembly and the heatsink. 11. Remove the keyboard. 5. Remove the screws that secure the... cable (5), and the coin-cell battery cable (6).
12. Disconnect the display cable (1), DC-in Before Working On Your Computer. 2. Remove the battery. 3.
Owners Manual - Page 45
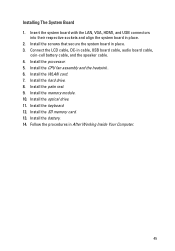
Install the WLAN card. 7. Install the optical drive. 11. Install the battery. 14. Insert the system board with the LAN, VGA, ...memory card. 13. Installing The System Board 1. Install the screws that secure the system board in After Working Inside Your Computer.
45 Install the hard drive. 8. Install the keyboard. 12. Follow the procedures in place. 3. Install the memory module. 10.
Owners Manual - Page 47
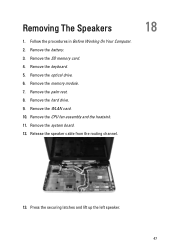
Removing The Speakers
1. Remove the SD memory card. 4. Remove the palm rest. 8. Remove the hard drive. 9. Remove the CPU fan assembly and the heatsink. 11. Remove the memory module. 7. Release the speaker cable .... 12. Press the securing latches and lift up the left speaker. 47 Follow the procedures in Before Working On Your Computer. 2. Remove the battery. 3. Remove the optical...
Owners Manual - Page 49
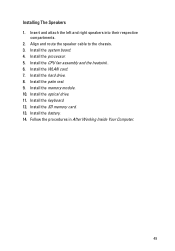
.... Install the palm rest. 9. Align and route the speaker cable to the chassis. 3. Follow the procedures in After Working Inside Your Computer.
49 Insert and attach the left and right speakers into their respective
compartments. 2. Install the processor. 5. Installing The Speakers 1. Install the hard drive. 8. Install the CPU fan assembly and the heatsink . 6.
Owners Manual - Page 71

... user password. • read the current amount of memory or set the type of hard drive installed.
Press < Left Arrow >
71 Once the F2 prompt appears, press immediately..... Turn on top of the System Setup window. When the blue DELL logo is highlighted, the Options List lists the options that define the...keys to work incorrectly. Appears on (or restart) your computer to navigate.
Similar Questions

What To Do After Installing A New Hard Drive For Dell Inspiron N7010
(Posted by avpki 10 years ago)

Dell N7110 New Hard Drive Installed Has Error Operation System Not Found
I've install a new hard drive, but upon power up error code operation system not found. I have the r...
I've install a new hard drive, but upon power up error code operation system not found. I have the r...
(Posted by Romanhome24999 10 years ago)

My Right Speaker Is Not Working
as i'm using dell vostro 1550 from past 3months & i'm facing problem in my right speaker so plea...
as i'm using dell vostro 1550 from past 3months & i'm facing problem in my right speaker so plea...
(Posted by umesh064 11 years ago)

How Do I Get The Touch Pad Scroll To Work On My Vostro 1540?
(Posted by joshdixon91 11 years ago)

New Laptop Vostro 1540 Purchased In Feb 12 And Key Bod Is Not Working. What To D
DEAR SIR KEDY BOARD OF ABOVE SAID LAPTOP IS NOT WORKING. MY ALL WORKS ARE HELD UP. PLEASE ADVICE WH...
DEAR SIR KEDY BOARD OF ABOVE SAID LAPTOP IS NOT WORKING. MY ALL WORKS ARE HELD UP. PLEASE ADVICE WH...
(Posted by sureshnairmb 11 years ago)