
Dell PowerEdge 1900 Support Question
Dell PowerEdge 1900 Support Question
Find answers below for this question about Dell PowerEdge 1900.Need a Dell PowerEdge 1900 manual? We have 7 online manuals for this item!
Question posted by bragionr on August 26th, 2014
Power Supply Nd444
Hi, i need the electronic schematic of ND 444 power supply. Can someone help me? Thanks. Renato.
Current Answers
Related Dell PowerEdge 1900 Manual Pages
Getting Started Guide - Page 5
... of this feature, you must use an operating system that signals the appropriate systems management software if the top cover is opened.
• An 800-W power supply.
• Six system cooling fans.
NOTE: If you decide to upgrade your system include: • One or two Dual-Core Intel® Xeon® Processors...
Getting Started Guide - Page 9
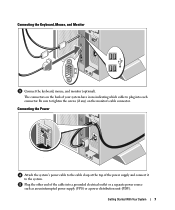
..., mouse, and monitor (optional).
Be sure to plug into a grounded electrical outlet or a separate power source such as an uninterrupted power supply (UPS) or a power distribution unit (PDU).
The connectors on the monitor's cable connector. Connecting the Power
Attach the system's power cable to the cable clasp at the top of your system have icons indicating...
Getting Started Guide - Page 12
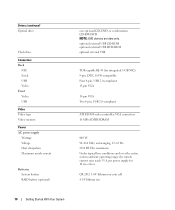
...and over the entire system ambient operating range, the inrush current may reach 55 A per power supply for integrated 1-GB NIC) 9-pin, DTE, 16550-compatible Four 4-pin, USB 2.0-compliant...
Connectors Back
NIC Serial USB Video Front Video USB
Video Video type Video memory
Power AC power supply
Wattage Voltage Heat dissipation Maximum inrush current
Batteries System battery RAID battery (optional)
...
Hardware Owner's Manual (PDF) - Page 4
...
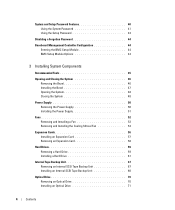
Opening and Closing the System 46 Removing the Bezel 46 Installing the Bezel 47 Opening the System 48 Closing the System 48
Power Supply 50 Removing the Power Supply 50 Installing the Power Supply 51
Fans 52 Removing and Installing a Fan 53 Removing and Installing the Cooling Shroud Fan 54
Expansion Cards 56 Installing an Expansion...
Hardware Owner's Manual (PDF) - Page 6
... 105 Troubleshooting a USB Device 105 Troubleshooting a NIC 106 Troubleshooting a Wet System 106 Troubleshooting a Damaged System 107 Troubleshooting the System Battery 108 Troubleshooting the Power Supply 108 Troubleshooting System Cooling Problems 109 Troubleshooting a Fan 109 Troubleshooting System Memory 110 Troubleshooting a Diskette Drive 112 Troubleshooting an Optical Drive 113...
Hardware Owner's Manual (PDF) - Page 12

...
The LCD lights blue during normal system operation. The LCD lights amber when the system needs attention, and the LCD panel displays an error code followed by the operating system's documentation....About Your System
Use this button only if directed to the system.
The power button controls the DC power supply output to do so by qualified support personnel or by descriptive text. The...
Hardware Owner's Manual (PDF) - Page 14
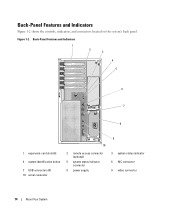
... and Indicators 1
2 3
4 5
6 7
8
1 expansion-card slots (6)
4 system identification button
7 USB connectors (4) 10 serial connector
10
2 remote access connector (optional)
5 system status indicator connector
8 power supply
9
3 system status indicator 6 NIC connector 9 video connector
14
About Your System Back-Panel Features and Indicators
Figure 1-2 shows the controls, indicators, and...
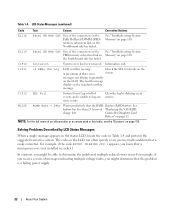
Hardware Owner's Manual (PDF) - Page 18
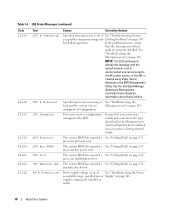
... page 118. supply is
cleared using either Server
Assistant or the BMC Management
Utility. Specified processor is missing or See "Troubleshooting the
bad, and the system is out of See "Troubleshooting the Power acceptable range;
The system BIOS has reported a See "Getting Help" on page 118. If the problem persists, ensure
that your system...
Hardware Owner's Manual (PDF) - Page 19
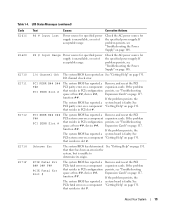
... reseat the PCI
PCI system error on page 131.
If the problem persists, the system board is faulty.
Check the AC power source for the specified power supply. I /O channel check error.
See "Getting Help" on a component that resides in slot #. The system BIOS has reported a PCIe fatal error on page 131.
If the problem...
Hardware Owner's Manual (PDF) - Page 22
...
charge left. messages can often specify a very precise fault condition that the RAID Replace RAID battery. W1228
ROMB Batt < 24hr
Warns predictively that is a failing power supply.
22
About Your System NOTE: For the full name of an abbreviation or acronym used in the See "Troubleshooting System FBD memory subsystem link on...
Hardware Owner's Manual (PDF) - Page 45
...
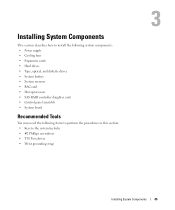
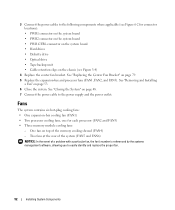
This section describes how to install the following system components: • Power supply • Cooling fans • Expansion cards • Hard drives •...8226; SAS RAID controller daughter card • Control panel assembly • System board
Recommended Tools
You may need the following items to perform the procedures in this section: • Keys to the system keylocks •...
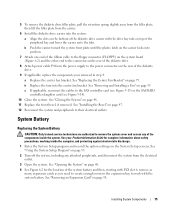
Hardware Owner's Manual (PDF) - Page 50
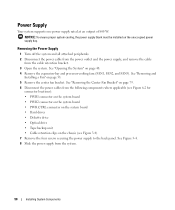
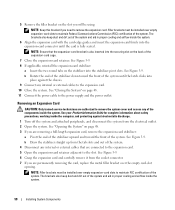
...53. 5 Remove the center fan bracket. NOTICE: To ensure proper system cooling, the power supply blank must be installed on the chassis (see Figure 6-2 for
connector locations): •...clips on the unoccupied power supply bay. Removing the Power Supply
1 Turn off the system and all attached peripherals. 2 Disconnect the power cable from the power outlet and the power supply, and remove the cable...
Hardware Owner's Manual (PDF) - Page 51
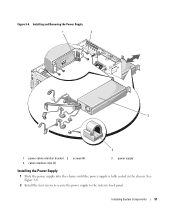
Figure 3-4. Installing and Removing the Power Supply
1
2
3
4
1 power cable retention bracket 2 4 cable retention clips (3)
screws (4)
3 power supply
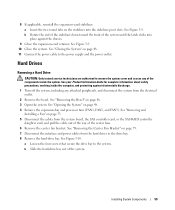
Installing the Power Supply
1 Slide the power supply into the chassis until the power supply is fully seated in the chassis. See Figure 3-4.
2 Install the four screws to secure the power supply to the system's back panel. Installing ...
Hardware Owner's Manual (PDF) - Page 52
... FAN6) NOTICE: In the event of the memory cooling shroud (FAN4) - See "Removing and Installing
a Fan" on page 48. 7 Connect the power cable to the power supply and the power outlet. 3 Connect the power cables to easily identify and replace the proper fan.
52
Installing System Components See "Closing the System" on page 53. 6 Close...
Hardware Owner's Manual (PDF) - Page 58
... airflow inside the system.
58
Installing System Components See "Closing the System" on page 48. 3 If you need to the power supply and the power outlet. See "Opening the System" on page 48. 11 Connect the power cable to remove the expansion card. See Figure 3-9. 6 Grasp the expansion card and carefully remove it from the...
Hardware Owner's Manual (PDF) - Page 59
...Installing System Components
59 a Loosen the four screws that secure the drive bay to the power supply and the power outlet. See Figure 3-10. b Rotate the end of the stabilizer down toward the ...Remove the hard-drive bay. See "Closing the System" on page 48. 11 Connect the power cable to the system. See your Product Information Guide for complete information about safety precautions, working...
Hardware Owner's Manual (PDF) - Page 67
...67 See "Closing the System" on page 53. 14 If applicable, reconnect the cables to the power supply and the power outlet. See "Removing and Installing a Fan" on page 48. 8 Replace the bezel, if .... 7 Remove the center fan bracket. See "Installing the Bezel" on page 47. 9 Connect the power cable to the SAS RAID controller daughter card or SCSI controller card.
7 Close the system. See "...
Hardware Owner's Manual (PDF) - Page 71
... on the system board (see Figure 6-2) and
the other end to the connector on the rear of the optical drive. 11 Attach power cable P5 from the power supply to the CD power connect or on page 79. 8 If the mounting screws are authorized to the SAS controller card (see Figure 3-13) or the...
Hardware Owner's Manual (PDF) - Page 75
... bottom of the diskette drive carrier with PCI slot 6, remove as
many expansion cards as you need to create enough room in step 4: a Replace the center fan bracket. See your removed in...the retention spring slightly away from the filler plate, then lift the filler plate from the power supply to the power connector on the rear of the diskette drive.
9 If applicable, replace the components your...
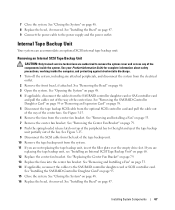
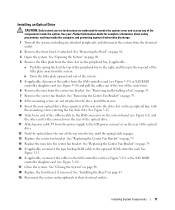
Installing a SATA Optical Drive - Page 9

... optical drive and the other to the power supply as follows:
- Installing the SATA Optical Drive - See "Replacing the Center Fan Bracket" in your Hardware Owner's Manual.
6 Replace the fans in your Hardware Owner's Manual.
10 Close the system. For a PowerEdge 1900, use the SATA_B connector.
- PowerEdge 2900 and 1900
1 If the mounting screws are not...
Similar Questions

Dell Server Poweredge R710 Error Message Error 1
hi Good Day,we are having issue with our dell R710 with error message error 1 but we look up in OMSA...
hi Good Day,we are having issue with our dell R710 with error message error 1 but we look up in OMSA...
(Posted by jillustrisimo32 4 years ago)


How To Configure Raid In Dell Server Poweredge 710
(Posted by brandaniep 10 years ago)