Dell Inspiron One 2330 Support Question
Dell Inspiron One 2330 Support Question
Find answers below for this question about Dell Inspiron One 2330.Need a Dell Inspiron One 2330 manual? We have 2 online manuals for this item!
Question posted by toytoy102691 on May 28th, 2014
Do You Have To Have A Certain Monitor To Connect To It Or Will And One Work?
i have a inspiron 1 2330 i need to find another monitor to connect to it i was just wondering is there specific monitors that will only work for it or will any monitor do?
Current Answers
Answer #1: Posted by BusterDoogen on May 28th, 2014 6:24 PM
BusterDoogen

Member since:
October 30th, 2011 Points: 28,565,447

Member since:
October 30th, 2011 Points: 28,565,447
Any monitor that has the connector(s) that match your video out connectors on the PC will do the trick!
I hope this is helpful to you!
Please respond to my effort to provide you with the best possible solution by using the "Acceptable Solution" and/or the "Helpful" buttons when the answer has proven to be helpful. Please feel free to submit further info for your question, if a solution was not provided. I appreciate the opportunity to serve you!
Related Dell Inspiron One 2330 Manual Pages
Owner's Manual (PDF) - Page 1
Dell Inspiron One 2330 Owner's Manual
Computer model: Inspiron One 2330
Regulatory model: W05C
Regulatory type: W05C001
Owner's Manual (PDF) - Page 2

... be used in this document to refer to change without the written permission of Microsoft corporation in this text: Dell™, the DELL logo, and Inspiron™ are not followed. Dell Inc. Intel® and Intel SpeedStep® are either the entities claiming the marks and names or their products. A00...
Owner's Manual (PDF) - Page 3
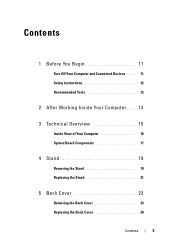
Contents
1 Before You Begin 11
Turn Off Your Computer and Connected Devices . . . . 11 Safety Instructions 12 Recommended Tools 12
2 After Working Inside Your Computer . . . . 13
3 Technical Overview 15
Inside View of Your Computer 16 System Board Components 17
4 Stand 19
Removing the Stand 19 Replacing the ...
Owner's Manual (PDF) - Page 12
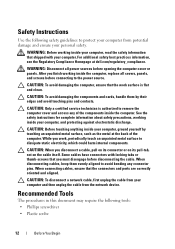
... components inside your computer. After you must disengage before opening the computer cover or panels. CAUTION: Only a certified service technician is flat and clean. When connecting cables, ensure that you finish working inside the computer, replace all power sources before disconnecting the cable.
CAUTION: To avoid damaging the computer, ensure that the...
Owner's Manual (PDF) - Page 13
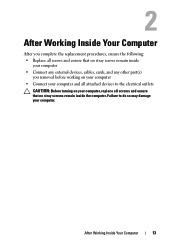
... Your Computer
13 After Working Inside Your Computer
After you complete the replacement procedures, ensure the following: •...screws and ensure that no stray screws remain inside
your computer • Connect any external devices, cables, cards, and any other part(s)
you removed before working on your computer • Connect your computer and all attached devices to do so may damage your ...
Owner's Manual (PDF) - Page 27
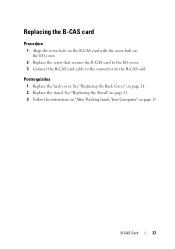
... the back cover. See "Replacing the Stand" on page 21. 3 Follow the instructions in "After Working Inside Your Computer" on the B-CAS card. B-CAS Card
27
Replacing the B-CAS card
Procedure
1...the I/O cover.
2 Replace the screw that secures the B-CAS card to the I/O cover. 3 Connect the B-CAS card cable to the connector on page 13. See "Replacing the Back Cover" on page 24. 2 Replace the stand...
Owner's Manual (PDF) - Page 31
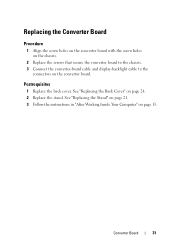
... board with the screw holes on the chassis.
2 Replace the screws that secure the converter board to the chassis. 3 Connect the converter-board cable and display-backlight cable to the
connectors on page 24. 2 Replace the stand.
Converter Board
31 ... on the convertor board.
See "Replacing the Stand" on page 21. 3 Follow the instructions in "After Working Inside Your Computer" on page 13.
Owner's Manual (PDF) - Page 34
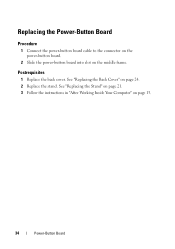
Replacing the Power-Button Board
Procedure
1 Connect the power-button board cable to the connector on the power-button board.
2 Slide the power-button board into slot on page 24....Back Cover" on the middle frame.
Postrequisites
1 Replace the back cover. See "Replacing the Stand" on page 21. 3 Follow the instructions in "After Working Inside Your Computer" on page 13.
34
Power-Button Board
Owner's Manual (PDF) - Page 42
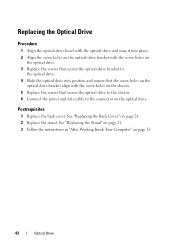
See "Replacing the Stand" on page 21. 3 Follow the instructions in "After Working Inside Your Computer" on page 24. 2 Replace the stand. See "Replacing the Back Cover" on page 13.
... screw holes on the chassis. 5 Replace the screws that secure the optical drive to the chassis. 6 Connect the power and data cable to the connector on the optical drive.
Postrequisites
1 Replace the back cover.
Owner's Manual (PDF) - Page 48
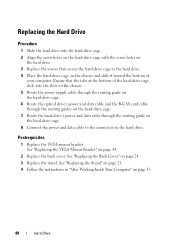
See "Replacing the Stand" on page 21. 4 Follow the instructions in "After Working Inside Your Computer" on page 24. 3 Replace the stand. Ensure that secure the hard-drive ...drive cage. 7 Route the hard-drive's power and data cable through the routing guide on the hard-drive cage. 8 Connect the power and data cable to the hard drive. 4 Place the hard-drive cage on the chassis and slide it ...
Owner's Manual (PDF) - Page 56

..." on page 24. 4 Replace the stand. See "Replacing the Stand" on page 21. 5 Follow the instructions in "After Working Inside Your Computer" on page 51.
2 Replace the VESA-mount bracket. Postrequisites
1 Replace the system-board shield. See "Replacing ...that secure the TV tuner card to the system-board connector.
4 Connect the antenna cable to the connector on the TV tuner card. 5 For Japan only...
Owner's Manual (PDF) - Page 63
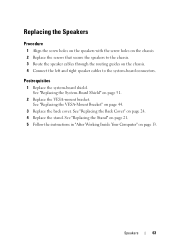
See "Replacing the Back Cover" on the chassis. 4 Connect the left and right speaker cables to the system-board connectors.
...Replacing the System-Board Shield" on page 13. See "Replacing the Stand" on page 21. 5 Follow the instructions in "After Working Inside Your Computer" on page 51.
2 Replace the VESA-mount bracket. Postrequisites
1 Replace the system-board shield. See "Replacing...
Owner's Manual (PDF) - Page 71
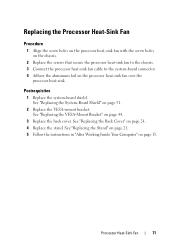
... the system-board shield. See "Replacing the Stand" on page 21. 5 Follow the instructions in "After Working Inside Your Computer" on page 24. 4 Replace the stand.
See "Replacing the VESA-Mount Bracket" on ...chassis.
2 Replace the screws that secure the processor heat-sink fan to the chassis. 3 Connect the processor heat-sink fan cable to the system-board connector. 4 Adhere the aluminum foil ...
Owner's Manual (PDF) - Page 79
...Postrequisites
1 Replace the back cover.
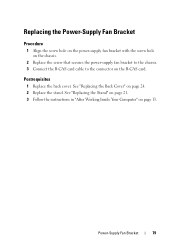
See "Replacing the Stand" on page 21. 3 Follow the instructions in "After Working Inside Your Computer" on page 24. 2 Replace the stand. See "Replacing the Back Cover" on page 13. ...hole on the chassis.
2 Replace the screw that secures the power-supply fan bracket to the chassis. 3 Connect the B-CAS card cable to the connector on the B-CAS card.
Owner's Manual (PDF) - Page 88
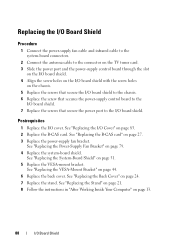
...power-supply fan cable and infrared cable to the system-board connectors.
2 Connect the antenna cable to the connector on the TV tuner card. 3 Slide ...System-Board Shield" on page 24. 7 Replace the stand. See "Replacing the Stand" on page 21. 8 Follow the instructions in "After Working Inside Your Computer" on page 83. 2 Replace the B-CAS card. See "Replacing the I/O Cover" on page 13.
88
I /O ...
Owner's Manual (PDF) - Page 91
... the system-board shield. See "Replacing the Stand" on page 21. 9 Follow the instructions in "After Working Inside Your Computer" on page 24. 8 Replace the stand.
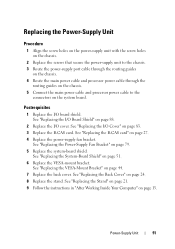
See "Replacing the Back Cover" on page ...the main power cable and processor power cable through the
routing guides on the chassis. 5 Connect the main power cable and processor power cable to the
connectors on page 44. 7 Replace...
Owner's Manual (PDF) - Page 108

...holes on the chassis. 2 Replace the screws that secures the grounding cable to the chassis. 5 Connect the main power cable to the connectors on
the I /O cover.
See "Replacing the I/O Board... /O board. 4 Replace the screw that secure the I/O board to chassis. 3 Connect the display cable and AV-in "After Working Inside Your Computer" on page 24. 8 Replace the stand. See "Replacing the Stand...
Owner's Manual (PDF) - Page 115
... "Replacing the Memory Module(s)" on page 13. See "Replacing the Stand" on page 21. 15 Follow the instructions in "After Working Inside Your Computer" on page 37. 11 Replace the system-board shield.
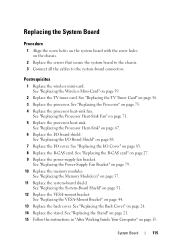
See "Replacing the TV Tuner Card" on page 75....holes on the chassis.
2 Replace the screws that secure the system board to the chassis. 3 Connect all the cables to the system-board connectors.
Owner's Manual (PDF) - Page 143
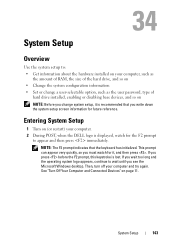
..., this keystroke is recommended that the keyboard has initialized. See "Turn Off Your Computer and Connected Devices" on page 11. This prompt can appear very quickly, so you must watch for it... long and the operating system logo appears, continue to wait until you see the Microsoft Windows desktop.
Entering System Setup
1 Turn on (or restart) your computer and try again. System Setup...
Owner's Manual (PDF) - Page 151
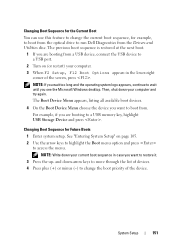
... to change the boot priority of the device.
For example, if you want to boot from a USB device, connect the USB device to a USB port.
2 Turn on page 105. 2 Use the arrow keys to highlight the...The previous boot sequence is restored at the next boot.
1 If you see the Microsoft Windows desktop. NOTE: If you wait too long and the operating system logo appears, continue to wait until you are...
Similar Questions

Does A Dell Inspiron 2330 Need A Wireless Adapter
(Posted by sfsdfrabble 9 years ago)

How To Connect 2nd Monitor To Dell Inspiron 2330 All In One Computer
(Posted by rakdoug 10 years ago)

How I Can Make A New Operation System That Work Right For Dell Desktop Inspiron
570 free
570 free
(Posted by tolgnb 10 years ago)

What Cords Needed To Connect Monitor To Inspiron One 2330
(Posted by Mrgstevel 10 years ago)
How To Use The Hdmi Cable On Inspiron Desktop Inspiron One 2330
(Posted by mhoras 10 years ago)