Get support for 2005 Cadillac SRX

2005 Cadillac SRX Support Question

2005 Cadillac SRX Support Question

Find answers below for this question about 2005 Cadillac SRX.
Need a 2005 Cadillac SRX manual? We have 1 online manual for this item!
Question posted by tecorabrown on January 13th, 2013

How Do I Take Apart Sunroof

sunroof wont open

Current Answers

Answer #1: Posted by ultra680sp on July 22nd, 2013 8:53 PM
ultra680sp

Member since:
July 22nd, 2013

Points: 10
110
points
I have put together some instructions to help. I also have a kit for sale on ebay that should save you some money.

Instructions courtesy of GM with commentary and pictures inserted.

Body - Sunroof Noises/Reverses When Closing

TECHNICAL

Bulletin No.: 06-08-67-011G

Date: September 22, 2008

Subject:

Ultraview Sunroof Reverses During Auto Close Operation, Shudder, Squeak/Moan Noise (Clean / Lubricate Tracks / Replace Shoes) Models:

2004-2009 Cadillac SRX

Supercede:

This bulletin is being revised to add a statement in procedure 3 and a part number for the white rear guide shoe. Please discard Corporate Bulletin Number 06-08-67-011F (Section 08 - Body and Accessories).

Tools needed:

T25 Torq driver

Kit provides:

Brushes

Rheosil 500f (25grams)

4 plastic glide shoes (Not the pads or metal guide)

Condition

Some customers may comment that the Ultraview Sunroof reverses direction when auto closing. This may be accompanied by a squeak or moan noise or a shuddering condition while the sunroof is moving.

Cause

This condition may be caused by high friction forces due to a lack of lubrication or dirt/grime inside the rear tracks for the front sunroof. A binding front drive cable or track may also cause this condition.

Correction

Clean and lubricate the tracks following the procedure below.

Tip

The rear track cleaning and sunroof motor initialization and teach module processes can be viewed on the GM Training website under Service Know-How/TECHAssists (U.S. dealers). The TECHAssist course number is 50250.23T1.

l Remove the moveable sunroof glass panel.

1. Open the sunroof until the air deflector is in the full upright position.

2. Carefully remove the front and rear sunroof-to-lift arm fasteners. (T25 torqs x4)

3. With the help of an assistant, lift and remove the sunroof glass panel. Important: Once the front sunroof glass panel is removed, operate the sunroof motor to open and close the front drive system. Listen for chattering or noisy front drive cables. If a condition is noted, replace the front track assembly and drive cable that is causing the noise. It may not be necessary to replace both sides. Once the front drive system operates freely, move to the rear track system.

2. Remove the front cam extensions for the rear tracks.

You can now remove the rear track guides. Clean the white plastic guide shoes with brake clean. You may notice small scratches in the plastic shoes this is normal and it's not necessary to replace the guide arms.

3. Remove the four white plastic guide shoes from the rear track guides. Once the shoes are removed, install the softer durometer rubber guide caps if needed, P/N 25880591, in place of the original ones. Once all for rubber caps are installed, reinstall the white (gm) or black (provided)

plastic guide shoes over the caps. The shoes must be reinstalled to reduce friction forces. Important: If cracks are found in the plastic guide shoes, replaces all four shoes, P/N 25979460.

4. Once the rear track guides are removed, place a clean shop towel where the guide was removed from the track. Using shop air pressure, start at the rear of the track and blow out the tracks moving back to front. Once air has been used to clean the track, obtain a steel rod (a used antenna mast works as well) and wrap with a shop towel/paper towel soaked with brake clean. Move the rod or mast with the towel through both rear tracks. Continue until all debris and grease is removed. (I used a rag pushed down the track

by the guide assembly)

5. The towel should be clean after running it through the tracks. After the tracks are clean, lubricate both rear tracks and guides with RHEOSIL 500F.

Make sure you slide the rear guides back and forth through the tracks several times to evenly spread the lubricant throughout the rear track system. Use a small acid brush to coat the grease throughout the complete rear track assembly.

*( Notice: Over-tightening any of the sunroof fasteners may damage the sunroof system. The front sunroof glass fasteners go into an aluminum boss and they can be stripped-out if overtightened. The stripped condition should not be covered under warranty as it was likely caused by overtightening or cross-threading.)

6. Reinstall the rear sunroof track guides and cam extensions. Make sure to apply

Threadlocker medium strength, P/N 12345382 (in Canada, use 10953489), to the guide fasteners. 7. Reinstall the sunroof glass. Align and install the front and rear glass fasteners.

Tighten the front and rear glass fasteners to 5 Nm (44 lb in).

*(I tried several times to do the learn process with no results on a 2005 SRX)

8. To complete the track cleaning procedure, the initialization and teach processes must be completed. Please note that the teach process must be performed immediately

following the initialization process. If the teach process is not begun within three

seconds of completing the initialization process, the entire procedure will have to be

repeated.

9. If you still have a concern after properly cleaning the tracks, replace the front sunroof motor. "The revised sunroof motor was implemented during the start of the 2007 model year. It may not be necessary to replace the motor for 2007 and 2008 models if it has 13 06 stamped on the sticker attached to the motor."

Initialization/Teach Module Process

Important: Perform the Teach Module Process immediately after completing the Initialization Process. Failure to begin the Teach Module Process within 3 seconds of completing the Initialization Process will require the entire procedure to be repeated.

1. Make sure the engine is idling and the vehicle is in Park.

2. Press and hold the Sunroof Open Switch and the Sunshade Close Switch together for six seconds.

3. Release both buttons.

4. Press the Sunshade Close Switch until the motor stalls in the close position.

5. Press the Sunroof Close Switch until the motor stalls in the close position.

6. Run the Initialization Process above and within three seconds perform Step 7 below.

7. Press the Sunroof Close Switch three times and hold the switch down on the third switch press.

8. Continue holding the Sunroof Close Switch until the sunroof and sunshade have stopped moving.*

*The sunroof has entered the teach mode at this point and the following operations will be observed:

^ The sunroof and sunshade will move to the full open position. After the sunroof reaches the full open position, the sunroof will begin to close.

^ When the sunroof reaches the closed position, the front sunshade will then close.

^ The Teach Module Process is complete when both panels have stopped moving.

Related Manual Pages

Owner's Manual - Page 1

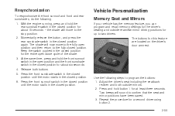
......2-13 Theft-Deterrent Systems ...2-17 Starting and Operating Your Vehicle ...2-20 Mirrors ...2-35 OnStar® System ...2-40 HomeLink® Transmitter ...2-42 Storage Areas ...2-47 Sunroof ...2-50 Vehicle Personalization ...2-53 Instrument Panel ...3-1 Instrument Panel Overview ...3-4 Climate Controls ...3-25 Warning Lights, Gages, and Indicators ...3-33 Driver Information Center (DIC) ...3-48...
Owner's Manual - Page 13

.... To remove the third row head rests, press the button located on the head rest. This position reduces the chance of the rest facing up. Open the cover and insert the head rest posts through the slats in a crash. They are not adjustable. Position and snap the head rests in the...
Owner's Manual - Page 15

... when the vehicle is not unfolded fully into the seating position. Press one of PARK (P). • The liftgate or passenger's side rear door must be open. • The unlock button on the seat must be in ON or ACCESSORY. • The vehicle must be folded forward to its previous position. The...
Owner's Manual - Page 59

The path of your vehicle by routing the rope or tiedown through any door or window opening. Do not put anything between an occupant and an airbag, and do not attach or put anything to the roof of an in flating ...
Owner's Manual - Page 62

...;ates, it is dust in the deflated airbags. To avoid this, everyone in flates, there is safe to turn them off by opening a window or a door. You can not get fresh air by using the door lock and interior lamp controls. What Will You See After an Airbag...
Owner's Manual - Page 63

... and ceiling covering for your airbag system. A new system will not work properly. The service manual for the roof-mounted side impact airbag. Do not open or break the airbag coverings. • Let only qualified technicians work on page 7-10. See your airbag systems. Improper service can mean that...
Owner's Manual - Page 64

... with yellow tape, yellow coverings or yellow connectors. If a belt is disconnected, an airbag can rip apart under impact forces. Look for any other loose or damaged safety belt system parts. Also look for any opened or broken airbag covers, and have information about servicing your belts, buckles, latch plates, retractors and...
Owner's Manual - Page 68

Section 2 Features and Controls Convenience Net ...2-49 Cargo Cover ...2-49 Cargo Management System ...2-49 Sunroof ...2-50 Sunroof (UltraView) ...2-50 Sunroof (UltraView Plus) ...2-51 Vehicle Personalization ...2-53 Memory Seat and Mirrors ...2-53 Storage Areas ...2-47 Glove Box ...2-47 Cupholder(s) ...2-47 Cell Phone Storage Area ...2-47 Front ...
Owner's Manual - Page 72

...is programmed for up to two drivers. Press the horn symbol when the ignition is open , remote confirmation will sound when you lock the doors with the remote keyless...transmitter supplied with an instant panic alarm. The remote keyless entry transmitter can program your vehicle is open , remote confirmation will be closed for up to lock the doors. You can be...
Owner's Manual - Page 73

... weak if the transmitter won't work at thin object to change the battery. Static from unlocking your body transferred to it 's probably time to pry open the transmitter. 2. Battery Replacement Under normal use care not to resynchronize the transmitter. 6. Each vehicle can be matched. Insert the new battery as the instructions...
Owner's Manual - Page 74

... Locks There are several ways to manually unlock the vehicle because you will not open the doors and fall out of the vehicle in to lock and unlock your ... panels near the windows. {CAUTION: Unlocked doors can be dangerous. • Passengers - especially children - can easily open it . • Outsiders can easily enter through an unlocked door when you slow down or stop your doors can...
Owner's Manual - Page 75

... driver's door is active. The rear doors do not have elapsed, the five second timer will sound three times indicating that delayed locking is opened, a chime will reset itself once all the doors are closed, the doors will lock immediately when you can press the door lock switch or the...
Owner's Manual - Page 88

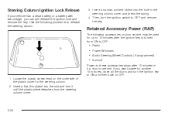
... turn it until the plastic piece detaches from ON to OFF: Radio Power Windows Audio Steering Wheel Controls (if programmed) Sunroof Power to these accessories stops after the ignition key is opened. Retained Accessory Power (RAP) The following procedure to release the steering column: 3. Then, turn the ignition key to ON and...
Owner's Manual - Page 116

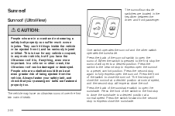
... much worse injuries. Press the back of the sunshade switch to a desired position at even greater risk of the switch to fully express open the sunshade. Sunroof Sunroof (UltraView) The sunroof/sunshade switches are located in the headliner between the driver and front passenger. {CAUTION: People who are unbelted would then be at a normal...
Owner's Manual - Page 117

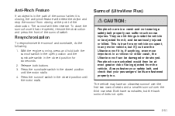
.... Both have sunshades, but if you have an ultraview sunroof over the third row seat. Release both the sunroof switch in the open . Always fasten your safety belt, and check that your...damaged or destroyed. Press the sunshade switch in any motor vehicle, but the back sunroof does not open position and the sunshade switch in the closed position for any vehicle occupant, in ...
Owner's Manual - Page 118

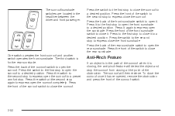
... the front of the switch to the second stop . Press the switch at the point of the obstruction. Press the front of the sunroof switch to open the sunroof. Press the switch to the first stop to open the sunroof to a desired position. Press the front of the front sunshade switch to close the...
Owner's Manual - Page 119

... rearview mirror driving positions for about 15 seconds - the shade will move to the fully open /close cycle of the shade. 3. Adjust the driver's seat including the seatback recliner and both buttons. 5. Press the front sunroof switch in the closed position until the motor stalls in the closed position again. With the...
Owner's Manual - Page 234

... warranty. Notice: Do not apply aftermarket glass tinting with the rear quarter glass windows, located in some tinting materials will not be affected if the sunroof is open.
Owner's Manual - Page 395

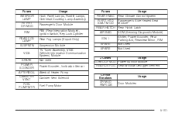
... Heated Seat Module Rear Hatch Latch SDM (Sensing Diagnostic Module) Shifter, Power Sounder, Rear Parking Aid, Rearview Mirror, RIM Not Used Not Used J Cases Usage SUNROOF MOD Power Sunroof Module REAR DEFOG Rear Window Defogger Element Circuit Breakers DR MOD PWR C/B Usage Door Modules 5-101
Owner's Manual - Page 440

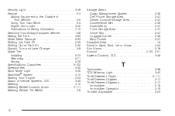
... Storage Area ...2-47 Glove Box ...2-47 Luggage Carrier ...2-48 Map Pocket ...2-47 Stowable Seat ...1-8 Stuck in Sand, Mud, Ice or Snow ...4-44 Sun Visors ...2-16 Sunroof ...2-50, 2-51 System Controls, DIC ...3-48 T Tachometer ...3-36 TCS Warning Light ...3-40 Theft-Deterrent, Radio ...3-111 Theft-Deterrent System ...2-17 Theft-Deterrent Systems ...2-17 Immobilizer...

Similar Questions

Ask a New Question
Use the box below to post a new question about this Cadillac automobile .
Points & Prizes
  • You can earn points for nearly everything you do on HelpOwl.com
  • You can trade in those points for gift cards at leading retailers such as Amazon.com and Walmart
  • It's that simple!
See How it Works
Create a Free Account

Cadillac Manuals

Find free 2005 Cadillac SRX manuals and user guides available at ManualOwl.com. Try out our unique manual viewer allowing you to interact with manuals from directly within your browser!

Cadillac Reviews

View thousands of Cadillac user reviews and customer ratings available at ReviewOwl.com.

Contact Information

Complete Cadillac customer service contact information including steps to reach representatives, hours of operation, customer support links and more from ContactHelp.com.

Scoreboard Ratings

See detailed Cadillac customer service rankings, employee comments and much more from our sister site.

Cadillac Recalls

Find comprehensive Cadillac recall information updated hourly on RecallOwl.com.