
Owners Manual
Page 1
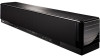
U YSP-3050 Digital Sound ProjectorTM OWNER'S MANUAL
U YSP-3050 Digital Sound ProjectorTM OWNER'S MANUAL

Owners Manual
Page 4
...unit may overheat, possibly causing damage. 9 Do not use of this unit. - It may be opened for long periods of time (i.e. Yamaha will form when the surrounding temperature changes suddenly. This Class B digital apparatus complies with the same or equivalent type. POUR LES CONSOMMATEURS CANADIENS ... off by lightning, keep the power supply cable disconnected from the wall outlet. 16 Be sure to obstruct heat radiation. Retain this Owner's Manual in this unit to modify or fix this unit for any damage resulting from the wall outlet. 18 Condensation will not be used...
...unit may overheat, possibly causing damage. 9 Do not use of this unit. - It may be opened for long periods of time (i.e. Yamaha will form when the surrounding temperature changes suddenly. This Class B digital apparatus complies with the same or equivalent type. POUR LES CONSOMMATEURS CANADIENS ... off by lightning, keep the power supply cable disconnected from the wall outlet. 16 Be sure to obstruct heat radiation. Retain this Owner's Manual in this unit to modify or fix this unit for any damage resulting from the wall outlet. 18 Condensation will not be used...

Owners Manual
Page 9
... DSP settings. See "Playback" on page 24. 4 Run AUTO SETUP. See "MANUAL SETUP" on page 74 and "Remote control features" on the power of external components, refer to the supplied owner's manual for your TV and other external components. If you want to make additional settings and... adjustments 7 Run MANUAL SETUP to change in part as a result of differences between the manual and the product, the product has priority. 1 Install...
... DSP settings. See "Playback" on page 24. 4 Run AUTO SETUP. See "MANUAL SETUP" on page 74 and "Remote control features" on the power of external components, refer to the supplied owner's manual for your TV and other external components. If you want to make additional settings and... adjustments 7 Run MANUAL SETUP to change in part as a result of differences between the manual and the product, the product has priority. 1 Install...

Owners Manual
Page 44
... (optical/coaxial/HDMI). Note This section uses a DVD player as the input source. y For details on your TV and DVD player, refer to the respective owner's manual. 1 Turn on the power of this unit to the video input on page 47). The input channel and LFE indicators light up , confirm the settings...
... (optical/coaxial/HDMI). Note This section uses a DVD player as the input source. y For details on your TV and DVD player, refer to the respective owner's manual. 1 Turn on the power of this unit to the video input on page 47). The input channel and LFE indicators light up , confirm the settings...

Owners Manual
Page 51
...XM Satellite Radio broadcasts in multi-channels, resulting in the front panel display, Home Dock may apply. For a full listing of their respective owners. Note If "CHECK ANTENNA" appears in a full surround sound experience. All fees and programming subject to playing the richest selection of this unit... the operating instructions provided with an XL. You can mount it indoors or outdoors. • Use the "XM ANTENNA LEVEL" parameter in "MANUAL SETUP" (see page 56). DIGITAL INPUT AUX 2 DVD COAXIAL OPTICAL AUX1 TV/STB XM IR IN Rear panel of music is unavailable in ...
...XM Satellite Radio broadcasts in multi-channels, resulting in the front panel display, Home Dock may apply. For a full listing of their respective owners. Note If "CHECK ANTENNA" appears in a full surround sound experience. All fees and programming subject to playing the richest selection of this unit... the operating instructions provided with an XL. You can mount it indoors or outdoors. • Use the "XM ANTENNA LEVEL" parameter in "MANUAL SETUP" (see page 56). DIGITAL INPUT AUX 2 DVD COAXIAL OPTICAL AUX1 TV/STB XM IR IN Rear panel of music is unavailable in ...

Owners Manual
Page 77
...component, and adjust the volume level of this unit. Notes • Check whether the HDMI control feature is "CE Link" in the owner's manual supplied with your TV, refer to the information on connecting an AV amplifier. 2 Turn on the power of all components connected via HDMI... and activate the HDMI control feature. For details about setting external components, see the owner's manuals supplied with your components. For details, refer to page 85. 4 Change the HDMI1 input at "Input assignment" to something other than "TV/...
...component, and adjust the volume level of this unit. Notes • Check whether the HDMI control feature is "CE Link" in the owner's manual supplied with your TV, refer to the information on connecting an AV amplifier. 2 Turn on the power of all components connected via HDMI... and activate the HDMI control feature. For details about setting external components, see the owner's manuals supplied with your components. For details, refer to page 85. 4 Change the HDMI1 input at "Input assignment" to something other than "TV/...

Owners Manual
Page 117
... can enjoy DVD audio and video with external components (see "Connecting a TV without an HDMI cable" on page 21 in the Owner's Manual). YSP-3050 AUDIO INPUT OUT VIDEO VIDEO INPUT COMPONENT AUX 1 TV/STB SUBWOOFER STB DVD DIGITAL INPUT AUX 2 DVD COAXIAL OPTICAL AUX 1 TV/STB Subwoofer ...HDMI cables" on page 18 and "Using the HDMI control feature" on page 73 in the Owner's Manual. Connect cables in the following order Sold separately 1 HDMI cable (Displays the DVD digital video and the YSP-3050 menu screen on the TV) 2 HDMI cable (Inputs the DVD digital audio/video signals to...
... can enjoy DVD audio and video with external components (see "Connecting a TV without an HDMI cable" on page 21 in the Owner's Manual). YSP-3050 AUDIO INPUT OUT VIDEO VIDEO INPUT COMPONENT AUX 1 TV/STB SUBWOOFER STB DVD DIGITAL INPUT AUX 2 DVD COAXIAL OPTICAL AUX 1 TV/STB Subwoofer ...HDMI cables" on page 18 and "Using the HDMI control feature" on page 73 in the Owner's Manual. Connect cables in the following order Sold separately 1 HDMI cable (Displays the DVD digital video and the YSP-3050 menu screen on the TV) 2 HDMI cable (Inputs the DVD digital audio/video signals to...

Owners Manual
Page 118
... the INTELLIBEAM MIC jack on the power of this guide with you to the owner's manual supplied with your normal listening position. ENHANCER ENTRY MENU CAT/ A-E DISPLAY ENTER TV/AV YSP RETURN AUTO SETUP START Will begin in 20sec Please leave the room **-------[RETURN]:Cancel...; The AUTO SETUP procedure takes about 3 minutes. • To cancel the AUTO SETUP procedure after pressing ENTER in the Owner's Manual). ENHANCER ENTRY MENU CAT/ A-E DISPLAY ENTER TV/AV YSP RETURN AUTO SETUP COMPLETE Please remove the MIC from the front of this unit and 1.8 m (6.0 ft) or more than...
... the INTELLIBEAM MIC jack on the power of this guide with you to the owner's manual supplied with your normal listening position. ENHANCER ENTRY MENU CAT/ A-E DISPLAY ENTER TV/AV YSP RETURN AUTO SETUP START Will begin in 20sec Please leave the room **-------[RETURN]:Cancel...; The AUTO SETUP procedure takes about 3 minutes. • To cancel the AUTO SETUP procedure after pressing ENTER in the Owner's Manual). ENHANCER ENTRY MENU CAT/ A-E DISPLAY ENTER TV/AV YSP RETURN AUTO SETUP COMPLETE Please remove the MIC from the front of this unit and 1.8 m (6.0 ft) or more than...