
Owners Manual
Page 5
... the receiver may be authorized by Macrovision Corporation, and is intended for reproducing higher quality super-bass sound.This super-bass sound adds a more realistic, theater-in power amplifier. "DTS" and "DTS Digital Surround" are trademarks of Digital Theater Systems, Inc. This subwoofer system (NX-SW300) employs Advanced Yamaha Active Servo Technology which YAMAHA has developed for home...
... the receiver may be authorized by Macrovision Corporation, and is intended for reproducing higher quality super-bass sound.This super-bass sound adds a more realistic, theater-in power amplifier. "DTS" and "DTS Digital Surround" are trademarks of Digital Theater Systems, Inc. This subwoofer system (NX-SW300) employs Advanced Yamaha Active Servo Technology which YAMAHA has developed for home...

Owners Manual
Page 8
.... do not touch the surface. Choosing a suitable location - Introduction Thank you for purchasing this unit.This Owner's Manual explains the basic operation of this receiver. - Region Codes The unit is designed to play the disc. and Canada models 1 ALL 1 Australia model 4 ALL 4 Notes About Discs - JPEG...and dust - Write only on a flat, hard, and stable surface. 4 A. This receiver is suddenly moved from the center out. CD-R and CD-RW cannot be unable to support the Region Management System. Do not use only CD-R and CD-RW discs made by heating equipment or direct ...
.... do not touch the surface. Choosing a suitable location - Introduction Thank you for purchasing this unit.This Owner's Manual explains the basic operation of this receiver. - Region Codes The unit is designed to play the disc. and Canada models 1 ALL 1 Australia model 4 ALL 4 Notes About Discs - JPEG...and dust - Write only on a flat, hard, and stable surface. 4 A. This receiver is suddenly moved from the center out. CD-R and CD-RW cannot be unable to support the Region Management System. Do not use only CD-R and CD-RW discs made by heating equipment or direct ...

Owners Manual
Page 9
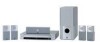
...) (12m x2) (x2) (DVX-C300 only) (5m x3) Fasteners (2 Sets) (DVX-C300 only) (2 Sets) 5 English About the main unit General Information Supplied accessories DVD Receiver (DVR-C300) Subwoofer (NX-SW300) NATURAL SOUND HOME THEATER SYSTEM DVR-C300 1 2 3 4 5 DISC AUDIO/VIDEO INPUT VOLUME PLAYXCHANGE FM Wire Antenna AM Loop Antenna Front Speakers (NX-F300) (DVX-C300 only) Center Speaker (NX-C300) (DVX-C300 only) Remote Control...
...) (12m x2) (x2) (DVX-C300 only) (5m x3) Fasteners (2 Sets) (DVX-C300 only) (2 Sets) 5 English About the main unit General Information Supplied accessories DVD Receiver (DVR-C300) Subwoofer (NX-SW300) NATURAL SOUND HOME THEATER SYSTEM DVR-C300 1 2 3 4 5 DISC AUDIO/VIDEO INPUT VOLUME PLAYXCHANGE FM Wire Antenna AM Loop Antenna Front Speakers (NX-F300) (DVX-C300 only) Center Speaker (NX-C300) (DVX-C300 only) Remote Control...

Owners Manual
Page 11
... a sound effect. Selects the appropriate active source mode. - o POWER (B/I) - s PAGE - g ON SCREEN - Enters or exits the system setup menu. DVD/CD: pauses playback. Mutes or restores the volume. Selects a subtitle language. Turns the DVD receiver on, or set it to DVD/CD mode. Repeats a specific section on the disc. DVD/CD: starts...
... a sound effect. Selects the appropriate active source mode. - o POWER (B/I) - s PAGE - g ON SCREEN - Enters or exits the system setup menu. DVD/CD: pauses playback. Mutes or restores the volume. Selects a subtitle language. Turns the DVD receiver on, or set it to DVD/CD mode. Repeats a specific section on the disc. DVD/CD: starts...

Owners Manual
Page 12
Adjusts the volume level. 4 INPUT - Exits an operation. - DVD/CD: starts/pauses playback. - Connects headphones. Functional Overview Front panel (DVR-C300) 1 2 NATURAL SOUND HOME THEATER SYSTEM DVR-C300 1 2 3 4 5 DISC 3 45 AUDIO/VIDEO INPUT VOLUME PLAYXCHANGE e w q 0 9 87 6 1 STANDBY/ON - Load up /down. 0 Head ... Use to the standby mode. 2 Disc tray - TUNER: tunes the radio preset up to the start of a disc track - Turns the DVD receiver on, or set it to change discs not being played during playback. 77 - TUNER: erases a preset radio station.* 83 / 8 - q ...
Adjusts the volume level. 4 INPUT - Exits an operation. - DVD/CD: starts/pauses playback. - Connects headphones. Functional Overview Front panel (DVR-C300) 1 2 NATURAL SOUND HOME THEATER SYSTEM DVR-C300 1 2 3 4 5 DISC 3 45 AUDIO/VIDEO INPUT VOLUME PLAYXCHANGE e w q 0 9 87 6 1 STANDBY/ON - Load up /down. 0 Head ... Use to the standby mode. 2 Disc tray - TUNER: tunes the radio preset up to the start of a disc track - Turns the DVD receiver on, or set it to change discs not being played during playback. 77 - TUNER: erases a preset radio station.* 83 / 8 - q ...

Owners Manual
Page 15
English Connecting the DVD receiver and speakers to the subwoofer Front Speaker Front Speaker (Right) (Left) Connections Surround Surround Speaker (Right) Speaker (Left) -+ -+ Center Speaker -+ 1 -+ -+ DVD Receiver 3 Subwoofer 2 FRONT CENTER SURROUND 11
English Connecting the DVD receiver and speakers to the subwoofer Front Speaker Front Speaker (Right) (Left) Connections Surround Surround Speaker (Right) Speaker (Left) -+ -+ Center Speaker -+ 1 -+ -+ DVD Receiver 3 Subwoofer 2 FRONT CENTER SURROUND 11

Owners Manual
Page 16
...line to the + connector of each terminal on a loose speaker cable, the speaker may damage the system due to the DVD receiver, AC power adaptor,TV or other sources of the DVD receiver. Improper connections may fall. - When connecting the speakers, fix the speaker cables in place so ... are correctly connected. To prevent unwanted noise, do not loosen. connector. 3 Connect the subwoofer to the DVD receiver using the system control cable from the subwoofer to the - SYSTEM CONNECTOR TO NX-SW300 Notes: - If your foot or hand accidentally gets caught on the subwoofer and with the...
...line to the + connector of each terminal on a loose speaker cable, the speaker may damage the system due to the DVD receiver, AC power adaptor,TV or other sources of the DVD receiver. Improper connections may fall. - When connecting the speakers, fix the speaker cables in place so ... are correctly connected. To prevent unwanted noise, do not loosen. connector. 3 Connect the subwoofer to the DVD receiver using the system control cable from the subwoofer to the - SYSTEM CONNECTOR TO NX-SW300 Notes: - If your foot or hand accidentally gets caught on the subwoofer and with the...

Owners Manual
Page 17
... English Connecting a TV Connections TV FM ANT GND AM ANT 75Ω UNBAL VIDEO OUT (DVD ONLY) S VIDEO DVD Receiver DIGITAL IN COMPONENT COAXIAL VIDEO PCM/DTS q DIGITAL SYSTEM CONNECTOR TV IN AUX IN LINE OUT TO NX-SW300 IMPORTANT! - You only need to the corresponding AUDIO OUT jacks on... a clearer picture than composite video connections. Using the composite video output ● Use a composite video cable (yellow -supplied) to connect the DVD receiver's VIDEO output to the video input jack (or A/V In/Video In/Composite/ Baseband jack) on the capabilities of your TV. -
... English Connecting a TV Connections TV FM ANT GND AM ANT 75Ω UNBAL VIDEO OUT (DVD ONLY) S VIDEO DVD Receiver DIGITAL IN COMPONENT COAXIAL VIDEO PCM/DTS q DIGITAL SYSTEM CONNECTOR TV IN AUX IN LINE OUT TO NX-SW300 IMPORTANT! - You only need to the corresponding AUDIO OUT jacks on... a clearer picture than composite video connections. Using the composite video output ● Use a composite video cable (yellow -supplied) to connect the DVD receiver's VIDEO output to the video input jack (or A/V In/Video In/Composite/ Baseband jack) on the capabilities of your TV. -

Owners Manual
Page 18
...progressive scan TV Placing the speakers and subwoofer DVD Receiver Front Speaker (Left) 1 Center speaker 2 Front Speaker (Right) 1 TV FM ANT GND AM ANT 75W UNBAL VIDEO OUT (DVD ONLY) S VIDEO DIGITAL IN COMPONENT COAXIAL VIDEO PCM/DTS q DIGITAL SYSTEM CONNECTOR TV IN AUX IN LINE OUT TO ...NX-SW300 DVD Receiver IMPORTANT! - To avoid magnetic interference, do not position the front speakers too close to the corresponding component ...
...progressive scan TV Placing the speakers and subwoofer DVD Receiver Front Speaker (Left) 1 Center speaker 2 Front Speaker (Right) 1 TV FM ANT GND AM ANT 75W UNBAL VIDEO OUT (DVD ONLY) S VIDEO DIGITAL IN COMPONENT COAXIAL VIDEO PCM/DTS q DIGITAL SYSTEM CONNECTOR TV IN AUX IN LINE OUT TO ...NX-SW300 DVD Receiver IMPORTANT! - To avoid magnetic interference, do not position the front speakers too close to the corresponding component ...

Owners Manual
Page 19
... power cord into moist earth. TV IN AUX IN 1 Connect the supplied AM loop antenna to the type plate on the rear of the DVD receiver and subwoofer for optimal reception. - Place the AM loop antenna on . Never make or change any connections with the power switched on a shelf or attach... ANT GND AM ANT 75Ω UNBAL VIDEO OUT (DVD ONLY) S VIDEO DIGITAL IN COMPONENT COAXIAL VIDEO PCM/DTS q DIGITAL SYSTEM CONNECTOR TV IN AUX IN LINE OUT TO NS-SW300 System Control Cable TV Subwoofer To an AC wall outlet After everything is a metal stake driven into the power outlet. Adjust...
... power cord into moist earth. TV IN AUX IN 1 Connect the supplied AM loop antenna to the type plate on the rear of the DVD receiver and subwoofer for optimal reception. - Place the AM loop antenna on . Never make or change any connections with the power switched on a shelf or attach... ANT GND AM ANT 75Ω UNBAL VIDEO OUT (DVD ONLY) S VIDEO DIGITAL IN COMPONENT COAXIAL VIDEO PCM/DTS q DIGITAL SYSTEM CONNECTOR TV IN AUX IN LINE OUT TO NS-SW300 System Control Cable TV Subwoofer To an AC wall outlet After everything is a metal stake driven into the power outlet. Adjust...

Owners Manual
Page 20
....This section provides some examples of other AV equipment connections. For information on your AV equipment, refer to the AUDIO IN jacks on the DVD receiver, you to activate the input source. Connecting a VCR or Cassette Deck TV 1 VCR or Cassette Deck 3 FM ANT GND AM ANT 75Ω UNBAL... VIDEO OUT (DVD ONLY) S VIDEO DIGITAL IN COMPONENT COAXIAL VIDEO PCM/DTS q DIGITAL SYSTEM CONNECTOR TV IN AUX IN LINE OUT TO NX-SW300 24 DVD Receiver Viewing and listening to playback 1 Connect the VCR or cassette deck to the TV as a VCR, cassette deck or...
....This section provides some examples of other AV equipment connections. For information on your AV equipment, refer to the AUDIO IN jacks on the DVD receiver, you to activate the input source. Connecting a VCR or Cassette Deck TV 1 VCR or Cassette Deck 3 FM ANT GND AM ANT 75Ω UNBAL... VIDEO OUT (DVD ONLY) S VIDEO DIGITAL IN COMPONENT COAXIAL VIDEO PCM/DTS q DIGITAL SYSTEM CONNECTOR TV IN AUX IN LINE OUT TO NX-SW300 24 DVD Receiver Viewing and listening to playback 1 Connect the VCR or cassette deck to the TV as a VCR, cassette deck or...

Owners Manual
Page 21
... 75Ω UNBAL VIDEO OUT (DVD ONLY) S VIDEO DIGITAL IN COMPONENT COAXIAL VIDEO PCM/DTS q DIGITAL SYSTEM CONNECTOR TV IN AUX IN LINE OUT TO NX-SW300 DVD Receiver Listening to playback ● Connect the DVD receiver's DIGITAL IN to activate the input source. Always refer to the owner's manual of that player...
... 75Ω UNBAL VIDEO OUT (DVD ONLY) S VIDEO DIGITAL IN COMPONENT COAXIAL VIDEO PCM/DTS q DIGITAL SYSTEM CONNECTOR TV IN AUX IN LINE OUT TO NX-SW300 DVD Receiver Listening to playback ● Connect the DVD receiver's DIGITAL IN to activate the input source. Always refer to the owner's manual of that player...

Owners Manual
Page 22
...or humid places, such as possible. dusty places 18 If the batteries run out, immediately remove them from the remote control to the DVD receiver. Notes: - Each type of the batteries according to let leaking battery acid come into the remote control 3 Using the remote control 1 ...happens, replace the batteries with new one. - Be careful not to spill liquid on page 38). Do not use different types of the DVD receiver and point it immediately. Be careful not to the regional regulations. - If a battery starts leaking, dispose of the remote control decreases considerably. ...
...or humid places, such as possible. dusty places 18 If the batteries run out, immediately remove them from the remote control to the DVD receiver. Notes: - Each type of the batteries according to let leaking battery acid come into the remote control 3 Using the remote control 1 ...happens, replace the batteries with new one. - Be careful not to spill liquid on page 38). Do not use different types of the DVD receiver and point it immediately. Be careful not to the regional regulations. - If a battery starts leaking, dispose of the remote control decreases considerably. ...

Owners Manual
Page 23
... on this if you have connected.The format you have a wide-screen TV. 5 Select a setting and press ENTER (OK). Select this DVD receiver, the color system of the options below : 4:3 PAN SCAN - Select this if the connected TV is not, the TV display setting will change the video signal... of the DVD receiver according to PAL format. Getting Started English Setting the TV IMPORTANT! If it to NTSC format. 4 Press 5∞ to ...
... on this if you have connected.The format you have a wide-screen TV. 5 Select a setting and press ENTER (OK). Select this DVD receiver, the color system of the options below : 4:3 PAN SCAN - Select this if the connected TV is not, the TV display setting will change the video signal... of the DVD receiver according to PAL format. Getting Started English Setting the TV IMPORTANT! If it to NTSC format. 4 Press 5∞ to ...

Owners Manual
Page 24
... mode, press SET UP. 2 Press 3 to select [GENERAL SETUP PAGE]. 3 Press 5∞ to your preferred language settings so that this receiver will remain as you want is not available on the disc, the disc's default setting language will be used instead.The OSD (on the remote... SPANISH PORTUGUESE POLISH ITALIAN TURKISH 4 Press 5∞ to select a language and press ENTER (OK) to confirm. 5 Repeat steps 3~4 for the system menu will automatically switch to highlight [OSD LANGUAGE], then press 3. Use the numeric keypad (0-9) on -screen display) language for other settings. GENERAL SETUP...
... mode, press SET UP. 2 Press 3 to select [GENERAL SETUP PAGE]. 3 Press 5∞ to your preferred language settings so that this receiver will remain as you want is not available on the disc, the disc's default setting language will be used instead.The OSD (on the remote... SPANISH PORTUGUESE POLISH ITALIAN TURKISH 4 Press 5∞ to select a language and press ENTER (OK) to confirm. 5 Repeat steps 3~4 for the system menu will automatically switch to highlight [OSD LANGUAGE], then press 3. Use the numeric keypad (0-9) on -screen display) language for other settings. GENERAL SETUP...

Owners Manual
Page 26
... TV screen when a button is pressed, the function for certain discs. Repeat play mode Repeat chapter/title/disc (DVD-V) Each time you must enter your receiver. - Playing discs 1 Press DVD/CD until "DVD CD" appears on the display panel. 2 Turn on the TV power and set to the instructions supplied ... / ¢ again will replay the same track/ chapter. Disc Operations IMPORTANT! - Doing so may not be possible for that button is a power-saving feature.The receiver will stop after a disc has stopped playing. Auto Eco Power standby mode This is not available on the disc tray.
... TV screen when a button is pressed, the function for certain discs. Repeat play mode Repeat chapter/title/disc (DVD-V) Each time you must enter your receiver. - Playing discs 1 Press DVD/CD until "DVD CD" appears on the display panel. 2 Turn on the TV power and set to the instructions supplied ... / ¢ again will replay the same track/ chapter. Disc Operations IMPORTANT! - Doing so may not be possible for that button is a power-saving feature.The receiver will stop after a disc has stopped playing. Auto Eco Power standby mode This is not available on the disc tray.

Owners Manual
Page 29
.... ● Press AUDIO repeatedly to the selected angle. Viewing from another angle (DVD only) If the disc contains sequences recorded from different camera angles, this receiver's power switched off. 1 Load one of different angles. ● Press ANGLE repeatedly to select the desired angle. ➜ Playback changes to select the available audio...
.... ● Press AUDIO repeatedly to the selected angle. Viewing from another angle (DVD only) If the disc contains sequences recorded from different camera angles, this receiver's power switched off. 1 Load one of different angles. ● Press ANGLE repeatedly to select the desired angle. ➜ Playback changes to select the available audio...

Owners Manual
Page 31
... information areas. - It may contain up to two areas of JPEG images, the picture rotates. English Disc Operations Playing MP3/JPEG/DivX® discs This receiver can : ● Press 4 / ¢ to select another track/file in the current folder. ● To select another folder from the current disc, press 2 to return...
... information areas. - It may contain up to two areas of JPEG images, the picture rotates. English Disc Operations Playing MP3/JPEG/DivX® discs This receiver can : ● Press 4 / ¢ to select another track/file in the current folder. ● To select another folder from the current disc, press 2 to return...

Owners Manual
Page 33
...; to highlight [DISC LOCK], then press 3. English DVD Setup Menu Options This setup is carried out via the TV, enabling you to customize the DVD receiver to enter a valid track/chapter number. UNLOCK Select this to be played.You can prevent playback of the DVDVideo. 2 Press 5∞ to select a setting, then...
...; to highlight [DISC LOCK], then press 3. English DVD Setup Menu Options This setup is carried out via the TV, enabling you to customize the DVD receiver to enter a valid track/chapter number. UNLOCK Select this to be played.You can prevent playback of the DVDVideo. 2 Press 5∞ to select a setting, then...

Owners Manual
Page 34
... SETUP PAGE', press 5∞ to highlight [PROGRAM], then press 3 to select [FDS]. 2 Press ENTER (OK) to confirm. OFF Select this receiver. The time search function is not available during DivX® movie playback. 30 Program: Disc You can playback discs in the programmed sequence. To exit...35∞ keys to move the cursor to the next position. 5 Repeat steps 3~4 to input another track/chapter number. DivX® VOD registration code Yamaha provides you want to remove. 7 Press 0 on this to disable the screen saver function. 2 Press 5∞ to select a setting and press ...
... SETUP PAGE', press 5∞ to highlight [PROGRAM], then press 3 to select [FDS]. 2 Press ENTER (OK) to confirm. OFF Select this receiver. The time search function is not available during DivX® movie playback. 30 Program: Disc You can playback discs in the programmed sequence. To exit...35∞ keys to move the cursor to the next position. 5 Repeat steps 3~4 to input another track/chapter number. DivX® VOD registration code Yamaha provides you want to remove. 7 Press 0 on this to disable the screen saver function. 2 Press 5∞ to select a setting and press ...


