
User Guide
Page 4
... Printing 3-30 Printing on Specialty Media 3-32 Printing Transparencies 3-32 Printing Envelopes 3-37 Printing Labels 3-40 Printing Glossy Paper 3-42 Printing Custom Size Paper 3-45 Choosing Output Options 3-50 Output Tray Guidelines 3-50 Offsetting Output 3-52 Stapling Output 3-53 Using the Hole Puncher 3-54 4 Print Quality Controlling the Quality of Your Prints 4-2 Selecting a Print-Quality Mode 4-2 Adjusting Color 4-3 Phaser® 7400 Color Printer ii
... Printing 3-30 Printing on Specialty Media 3-32 Printing Transparencies 3-32 Printing Envelopes 3-37 Printing Labels 3-40 Printing Glossy Paper 3-42 Printing Custom Size Paper 3-45 Choosing Output Options 3-50 Output Tray Guidelines 3-50 Offsetting Output 3-52 Stapling Output 3-53 Using the Hole Puncher 3-54 4 Print Quality Controlling the Quality of Your Prints 4-2 Selecting a Print-Quality Mode 4-2 Adjusting Color 4-3 Phaser® 7400 Color Printer ii

User Guide
Page 5
...4-15 Color Misregistration 4-16 Printed Area Does Not Fit on the Paper or Margins Are Incorrect 4-20 5 Maintenance Cleaning the Printer 5-2 Cleaning the Outside of the Printer 5-2 Cleaning the LEDs 5-3 ...Printer 5-14 Moving the Printer Within the Office 5-14 Preparing the Printer for Shipment 5-14 6 Troubleshooting Clearing Paper Jams 6-2 Preventing Jams 6-2 Jams in the Printer 6-3 Jams in the Finisher 6-36 Getting Help 6-63 Control Panel Messages 6-63 PhaserSMART Technical Support 6-64 PrintingScout Alerts 6-64 Web Links 6-65 A User Safety Index Phaser® 7400 Color Printer...
...4-15 Color Misregistration 4-16 Printed Area Does Not Fit on the Paper or Margins Are Incorrect 4-20 5 Maintenance Cleaning the Printer 5-2 Cleaning the Outside of the Printer 5-2 Cleaning the LEDs 5-3 ...Printer 5-14 Moving the Printer Within the Office 5-14 Preparing the Printer for Shipment 5-14 6 Troubleshooting Clearing Paper Jams 6-2 Preventing Jams 6-2 Jams in the Printer 6-3 Jams in the Finisher 6-36 Getting Help 6-63 Control Panel Messages 6-63 PhaserSMART Technical Support 6-64 PrintingScout Alerts 6-64 Web Links 6-65 A User Safety Index Phaser® 7400 Color Printer...

User Guide
Page 11
.../100 Base-T ■ Fonts: PostScript and PCL ■ Trays: Tray 1 (MPT) and Tray 2 ■ Banner Sizes ■ Photo Print-Quality Mode Available Configurations The Phaser 7400 Color Printer is available in five configurations: Printer Configurations Features 7400N 7400DN 7400DT 7400DX 7400DXF Hard Drive Optional Optional Yes Yes Yes Standard Memory (MB) 256 256 512 512 512...
.../100 Base-T ■ Fonts: PostScript and PCL ■ Trays: Tray 1 (MPT) and Tray 2 ■ Banner Sizes ■ Photo Print-Quality Mode Available Configurations The Phaser 7400 Color Printer is available in five configurations: Printer Configurations Features 7400N 7400DN 7400DT 7400DX 7400DXF Hard Drive Optional Optional Yes Yes Yes Standard Memory (MB) 256 256 512 512 512...

User Guide
Page 12
... configurations. The Duplex Unit is available with the optional hard drive: ■ Secure Print Jobs ■ Proof Print Jobs ■ Personal Print Jobs ■ Saved Print Jobs Duplex Unit A Duplex Unit can be added to the Phaser 7400N printer to provide automatic 2-sided printing. Phaser® 7400 Color Printer 1-7 The finisher requires a hard drive, a 550-Sheet Feeder, and a 1650-Sheet High...
... configurations. The Duplex Unit is available with the optional hard drive: ■ Secure Print Jobs ■ Proof Print Jobs ■ Personal Print Jobs ■ Saved Print Jobs Duplex Unit A Duplex Unit can be added to the Phaser 7400N printer to provide automatic 2-sided printing. Phaser® 7400 Color Printer 1-7 The finisher requires a hard drive, a 550-Sheet Feeder, and a 1650-Sheet High...

User Guide
Page 13
... Color Printer 1-8 Control Panel Control Panel This section includes: ■ Control Panel Features on page 1-8 ■ Control Panel Layout on page 1-9 ■ Menu Map on page 1-10 ■ Information Pages on page 1-10 ■ Sample Pages on page 1-10 Control Panel Features The control panel: ■ Displays the printer's operating status (for example, Printing...
... Color Printer 1-8 Control Panel Control Panel This section includes: ■ Control Panel Features on page 1-8 ■ Control Panel Layout on page 1-9 ■ Menu Map on page 1-10 ■ Information Pages on page 1-10 ■ Sample Pages on page 1-10 Control Panel Features The control panel: ■ Displays the printer's operating status (for example, Printing...

User Guide
Page 14
... maintenance information. Back button Green: Printer is busy or warming up. OK button Accepts the setting selected. 8. Control Panel Layout Control Panel 7400-006 3 5 78 1 2 46 7400-007 1. Returns to the previous menu item. Graphic display indicates status messages and menus. 3. Phaser® 7400 Color Printer 1-9 Up Arrow button print. Scrolls upward through the menus...
... maintenance information. Back button Green: Printer is busy or warming up. OK button Accepts the setting selected. 8. Control Panel Layout Control Panel 7400-006 3 5 78 1 2 46 7400-007 1. Returns to the previous menu item. Graphic display indicates status messages and menus. 3. Phaser® 7400 Color Printer 1-9 Up Arrow button print. Scrolls upward through the menus...

User Guide
Page 15
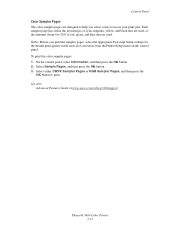
...OK button. 2. Sample Pages Your printer comes with a set of information pages that demonstrate different printer functions. Select Configuration Page or Supplies Usage Page, and then press the OK button to print. Phaser® 7400 Color Printer 1-10 Note: This print icon appears before the titles of... sample pages that can also print information pages from CentreWare Internet Services (IS) and from the control panel....
...OK button. 2. Sample Pages Your printer comes with a set of information pages that demonstrate different printer functions. Select Configuration Page or Supplies Usage Page, and then press the OK button to print. Phaser® 7400 Color Printer 1-10 Note: This print icon appears before the titles of... sample pages that can also print information pages from CentreWare Internet Services (IS) and from the control panel....
User Guide
Page 16
... sampler pages, select the appropriate Postscript Setup settings for the default print-quality mode and color correction from 0 to use in your print jobs. See also: Advanced Features Guide at www.xerox.com/office/7400support. Phaser® 7400 Color Printer 1-11 To print the color sampler pages: 1. Select Sample Pages, and then press the OK button. 3. Each sampler page...
... sampler pages, select the appropriate Postscript Setup settings for the default print-quality mode and color correction from 0 to use in your print jobs. See also: Advanced Features Guide at www.xerox.com/office/7400support. Phaser® 7400 Color Printer 1-11 To print the color sampler pages: 1. Select Sample Pages, and then press the OK button. 3. Each sampler page...
User Guide
Page 21
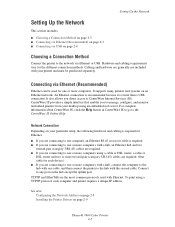
...Ethernet can be purchased separately. Connecting via Ethernet or USB. Network Connection Depending on the hub except the uplink port. To print using a TCP/IP protocol, each device.) ■ If you are connecting to one or more computers. See also: ... cable for each computer and printer requires a unique IP address. It supports many printers and systems on page 2-9 Phaser® 7400 Color Printer 2-3 CentreWare IS provides a simple interface that enables you to manage, configure, and monitor networked printers from your printer and must be used with your...
...Ethernet can be purchased separately. Connecting via Ethernet or USB. Network Connection Depending on the hub except the uplink port. To print using a TCP/IP protocol, each device.) ■ If you are connecting to one or more computers. See also: ... cable for each computer and printer requires a unique IP address. It supports many printers and systems on page 2-9 Phaser® 7400 Color Printer 2-3 CentreWare IS provides a simple interface that enables you to manage, configure, and monitor networked printers from your printer and must be used with your...

User Guide
Page 27
... CD-ROM and Web Web only Description The PostScript driver is especially helpful for the latest printer drivers. This is recommended to any Xerox PostScript-enabled printer. Phaser® 7400 Color Printer 2-9 This driver enables printing from a Mac OS 9.x operating system. Xerox provides drivers for a variety of your system's custom features and genuine Adobe® PostScript®. (Default...
... CD-ROM and Web Web only Description The PostScript driver is especially helpful for the latest printer drivers. This is recommended to any Xerox PostScript-enabled printer. Phaser® 7400 Color Printer 2-9 This driver enables printing from a Mac OS 9.x operating system. Xerox provides drivers for a variety of your system's custom features and genuine Adobe® PostScript®. (Default...

User Guide
Page 29
... also: Advanced Features Guide at www.xerox.com/office/7400support Knowledge Base at www.xerox.com/office/7400support Phaser® 7400 Color Printer 2-11 Insert the CD-ROM into the CD-ROM drive. 2. Open the Print Center utility. Select Xerox from the dropdown menu. 4. Click the Add icon in the Printer List window, and then select Bonjour from...
... also: Advanced Features Guide at www.xerox.com/office/7400support Knowledge Base at www.xerox.com/office/7400support Phaser® 7400 Color Printer 2-11 Insert the CD-ROM into the CD-ROM drive. 2. Open the Print Center utility. Select Xerox from the dropdown menu. 4. Click the Add icon in the Printer List window, and then select Bonjour from...

User Guide
Page 30
Printing Basics This chapter includes: ■ Overview of Basic Steps on page 3-2 ■ Supported Paper and Media on page 3-3 ■ Loading Paper on page 3-8 ■ Selecting Printing Options on page 3-24 ■ Printing on Both Sides of the Paper on page 3-29 ■ Printing on Specialty Media on page 3-32 ■ Choosing Output Options on page 3-50 See also: Using paper trays video tutorials at www.xerox.com/office/7400support Phaser® 7400 Color Printer 3-1
Printing Basics This chapter includes: ■ Overview of Basic Steps on page 3-2 ■ Supported Paper and Media on page 3-3 ■ Loading Paper on page 3-8 ■ Selecting Printing Options on page 3-24 ■ Printing on Both Sides of the Paper on page 3-29 ■ Printing on Specialty Media on page 3-32 ■ Choosing Output Options on page 3-50 See also: Using paper trays video tutorials at www.xerox.com/office/7400support Phaser® 7400 Color Printer 3-1

User Guide
Page 31
Overview of Basic Steps Overview of Basic Steps Follow these steps to the printer. 3. Caution: Setting the appropriate paper type improves print quality and avoids damage to print jobs: 1. For more information, see Selecting Printing Options on page 3-8 Phaser® 7400 Color Printer 3-2 See also: Loading Paper on page 3-24. 4. Load paper in the printer driver. At the control panel, either confirm the paper type and size or change them as required. Send the job to the printer. From the application, access the Print dialog box, and select printing options in the tray. 2.
Overview of Basic Steps Overview of Basic Steps Follow these steps to the printer. 3. Caution: Setting the appropriate paper type improves print quality and avoids damage to print jobs: 1. For more information, see Selecting Printing Options on page 3-8 Phaser® 7400 Color Printer 3-2 See also: Loading Paper on page 3-24. 4. Load paper in the printer driver. At the control panel, either confirm the paper type and size or change them as required. Send the job to the printer. From the application, access the Print dialog box, and select printing options in the tray. 2.

User Guide
Page 32
....xerox.com/office/7400support To order paper, transparencies, or other media from Tray 1 (MPT) and Tray 2. ■ Fan paper, transparencies, and labels prior to be printed single-sided only. please contact your local representative for your Phaser 7400 Color Printer. See also: Printing ...on Specialty Media on page 3-5 Your printer is designed to loading them in the United States and Canada....
....xerox.com/office/7400support To order paper, transparencies, or other media from Tray 1 (MPT) and Tray 2. ■ Fan paper, transparencies, and labels prior to be printed single-sided only. please contact your local representative for your Phaser 7400 Color Printer. See also: Printing ...on Specialty Media on page 3-5 Your printer is designed to loading them in the United States and Canada....

User Guide
Page 33
... basements for storing paper. Inside walls are ready to use a variety of media types for print jobs. Paper should be stored on page 3-37 Paper Storage Guidelines Providing good storage conditions for your printer. Phaser® 7400 Color Printer 3-4 For most commercial cut-size grades, the ream wrapper contains an inner lining that is less...
... basements for storing paper. Inside walls are ready to use a variety of media types for print jobs. Paper should be stored on page 3-37 Paper Storage Guidelines Providing good storage conditions for your printer. Phaser® 7400 Color Printer 3-4 For most commercial cut-size grades, the ream wrapper contains an inner lining that is less...

User Guide
Page 34
See also: Recommended Media List at www.xerox.com/office/7400support Phaser® 7400 Color Printer 3-5 Select Information Pages, and then press the OK button. 3. For more detailed information about paper sizes and weights supported in the printer trays. Select Paper Tips, and then press the OK button to print. On the control panel, select Information, and then press the OK button. 2. Supported Paper and Media Supported Paper Sizes and Weights The following sections provide information about supported paper and other media, print the Paper Tips page: 1.
See also: Recommended Media List at www.xerox.com/office/7400support Phaser® 7400 Color Printer 3-5 Select Information Pages, and then press the OK button. 3. For more detailed information about paper sizes and weights supported in the printer trays. Select Paper Tips, and then press the OK button to print. On the control panel, select Information, and then press the OK button. 2. Supported Paper and Media Supported Paper Sizes and Weights The following sections provide information about supported paper and other media, print the Paper Tips page: 1.

User Guide
Page 38
... load paper or other media with the top of the page towards the back of the printer. Load the paper or other media in the following illustrations: ■ For single-sided printing, place the side to be printed faceup, with the long edge against the roller, as shown in Tray 1 (MPT): 1. Loading Paper... for all supported paper types and sizes, except labels and paper that is longer than 305 mm (12.0 in.) or narrower than 142 mm (5.6 in.). XEROX 7400-246 Phaser® 7400 Color Printer 3-9 Prepunched holes should enter the...
... load paper or other media with the top of the page towards the back of the printer. Load the paper or other media in the following illustrations: ■ For single-sided printing, place the side to be printed faceup, with the long edge against the roller, as shown in Tray 1 (MPT): 1. Loading Paper... for all supported paper types and sizes, except labels and paper that is longer than 305 mm (12.0 in.) or narrower than 142 mm (5.6 in.). XEROX 7400-246 Phaser® 7400 Color Printer 3-9 Prepunched holes should enter the...

User Guide
Page 39
XEROX ■ Do not load more information, see Printing on page 3-29. Prepunched holes should enter the printer last. Adjust the paper guides to fit the paper. 7400-251 7400-011 Phaser® 7400 Color Printer 3-10 For more than 50 transparencies. 3. Loading Paper ■ For automatic two-sided printing, place side one facedown, with the top of the page towards the back of the Paper on Both Sides of the printer.
XEROX ■ Do not load more information, see Printing on page 3-29. Prepunched holes should enter the printer last. Adjust the paper guides to fit the paper. 7400-251 7400-011 Phaser® 7400 Color Printer 3-10 For more than 50 transparencies. 3. Loading Paper ■ For automatic two-sided printing, place side one facedown, with the top of the page towards the back of the Paper on Both Sides of the printer.

User Guide
Page 41
Prepunched holes should be printed faceup, with the short edge against the roller, as shown in .). 1. Loading Paper Short-Edge Feed Use short-edge feed for labels, for A6 size ... 305 mm (12.0 in the following illustrations: ■ For single-sided printing, place the side to be towards the front of the page entering the printer first. Load the paper or other media with the top of the printer. 7400-249 Phaser® 7400 Color Printer 3-12 Open Tray 1 (MPT) by pulling out on the handle...
Prepunched holes should be printed faceup, with the short edge against the roller, as shown in .). 1. Loading Paper Short-Edge Feed Use short-edge feed for labels, for A6 size ... 305 mm (12.0 in the following illustrations: ■ For single-sided printing, place the side to be towards the front of the page entering the printer first. Load the paper or other media with the top of the printer. 7400-249 Phaser® 7400 Color Printer 3-12 Open Tray 1 (MPT) by pulling out on the handle...

User Guide
Page 42
Adjust the paper guides to fit the paper. 7400-021515 Phaser® 7400 Color Printer 3-13 Overloading the tray may cause jams. 3. XEROX Loading Paper ■ For automatic two-sided printing, place side one facedown, with the top of the Paper on page 3-29. 7400-252 Caution: Do not load paper or media past the fill line indicated on Both Sides of the page entering the printer first. For more information, see Printing on the tray. Prepunched holes should be towards the back of the printer.
Adjust the paper guides to fit the paper. 7400-021515 Phaser® 7400 Color Printer 3-13 Overloading the tray may cause jams. 3. XEROX Loading Paper ■ For automatic two-sided printing, place side one facedown, with the top of the Paper on page 3-29. 7400-252 Caution: Do not load paper or media past the fill line indicated on Both Sides of the page entering the printer first. For more information, see Printing on the tray. Prepunched holes should be towards the back of the printer.


