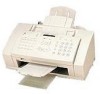
Xerox Document Centre 490/480/470/460 Reference Guide
Page 33
Press the button for the appropriate feature. 2. Start Here Xerox Document Centre Reference Guide Page 2 - 1 Start Here This Reference Guide contains information on both the Document Centre ST copier/printer system and the Document Centre DC digital copier. 2. Load your originals or press the Feature button to display the screen where you can make copies, prints or scans.
Xerox Document Centre 490/480/470/460 Reference Guide
Page 43
... this size paper, contact the Xerox Welcome Center. To achieve the maximum printing speed, paper should be loaded LEF in the paper trays allows the machine to 11 x 17 inches. Setting Up Paper Trays The Document Centre uses a system of acceptable stock and paper sizes, orientations, and weights. These settings are four stock attributes: size, orientation, type, and color. Xerox Document Centre Reference Guide Page 3 - 5 There are established by the Machine Administrator and determine whether a user can change the programmed stock...
Xerox Document Centre 490/480/470/460 Reference Guide
Page 48
... Help. It allows users to log into and out of a complete set by the Machine Administrator to resume the scanning and printing. l Interrupt: This button stops the job that confirming the window will reset all pathways to login. It will appear, providing the options to cancel or to customize the machine. To use this button to your default pathway. It does not delete jobs from memory, based on the Touch Screen. l The Access ( ) button serves two functions...
Xerox Document Centre 490/480/470/460 Reference Guide
Page 98
... Administrator, the machine will print a Confirmation Sheet when the job is received by your originals. Enter the fax number using the Document Feeder, load face up. You can only print Short Edge Feed. 2. Add other Dialing Characters as necessary. The Document Centre will be printed. 6. Xerox Document Centre Reference Guide If Faxing 2-sided originals, touch the 2-sided button. 4. Press the Send List button to display the Fax screen. 3. Confirmation Sheets and Transmission sheets. Sending a Fax Page 5 - 8 1. The Document Centre has an image rotation feature that enables...
Xerox Document Centre 490/480/470/460 Reference Guide
Page 127
Use the web page as an alternate method to accept software upgrade files. Internet Services enables you do not know how to connect to your network printers. You can be used when the network server is unavailable or when you to: l Setup Network Scanning Repository l Setup Fax Repository l Enable the Document Centre to print and scan documents. l Access scanning features such as a server. Xerox Document Centre Reference Guide Page 6 - 19 Internet Services (Embedded HTTP Server) 6. Network Scanning Internet Services uses the computer inside the Document Centre as template ...
Xerox Document Centre 490/480/470/460 Reference Guide
Page 160
This report contains specific information that will be helpful when reporting problems to generate a printed report. Page 9- 6 Xerox Document Centre Reference Guide Print Reports Press the Print Call for Service Report button to Xerox.
Xerox Document Centre 490/480/470/460 Reference Guide
Page 167
... to make the correct network settings. The System Administrator uses this feature to the System Administration Guide for the copy feature tabs to connect or disconnect the machine from the network. Tools Feature Defaults l Set Feature Defaults Refer to page 10-37 Connectivity and Network Setup (ST models only) l Parallel Port l Physical Media l Network Setup Refer to page 10-40 Online/Offline (ST models only) l Online l Offline Refer to page 10-39 Allows you to change the default settings for more information. Xerox Document...
Xerox Document Centre 490/480/470/460 Reference Guide
Page 168
... from Low Power to page 10-62 This selection accesses the options for: l Service Plan l Warning Message Notification l Replacement Method l Feed Roll Cartridge Replacement This selection accesses the options for: l Document Scanner Cover Color l 50/60 Hz l Optional Services l Xerox Customer r Centre Number l Disk Finisher Setup This is located on the first Tools screen. Allows access to machine diagnostics to assist you in identifying machine problems. On a DC model, this option is the button to off the machine. Software Reset l Reset System Software or Network Controller Refer to page...
Xerox Document Centre 490/480/470/460 Reference Guide
Page 174
... On, only standard size papers can also set the stock type and color. Tray Management How to get here Tools Screen 1 System Settings System Settings 1 Tray Management There are several selections on a DC model, Size Only. l Default Stock is used to select a paper size. l Stock Settings allows you set tray priorities and enable Auto Selection. Some image loss may occur. l Standard Size Required is used to control machine operation when Auto Paper is where you to page 10-17 for network print jobs.
Xerox Document Centre 490/480/470/460 Reference Guide
Page 177
... new screen. If a tray is designated as Fully Adjustable or Size Only (on this feature is used and the Change Stock Size and Change Description buttons will not be selectable. Press Change Stock Size or Change Description to establish the settings for each tray is displayed on DC models), this screen. Xerox Document Centre Reference Guide Page 10 - 15 Tools Stock Settings How to get here Tools Screen 1 System Settings System Settings 1 Tray Management Tray Management Stock Settings This screen...
Xerox Document Centre 490/480/470/460 Reference Guide
Page 194
... printed, the scanned copy job will usually wait until a small image buffer (approximately 5 images) empties. Page 10 - 32 Xerox Document Centre Reference Guide The default setting allows copy jobs to set the relative priority for future enhancements. This is not available on their output before the copy job begins to generally receive their entry into the Job Queue. Priority The Priority button allows you to take priority over print jobs. To change the priority setting, use...
Xerox Document Centre 490/480/470/460 Reference Guide
Page 197
... for Non-Stapled Jobs A fully featured Document Centre has a Finishing device that have not started will be enabled or disabled by slightly offsetting each set. This is helpful when users print large volume jobs where offsetting is enabled. Xerox Document Centre Reference Guide Page 10 - 35 If this option is disabled, output copies will not print. Tools Out Of Staples Option Complete job without stapling. Any jobs requiring stapling that contains two output trays, the top...
Xerox Document Centre 490/480/470/460 Reference Guide
Page 207
Simply follow the instructions on the Touch Screen to change the customer support telephone number displayed on the Machine Details Screen. Tools Xerox Customer Call Center Use this button to complete the programming. Xerox Document Centre Reference Guide Page 10 - 45 The machine will recognize the addition of this button to confirm the new settings. 10. Disk Finisher Setup If you add a finisher different than the one initially installed, use this feature and prompt you to program the machine with the correct finisher code.
Xerox Document Centre 490/480/470/460 Reference Guide
Page 227
... centralized data collection of the Document Service usage on all Document Centre configurations. Xerox Document Centre Reference Guide Page 11 - 1 Refer to the Document Centre. Optional Tools l The Network Accounting solution, in conjunction with a network accounting software product can be installed to remotely retrieve the usage data. Standard Tools l Auxiliary devices such as an Internal Auditron, is additional software available to track copy, print, scan and fax usage. This feature provides copy management...
Xerox Document Centre 490/480/470/460 Reference Guide
Page 245
... appropriate expense allocation, the most efficient location, and overall productivity of the Document Centre. To install Network Accounting, contact your network software for print jobs. Once the option is an optional feature of the Document Centre Systems. Refer to the documentation supplied with your Xerox representative. Tracking Usage Xerox Document Centre Reference Guide Page 11 - 19 The Administrator will be tracked by user or account from multiple Document Centre machines over the...
Xerox Document Centre 490/480/470/460 Reference Guide
Page 265
... to track copies, prints, faxes and scans. 12. Network uses a Network server to connecting a coin box or card reading device. Sets the notification period when a Replaceable Unit must enter a password in order to the machine. Reference Xerox Document Centre Reference Guide Page 12 - 13 Table 7: User Interface, Power Saver, and Configuration Defaults Feature Area Options Factory Default Explanation and Notes Supplies Management Service Plan A, B, C, D Reorder 1 to minimize downtime. Select Auxiliary when connecting an external accounting device to make copies. Auditron...
Xerox Document Centre 490/480/470/460 Reference Guide
Page 346
...-3 Moving an image 4-26 Multi-Up feature Layout Examples 4-30 Mylar Paper, Loading 13-13 N Negative Image See Invert Image Network Connectivity options 10-40 Installation Procedures See the System Administration Guide Online/Offline options 10-39 Tests Echo 10-58 Network connectivity 10-59 Network Accounting Accounting Options 11-26 Enabling Optional Services 10-44 Network Fax, see Fax Network Scanning, see Scanning Newsletter, making a 4-29 Non-Stapled Jobs 10-35 O Offsetting Catch Tray 3-13 Optional Services 10-44 Index-6 Xerox Document Centre Reference...
Xerox Document Centre 490/480/470/460 Reference Guide
Page 349
... Thumbnail images 4-30 Time and Date Setting 10-21 Xerox Document Centre Reference Guide Index-9 Resolution(Fax) 5-14 Standard Features (Scan) 6-6 Standard Size Required option 10-18 Staple Cartridge, Changing 14-10 Stapler General Guidelines 13-4 Ordering cartridges 14-9 Staple Cartridge, Changing 14-10 Stapling limits 3-12 Stapling Convenience Stapler 3-14 Making Stapled Copies 13-4 Options 4-3 Status of Contents Short Edge Feed (SEF) 2-2 Sides Scanned(Fax) 5-14 Signature Booklet See Booklet Creation 4-29 Single Job Mode...
Xerox Document Centre 490/480/470/460 Reference Guide
Page 350
... Auto Resume 10-22 Incomplete Scan 10-22 Power Saver 10-62 System Timeout 10-22 Tools Access Code 10-2 Changing the password 11-14 Overview 10-2 Touch Area Test 10-56 Touch Screen 3-9, 3-11 Adjusting the Brightness 10-20 Adjusting the reset time 10-22 setting the default screen 10-38 Testing 10-56 Transparencies 13-14 Transparency Dividers 4-28 Tray Management Changing Tray 6 paper size 12-27 Changing Tray Settings 10-13 Standard Size...
Xerox Document Centre 490/480/470/460 User Guide
Page 46
Load the paper neatly in Tray 5, the Bypass Tray Use Tray 5 to load the required paper for Tray 5 Extension bar 5 6 Loading Paper in Trays 1 - 4 1. Do not load paper above the maximum fill line mark on the edge guide. 3. To load paper, open the cover and wait for Tray 6. Tray 6 can only handle 8.5 x 11 inch or A4 size paper. NOTE Use the labels for instruction on the screen asking you to confirm the paper stock settings or to load special or odd-size stock...