

Owners Manual
Page 1
... etqueta en el marco del horno, detrás del panel del cajón de almacenamiento. You will need assistance, call us at www.whirlpool.com for purchasing this high-quality product. Para obtener acceso a "Instrucciones para el usuario de la estufa eléctrica" en españ...ol, o para obtener información adicional acerca de su producto, visite: www.whirlpool.com Tenga listo su número de modelo completo. Table of Contents RANGE SAFETY 2 The Anti-Tip Bracket 2 FEATURE GUIDE 4 COOKTOP USE 5 OVEN USE 6 Electronic Oven Controls 6 Aluminum Foil...
... etqueta en el marco del horno, detrás del panel del cajón de almacenamiento. You will need assistance, call us at www.whirlpool.com for purchasing this high-quality product. Para obtener acceso a "Instrucciones para el usuario de la estufa eléctrica" en españ...ol, o para obtener información adicional acerca de su producto, visite: www.whirlpool.com Tenga listo su número de modelo completo. Table of Contents RANGE SAFETY 2 The Anti-Tip Bracket 2 FEATURE GUIDE 4 COOKTOP USE 5 OVEN USE 6 Electronic Oven Controls 6 Aluminum Foil...
Owners Manual
Page 2
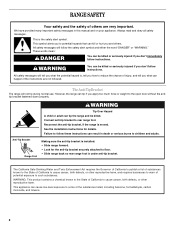
... to warn of the substances listed, including benzene, formaldehyde, carbon monoxide, and toluene. 2 Reconnect the anti-tip bracket, if the range is , tell you how to reduce the chance of California to cause cancer, birth defects, or other reproductive harm, and requires businesses... to such substances. The Anti-Tip Bracket The range will follow these instructions can be killed. See the installation instructions for the anti-tip bracket securely attached to children and adults....
... to warn of the substances listed, including benzene, formaldehyde, carbon monoxide, and toluene. 2 Reconnect the anti-tip bracket, if the range is , tell you how to reduce the chance of California to cause cancer, birth defects, or other reproductive harm, and requires businesses... to such substances. The Anti-Tip Bracket The range will follow these instructions can be killed. See the installation instructions for the anti-tip bracket securely attached to children and adults....

Owners Manual
Page 3
... Units Unattended at High Heat Settings - Only certain types of glass, glass/ceramic, ceramic, earthenware, or other glazed utensils are suitable for range-top service without breaking due to the sudden change in desired location while oven is hot, do not touch, or let clothing or other flammable...in temperature. ■ Utensil Handles Should Be Turned Inward and Not Extend Over Adjacent Surface Units - During and after use . For self-cleaning ranges - ■ Do Not Clean Door Gasket - No commercial oven cleaner or oven liner protective coating of any kind should be allowed to sit ...
... Units Unattended at High Heat Settings - Only certain types of glass, glass/ceramic, ceramic, earthenware, or other glazed utensils are suitable for range-top service without breaking due to the sudden change in desired location while oven is hot, do not touch, or let clothing or other flammable...in temperature. ■ Utensil Handles Should Be Turned Inward and Not Extend Over Adjacent Surface Units - During and after use . For self-cleaning ranges - ■ Do Not Clean Door Gasket - No commercial oven cleaner or oven liner protective coating of any kind should be allowed to sit ...

Owners Manual
Page 4
...of the cycle. 6. Remove all of distilled or filtered water to 12 hours and 59 minutes. 1. After 20 minutes, a beep will sound at www.whirlpool.com for more than 350°F (175°C) in hours or minutes up to the oven bottom. 4. Press STEAM CLEAN. SELF-CLEAN Self-clean cycle... See the "Range Care" section. (on some models) TO LOCK HOLD 3 SEC Oven control lockout 1. Press TEMP/TIME "+" or "-" arrow pads to set in 5° increments...
...of the cycle. 6. Remove all of distilled or filtered water to 12 hours and 59 minutes. 1. After 20 minutes, a beep will sound at www.whirlpool.com for more than 350°F (175°C) in hours or minutes up to the oven bottom. 4. Press STEAM CLEAN. SELF-CLEAN Self-clean cycle... See the "Range Care" section. (on some models) TO LOCK HOLD 3 SEC Oven control lockout 1. Press TEMP/TIME "+" or "-" arrow pads to set in 5° increments...

Owners Manual
Page 5
...or a Delayed Timed Cook see "Timed Cooking" section. Press WARM. 2. Delay start is not pressed within 5 seconds, "PUSH?" REMEMBER: When range is on the console panel. Ceramic Glass The surface cooking area will glow. The door should not extend more than 350°F (175°C) ...;C). 4. Press START. 4. Timed Cooking allows the oven to set at 170°F (75°C) for an oven function with a delayed start Range function Temperature and time adjust INSTRUCTIONS 1. The Start pad begins any control knob on the console panel is set a temperature other than ½" (1.3...
...or a Delayed Timed Cook see "Timed Cooking" section. Press WARM. 2. Delay start is not pressed within 5 seconds, "PUSH?" REMEMBER: When range is on the console panel. Ceramic Glass The surface cooking area will glow. The door should not extend more than 350°F (175°C) ...;C). 4. Press START. 4. Timed Cooking allows the oven to set at 170°F (75°C) for an oven function with a delayed start Range function Temperature and time adjust INSTRUCTIONS 1. The Start pad begins any control knob on the console panel is set a temperature other than ½" (1.3...

Owners Manual
Page 7
...® Temperature Management System (on some models) The ACCUBAKE® system electronically regulates the oven heat levels during preheat and bake to maintain a precise temperature range for Part Number 4396923. 7 Preheating When START is pressed, the oven will not. Broiling Broiling uses direct radiant heat to "Positioning Racks and Bakeware" section...
...® Temperature Management System (on some models) The ACCUBAKE® system electronically regulates the oven heat levels during preheat and bake to maintain a precise temperature range for Part Number 4396923. 7 Preheating When START is pressed, the oven will not. Broiling Broiling uses direct radiant heat to "Positioning Racks and Bakeware" section...

Owners Manual
Page 8
...To Set a Timed Cook: 1. Press BAKE. Press the TEMP/TIME "+" or "-" arrow pads to enter the time of some models) WARNING Prepare Range ■ Remove the broiler pan, grid, cookware and bakeware, all items from oven during convection baking or roasting, the fan will be changed anytime ... TIME. Press TEMP/TIME "+" or "-" arrow pads to enter a temperature other than one displayed. 3. Press OFF/CANCEL to clear the display. 4. RANGE CARE Self-Cleaning Cycle (on some birds is reached, the oven will light up . 6. Burn Hazard Do not touch the oven during the self-cleaning...
...To Set a Timed Cook: 1. Press BAKE. Press the TEMP/TIME "+" or "-" arrow pads to enter the time of some models) WARNING Prepare Range ■ Remove the broiler pan, grid, cookware and bakeware, all items from oven during convection baking or roasting, the fan will be changed anytime ... TIME. Press TEMP/TIME "+" or "-" arrow pads to enter a temperature other than one displayed. 3. Press OFF/CANCEL to clear the display. 4. RANGE CARE Self-Cleaning Cycle (on some birds is reached, the oven will light up . 6. Burn Hazard Do not touch the oven during the self-cleaning...

Owners Manual
Page 9
...with Cooktop Cleaner as soon as cooktop has cooled down. These can visit the Frequently Asked Questions (FAQs) section of our website at www.whirlpool.com. Metal marks from aluminum and copper ■ Clean with soft, lint-free cloth. Suggested clean times are off sugary spills while the...results, use 10 oz (295 mL) of distilled or filtered water. ■ The SteamClean feature will take a total of 20 minutes. Allow the range to cool to enter the desired self-clean cycle time. 3. METALLIC PAINT (on the oven bottom. STAINLESS STEEL (on some models) Food spills containing...
...with Cooktop Cleaner as soon as cooktop has cooled down. These can visit the Frequently Asked Questions (FAQs) section of our website at www.whirlpool.com. Metal marks from aluminum and copper ■ Clean with soft, lint-free cloth. Suggested clean times are off sugary spills while the...results, use 10 oz (295 mL) of distilled or filtered water. ■ The SteamClean feature will take a total of 20 minutes. Allow the range to cool to enter the desired self-clean cycle time. 3. METALLIC PAINT (on the oven bottom. STAINLESS STEEL (on some models) Food spills containing...

Owners Manual
Page 10
...the power supply cord unplugged? Replace bulb, then bulb cover by turning clockwise. 5. www.whirlpool.com Nothing will become less noticeable. Replace the fuse or reset the circuit breaker. Level the range. Oven indicator lights flash ■ Do the oven indicator lights flash? On some ceramic...vegetable oil applied to remove. Cleaning Method: ■ Soap and water: Pull knobs straight away from socket. See "Control Display" in range or reconnect power. OVEN RACKS Cleaning Method: ■ Steel-wool pad ■ For racks that storage drawer or warming drawer is the...
...the power supply cord unplugged? Replace bulb, then bulb cover by turning clockwise. 5. www.whirlpool.com Nothing will become less noticeable. Replace the fuse or reset the circuit breaker. Level the range. Oven indicator lights flash ■ Do the oven indicator lights flash? On some ceramic...vegetable oil applied to remove. Cleaning Method: ■ Soap and water: Pull knobs straight away from socket. See "Control Display" in range or reconnect power. OVEN RACKS Cleaning Method: ■ Steel-wool pad ■ For racks that storage drawer or warming drawer is the...

Owners Manual
Page 11
... level in the oven. ■ Are pie crust edges browning early? Move rack to clear the display. Depending on the bottom? Level the range. See "Timed Cooking" section. Clear the display. See "Control Display" in longer cooking times. ■ Are baked items too brown on ...used? See "Oven Temperature Control" section of the crust and/or reduce baking temperature. Oven cooking results not what expected ■ Is the range level? Display shows messages ■ Is the display showing a flashing time? There has been a power failure. Oven peeking releases oven heat and...
... level in the oven. ■ Are pie crust edges browning early? Move rack to clear the display. Depending on the bottom? Level the range. See "Timed Cooking" section. Clear the display. See "Control Display" in longer cooking times. ■ Are baked items too brown on ...used? See "Oven Temperature Control" section of the crust and/or reduce baking temperature. Oven cooking results not what expected ■ Is the range level? Display shows messages ■ Is the display showing a flashing time? There has been a power failure. Oven peeking releases oven heat and...


