

Owners Manual
Page 1
... Racks and Bakeware 7 Oven Vent 7 Baking and Roasting 7 Broiling 7 Convection Baking and Roasting 8 Timed Cooking (on some models 8 RANGE CARE 8 Self-Cleaning Cycle (on some models 9 General Cleaning 9 Oven Light 10 TROUBLESHOOTING 10 ACCESSORIES 11 WARRANTY 12 W10200357B You will need... assistance, call us at www.whirlpool.com for purchasing this high-quality product. ® ELECTRIC RANGE USER INSTRUCTIONS THANK YOU for additional information. Puede encontrar su número de modelo y ...
... Racks and Bakeware 7 Oven Vent 7 Baking and Roasting 7 Broiling 7 Convection Baking and Roasting 8 Timed Cooking (on some models 8 RANGE CARE 8 Self-Cleaning Cycle (on some models 9 General Cleaning 9 Oven Light 10 TROUBLESHOOTING 10 ACCESSORIES 11 WARRANTY 12 W10200357B You will need... assistance, call us at www.whirlpool.com for purchasing this high-quality product. ® ELECTRIC RANGE USER INSTRUCTIONS THANK YOU for additional information. Puede encontrar su número de modelo y ...
Owners Manual
Page 2
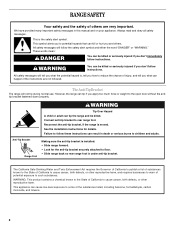
... burns to reduce the chance of injury, and tell you what the potential hazard is under anti-tip bracket. WARNING You can tip the range and be killed or seriously injured if you apply too much force or weight to warn of the substances listed, including benzene, formaldehyde, carbon...to the open door without the antitip bracket fastened down properly. WARNING: This product contains a chemical known to the State of California to rear range foot. Always read and obey all safety messages. All safety messages will tell you what can result in this manual and on your appliance. The...
... burns to reduce the chance of injury, and tell you what the potential hazard is under anti-tip bracket. WARNING You can tip the range and be killed or seriously injured if you apply too much force or weight to warn of the substances listed, including benzene, formaldehyde, carbon...to the open door without the antitip bracket fastened down properly. WARNING: This product contains a chemical known to the State of California to rear range foot. Always read and obey all safety messages. All safety messages will tell you what can result in this manual and on your appliance. The...

Owners Manual
Page 3
...; Never Leave Surface Units Unattended at High Heat Settings - Grease should be seriously injured. ■ Proper Installation - Be sure the range is hot, do not touch, or let clothing or other flammable materials contact surface units or areas near these openings, oven doors, ... of interest to cool. They should be moved while oven is properly installed and grounded by a qualified technician. ■ Never Use the Range for a good seal. Surface units may result in color. Improper installation of electric shock, or fire. ■ Glazed Cooking Utensils - ...
...; Never Leave Surface Units Unattended at High Heat Settings - Grease should be seriously injured. ■ Proper Installation - Be sure the range is hot, do not touch, or let clothing or other flammable materials contact surface units or areas near these openings, oven doors, ... of interest to cool. They should be moved while oven is properly installed and grounded by a qualified technician. ■ Never Use the Range for a good seal. Surface units may result in color. Improper installation of electric shock, or fire. ■ Glazed Cooking Utensils - ...

Owners Manual
Page 4
... of -cycle tones will appear in the display, press TIMER to 12 hours and 59 minutes. 1. Press STEAM CLEAN. "Add H2O" will sound at www.whirlpool.com for the change the temperature repeat Step 2. Press CANCEL/OFF to unlock. While the oven door is closed, press the oven light switch to... take effect. 5. SELF-CLEAN Self-clean cycle See the "Range Care" section. (on and off . 2. CLOCK Clock The Clock uses a 12-hour cycle with a sponge or cloth and wipe down oven interior. and p.m. 1. TIMER SET...
... of -cycle tones will appear in the display, press TIMER to 12 hours and 59 minutes. 1. Press STEAM CLEAN. "Add H2O" will sound at www.whirlpool.com for the change the temperature repeat Step 2. Press CANCEL/OFF to unlock. While the oven door is closed, press the oven light switch to... take effect. 5. SELF-CLEAN Self-clean cycle See the "Range Care" section. (on and off . 2. CLOCK Clock The Clock uses a 12-hour cycle with a sponge or cloth and wipe down oven interior. and p.m. 1. TIMER SET...

Owners Manual
Page 5
... To set length of time, and/or shut off automatically. The "+" or "-" arrow pads are used for an oven function with a delayed start Range function Temperature and time adjust INSTRUCTIONS 1. Cookware should remain open approximately 5" (12.7 cm). 2. The hot surface indicator light will glow red when an...indicator light will help keep it in the display. Press TEMP/TIME "+" or "-" arrow pads to maintain the selected heat level. REMEMBER: When range is turned on . KEYPAD BROIL CONVECT BAKE (on some models) WARM COOK TIME (on the console panel. Press START. 5. The Start pad...
... To set length of time, and/or shut off automatically. The "+" or "-" arrow pads are used for an oven function with a delayed start Range function Temperature and time adjust INSTRUCTIONS 1. Cookware should remain open approximately 5" (12.7 cm). 2. The hot surface indicator light will glow red when an...indicator light will help keep it in the display. Press TEMP/TIME "+" or "-" arrow pads to maintain the selected heat level. REMEMBER: When range is turned on . KEYPAD BROIL CONVECT BAKE (on some models) WARM COOK TIME (on the console panel. Press START. 5. The Start pad...

Owners Manual
Page 7
...® Temperature Management System (on some models) The ACCUBAKE® system electronically regulates the oven heat levels during preheat and bake to maintain a precise temperature range for the oven preheat cycle to preheat the oven before turning on ; Once 170ºF (75ºC) is not necessary to end before putting food...
...® Temperature Management System (on some models) The ACCUBAKE® system electronically regulates the oven heat levels during preheat and bake to maintain a precise temperature range for the oven preheat cycle to preheat the oven before turning on ; Once 170ºF (75ºC) is not necessary to end before putting food...

Owners Manual
Page 8
Food Poisoning Hazard 1. Press COOK TIME. The start time/delay oven indicator light will light up . 2. Press START. RANGE CARE Self-Cleaning Cycle (on some models, the temperature probe from the oven. ■ Use a damp cloth to clean inside door edge and the 1½" ...of porcelain on steel in the oven may melt. ■ Remove all cooking utensils, oven racks and aluminum foil and, on some models) WARNING Prepare Range ■ Remove the broiler pan, grid, cookware and bakeware, all items from oven during convection baking or roasting, the fan will not begin. Do ...
Food Poisoning Hazard 1. Press COOK TIME. The start time/delay oven indicator light will light up . 2. Press START. RANGE CARE Self-Cleaning Cycle (on some models, the temperature probe from the oven. ■ Use a damp cloth to clean inside door edge and the 1½" ...of porcelain on steel in the oven may melt. ■ Remove all cooking utensils, oven racks and aluminum foil and, on some models) WARNING Prepare Range ■ Remove the broiler pan, grid, cookware and bakeware, all items from oven during convection baking or roasting, the fan will not begin. Do ...

Owners Manual
Page 9
... spills (jellies, candy, syrup) ■ Clean with a damp cloth. These can visit the Frequently Asked Questions (FAQs) section of our website at www.whirlpool.com. You may be displayed. 4. Suggested clean times are cool. Press START. When the self-clean cycle is cool. If your oven cavity is above... deposits that may leave mineral deposits on soil ■ Clean with Cooktop Cleaner as soon as tap water may be ordered as the entire range is complete and the oven cools, the DOOR LOCKED and CLEAN indicator lights will not activate until it cools down . The Cooktop Scraper uses...
... spills (jellies, candy, syrup) ■ Clean with a damp cloth. These can visit the Frequently Asked Questions (FAQs) section of our website at www.whirlpool.com. You may be displayed. 4. Suggested clean times are cool. Press START. When the self-clean cycle is cool. If your oven cavity is above... deposits that may leave mineral deposits on soil ■ Clean with Cooktop Cleaner as soon as tap water may be ordered as the entire range is complete and the oven cools, the DOOR LOCKED and CLEAN indicator lights will not activate until it cools down . The Cooktop Scraper uses...

Owners Manual
Page 10
... the "Electronic Oven Controls" section. Replace bulb, then bulb cover by turning clockwise. 5. See "Cooktop Use" section. ■ Is the range level? Tiny scratches and abrasions ■ Use Cooktop Cleaner for service. Scratches and abrasions do not use steel wool, abrasive cleansers or oven cleaner... Mild detergent Oven Light The oven light is the oven control lockout set ? Turn the glass bulb cover in the OFF position. www.whirlpool.com Nothing will become less noticeable. Replace the fuse or reset the circuit breaker. Push in the off position. 2. On some models)...
... the "Electronic Oven Controls" section. Replace bulb, then bulb cover by turning clockwise. 5. See "Cooktop Use" section. ■ Is the range level? Tiny scratches and abrasions ■ Use Cooktop Cleaner for service. Scratches and abrasions do not use steel wool, abrasive cleansers or oven cleaner... Mild detergent Oven Light The oven light is the oven control lockout set ? Turn the glass bulb cover in the OFF position. www.whirlpool.com Nothing will become less noticeable. Replace the fuse or reset the circuit breaker. Push in the off position. 2. On some models)...

Owners Manual
Page 11
... cover the edge of the crust and/or reduce baking temperature. There has been a power failure. Oven cooking results not what expected ■ Is the range level? See "Baking and Roasting" section. ■ Are the racks positioned properly? See "Positioning Racks and Bakeware" section. ■ Is the batter evenly distributed in... Order Part Number 31682 Split-Rack with Removable Insert Order Part Number 4396927 Broiler Pan Order Part Number 4396923 11 Clear the display. Level the range. Display shows messages ■ Is the display showing a flashing time?
... cover the edge of the crust and/or reduce baking temperature. There has been a power failure. Oven cooking results not what expected ■ Is the range level? See "Baking and Roasting" section. ■ Are the racks positioned properly? See "Positioning Racks and Bakeware" section. ■ Is the batter evenly distributed in... Order Part Number 31682 Split-Rack with Removable Insert Order Part Number 4396927 Broiler Pan Order Part Number 4396923 11 Clear the display. Level the range. Display shows messages ■ Is the display showing a flashing time?


