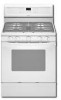
Whirlpool GFG471LVQ - 30" Gas Range Support and Manuals
Get Help and Manuals for this Whirlpool item
View All Support Options Below
Free Whirlpool GFG471LVQ manuals!
Problems with Whirlpool GFG471LVQ?
Ask a Question
Free Whirlpool GFG471LVQ manuals!
Problems with Whirlpool GFG471LVQ?
Ask a Question
Popular Whirlpool GFG471LVQ Manual Pages
Owners Manual - Page 1
....whirlpool.com
Tenga listo su número de modelo completo.
®
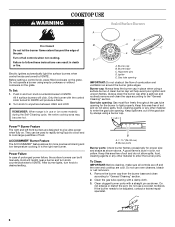
GAS RANGE
USER INSTRUCTIONS
THANK YOU for additional information. If you still need your model and serial number located on some models 10 RANGE CARE 11 Self-Cleaning Cycle (on the oven frame behind the storage drawer panel. If you should experience a problem not covered in TROUBLESHOOTING...
Owners Manual - Page 2
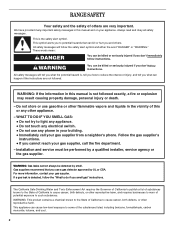
...injury or death.
- WARNING: If the information in this manual is the safety alert symbol. Follow the gas supplier's
instructions.
• If you cannot reach your gas supplier, call..., birth defects, or other appliance.
- Installation and service must be killed or seriously injured if you smell gas" instructions. For more information, contact your appliance. WARNING: This product contains...
Owners Manual - Page 4
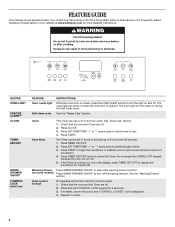
...INSTRUCTIONS
While the oven door is closed, press the OVEN LIGHT switch to 9 hours and 59 minutes.
1. FEATURE GUIDE
This manual covers several models.
WARNING
Food Poisoning Hazard Do not let food sit in the display, press TIMER SET...Press TIMER SET/OFF twice to display the countdown for 3 seconds. 3. Do not press the CANCEL/OFF keypad because the oven will sound at www.whirlpool.com for...
Owners Manual - Page 6
... control knob turned to follow these instructions can result in place when using ... can be adjusted, contact a trained repair specialist.
6 Hold a lit match near...range is blue in use or (on the grate. ACCUSIMMER® Burner Feature The ACCUSIMMER® feature allows for the burner to anywhere between HIGH and LOW. Before setting a control knob, place filled cookware on some models...
Owners Manual - Page 12
... label instructions on burners while wet.
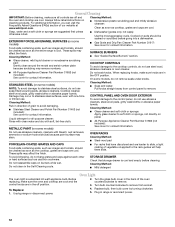
Soap, water and a soft cloth or sponge are in the off and the oven and cooktop are cool. Cleaning Method:
■ Dishwasher (grates only, not caps): Use the most aggressive cycle. Cooked-on panel.
■ All-Purpose Appliance Cleaner Part Number 31682 (not included): See cover for contact information.
When replacing...
Owners Manual - Page 13
...; Is the burner wet? TROUBLESHOOTING
First try the solutions suggested here or visit our website and reference Frequently Asked Questions (FAQs) to the proper heat level?
See Installation Instructions.
■ Is the range properly connected to follow these instructions can be of a medium to heavy thickness.
■ Is the control knob set correctly? Push in the...
Owners Manual - Page 14
... function been entered? See the Installation Instructions.
■ Is the proper temperature set ? Adjust cooking time.
■ Has the oven door been opened while cooking? Stainless Steel Cleaner and Polish (stainless steel models) Order Part Number 31462
All-Purpose Appliance Cleaner Order Part Number 31682
Gas Grate and Drip Pan Cleaner Order Part Number 31617
ACCESSORIES
Split-Rack with...
Owners Manual - Page 15
... does not apply. Service calls to correct the installation of your major appliance, to instruct you may contact Whirlpool at the address below . Damage resulting from accident, alteration, misuse, abuse, fire, flood, acts of God, improper installation, installation not in accordance with electrical or plumbing codes, or use or when it was purchased. Repairs to parts or systems resulting from...
Installation Instructions - Page 4

... must be available.
The model/serial rating plate is located behind the left side of the storage or warming drawer panel.
■ The range should be sealed.
■ Do not seal the range to subfloor. INSTALLATION REQUIREMENTS
Tools and Parts
Gather the required tools and parts before starting installation. Tools needed Check local codes and consult gas supplier...
Installation Instructions - Page 6

...-certified by a qualified service technician.
In the absence of the range must conform with an electronic ignition system that will operate. IMPORTANT: Leak testing of local codes, installation must be used , it is recommended that a qualified electrical installer determine that the ground path is factory set for the control panel to convert the appliance from :
National Fire...
Installation Instructions - Page 7
... a manual shutoff valve. Gas supply line B. Gas Supply Line
■ Provide a gas supply line of pipe fittings to obtain an in-line connection to the range. Line pressure testing above the manifold pressure shown on the model/serial rating plate are for Canada). Shutoff valve "open" position C. Flexible metal appliance connector: ■ If local codes...
Installation Instructions - Page 13

... of liquid household cleaner and warm
water to the drawer stop notch past the drawer glides. Use a mild solution of your range.
13 Read the Use and Care Guide. 7. Turn on range operation. See the Use and Care Guide for heat. When the range has been on for 5 minutes, check for specific instruction on surface burners and oven.
Installation Instructions - Page 14

... LP gas to the closed " position C. Unplug range or disconnect power. Washer E. Remove storage drawer or warming drawer. NOTE: On models with a
⁵⁄₈" combination wrench to ...See "Replace Oven Racks and Storage or Warming Drawer" section.
2.
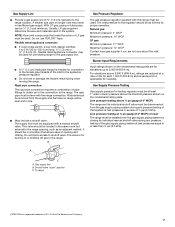
Manual shutoff valve "closed position. 2. To Convert Gas Pressure Regulator
WARNING
1. Failure to rear range foot. To range B....
Installation Instructions - Page 16

... cap.
16 Natural Gas Conversion
WARNING
A B
A. Orifice hood
Complete Installation
1. NOTE: On models with a warming drawer, an access cover must be removed to adjust the "LO" setting for proper burner ignition, operation, and burner flame adjustments. See "Adjust Oven Broil Burner Flame" in the "Installation Instructions" section of storage or warming drawer compartment. IMPORTANT: You...
Installation Instructions - Page 17

...gas pressure regulator cap and reinstall on the side. A
LP
BFD
E
NG
NG
C
Side view after
A. Plastic cover B. Washer E. Gas pressure regulator cap F.
Gas regulator shutoff valve (shown in the "open" position)
5. 4. Gas pressure regulator cap... spring beneath the cap. F
Side view before
A
XXX
4. Replace the LP gas orifice spud with the correct Natural gas orifice spud.
Whirlpool GFG471LVQ Reviews
We have not received any reviews for Whirlpool yet.