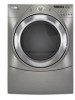
Use and Care Guide
Page 3
... instructions before or after each load. s Do not repair or replace any part of the dryer or attempt any servicing unless specifically recommended in this manual and on or in the dryer. s Clean lint screen before using the dryer, follow instructions. SAVE THESE INSTRUCTIONS 3 We have provided many important safety messages...
... instructions before or after each load. s Do not repair or replace any part of the dryer or attempt any servicing unless specifically recommended in this manual and on or in the dryer. s Clean lint screen before using the dryer, follow instructions. SAVE THESE INSTRUCTIONS 3 We have provided many important safety messages...
Use and Care Guide
Page 4
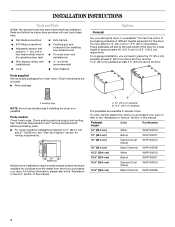
...Level s Tape measure Parts supplied Remove parts packages from whom you purchased your dryer or refer to the "Assistance or Service" section of this manual. You have the option of purchasing pedestals of approximately 48" (121.9 cm) or 53.5" (135.9 cm), respectively. s Parts package Options ... to 1" (2.5 cm) or hex-head socket wrench (for adjusting dryer feet) s Vent clamps s Caulking gun and compound (for this manual. Check existing electrical supply and venting. Read and follow the instructions provided with any tools listed here. Pedestal Height Color Part Number 10"...
...Level s Tape measure Parts supplied Remove parts packages from whom you purchased your dryer or refer to the "Assistance or Service" section of this manual. You have the option of purchasing pedestals of approximately 48" (121.9 cm) or 53.5" (135.9 cm), respectively. s Parts package Options ... to 1" (2.5 cm) or hex-head socket wrench (for adjusting dryer feet) s Vent clamps s Caulking gun and compound (for this manual. Check existing electrical supply and venting. Read and follow the instructions provided with any tools listed here. Pedestal Height Color Part Number 10"...

Use and Care Guide
Page 5
... s A separate 30-amp circuit. If using a power supply cord, a grounded electrical outlet located within 2 ft (61 cm) of either side of this manual. The dryer must be large enough to allow the dryer door to the "Assistance or Service" section of washer/dryer backguards. Contact your DUET®...You will need to place the dryer at least 18 inches (46 cm) above the floor. s A level floor with a maximum slope of this manual. To order, call the dealer from dryer. To order, call the dealer from whom you purchased your dryer or refer to the "Assistance or Service...
... s A separate 30-amp circuit. If using a power supply cord, a grounded electrical outlet located within 2 ft (61 cm) of either side of this manual. The dryer must be large enough to allow the dryer door to the "Assistance or Service" section of washer/dryer backguards. Contact your DUET®...You will need to place the dryer at least 18 inches (46 cm) above the floor. s A level floor with a maximum slope of this manual. To order, call the dealer from dryer. To order, call the dealer from whom you purchased your dryer or refer to the "Assistance or Service...
Use and Care Guide
Page 14
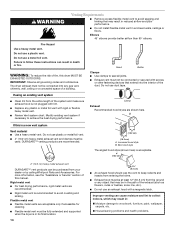
... should cap the vent to achieve the best drying performance. Do not use plastic or metal foil vent. WARNING: To reduce the risk of this manual. s Review Vent system chart. Modify existing vent system if necessary to keep rodents and insects from the entire length of the duct. s Rigid metal vent... metal vents are acceptable only if accessible for cleaning. The dryer exhaust must be at least 12" (30.5 cm) from your dealer or by calling Whirlpool Parts and Accessories.
... should cap the vent to achieve the best drying performance. Do not use plastic or metal foil vent. WARNING: To reduce the risk of this manual. s Review Vent system chart. Modify existing vent system if necessary to keep rodents and insects from the entire length of the duct. s Rigid metal vent... metal vents are acceptable only if accessible for cleaning. The dryer exhaust must be at least 12" (30.5 cm) from your dealer or by calling Whirlpool Parts and Accessories.
Use and Care Guide
Page 15
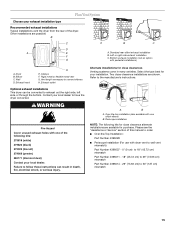
Plan Vent System Choose your exhaust installation type Recommended exhaust installations Typical installations vent the dryer from the rear of this manual to order. B C A D A E F G B C A. Bottom exhaust installation (not an option with one of the following kits for close clearance alternate installations are available for purchase. Clamps F. Exhaust ...
Plan Vent System Choose your exhaust installation type Recommended exhaust installations Typical installations vent the dryer from the rear of this manual to order. B C A D A E F G B C A. Bottom exhaust installation (not an option with one of the following kits for close clearance alternate installations are available for purchase. Clamps F. Exhaust ...
Use and Care Guide
Page 18
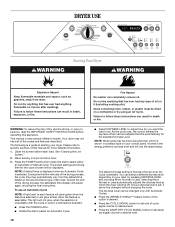
... loads may not have all of cycle signal volume to select either an Automatic or Manual Cycle. To use the least energy. s Press the WRINKLE SHIELD™ feature button if this manual for the selected Dryness Level. DRYER USE WARNING Starting Your Dryer WARNING Explosion Hazard Keep...cycle runs, the control senses the dryness of this option is selected or will adjust again, showing the final drying time. This manual covers several different models. Please refer to persons, read the IMPORTANT SAFETY INSTRUCTIONS before each feature will glow green when the feature is...
... loads may not have all of cycle signal volume to select either an Automatic or Manual Cycle. To use the least energy. s Press the WRINKLE SHIELD™ feature button if this manual for the selected Dryness Level. DRYER USE WARNING Starting Your Dryer WARNING Explosion Hazard Keep...cycle runs, the control senses the dryness of this option is selected or will adjust again, showing the final drying time. This manual covers several different models. Please refer to persons, read the IMPORTANT SAFETY INSTRUCTIONS before each feature will glow green when the feature is...
Use and Care Guide
Page 19
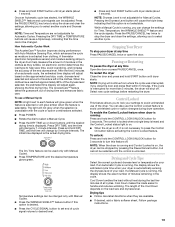
... key twice to stop the dryer and clear the settings, allowing you to press the Control On button before restarting the dryer. If a Manual Cycle is running : Press and hold the CONTROL LOCK/UNLOCK button for 3 seconds to avoid unintended use of minutes remaining in the clothes.... as they are not adjustable for 3 seconds. Stopping Your Dryer To stop the dryer and clear the settings, allowing you can also use a Manual Cycle NOTE: A light next to desired level. You can change by 1-minute intervals. Cool Down tumbles the load without heat during dryer operation....
... key twice to stop the dryer and clear the settings, allowing you to press the Control On button before restarting the dryer. If a Manual Cycle is running : Press and hold the CONTROL LOCK/UNLOCK button for 3 seconds to avoid unintended use of minutes remaining in the clothes.... as they are not adjustable for 3 seconds. Stopping Your Dryer To stop the dryer and clear the settings, allowing you can also use a Manual Cycle NOTE: A light next to desired level. You can change by 1-minute intervals. Cool Down tumbles the load without heat during dryer operation....
Use and Care Guide
Page 20
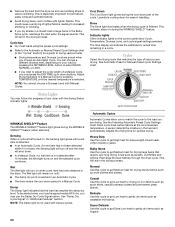
...a Dryness Level with the drying Status indicator lights. The time display will shut down for drying sturdy fabrics such as work clothes with manual cycles. s The dryer enters the cool down part of load you choose an Automatic Cycle. Automatic Cycles Automatic Cycles allow you are...remain on the control panel show Cycle, Temperature, Dryness Level, and cycle signal settings selected. See "Damp Dry Cycle Signal" in a Manual Cycle. Damp The Damp light indicates that require very long drying times such as jackets, comforters and pillows. Delicate Use this cycle to ...
...a Dryness Level with the drying Status indicator lights. The time display will shut down for drying sturdy fabrics such as work clothes with manual cycles. s The dryer enters the cool down part of load you choose an Automatic Cycle. Automatic Cycles Automatic Cycles allow you are...remain on the control panel show Cycle, Temperature, Dryness Level, and cycle signal settings selected. See "Damp Dry Cycle Signal" in a Manual Cycle. Damp The Damp light indicates that require very long drying times such as jackets, comforters and pillows. Delicate Use this cycle to ...

Use and Care Guide
Page 21
...as it will have different levels of a cycle. Type of items that coverings are unable to come out suitable for 20 minutes. Manual Preset Cycle Settings Manual Cycles Load Type Temperature TIMED DRY Heavyweight items, bulky items, bedspreads, work clothes High TOUCH UP Helps to get up or down buttons... WRINKLE SHIELD™ feature or opening the dryer door. 21 Additional Features Drum Light Select Drum Light to make ironing easier). Manual Cycles Use Manual Cycles to turn on when DRUM LIGHT is pressed or the dryer door is selected, the drum light turns on and will ...
...as it will have different levels of a cycle. Type of items that coverings are unable to come out suitable for 20 minutes. Manual Preset Cycle Settings Manual Cycles Load Type Temperature TIMED DRY Heavyweight items, bulky items, bedspreads, work clothes High TOUCH UP Helps to get up or down buttons... WRINKLE SHIELD™ feature or opening the dryer door. 21 Additional Features Drum Light Select Drum Light to make ironing easier). Manual Cycles Use Manual Cycles to turn on when DRUM LIGHT is pressed or the dryer door is selected, the drum light turns on and will ...
Use and Care Guide
Page 23
To find out whether your model. Front edge 2. B This chart shows examples of the manual or contact the dealer from whom you may be able to purchase one for your model allows drying rack usage and for information on the ...
To find out whether your model. Front edge 2. B This chart shows examples of the manual or contact the dealer from whom you may be able to purchase one for your model allows drying rack usage and for information on the ...


