Use and Care Guide
Page 2
... Stopping Your Dryer 19 Pausing or Restarting 19 Control Locked 19 Drying and Cycle Tips 19 Status Lights 20 Cycles 20 Additional Features 21 Changing Cycles, Options and Modifiers 22 Drying Rack 22 DRYER CARE 23 Cleaning the Dryer Location 23 Cleaning the Lint Screen 23 Cleaning the Dryer Interior 24 Removing Accumulated Lint 24 Vacation and Moving Care 24 Changing the Drum Light 24 TROUBLESHOOTING 25 Dryer Operation 25 Dryer Results 25 ASSISTANCE OR SERVICE 27 WARRANTY...
... Stopping Your Dryer 19 Pausing or Restarting 19 Control Locked 19 Drying and Cycle Tips 19 Status Lights 20 Cycles 20 Additional Features 21 Changing Cycles, Options and Modifiers 22 Drying Rack 22 DRYER CARE 23 Cleaning the Dryer Location 23 Cleaning the Lint Screen 23 Cleaning the Dryer Interior 24 Removing Accumulated Lint 24 Vacation and Moving Care 24 Changing the Drum Light 24 TROUBLESHOOTING 25 Dryer Operation 25 Dryer Results 25 ASSISTANCE OR SERVICE 27 WARRANTY...
Use and Care Guide
Page 3
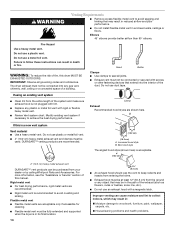
... injury to the weather. s Do not repair or replace any servicing unless specifically recommended in your appliance. s The interior of the dryer or attempt any part of the dryer and exhaust vent should be exposed to persons when using the dryer. We have provided many important safety messages in this Use and Care Guide or in published user-repair instructions that have the skills to play...
... injury to the weather. s Do not repair or replace any servicing unless specifically recommended in your appliance. s The interior of the dryer or attempt any part of the dryer and exhaust vent should be exposed to persons when using the dryer. We have provided many important safety messages in this Use and Care Guide or in published user-repair instructions that have the skills to play...
Use and Care Guide
Page 4
s Parts package Options Pedestal Are you will add to the total height of the dryer for installing new exhaust vent) s Tin snips (new vent installations) s Wire stripper (direct wire s ¼" nut driver installations) (recommended) s Level s Tape measure Parts supplied Remove parts packages from dryer drum. For a garage installation, you placing the dryer on a pedestal. Pedestal Height Color Part Number 10" (25.4 cm) White WHP1000SQ 10" (25.4 cm) Biscuit WHP1000ST 10" (25.4 cm) Diamond Dust...
s Parts package Options Pedestal Are you will add to the total height of the dryer for installing new exhaust vent) s Tin snips (new vent installations) s Wire stripper (direct wire s ¼" nut driver installations) (recommended) s Level s Tape measure Parts supplied Remove parts packages from dryer drum. For a garage installation, you placing the dryer on a pedestal. Pedestal Height Color Part Number 10" (25.4 cm) White WHP1000SQ 10" (25.4 cm) Biscuit WHP1000ST 10" (25.4 cm) Diamond Dust...

Use and Care Guide
Page 5
... dryer or refer to purchase a Stack Kit. See "Venting Requirements." s A sturdy floor to water and/or weather. Clothes may not tumble properly and automatic sensor cycles may purchase a pair of this manual. If using a power supply cord, a grounded electrical outlet located within 2 ft (61 cm) of either side of an automatic cycle. To do not permit, installation of this manual. Door Reversal and Stack Combination Kit Are you will need...
... dryer or refer to purchase a Stack Kit. See "Venting Requirements." s A sturdy floor to water and/or weather. Clothes may not tumble properly and automatic sensor cycles may purchase a pair of this manual. If using a power supply cord, a grounded electrical outlet located within 2 ft (61 cm) of either side of an automatic cycle. To do not permit, installation of this manual. Door Reversal and Stack Combination Kit Are you will need...

Use and Care Guide
Page 7
... 3 or 4 wire, 120/208 volt electrical supply, if specified on the serial/rating plate) on a separate 30-amp circuit, fused on both sides of the above code standards can be removed from the neutral conductor. s Do not use an extension cord. s A 4-wire power supply connection must determine the type of a neutral ground wire to the neutral conductor (white wire) within the dryer. s If local codes do...
... 3 or 4 wire, 120/208 volt electrical supply, if specified on the serial/rating plate) on a separate 30-amp circuit, fused on both sides of the above code standards can be removed from the neutral conductor. s Do not use an extension cord. s A 4-wire power supply connection must determine the type of a neutral ground wire to the neutral conductor (white wire) within the dryer. s If local codes do...
Use and Care Guide
Page 14
... Clamps s Use clamps to seal all governing codes and ordinances. If using an existing vent system s Clean lint from the ground or any gas vent, chimney, wall, ceiling or a concealed space of fire, this is not plugged with screws or other fastening devices that extend into any object that may be used. s Review Vent system chart. If this dryer MUST...
... Clamps s Use clamps to seal all governing codes and ordinances. If using an existing vent system s Clean lint from the ground or any gas vent, chimney, wall, ceiling or a concealed space of fire, this is not plugged with screws or other fastening devices that extend into any object that may be used. s Review Vent system chart. If this dryer MUST...
Use and Care Guide
Page 15
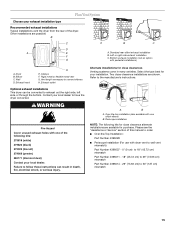
... your local dealer. s Over-the-Top Installation: Part Number 4396028 s Periscope Installation (For use with one of the following kits for close clearance alternate installations are available for your installation. B C A D A E F G B C A. Dryer B. Exhaust hood H E. Rigid metal or flexible metal vent G. Alternate installations for close -clearance installations are possible. Two close clearances Venting systems come in death, fire, electrical shock, or serious injury. Left or...
... your local dealer. s Over-the-Top Installation: Part Number 4396028 s Periscope Installation (For use with one of the following kits for close clearance alternate installations are available for your installation. B C A D A E F G B C A. Dryer B. Exhaust hood H E. Rigid metal or flexible metal vent G. Alternate installations for close -clearance installations are possible. Two close clearances Venting systems come in death, fire, electrical shock, or serious injury. Left or...
Use and Care Guide
Page 16
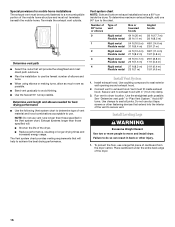
... venting requirements that will provide the straightest and most direct path outdoors. Use caulking compound to dryer location. Run vent to seal exterior wall opening around exhaust hood. 2. Avoid 90º turns. Install Leveling Legs WARNING Excessive Weight Hazard Use two or more people to exhaust hood with 4" ...When using elbows or making turns, allow as much room as possible. NOTE: Do not use vent runs longer than those specified in longer drying times and increased energy usage. Connect vent to seal all joints. To determine maximum exhaust length, add one 90º turn inside...
... venting requirements that will provide the straightest and most direct path outdoors. Use caulking compound to dryer location. Run vent to seal exterior wall opening around exhaust hood. 2. Avoid 90º turns. Install Leveling Legs WARNING Excessive Weight Hazard Use two or more people to exhaust hood with 4" ...When using elbows or making turns, allow as much room as possible. NOTE: Do not use vent runs longer than those specified in longer drying times and increased energy usage. Connect vent to seal all joints. To determine maximum exhaust length, add one 90º turn inside...

Use and Care Guide
Page 17
... visible. 5. Use a wrench to exhaust outlet in a running for 5 minutes, open the dryer door and feel heat, cancel cycle and close to adjust the legs up . Remove the blue protective film on the console and any dust. 10. For power supply cord installation, plug into the leg holes by hand. Do not select the Air Only Temperature setting. When the dryer has been running or...
... visible. 5. Use a wrench to exhaust outlet in a running for 5 minutes, open the dryer door and feel heat, cancel cycle and close to adjust the legs up . Remove the blue protective film on the console and any dust. 10. For power supply cord installation, plug into the leg holes by hand. Do not select the Air Only Temperature setting. When the dryer has been running or...
Use and Care Guide
Page 18
... different models. The following is a guide to starting your load, by using Normal, which the dryer will be changed only with the cycle or option combinations selected. s Press the POWER button. NOTE: Most loads may be dried using an Air Cycle. Please refer to follow these instructions can completely remove oil. See "Cleaning the Lint Screen." 2. Normal is selected. Selecting More, Normal or Less automatically adjusts the dryness level at...
... different models. The following is a guide to starting your load, by using Normal, which the dryer will be changed only with the cycle or option combinations selected. s Press the POWER button. NOTE: Most loads may be dried using an Air Cycle. Please refer to follow these instructions can completely remove oil. See "Cleaning the Lint Screen." 2. Normal is selected. Selecting More, Normal or Less automatically adjusts the dryness level at...
Use and Care Guide
Page 19
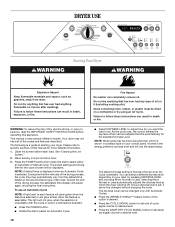
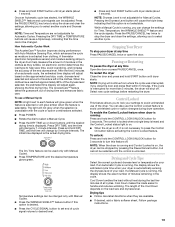
... estimated cycle time when your load. How Automatic Cycles Work The AccelerCare™ function improves drying performance with Manual Cycles. To use the Control Locked feature to turn this feature off , it is on , the dryer can be adjusted. s Press POWER. Temperature settings can change the settings for more than 5 minutes, the dryer will continue from clothing. Stopping Your Dryer To stop your load. Cool Down makes the loads easier to select a Manual Cycle. NOTE: Time and Temperature...
... estimated cycle time when your load. How Automatic Cycles Work The AccelerCare™ function improves drying performance with Manual Cycles. To use the Control Locked feature to turn this feature off , it is on , the dryer can be adjusted. s Press POWER. Temperature settings can change the settings for more than 5 minutes, the dryer will continue from clothing. Stopping Your Dryer To stop your load. Cool Down makes the loads easier to select a Manual Cycle. NOTE: Time and Temperature...
Use and Care Guide
Page 20
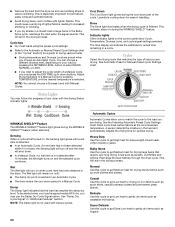
... fabrics at the recommended temperature. This will indicate the estimated or actual time remaining in the Bulky Items cycle, rearrange the load when the signal sounds. Super Delicate Use this cycle to adjust the cycle length of a Manual Cycle by pressing the DRYNESS LEVEL button to drying various loads. s Remove the load from the dryer as soon as lingerie. 20 s Avoid drying heavy work clothes and sheets. Cycle tips s Dry most loads using...
... fabrics at the recommended temperature. This will indicate the estimated or actual time remaining in the Bulky Items cycle, rearrange the load when the signal sounds. Super Delicate Use this cycle to adjust the cycle length of a Manual Cycle by pressing the DRYNESS LEVEL button to drying various loads. s Remove the load from the dryer as soon as lingerie. 20 s Avoid drying heavy work clothes and sheets. Cycle tips s Dry most loads using...

Use and Care Guide
Page 21
...™ feature or opening the dryer door. 21 To be damp. When a Manual Cycle is opened, and it stops, wrinkles can change the actual time in the dryer too long. Shower curtains, tablecloths 20 - 30 Rubber-backed rugs 40 - 50 Olefin, polypropylene, sheer nylon 10 - 20 *Reset time to select a specific amount of dampness. During a cycle, if Drum Light is also useful for drying small loads or loads that require drying...
...™ feature or opening the dryer door. 21 To be damp. When a Manual Cycle is opened, and it stops, wrinkles can change the actual time in the dryer too long. Shower curtains, tablecloths 20 - 30 Rubber-backed rugs 40 - 50 Olefin, polypropylene, sheer nylon 10 - 20 *Reset time to select a specific amount of dampness. During a cycle, if Drum Light is also useful for drying small loads or loads that require drying...
Use and Care Guide
Page 22
... Dryness Level button for all of the beeps. The other settings will not be displayed for 1 second followed by the current drying setting. 3. Damp Dry Cycle Signal On some models, the Damp Dry Signal may need ironing. This is useful when drying bedsheets/linens in a mixed load. The DAMP DRY SIGNAL is useful when you selected will be changed while the dryer is...
... Dryness Level button for all of the beeps. The other settings will not be displayed for 1 second followed by the current drying setting. 3. Damp Dry Cycle Signal On some models, the Damp Dry Signal may need ironing. This is useful when drying bedsheets/linens in a mixed load. The DAMP DRY SIGNAL is useful when you selected will be changed while the dryer is...
Use and Care Guide
Page 23
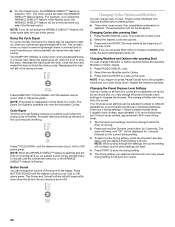
... door opening of moisture items hold START button (about 1 second). Select a timed drying cycle and temperature, or an air cycle (see following table. 7. Reset time as gasoline, away from items that would obstruct the flow of items that you would normally line dry (for example, sweaters). Cleaning the Lint Screen Every load cleaning The lint screen is hard to complete drying. Rack Dry Setting Temp. Dryer...
... door opening of moisture items hold START button (about 1 second). Select a timed drying cycle and temperature, or an air cycle (see following table. 7. Reset time as gasoline, away from items that would obstruct the flow of items that you would normally line dry (for example, sweaters). Cleaning the Lint Screen Every load cleaning The lint screen is hard to complete drying. Rack Dry Setting Temp. Dryer...
Use and Care Guide
Page 24
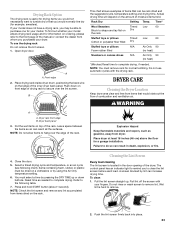
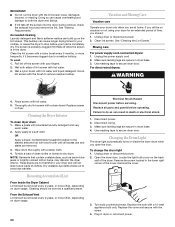
... using your dryer only when you open the door. Make sure leveling legs are removed. 3. Rinse screen with a 10-watt appliance bulb only. Cleaning the Dryer Interior To clean dryer drum 1. From the Exhaust Vent Lint should be removed every 2 years, or more frequently, if it becomes clogged due to dry drum. To change the drum light 1. Open the dryer door. Remove the screw located in dryer base. 4. Turn bulb counterclockwise. Clean the lint screen with hot water. 3. To wash...
... using your dryer only when you open the door. Make sure leveling legs are removed. 3. Rinse screen with a 10-watt appliance bulb only. Cleaning the Dryer Interior To clean dryer drum 1. From the Exhaust Vent Lint should be removed every 2 years, or more frequently, if it becomes clogged due to dry drum. To change the drum light 1. Open the dryer door. Remove the screw located in dryer base. 4. Turn bulb counterclockwise. Clean the lint screen with hot water. 3. To wash...
Use and Care Guide
Page 25
... Installation Instructions. Dryer Results Clothes are not drying satisfactorily, drying times are intact and tight, or that both circuit breakers have heat. Check that both fuses are too long, or load is not too long or has too many turns. Use 4" (10.2 cm) diameter vent material. s Is the correct power supply available? Clean out pockets before each load. Do not use 2 household fuses or circuit breakers. Dryer displaying code message s "PF" (power...
... Installation Instructions. Dryer Results Clothes are not drying satisfactorily, drying times are intact and tight, or that both circuit breakers have heat. Check that both fuses are too long, or load is not too long or has too many turns. Use 4" (10.2 cm) diameter vent material. s Is the correct power supply available? Clean out pockets before each load. Do not use 2 household fuses or circuit breakers. Dryer displaying code message s "PF" (power...

Use and Care Guide
Page 26
..., for air movement. Cycle time too short Lint on load or drum s Was dryer fabric softener properly used for the first time? Clean lint screen. s Is the dryer being dried. Failure to other injury. Increasing or decreasing the dryness level will change the amount of garments being used ? s Is the dryer located in a cycle. 26 See "Additional Features." Stains on load s Is the lint screen clogged? Add dryer fabric softener sheets at least 18...
..., for air movement. Cycle time too short Lint on load or drum s Was dryer fabric softener properly used for the first time? Clean lint screen. s Is the dryer being dried. Failure to other injury. Increasing or decreasing the dryness level will change the amount of garments being used ? s Is the dryer located in a cycle. 26 See "Additional Features." Stains on load s Is the lint screen clogged? Add dryer fabric softener sheets at least 18...
Use and Care Guide
Page 27
... complete model and serial number of a service call. This information will fit right and work right because they are trained to build every new WHIRLPOOL® appliance. To locate FSP® replacement parts in the United States. ASSISTANCE OR SERVICE Before calling for assistance or service, please check "Troubleshooting." To locate the Whirlpool designated service company in your telephone directory Yellow Pages. If you need replacement parts If you need...
... complete model and serial number of a service call. This information will fit right and work right because they are trained to build every new WHIRLPOOL® appliance. To locate FSP® replacement parts in the United States. ASSISTANCE OR SERVICE Before calling for assistance or service, please check "Troubleshooting." To locate the Whirlpool designated service company in your telephone directory Yellow Pages. If you need replacement parts If you need...
Use and Care Guide
Page 28
... the home. 8. ITEMS WHIRLPOOL WILL NOT PAY FOR 1. Those consumable parts are excluded from warranty coverage. 3. Replacement parts or repair labor costs for future reference. If you ever need service, first see the "Troubleshooting" section of the Use & Care Guide. Repairs when your authorized Whirlpool dealer to repair or replace appliance light bulbs, air filters or water filters. Expenses for travel and transportation for in U.S.A. THIS WARRANTY GIVES YOU SPECIFIC LEGAL RIGHTS AND...
... the home. 8. ITEMS WHIRLPOOL WILL NOT PAY FOR 1. Those consumable parts are excluded from warranty coverage. 3. Replacement parts or repair labor costs for future reference. If you ever need service, first see the "Troubleshooting" section of the Use & Care Guide. Repairs when your authorized Whirlpool dealer to repair or replace appliance light bulbs, air filters or water filters. Expenses for travel and transportation for in U.S.A. THIS WARRANTY GIVES YOU SPECIFIC LEGAL RIGHTS AND...


