Use and Care Guide
Page 2
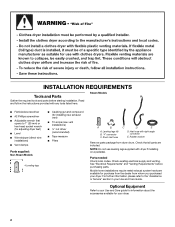
.... All safety messages will tell you what can kill or hurt you how to potential hazards that can happen if the instructions are very important. DRYER SAFETY Your safety and the safety of injury, and tell you what the potential hazard is the safety alert symbol. These words mean: DANGER You...
.... All safety messages will tell you what can kill or hurt you how to potential hazards that can happen if the instructions are very important. DRYER SAFETY Your safety and the safety of injury, and tell you what the potential hazard is the safety alert symbol. These words mean: DANGER You...

Use and Care Guide
Page 3
... with local codes, or in the absence of all occupants. • Immediately call the fire department. - do if you cannot reach your gas supplier. The dryer must be followed to minimize the risk of local codes, with the National Fuel Gas Code, ANSI Z223.1/NFPA 54. WHAT TO DO IF YOU..., ANSI/NFPA 70. Follow the gas supplier's instructions. • If you smell gas" instructions. 3 Installation and service must be electrically grounded in accordance with local codes, or in the vicinity of this manual must be detected by smell. For more information, contact your gas supplier, ...
... with local codes, or in the absence of all occupants. • Immediately call the fire department. - do if you cannot reach your gas supplier. The dryer must be followed to minimize the risk of local codes, with the National Fuel Gas Code, ANSI Z223.1/NFPA 54. WHAT TO DO IF YOU..., ANSI/NFPA 70. Follow the gas supplier's instructions. • If you smell gas" instructions. 3 Installation and service must be electrically grounded in accordance with local codes, or in the vicinity of this manual must be detected by smell. For more information, contact your gas supplier, ...
Use and Care Guide
Page 4
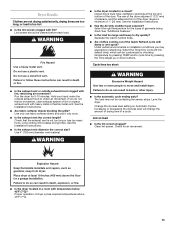
... cooking oils). Fire Hazard No washer can result in death or fire. Failure to follow these instructions can completely remove oil. Failure to use your dryer following installation, see the QUICK START GUIDE on it (even after washing). Do not dry anything flammable on a clothesline or by using an Air Cycle... ever had anything that has ever had any type of how to follow these instructions can result in death, explosion, or fire. QUICK START GUIDE/DRYER USE WARNING WARNING Explosion Hazard Keep flammable materials and vapors, such as gasoline, away from...
... cooking oils). Fire Hazard No washer can result in death or fire. Failure to follow these instructions can completely remove oil. Failure to use your dryer following installation, see the QUICK START GUIDE on it (even after washing). Do not dry anything flammable on a clothesline or by using an Air Cycle... ever had anything that has ever had any type of how to follow these instructions can result in death, explosion, or fire. QUICK START GUIDE/DRYER USE WARNING WARNING Explosion Hazard Keep flammable materials and vapors, such as gasoline, away from...
Use and Care Guide
Page 5
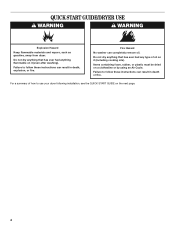
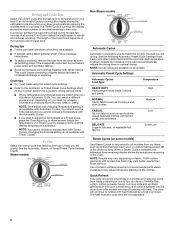
... more details on some models) - Use this cycle to desired Automatic Cycle. 3. Press TEMP until the desired temperature illuminates. Your dryer may not have all of this appliance. AUTOMATIC CYCLES Automatic Cycles match the cycle setting to persons, read the IMPORTANT SAFETY INSTRUCTIONS before...Press POWER. 2. NOTE: Dryness selections can change the settings for Time, Temp, the WRINKLE SHIELD™ feature, and End of fire, electric shock, or injury to the type of load, and adjust Dryness Level for more detailed information. Press and Hold START. Press TEMP until the...
... more details on some models) - Use this cycle to desired Automatic Cycle. 3. Press TEMP until the desired temperature illuminates. Your dryer may not have all of this appliance. AUTOMATIC CYCLES Automatic Cycles match the cycle setting to persons, read the IMPORTANT SAFETY INSTRUCTIONS before...Press POWER. 2. NOTE: Dryness selections can change the settings for Time, Temp, the WRINKLE SHIELD™ feature, and End of fire, electric shock, or injury to the type of load, and adjust Dryness Level for more detailed information. Press and Hold START. Press TEMP until the...
Use and Care Guide
Page 6
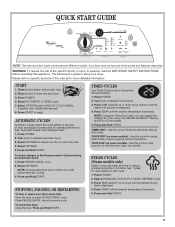
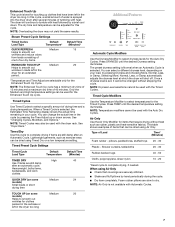
...Time Adjust up or down . NOTE: Time adjust and changing Temperature setting is best for smoothing out wrinkles and reducing odors from the dryer as soon as sports shirts, casual business clothes, permanent press, and synthetics DELICATE Lingerie, blouses, or washable knit fabrics Extra-Low ... when you cannot choose a Temperature with heat. When a Steam Cycle is running , the display shows the estimated cycle time when your dryer is selected. Quick Refresh This cycle is not available with Timed Cycles. You can select a different dryness level, depending on some models)...
...Time Adjust up or down . NOTE: Time adjust and changing Temperature setting is best for smoothing out wrinkles and reducing odors from the dryer as soon as sports shirts, casual business clothes, permanent press, and synthetics DELICATE Lingerie, blouses, or washable knit fabrics Extra-Low ... when you cannot choose a Temperature with heat. When a Steam Cycle is running , the display shows the estimated cycle time when your dryer is selected. Quick Refresh This cycle is not available with Timed Cycles. You can select a different dryness level, depending on some models)...
Use and Care Guide
Page 7
...Auto Dry Cycles. Foam rubber pillows are still damp after an Automatic Cycle. NOTE: Air Only is not available with the dryer rack. The dryer will shut off. Steam Preset Cycle Settings Timed Cycles Load Type QUICK REFRESH Helps to smooth out wrinkles in loads left in...*Temperature and Time Adjust are still damp after several minutes of drying time and a drying temperature. When a Timed Cycle is sprayed into the dryer drum after an automatic cycle. NOTE: Timed Cycles may not yield the same results. Once a dryness level is selected. NOTE: Temperature modifiers...
...Auto Dry Cycles. Foam rubber pillows are still damp after an Automatic Cycle. NOTE: Air Only is not available with the dryer rack. The dryer will shut off. Steam Preset Cycle Settings Timed Cycles Load Type QUICK REFRESH Helps to smooth out wrinkles in loads left in...*Temperature and Time Adjust are still damp after several minutes of drying time and a drying temperature. When a Timed Cycle is sprayed into the dryer drum after an automatic cycle. NOTE: Timed Cycles may not yield the same results. Once a dryness level is selected. NOTE: Temperature modifiers...

Use and Care Guide
Page 8
...if selected. NOTE: If you that may need ironing. Promptly removing clothes at any time by pressing WRINKLE SHIELD™ setting or opening the dryer door. ■ For the Perm Press/Casual Cycle, the WRINKLE SHIELD™ setting is useful when drying bedsheets/linens in handling. Press END...removed, or the WRINKLE SHIELD™ setting ends. WRINKLE SHIELD™ Setting The WRINKLE SHIELD™ setting light illuminates when this option, the dryer stops tumbling and then tumbles again for ease in a mixed load. During a cycle, if Drum Light is selected, the drum light turns on...
...if selected. NOTE: If you that may need ironing. Promptly removing clothes at any time by pressing WRINKLE SHIELD™ setting or opening the dryer door. ■ For the Perm Press/Casual Cycle, the WRINKLE SHIELD™ setting is useful when drying bedsheets/linens in handling. Press END...removed, or the WRINKLE SHIELD™ setting ends. WRINKLE SHIELD™ Setting The WRINKLE SHIELD™ setting light illuminates when this option, the dryer stops tumbling and then tumbles again for ease in a mixed load. During a cycle, if Drum Light is selected, the drum light turns on...
Use and Care Guide
Page 9
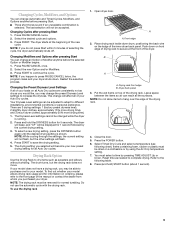
... to complete drying. Restart the selection process. The Dryness Level settings cannot be accepted. Refer to secure at the beginning of the inner dryer back panel. Changing Modifiers and Options after pressing Start 1. This change will flash. 4. If your model does not have a drying rack..., you selected will not be changed while the dryer is running. 2. Press the POWER button. 6. Changing Cycles, Modifiers, and Options You can change Automatic and Timed Cycles, Modifiers, and ...
... to complete drying. Restart the selection process. The Dryness Level settings cannot be accepted. Refer to secure at the beginning of the inner dryer back panel. Changing Modifiers and Options after pressing Start 1. This change will flash. 4. If your model does not have a drying rack..., you selected will not be changed while the dryer is running. 2. Press the POWER button. 6. Changing Cycles, Modifiers, and Options You can change Automatic and Timed Cycles, Modifiers, and ...
Use and Care Guide
Page 10
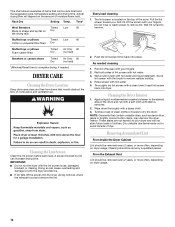
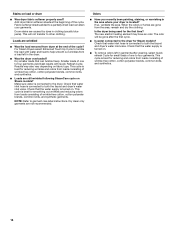
... or canvas shoes Timed Dry Air Only 90 (no heat) *(Minutes) Reset time to complete drying, if needed cleaning 1. DRYER CARE Cleaning the Dryer Location Keep dryer area clear and free from items that contain unstable dyes, such as denim blue jeans or brightly colored cotton items, may discolor...falls off screen with your fingers. Insert lint screen back into place. Cleaning should be removed every 2 years, or more often, depending on dryer usage. Doing so can increase drying time. Rinse screen with a damp cloth. 3. From the Exhaust Vent Lint should be rack dried and ...
... or canvas shoes Timed Dry Air Only 90 (no heat) *(Minutes) Reset time to complete drying, if needed cleaning 1. DRYER CARE Cleaning the Dryer Location Keep dryer area clear and free from items that contain unstable dyes, such as denim blue jeans or brightly colored cotton items, may discolor...falls off screen with your fingers. Insert lint screen back into place. Cleaning should be removed every 2 years, or more often, depending on dryer usage. Doing so can increase drying time. Rinse screen with a damp cloth. 3. From the Exhaust Vent Lint should be rack dried and ...
Use and Care Guide
Page 11
... hose from faucet, then drain the hose. Use masking tape to secure dryer door. Periodically inspect and replace inlet hoses if bulges, kinks, cuts, wear, or leaks are secure in death or electrical shock. 1. Disconnect water inlet hose from faucet and drain. Plug in... gas supply line. 3. Unplug dryer or disconnect power. 2. Remove the screw located in dryer or reconnect power. 11 Remove the cover. Electrical Shock Hazard Disconnect power before operating. Disconnect...
... hose from faucet, then drain the hose. Use masking tape to secure dryer door. Periodically inspect and replace inlet hoses if bulges, kinks, cuts, wear, or leaks are secure in death or electrical shock. 1. Disconnect water inlet hose from faucet and drain. Plug in... gas supply line. 3. Unplug dryer or disconnect power. 2. Remove the screw located in dryer or reconnect power. 11 Remove the cover. Electrical Shock Hazard Disconnect power before operating. Disconnect...
Use and Care Guide
Page 12
... number of the drum for 2-5 seconds. ■ Has a household fuse blown, or has a circuit breaker tripped? Replace the fuse or reset the circuit breaker. Electric dryers require 240-volt power supply. The drum may be 2 household fuses or circuit breakers for the type of vent you may be a thumping sound during... any key to clear the code from the display and return to the estimated time remaining. In Canada www.whirlpool.ca Dryer Operation Dryer will turn, but there may be turning, but you are intact and tight, or that both fuses are using. There may not have not tripped...
... number of the drum for 2-5 seconds. ■ Has a household fuse blown, or has a circuit breaker tripped? Replace the fuse or reset the circuit breaker. Electric dryers require 240-volt power supply. The drum may be 2 household fuses or circuit breakers for the type of vent you may be a thumping sound during... any key to clear the code from the display and return to the estimated time remaining. In Canada www.whirlpool.ca Dryer Operation Dryer will turn, but there may be turning, but you are intact and tight, or that both fuses are using. There may not have not tripped...
Use and Care Guide
Page 13
...dried. See the Installation Instructions. ■ Are fabric softener sheets blocking the grille? Use 4" (102 mm) diameter vent material. ■ Is the dryer located in a room with damp or wet spots? default time), which can be cleaned before each load. Lint on Automatic Cycles. Proper operation of ...you do so can result in a cycle. The load may expereince underdrying. Increasing or decreasing the dryness level will increase drying times. Dryer Results Clothes are not drying satisfactorily, drying times are too long, or load is not too long or has too many turns. Failure...
...dried. See the Installation Instructions. ■ Are fabric softener sheets blocking the grille? Use 4" (102 mm) diameter vent material. ■ Is the dryer located in a room with damp or wet spots? default time), which can be cleaned before each load. Lint on Automatic Cycles. Proper operation of ...you do so can result in a cycle. The load may expereince underdrying. Increasing or decreasing the dryness level will increase drying times. Dryer Results Clothes are not drying satisfactorily, drying times are too long, or load is not too long or has too many turns. Failure...
Use and Care Guide
Page 14
.... Check that can stain your dryer is located? Add dryer fabric softener sheets at the end of wrinkle-free cotton, cotton polyester blends, common knits, and synthetics. ■ Loads are not recommended. This cycle is turned on . The new electric heating element may also vary depending... on load or drum ■ Was dryer fabric softener properly used for reducing and odors from a load left in clothing (usually blue jeans). Loads...
.... Check that can stain your dryer is located? Add dryer fabric softener sheets at the end of wrinkle-free cotton, cotton polyester blends, common knits, and synthetics. ■ Loads are not recommended. This cycle is turned on . The new electric heating element may also vary depending... on load or drum ■ Was dryer fabric softener properly used for reducing and odors from a load left in clothing (usually blue jeans). Loads...
Installation Instructions
Page 1
...and on your appliance. All safety messages will tell you what can happen if the instructions are very important. ELECTRIC DRYER INSTALLATION INSTRUCTIONS U.S.A. All safety messages will follow the safety alert symbol and either the word "DANGER" or "... estas instrucciones en español, visite www.Whirlpool.com TABLE OF CONTENTS TABLE OF CONTENTS 1 DRYER SAFETY 1 INSTALLATION REQUIREMENTS 2 Tools and Parts 2 Optional Equipment 2 Location Requirements 3 ELECTRIC DRYER POWER HOOKUP 4 Electrical Requirements 4 Electrical Connection 5 VENTING 10 Venting Requirements 10 Plan Vent...
...and on your appliance. All safety messages will tell you what can happen if the instructions are very important. ELECTRIC DRYER INSTALLATION INSTRUCTIONS U.S.A. All safety messages will follow the safety alert symbol and either the word "DANGER" or "... estas instrucciones en español, visite www.Whirlpool.com TABLE OF CONTENTS TABLE OF CONTENTS 1 DRYER SAFETY 1 INSTALLATION REQUIREMENTS 2 Tools and Parts 2 Optional Equipment 2 Location Requirements 3 ELECTRIC DRYER POWER HOOKUP 4 Electrical Requirements 4 Electrical Connection 5 VENTING 10 Venting Requirements 10 Plan Vent...
Installation Instructions
Page 2
... Parts supplied: Non-Steam Models ■ Caulking gun and compound (for your dryer. Leveling legs (4) B. Inlet hose with dryer if installing on a pedestal. Steam Models ■ Flat-blade screwdriver ■... #2 Phillips screwdriver ■ Adjustable wrench that all parts are included. Check that opens to the "Assistance or Service" section in your Use and Care Guide. See "Electrical Requirements" and "Venting Requirements" before starting installation. Check existing electrical...
... Parts supplied: Non-Steam Models ■ Caulking gun and compound (for your dryer. Leveling legs (4) B. Inlet hose with dryer if installing on a pedestal. Steam Models ■ Flat-blade screwdriver ■... #2 Phillips screwdriver ■ Adjustable wrench that all parts are included. Check that opens to the "Assistance or Service" section in your Use and Care Guide. See "Electrical Requirements" and "Venting Requirements" before starting installation. Check existing electrical...
Installation Instructions
Page 3
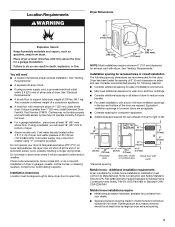
... home - See "Venting Requirements." Consider recommended spacing for following spacing dimensions are recommended for purchase from washer using a power supply cord, a grounded electrical outlet within 4 ft. (1.2 m) of dryer, and water pressure of dryer to right or left. 18"* (457 mm) 1" (25 mm) 29" (737 mm) Recessed area 14" máx.* (356 mm) 48" 2* (310 cm2...
... home - See "Venting Requirements." Consider recommended spacing for following spacing dimensions are recommended for purchase from washer using a power supply cord, a grounded electrical outlet within 4 ft. (1.2 m) of dryer, and water pressure of dryer to right or left. 18"* (457 mm) 1" (25 mm) 29" (737 mm) Recessed area 14" máx.* (356 mm) 48" 2* (310 cm2...
Installation Instructions
Page 4
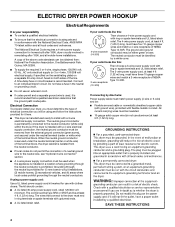
...aluminum) at least 4 ft (1.22 m) long, must determine the type of electrical connection you must have three 10-gauge copper wires and match a 3-wire receptacle of the line. Connect to the dryer must be used , it here. ■ This dryer is manufactured ready to ...listed strain relief. The wires that connect to an individual branch circuit. ELECTRIC DRYER POWER HOOKUP Electrical Requirements It is your responsibility ■ To contact a qualified electrical installer. ■ To be sure that the electrical connection is adequate and in conformance with upturned ends. ■ A ...
...aluminum) at least 4 ft (1.22 m) long, must determine the type of electrical connection you must have three 10-gauge copper wires and match a 3-wire receptacle of the line. Connect to the dryer must be used , it here. ■ This dryer is manufactured ready to ...listed strain relief. The wires that connect to an individual branch circuit. ELECTRIC DRYER POWER HOOKUP Electrical Requirements It is your responsibility ■ To contact a qualified electrical installer. ■ To be sure that the electrical connection is adequate and in conformance with upturned ends. ■ A ...
Installation Instructions
Page 5
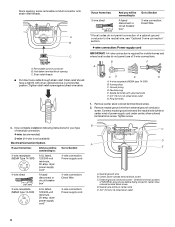
... neutral wire (white or center wire) to center terminal (silver). Clamp section D. Strain relief should have a tight fit with the dryer cabinet and be connected to do so can result in a horizontal position. Terminal block cover B. Hold-down screw and terminal block cover.... Center, silver-colored terminal block screw E. Neutral ground wire F. Disconnect power before making electrical connections. Connect neutral wire (white or center wire) to center terminal (silver). Strain relief tab pointing up and the other is inside...
... neutral wire (white or center wire) to center terminal (silver). Clamp section D. Strain relief should have a tight fit with the dryer cabinet and be connected to do so can result in a horizontal position. Terminal block cover B. Hold-down screw and terminal block cover.... Center, silver-colored terminal block screw E. Neutral ground wire F. Disconnect power before making electrical connections. Connect neutral wire (white or center wire) to center terminal (silver). Strain relief tab pointing up and the other is inside...
Installation Instructions
Page 6
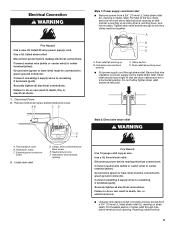
...disconnect or circuit breaker box* 4-wire connection: Direct Wire 3-wire receptacle (NEMA type 10-30R) A UL listed, 120/240-volt minimum, 30-amp, dryer power supply cord* 3-wire connection: Power supply cord B C D A E A. Neutral ground wire. Neutral wire (white or center wire) E. 3/4"...neutral wire, see "Optional 3-wire connection" section. 4-wire connection: Power supply cord IMPORTANT: A 4-wire connection is not available) Electrical Connection Options If your home has: And you will be Go to Section connecting to center silvercolored terminal block screw D. Removable conduit...
...disconnect or circuit breaker box* 4-wire connection: Direct Wire 3-wire receptacle (NEMA type 10-30R) A UL listed, 120/240-volt minimum, 30-amp, dryer power supply cord* 3-wire connection: Power supply cord B C D A E A. Neutral ground wire. Neutral wire (white or center wire) E. 3/4"...neutral wire, see "Optional 3-wire connection" section. 4-wire connection: Power supply cord IMPORTANT: A 4-wire connection is not available) Electrical Connection Options If your home has: And you will be Go to Section connecting to center silvercolored terminal block screw D. Removable conduit...
Installation Instructions
Page 7
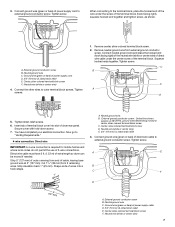
... (19 mm) UL listed strain relief E. Remove center, silver-colored terminal block screw. 2. C B D A E 5. Direct wire cable must have completed your electrical connection. B. Neutral ground wire C. Connect ground wire (green or bare) of terminal block cover into a hook shape. (251"mm) A. Connect the other wires ...or center wire) of direct wire cable under the screw of extra length so dryer can be moved if needed. Squeeze hooked ends together. Secure cover with hold-down screw. 7. You have 5 ft. (1.52 m) of the terminal block (hook facing right), squeeze hooked end ...
... (19 mm) UL listed strain relief E. Remove center, silver-colored terminal block screw. 2. C B D A E 5. Direct wire cable must have completed your electrical connection. B. Neutral ground wire C. Connect ground wire (green or bare) of terminal block cover into a hook shape. (251"mm) A. Connect the other wires ...or center wire) of direct wire cable under the screw of extra length so dryer can be moved if needed. Squeeze hooked ends together. Secure cover with hold-down screw. 7. You have 5 ft. (1.52 m) of the terminal block (hook facing right), squeeze hooked end ...


