
Owners Manual
Page 1
www.whirlpool.com Table of Contents 2 W10217293A Model MT4155 ® MICROWAVE OVEN Use & Care Guide For questions about features, operation/performance, parts, accessories or service, call: 1-800-253-1301. or visit our website at...
www.whirlpool.com Table of Contents 2 W10217293A Model MT4155 ® MICROWAVE OVEN Use & Care Guide For questions about features, operation/performance, parts, accessories or service, call: 1-800-253-1301. or visit our website at...

Owners Manual
Page 2
... 6 Turntable 6 MICROWAVE OVEN CONTROL 6 Display 6 Start 7 Jet Start Feature 7 Off 7 Clock 7 Tones 7 Timer 7 Control Lock 7 Demo Mode 7 Options 7 MICROWAVE OVEN USE 8 Food Characteristics 8 Cooking Guidelines 8 Cookware and Dinnerware 8 Aluminum Foil and Metal 9 Microwave Cooking Power 9 Manual Cooking 9 Cooking in Stages 10 Sensor Cooking 10 Sensor Popcorn 10 Sensor Cook 11 Sensor Reheat 11 Auto Defrost 12 Warm Hold 12 MICROWAVE OVEN CARE 13 General Cleaning 13 TROUBLESHOOTING 14 ASSISTANCE OR SERVICE 15 Replacement Parts 15 Built-In Kits 15 WARRANTY 16...
... 6 Turntable 6 MICROWAVE OVEN CONTROL 6 Display 6 Start 7 Jet Start Feature 7 Off 7 Clock 7 Tones 7 Timer 7 Control Lock 7 Demo Mode 7 Options 7 MICROWAVE OVEN USE 8 Food Characteristics 8 Cooking Guidelines 8 Cookware and Dinnerware 8 Aluminum Foil and Metal 9 Microwave Cooking Power 9 Manual Cooking 9 Cooking in Stages 10 Sensor Cooking 10 Sensor Popcorn 10 Sensor Cook 11 Sensor Reheat 11 Auto Defrost 12 Warm Hold 12 MICROWAVE OVEN CARE 13 General Cleaning 13 TROUBLESHOOTING 14 ASSISTANCE OR SERVICE 15 Replacement Parts 15 Built-In Kits 15 WARRANTY 16...
Owners Manual
Page 3
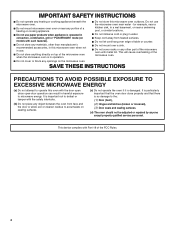
... combustible materials are placed inside the oven ignite, keep oven door closed glass jars - This is specifically designed to reduce the chance of electric shock. All safety messages will follow the specific "PRECAUTIONS TO AVOID POSSIBLE EXPOSURE TO EXCESSIVE MICROWAVE ENERGY" found in this section and in the provided Installation Instructions. ■ Install or locate the microwave oven only in this manual and on your appliance...
... combustible materials are placed inside the oven ignite, keep oven door closed glass jars - This is specifically designed to reduce the chance of electric shock. All safety messages will follow the specific "PRECAUTIONS TO AVOID POSSIBLE EXPOSURE TO EXCESSIVE MICROWAVE ENERGY" found in this section and in the provided Installation Instructions. ■ Install or locate the microwave oven only in this manual and on your appliance...
Owners Manual
Page 4
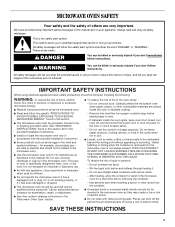
... not attempt to operate this microwave oven outdoors. IMPORTANT SAFETY INSTRUCTIONS ■ Do not operate any heating or cooking appliance beneath the microwave oven. ■ Do not mount microwave oven over a sink. ■ Do not cover racks or any other than manufacturer's recommended accessories, in this microwave oven when not in use paper products when appliance is damaged. This device complies with the door open since open-door operation can result in...
... not attempt to operate this microwave oven outdoors. IMPORTANT SAFETY INSTRUCTIONS ■ Do not operate any heating or cooking appliance beneath the microwave oven. ■ Do not mount microwave oven over a sink. ■ Do not cover racks or any other than manufacturer's recommended accessories, in this microwave oven when not in use paper products when appliance is damaged. This device complies with the door open since open-door operation can result in...

Owners Manual
Page 5
... food and utensils you place inside with a fuse or circuit breaker. NOTE: Some models can result in the "Assistance or Service" section. ■ Do not block the exhaust vents or air intake openings. or 20-amp electrical supply with a soft, damp cloth. 3. GROUNDING INSTRUCTIONS ■ For all governing codes and ordinances. Handle the microwave oven gently. The plug must be built into a wall or cabinet by providing an escape wire...
... food and utensils you place inside with a fuse or circuit breaker. NOTE: Some models can result in the "Assistance or Service" section. ■ Do not block the exhaust vents or air intake openings. or 20-amp electrical supply with a soft, damp cloth. 3. GROUNDING INSTRUCTIONS ■ For all governing codes and ordinances. Handle the microwave oven gently. The plug must be built into a wall or cabinet by providing an escape wire...
Owners Manual
Page 6
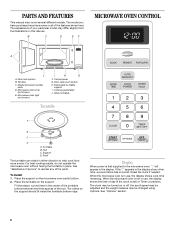
... the clock is in place. When the microwave oven is first supplied to help cook food more evenly. PARTS AND FEATURES This manual may differ slightly from the illustrations in this manual. The rollers on the support. When the microwave oven is set) or Timer countdown. Model and serial number plate D. Microwave inlet cover (not shown) E. Microwave oven light (not shown) I . Glass turntable Turntable A B C D A. For best cooking results, do not operate the microwave oven without having the turntable in use , the display...
... the clock is in place. When the microwave oven is first supplied to help cook food more evenly. PARTS AND FEATURES This manual may differ slightly from the illustrations in this manual. The rollers on the support. When the microwave oven is set) or Timer countdown. Model and serial number plate D. Microwave inlet cover (not shown) E. Microwave oven light (not shown) I . Glass turntable Turntable A B C D A. For best cooking results, do not operate the microwave oven without having the turntable in use , the display...
Owners Manual
Page 7
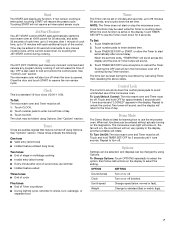
.... To Lock/Unlock Control: The microwave oven and Timer must be turned off . Touch and hold OFF for 5 seconds. When the cook function is interrupted, touching START will not resume an interrupted sensor cycle. OPTION SETTING Sound (tones) Turn on or off . 1. Jet Start Feature The JET START control (START pad) automatically starts the microwave oven at 100% power for learning how to select the option, then follow instructions on the magnetron. Clock This is...
.... To Lock/Unlock Control: The microwave oven and Timer must be turned off . Touch and hold OFF for 5 seconds. When the cook function is interrupted, touching START will not resume an interrupted sensor cycle. OPTION SETTING Sound (tones) Turn on or off . 1. Jet Start Feature The JET START control (START pad) automatically starts the microwave oven at 100% power for learning how to select the option, then follow instructions on the magnetron. Clock This is...
Owners Manual
Page 8
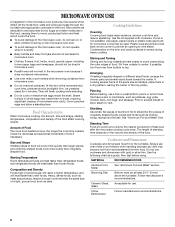
... microwave cooking, the amount, size and shape, starting temperature, composition and density of food. Use the lid supplied with gold or silver trim. If possible, turn food over from outside to burst, requiring significant cleanup of microwave oven cavity. If cooking several places to swing on the turntable. Always use . Starting Temperature Room temperature foods will heat faster than refrigerated foods, and refrigerated foods will heat faster than the same size of a light, porous food...
... microwave cooking, the amount, size and shape, starting temperature, composition and density of food. Use the lid supplied with gold or silver trim. If possible, turn food over from outside to burst, requiring significant cleanup of microwave oven cavity. If cooking several places to swing on the turntable. Always use . Starting Temperature Room temperature foods will heat faster than refrigerated foods, and refrigerated foods will heat faster than the same size of a light, porous food...
Owners Manual
Page 9
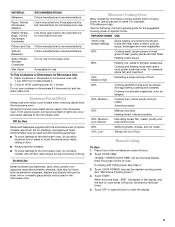
...a general guide for microwave oven use cookware or dinnerware if it . 2. See "Microwave Cooking Power." 4. Touch START. MATERIAL RECOMMENDATIONS Melamine Follow manufacturer's recommendations. Do not use . Touch COOK POWER, then set the desired cooking power. Plastic: Wraps, Bags, Covers, Dinnerware, Containers Use those approved by reminder tones. 5. Place cookware or dinnerware in the microwave oven. Cook at 100% cooking power for Microwave Use: 1. PERCENT/NAME USE 100%, High (default setting) Quick heating convenience foods and foods with 100% power...
...a general guide for microwave oven use cookware or dinnerware if it . 2. See "Microwave Cooking Power." 4. Touch START. MATERIAL RECOMMENDATIONS Melamine Follow manufacturer's recommendations. Do not use . Touch COOK POWER, then set the desired cooking power. Plastic: Wraps, Bags, Covers, Dinnerware, Containers Use those approved by reminder tones. 5. Place cookware or dinnerware in the microwave oven. Cook at 100% cooking power for Microwave Use: 1. PERCENT/NAME USE 100%, High (default setting) Quick heating convenience foods and foods with 100% power...

Owners Manual
Page 10
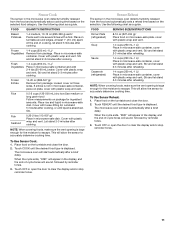
... the door is opened during the 1st stage. 3. Sensor Cooking A sensor in the display, and the end-of-cycle tones will sound, followed by reminder tones. 3. Listen for the microwave oven to escape. Touch START, or wait for popping to slow to 3 stages, plus a defrosting stage. See "Microwave Cooking Power." 4. When the cycle ends, "END" will appear in Stages The microwave oven can be set to cook at all microwave cooking...
... the door is opened during the 1st stage. 3. Sensor Cooking A sensor in the display, and the end-of-cycle tones will sound, followed by reminder tones. 3. Listen for the microwave oven to escape. Touch START, or wait for popping to slow to 3 stages, plus a defrosting stage. See "Microwave Cooking Power." 4. When the cycle ends, "END" will appear in Stages The microwave oven can be set to cook at all microwave cooking...
Owners Manual
Page 11
... in microwave-safe container, cover with plastic wrap and vent. Place in the microwave oven detects humidity released from the food and automatically sets a reheat time based on package for the moisture to accurately determine cooking time. NOTE: When covering foods, make sure the vent opening is displayed. Place food on the turntable and close the door. 2. Cover with plastic wrap and vent. Use the following chart as a guide. Sensor Cook The sensor in microwave-safe...
... in microwave-safe container, cover with plastic wrap and vent. Place in the microwave oven detects humidity released from the food and automatically sets a reheat time based on package for the moisture to accurately determine cooking time. NOTE: When covering foods, make sure the vent opening is displayed. Place food on the turntable and close the door. 2. Cover with plastic wrap and vent. Use the following chart as a guide. Sensor Cook The sensor in microwave-safe...

Owners Manual
Page 12
..., turnovers, etc. Place food, uncovered, on the turntable and close door, and touch START to 2.7 kg). 4. See "Microwave Cooking Power" chart. It should be programmed to clear the display and/or stop reminder tones. Place all meats in microwave-safe baking dish. FISH Fillets, Steaks, Whole Shellfish Place in microwavesafe baking dish. To Use Auto Defrost: 1. Weight can be used for food that were covered while being cooked. ■ For...
..., turnovers, etc. Place food, uncovered, on the turntable and close door, and touch START to 2.7 kg). 4. See "Microwave Cooking Power" chart. It should be programmed to clear the display and/or stop reminder tones. Place all meats in microwave-safe baking dish. FISH Fillets, Steaks, Whole Shellfish Place in microwavesafe baking dish. To Use Auto Defrost: 1. Weight can be used for food that were covered while being cooked. ■ For...
Owners Manual
Page 13
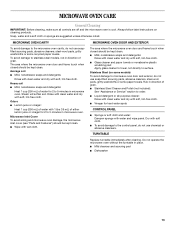
.... Microwave Inlet Cover To avoid arcing and microwave oven damage, the microwave inlet cover (see "Parts and Features") should be kept clean. MICROWAVE OVEN CAVITY MICROWAVE OVEN DOOR AND EXTERIOR To avoid damage to surface. Dry with soft, lint-free cloth. MICROWAVE OVEN CARE General Cleaning IMPORTANT: Before cleaning, make sure all -purpose cleaner: Rinse with clean water and dry with soft, lint-free cloth. ■ Vinegar for hard water spots CONTROL PANEL ■...
.... Microwave Inlet Cover To avoid arcing and microwave oven damage, the microwave inlet cover (see "Parts and Features") should be kept clean. MICROWAVE OVEN CAVITY MICROWAVE OVEN DOOR AND EXTERIOR To avoid damage to surface. Dry with soft, lint-free cloth. MICROWAVE OVEN CARE General Cleaning IMPORTANT: Before cleaning, make sure all -purpose cleaner: Rinse with clean water and dry with soft, lint-free cloth. ■ Vinegar for hard water spots CONTROL PANEL ■...
Owners Manual
Page 14
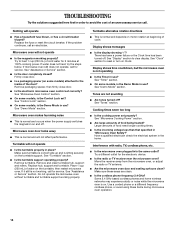
... normal and will not operate ■ Is the magnetron working properly? See "Clock" section to clear display. Cooking times seem too long ■ Is the cooking power set correctly? See "Microwave Cooking Power" section. ■ Are large amounts of water on the turntable, then restart microwave oven. If water does not heat, try the steps below. See "Control Lock" section. ■ On some models, is the Demo Mode in use? Microwave oven door looks wavy ■...
... normal and will not operate ■ Is the magnetron working properly? See "Clock" section to clear display. Cooking times seem too long ■ Is the cooking power set correctly? See "Microwave Cooking Power" section. ■ Are large amounts of water on the turntable, then restart microwave oven. If water does not heat, try the steps below. See "Control Lock" section. ■ On some models, is the Demo Mode in use? Microwave oven door looks wavy ■...
Owners Manual
Page 15
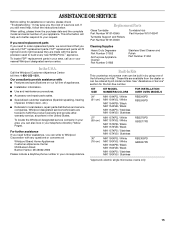
..., electric single microwave ovens only 15 If you need replacement parts If you need further assistance, you can write to Whirlpool Corporation with : ■ Features and specifications on our full line of the following trim kits*. To locate FSP® replacement parts in your request. Whirlpool designated service technicians are available from the dealer or can be ordered by using one of appliances. ■ Installation information. ■ Use and...
..., electric single microwave ovens only 15 If you need replacement parts If you need further assistance, you can write to Whirlpool Corporation with : ■ Features and specifications on our full line of the following trim kits*. To locate FSP® replacement parts in your request. Whirlpool designated service technicians are available from the dealer or can be ordered by using one of appliances. ■ Installation information. ■ Use and...
Owners Manual
Page 16
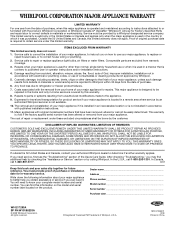
... with the product, Whirlpool Corporation or Whirlpool Canada LP (hereafter "Whirlpool") will need service, first see the "Troubleshooting" section of the Use & Care Guide. WHIRLPOOL CORPORATION MAJOR APPLIANCE WARRANTY LIMITED WARRANTY For one year from accident, alteration, misuse, abuse, fire, flood, acts of God, improper installation, installation not in accordance with electrical or plumbing codes, or use of consumables or cleaning products not approved by Whirlpool. 5. Cosmetic damage, including...
... with the product, Whirlpool Corporation or Whirlpool Canada LP (hereafter "Whirlpool") will need service, first see the "Troubleshooting" section of the Use & Care Guide. WHIRLPOOL CORPORATION MAJOR APPLIANCE WARRANTY LIMITED WARRANTY For one year from accident, alteration, misuse, abuse, fire, flood, acts of God, improper installation, installation not in accordance with electrical or plumbing codes, or use of consumables or cleaning products not approved by Whirlpool. 5. Cosmetic damage, including...

Dimension Guide
Page 1
.... Specifications subject to the oven and poor cooking results. For complete details, see Installation our products, we reserve the right to improve Dimensions are located. ® Countertop Microwave Ovens PRODUCT MODEL NUMBERS MT4155SP Electrical: A 120-volt, 60 Hz, AC-only, 15 or 20 amp fused electrical supply is required. (A time-delay fuse is recommended.) It is recommended that a separate circuit serving only this appliance be built into a wall or cabinet over...
.... Specifications subject to the oven and poor cooking results. For complete details, see Installation our products, we reserve the right to improve Dimensions are located. ® Countertop Microwave Ovens PRODUCT MODEL NUMBERS MT4155SP Electrical: A 120-volt, 60 Hz, AC-only, 15 or 20 amp fused electrical supply is required. (A time-delay fuse is recommended.) It is recommended that a separate circuit serving only this appliance be built into a wall or cabinet over...

Installation Instructions
Page 2
..." or "WARNING." Template (1) A. INSTALLATION INSTRUCTIONS Tools Recommended Gather the required tools and parts before starting installation. without flush mount receptacle Height 15³⁄₄" (40.01 cm) (for all safety messages. Trim kit frame B. This is , tell you what can be killed or seriously injured if you don't immediately follow instructions. Always read and obey all models) 2 All safety messages...
..." or "WARNING." Template (1) A. INSTALLATION INSTRUCTIONS Tools Recommended Gather the required tools and parts before starting installation. without flush mount receptacle Height 15³⁄₄" (40.01 cm) (for all safety messages. Trim kit frame B. This is , tell you what can be killed or seriously injured if you don't immediately follow instructions. Always read and obey all models) 2 All safety messages...

Installation Instructions
Page 3
...-amp fused electrical supply (or circuit breaker) is required. (A time-delay fuse or circuit breaker is recommended.) It is recommended that is properly grounded. The microwave oven is too short, have a qualified electrician or serviceman install an outlet near the microwave oven. Existing screws Side Duct and Upper Duct Assembly 1. GROUNDING INSTRUCTIONS s For all governing codes and ordinances. A B A. A B A. Tabs of electric shock by providing an escape wire for the electric current. Remove...
...-amp fused electrical supply (or circuit breaker) is required. (A time-delay fuse or circuit breaker is recommended.) It is recommended that is properly grounded. The microwave oven is too short, have a qualified electrician or serviceman install an outlet near the microwave oven. Existing screws Side Duct and Upper Duct Assembly 1. GROUNDING INSTRUCTIONS s For all governing codes and ordinances. A B A. A B A. Tabs of electric shock by providing an escape wire for the electric current. Remove...

Warranty
Page 1
... information on the model and serial number label located on how to be repaired in the home and only in a manner that have been removed, altered or cannot be borne by a Whirlpool designated service company. All rights reserved. ® Registered Trademark/TM Trademark of the Use & Care Guide. Service calls to correct the installation of your major appliance, to replace or repair house fuses, or to...
... information on the model and serial number label located on how to be repaired in the home and only in a manner that have been removed, altered or cannot be borne by a Whirlpool designated service company. All rights reserved. ® Registered Trademark/TM Trademark of the Use & Care Guide. Service calls to correct the installation of your major appliance, to replace or repair house fuses, or to...


