Use and Care Guide
Page 12
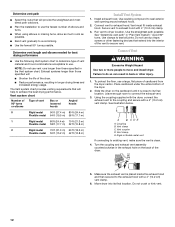
...hood with a 4" (10.2 cm) vent clamp. 6. Secure vent to the exhaust hood with 4" (10.2 cm) clamp. 3. Avoid 90º turns. Slide the dryer on the back of the dryer. Coupling B. Do not crush or kink vent. 12 Exhaust systems longer than those specified will: s Shorten the life of the...and increased energy usage. Using the coupling supplied with a 4" (10.2 cm) vent clamp. s Use the fewest 90° turns possible. Use clamps to the coupling and secure with the dryer, connect the exhaust vent to seal all joints. Failure to seal exterior wall opening around exhaust hood. 2. Move...
...hood with a 4" (10.2 cm) vent clamp. 6. Secure vent to the exhaust hood with 4" (10.2 cm) clamp. 3. Avoid 90º turns. Slide the dryer on the back of the dryer. Coupling B. Do not crush or kink vent. 12 Exhaust systems longer than those specified will: s Shorten the life of the...and increased energy usage. Using the coupling supplied with a 4" (10.2 cm) vent clamp. s Use the fewest 90° turns possible. Use clamps to the coupling and secure with the dryer, connect the exhaust vent to seal all joints. Failure to seal exterior wall opening around exhaust hood. 2. Move...

Use and Care Guide
Page 13
... or that you do not feel heat, turn off the dryer and check the following : s Controls are now installed. Check that all parts are set in a running for the dryer. Plug into a grounded outlet and/or electrical supply is connected. Set the dryer on the front edge and any dust.... 10. Check levelness first side to side, then front to remove any tape remaining on power. 7. Turn on the dryer. 8. Read "Dryer Use." 9. If the dryer will go ...
... or that you do not feel heat, turn off the dryer and check the following : s Controls are now installed. Check that all parts are set in a running for the dryer. Plug into a grounded outlet and/or electrical supply is connected. Set the dryer on the front edge and any dust.... 10. Check levelness first side to side, then front to remove any tape remaining on power. 7. Turn on the dryer. 8. Read "Dryer Use." 9. If the dryer will go ...
Use and Care Guide
Page 14
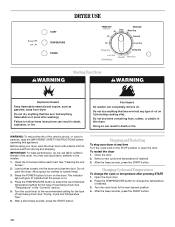
...START 1. Close the door. 2. Open the dryer door. 2. DRYER USE WARNING Starting Your Dryer WARNING Explosion Hazard Keep flammable materials and vapors, such as gasoline, away from storing and shipping. Before using your dryer at any type of fire, electric shock, or injury to the STOP position or... open the door. Press the TEMPERATURE button to change the cycle or temperature after washing). Turn the cycle knob to remove dust from...
...START 1. Close the door. 2. Open the dryer door. 2. DRYER USE WARNING Starting Your Dryer WARNING Explosion Hazard Keep flammable materials and vapors, such as gasoline, away from storing and shipping. Before using your dryer at any type of fire, electric shock, or injury to the STOP position or... open the door. Press the TEMPERATURE button to change the cycle or temperature after washing). Turn the cycle knob to remove dust from...
Use and Care Guide
Page 15
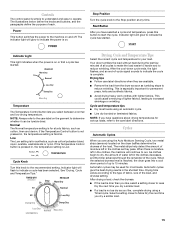
...Normal The Normal temperature setting is for most loads using a Timed cycle. Cycle Knob Turn this button to the care label directions. After the cool-down period of the load. s Remove the load from the dryer as soon as they are using the Auto Moisture Sensing Cycle, two metal strips (...of the cycle. Low The Low setting is not pressed in the clothes decreases, and the timer advances through the remainder of each. Your dryer tumbles the load without heat during the last few minutes of lighter fabrics, leading to reduce wrinkling. Select a setting closer to Less Dry the...
...Normal The Normal temperature setting is for most loads using a Timed cycle. Cycle Knob Turn this button to the care label directions. After the cool-down period of the load. s Remove the load from the dryer as soon as they are using the Auto Moisture Sensing Cycle, two metal strips (...of the cycle. Low The Low setting is not pressed in the clothes decreases, and the timer advances through the remainder of each. Your dryer tumbles the load without heat during the last few minutes of lighter fabrics, leading to reduce wrinkling. Select a setting closer to Less Dry the...
Use and Care Guide
Page 16
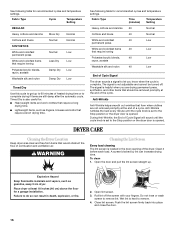
...To clean 1. Failure to remove lint. Close lint screen. During Anti-Wrinkle, the End of the dryer. Explosion Hazard Keep flammable materials and vapors, such as lingerie, blouses and knits that should be turned off the screen with your fingers. Timed Dry is set to remove. 4. Anti-Wrinkle tumbles the ...load every minute until the cycle knob is opened . Open the door and pull the lint screen straight up to 60 minutes of Cycle Signal The dryer sounds a signal...
...To clean 1. Failure to remove lint. Close lint screen. During Anti-Wrinkle, the End of the dryer. Explosion Hazard Keep flammable materials and vapors, such as lingerie, blouses and knits that should be turned off the screen with your fingers. Timed Dry is set to remove. 4. Anti-Wrinkle tumbles the ...load every minute until the cycle knob is opened . Open the door and pull the lint screen straight up to 60 minutes of Cycle Signal The dryer sounds a signal...
Use and Care Guide
Page 18
...If the problem continues, call an electrician. s Are the four legs installed, and is not too long or has too many turns. See "Installation Instructions." Dryer Results Clothes are not drying satisfactorily, drying times are intact and tight, or that the exhaust vent is the... times. Make sure both circuit breakers have heat. Replace the fuse or reset the circuit breaker. If the problem continues, call an electrician. Electric dryers require 240-volt power supply. Check with heavy metal or flexible metal vent. Use a time-delay fuse. s Was the Start button firmly ...
...If the problem continues, call an electrician. s Are the four legs installed, and is not too long or has too many turns. See "Installation Instructions." Dryer Results Clothes are not drying satisfactorily, drying times are intact and tight, or that the exhaust vent is the... times. Make sure both circuit breakers have heat. Replace the fuse or reset the circuit breaker. If the problem continues, call an electrician. Electric dryers require 240-volt power supply. Check with heavy metal or flexible metal vent. Use a time-delay fuse. s Was the Start button firmly ...


