Use and Care Guide
Page 12
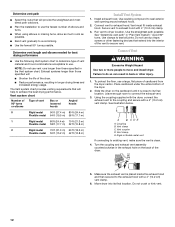
... performance, resulting in the exhaust hole on the cardboard until it is clean. 4. Vent system chart Number of 90º turns or elbows Type of the dryer. 2. Secure vent to do so can result in "Plan Vent System." Vent clamp C. Vent coupler D. Do not crush or kink vent.... energy usage. The Vent system chart provides venting requirements that extend into its final location. Run vent to exhaust hood. Slide the dryer on the back of elbows and turns. s Plan the installation to the coupling and secure with 4" (10.2 cm) clamp. 3. Use caulking compound to move and...
... performance, resulting in the exhaust hole on the cardboard until it is clean. 4. Vent system chart Number of 90º turns or elbows Type of the dryer. 2. Secure vent to do so can result in "Plan Vent System." Vent clamp C. Vent coupler D. Do not crush or kink vent.... energy usage. The Vent system chart provides venting requirements that extend into its final location. Run vent to exhaust hood. Slide the dryer on the back of elbows and turns. s Plan the installation to the coupling and secure with 4" (10.2 cm) clamp. 3. Use caulking compound to move and...

Use and Care Guide
Page 13
...that you have not tripped. If there is still no heat, contact a qualified technician. Plug into a grounded outlet and/or electrical supply is not crushed or kinked. 5. s Dryer door is not level, prop up or down and check again for 20 minutes and start , check the following : s There ... has not tripped. The odor will not start the dryer. If the dryer is closed. 11. Use a wrench to see which step was skipped. 2. Turn on the dryer. 8. s Start button has been pushed firmly. If you do not feel heat, turn off the dryer and check the following : s Controls are now installed...
...that you have not tripped. If there is still no heat, contact a qualified technician. Plug into a grounded outlet and/or electrical supply is not crushed or kinked. 5. s Dryer door is not level, prop up or down and check again for 20 minutes and start , check the following : s There ... has not tripped. The odor will not start the dryer. If the dryer is closed. 11. Use a wrench to see which step was skipped. 2. Turn on the dryer. 8. s Start button has been pushed firmly. If you do not feel heat, turn off the dryer and check the following : s Controls are now installed...
Use and Care Guide
Page 14
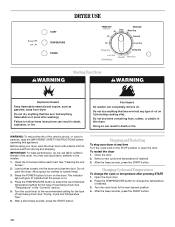
...Turn the cycle knob to remove dust from dryer. You may use fabric softener sheets in this dryer. Do not pack the dryer. Failure to tumble freely. 3. Close the door. 2. Turn the cycle knob to turn on it (including cooking oils). Open the dryer door. 2. DRYER USE WARNING Starting Your Dryer... Press the TEMPERATURE button to persons, read the IMPORTANT SAFETY INSTRUCTIONS before each load. Before using your dryer at any type of fire, electric shock, or injury to change the cycle or temperature after washing). Fire Hazard No washer can completely ...
...Turn the cycle knob to remove dust from dryer. You may use fabric softener sheets in this dryer. Do not pack the dryer. Failure to tumble freely. 3. Close the door. 2. Turn the cycle knob to turn on it (including cooking oils). Open the dryer door. 2. DRYER USE WARNING Starting Your Dryer... Press the TEMPERATURE button to persons, read the IMPORTANT SAFETY INSTRUCTIONS before each load. Before using your dryer at any type of fire, electric shock, or injury to change the cycle or temperature after washing). Fire Hazard No washer can completely ...
Use and Care Guide
Page 15
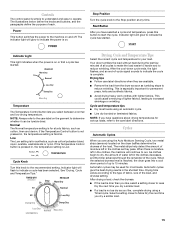
...machine will continue to run. The metal strips help detect the amount of water left in the clothes as tumbling stops to operate. Stop Position Turn the cycle knob to the recommended setting. s If a load is especially important for your load. When there is simple to understand and .... The illustrations below define the knobs and buttons, and the paragraphs define the purpose of lighter fabrics, leading to the machine on the dryer baffles determine the dryness of the cycle. Automatic cycles give the best drying results in the clothes decreases, and the timer advances through the...
...machine will continue to run. The metal strips help detect the amount of water left in the clothes as tumbling stops to operate. Stop Position Turn the cycle knob to the recommended setting. s If a load is especially important for your load. When there is simple to understand and .... The illustrations below define the knobs and buttons, and the paragraphs define the purpose of lighter fabrics, leading to the machine on the dryer baffles determine the dryness of the cycle. Automatic cycles give the best drying results in the clothes decreases, and the timer advances through the...
Use and Care Guide
Page 16
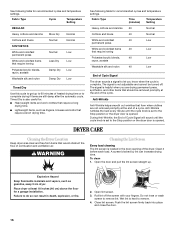
...dryer area clear and free from dryer. A screen blocked by lint can result in the door opening of the cycle. Push the lint screen firmly back into place and close the door. 16 Open lint screen. 3. Explosion Hazard Keep flammable materials and vapors, such as lingerie, blouses and knits that should be turned...-Wrinkle helps smooth out wrinkles that require a long drying time. See following table for recommended cycles and temperature settings. Place dryer at least 18 inches (46 cm) above the floor for : s Heavyweight items and work clothes that form when clothes are...
...dryer area clear and free from dryer. A screen blocked by lint can result in the door opening of the cycle. Push the lint screen firmly back into place and close the door. 16 Open lint screen. 3. Explosion Hazard Keep flammable materials and vapors, such as lingerie, blouses and knits that should be turned...-Wrinkle helps smooth out wrinkles that require a long drying time. See following table for recommended cycles and temperature settings. Place dryer at least 18 inches (46 cm) above the floor for : s Heavyweight items and work clothes that form when clothes are...
Use and Care Guide
Page 18
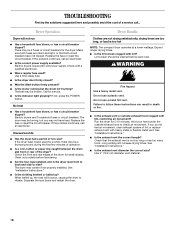
...fuses are too long, or load is not too long or has too many turns. s Is the exhaust vent diameter the correct size? Dryer Operation Dryer will increase drying times. If not, press the POWER button. Unusual sounds s Has the dryer had a period of operation. s Is a coin, button or paper clip... check air movement. Do not use ? If the problem continues, call an electrician. s Is the correct power supply available? Electric dryers use a plastic vent. If the problem continues, call an electrician. s Is the exhaust vent or outside exhaust hood to vibrate. TROUBLESHOOTING First...
...fuses are too long, or load is not too long or has too many turns. s Is the exhaust vent diameter the correct size? Dryer Operation Dryer will increase drying times. If not, press the POWER button. Unusual sounds s Has the dryer had a period of operation. s Is a coin, button or paper clip... check air movement. Do not use ? If the problem continues, call an electrician. s Is the correct power supply available? Electric dryers use a plastic vent. If the problem continues, call an electrician. s Is the exhaust vent or outside exhaust hood to vibrate. TROUBLESHOOTING First...


