
User Manual
Page 6
..., and can be used in Cord Maximum Current Rating of the FCC Rules. If this High Definition LCD TV is encouraged to try to correct the interference by turning the equipment off and on, the user is enclosed and has been selected according to radio communications if...not occur in a residential installation. The female receptacle of destination and must meet IEC-60320 requirements and should be located near High Definition LCD TV and should look like Figure A1 below: Figure A1 _ Figure A2@_:. SEV Canada CSA Britain BASE/BS Germany .......... PRODUCT SAFETY WARNING:...
..., and can be used in Cord Maximum Current Rating of the FCC Rules. If this High Definition LCD TV is encouraged to try to correct the interference by turning the equipment off and on, the user is enclosed and has been selected according to radio communications if...not occur in a residential installation. The female receptacle of destination and must meet IEC-60320 requirements and should be located near High Definition LCD TV and should look like Figure A1 below: Figure A1 _ Figure A2@_:. SEV Canada CSA Britain BASE/BS Germany .......... PRODUCT SAFETY WARNING:...
User Manual
Page 8
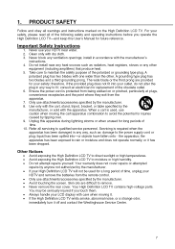
...with one wider than the other equipment (including amplifiers) that produce heat. 5. If the High Definition LCD TV emits smoke, abnormal noise, or a strange odor, immediately turn it . 1. Never use attachments/accessories specified by tipping over. 9. Ensure the power cord is ...required when the apparatus has been damaged in any way, such as radiators, heat registers, stoves or any ventilation openings; Only use caution when moving it off and contact the Westinghouse...
...with one wider than the other equipment (including amplifiers) that produce heat. 5. If the High Definition LCD TV emits smoke, abnormal noise, or a strange odor, immediately turn it . 1. Never use attachments/accessories specified by tipping over. 9. Ensure the power cord is ...required when the apparatus has been damaged in any way, such as radiators, heat registers, stoves or any ventilation openings; Only use caution when moving it off and contact the Westinghouse...
User Manual
Page 9
... of time, unplug it from touching such power lines or circuits. This will prevent damage to the High Definition LCD TV due to improve. Turn off your High Definition LCD TV and wait for the grounding electrode. 1. When installing an outside antenna system, extreme care should not be located...Antenna Grounding If an outside antenna system should be sure the antenna or cable system is left unattended and unused for the High Definition LCD TV during a heavy storm--lightning may strike while you are holding the cable cord, causing serious injury. Lightning For added protection for ...
... of time, unplug it from touching such power lines or circuits. This will prevent damage to the High Definition LCD TV due to improve. Turn off your High Definition LCD TV and wait for the grounding electrode. 1. When installing an outside antenna system, extreme care should not be located...Antenna Grounding If an outside antenna system should be sure the antenna or cable system is left unattended and unused for the High Definition LCD TV during a heavy storm--lightning may strike while you are holding the cable cord, causing serious injury. Lightning For added protection for ...
User Manual
Page 14
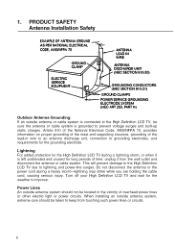
2. Source 5. INTRODUCTION: CONTROLS AND CONNECTIONS Front View Use buttons on the right front side of your HDTV (or keys on remote control) for On Screen Display (OSD), volume adjustment, channel selection, source, and turning power on or off. ,_-iCONTROLS "IR"RECEIVER SPEAKERS Side-Mounted Controls 1. Power DSD menu ON/OFF Increase/decrease sound or adjust features in OSD menus Scroll up/down through channels "_enus Select active Video source selected or OSD DN/OFF Power button 13 Menu 2. Volume + / - 3. Channel VIA 4.
2. Source 5. INTRODUCTION: CONTROLS AND CONNECTIONS Front View Use buttons on the right front side of your HDTV (or keys on remote control) for On Screen Display (OSD), volume adjustment, channel selection, source, and turning power on or off. ,_-iCONTROLS "IR"RECEIVER SPEAKERS Side-Mounted Controls 1. Power DSD menu ON/OFF Increase/decrease sound or adjust features in OSD menus Scroll up/down through channels "_enus Select active Video source selected or OSD DN/OFF Power button 13 Menu 2. Volume + / - 3. Channel VIA 4.

User Manual
Page 18
... program favorite channel). 9. 2. INTRODUCTION: CONTROLS AND CONNECTIONS Remote Control Features 1. PIP Display sub picture On/Off Note: This feature is not available on this 19" HDTV. 5. CO Turn Closed Caption On/Off 7. DOT To input dot when selecting digital channels 11.ENT Complete channel selection 12.INPUT Display MP input menu 13....VOL -/+ Volume Up/Down adjustment 14.SCALING Set video display format to previous channel 18. LAST CHANNEL Switch to "STANDARD", "FILL" 15.0H VIA TV Channel Up/Down adjustment 16.MENU Turn OSD Menu On/Off 17.
... program favorite channel). 9. 2. INTRODUCTION: CONTROLS AND CONNECTIONS Remote Control Features 1. PIP Display sub picture On/Off Note: This feature is not available on this 19" HDTV. 5. CO Turn Closed Caption On/Off 7. DOT To input dot when selecting digital channels 11.ENT Complete channel selection 12.INPUT Display MP input menu 13....VOL -/+ Volume Up/Down adjustment 14.SCALING Set video display format to previous channel 18. LAST CHANNEL Switch to "STANDARD", "FILL" 15.0H VIA TV Channel Up/Down adjustment 16.MENU Turn OSD Menu On/Off 17.
User Manual
Page 20
... the Power button on either the remote control or the side-mounted control panel to turn your HDTV on (it will take a few seconds to power up) Determining Available ... to run "Autoscan"--it shall be available first time when you power on your TV Or ChooseYourTV Source • Pressthe"lVbr_' bL_on on your remoteor the side panelto ...to scroll across to the "Setup" menu --Use the up/down arrow keys to select "TV" and "Quick Setup" • Use the arrow keys to select your "Time Zone", ..._x]_ OSD, press_ TV bu_ton _o e_/iMh _o _guM_ TV h_}uf and _l_eat the above TV Ou_ek S_tup agMn [ythis #}put source...
... the Power button on either the remote control or the side-mounted control panel to turn your HDTV on (it will take a few seconds to power up) Determining Available ... to run "Autoscan"--it shall be available first time when you power on your TV Or ChooseYourTV Source • Pressthe"lVbr_' bL_on on your remoteor the side panelto ...to scroll across to the "Setup" menu --Use the up/down arrow keys to select "TV" and "Quick Setup" • Use the arrow keys to select your "Time Zone", ..._x]_ OSD, press_ TV bu_ton _o e_/iMh _o _guM_ TV h_}uf and _l_eat the above TV Ou_ek S_tup agMn [ythis #}put source...
User Manual
Page 21
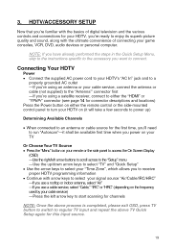
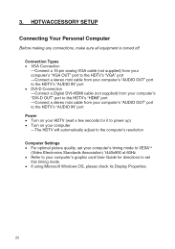
HDTV/ACCESSORY SETUP Connecting Your Personal Computer Before making any connections, make sure all equipment is turned off. Connection Types • VGA Connection --Connect a 15-pin analog VGA cable (not supplied) from your computer's "VGA OUT" port to the HDTV's "VGA" ... --Connect a stereo mini cable from your computer's "AUDIO OUT" port to the HDTV's "AUDIO IN" port Power • Turn on your HDTV (wait a few seconds for it to power Lip) • Turn on your computer --The HDTV will automatically adjust to the computer's resolution Computer Settings • For optimal picture quality...
HDTV/ACCESSORY SETUP Connecting Your Personal Computer Before making any connections, make sure all equipment is turned off. Connection Types • VGA Connection --Connect a 15-pin analog VGA cable (not supplied) from your computer's "VGA OUT" port to the HDTV's "VGA" ... --Connect a stereo mini cable from your computer's "AUDIO OUT" port to the HDTV's "AUDIO IN" port Power • Turn on your HDTV (wait a few seconds for it to power Lip) • Turn on your computer --The HDTV will automatically adjust to the computer's resolution Computer Settings • For optimal picture quality...
User Manual
Page 22
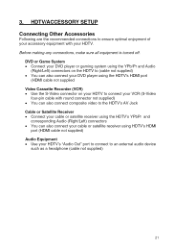
... also connect composite video to an external audio device such as a headphone (cable not supplied) 21 Before making any connections, make sure all equipment is turned off.
... also connect composite video to an external audio device such as a headphone (cable not supplied) 21 Before making any connections, make sure all equipment is turned off.
User Manual
Page 25
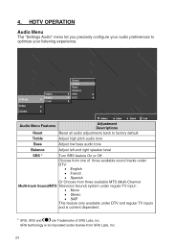
... pitch audio tone Bass _,djust low bass audio tone Balance Adjust left and right speaker level SRS * Turn SRS feature On or Off Shoose from one of SRS Labs, Inc. under DTV and regular TV inputs * SRS, SRS and (_O)' are Trademarks of three available sound tracks under DTV: ° English °...
... pitch audio tone Bass _,djust low bass audio tone Balance Adjust left and right speaker level SRS * Turn SRS feature On or Off Shoose from one of SRS Labs, Inc. under DTV and regular TV inputs * SRS, SRS and (_O)' are Trademarks of three available sound tracks under DTV: ° English °...
User Manual
Page 32
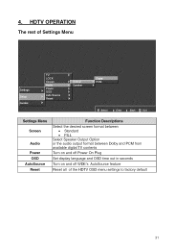
HDTV OPERATION The rest of Settings Menu Screen Audio Power OSD AutoSource Reset Select the desired screen format between • Standard • FILL Select Speaker Output Option or the audio output format between Dolby and PCM from available digital TV contents Turn on and off Power On Plug Set display language and OSD time out in seconds Turn on and off WDE's AutoSource feature Reset all of the HDTV OSD menu settings to factory default 31 4.
HDTV OPERATION The rest of Settings Menu Screen Audio Power OSD AutoSource Reset Select the desired screen format between • Standard • FILL Select Speaker Output Option or the audio output format between Dolby and PCM from available digital TV contents Turn on and off Power On Plug Set display language and OSD time out in seconds Turn on and off WDE's AutoSource feature Reset all of the HDTV OSD menu settings to factory default 31 4.
User Manual
Page 39
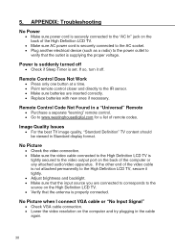
5. Power is suddenly turned off . If so, turn it tightly. • Adjust brightness and backlight. • Make sure that the antenna is tightly secured to the High Definition LCD TV is properly connected. No Picture when I connect VGA cable or "No Input Signal" • Check VGA cable connection. • Lower the video resolution on the...
5. Power is suddenly turned off . If so, turn it tightly. • Adjust brightness and backlight. • Make sure that the antenna is tightly secured to the High Definition LCD TV is properly connected. No Picture when I connect VGA cable or "No Input Signal" • Check VGA cable connection. • Lower the video resolution on the...
User Manual
Page 40
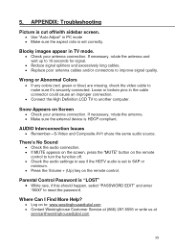
...• Check the audio settings to : www.westinghousedigital.com • Contact Westinghouse Customer Service at (866) 287-5555 service @westinghousedigital.com or write us...or broken pins in the cable connector could cause an improper connection. • Connect the High Definition LCD TV to make sure it's securely connected. Wrong or Abnormal Colors • If any colors (red,... screen, press the "MUTE" button on the remote control to turn the function off /with sidebar screen. • Use "Auto Adjust" in TV mode. • Check your antenna connection. If necessary, rotate the...
...• Check the audio settings to : www.westinghousedigital.com • Contact Westinghouse Customer Service at (866) 287-5555 service @westinghousedigital.com or write us...or broken pins in the cable connector could cause an improper connection. • Connect the High Definition LCD TV to make sure it's securely connected. Wrong or Abnormal Colors • If any colors (red,... screen, press the "MUTE" button on the remote control to turn the function off /with sidebar screen. • Use "Auto Adjust" in TV mode. • Check your antenna connection. If necessary, rotate the...
User Manual
Page 41
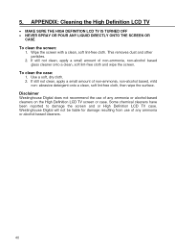
...clean, soft lint-free cloth, then wipe the surface. Some chemical cleaners have been reported to damage the screen and or High Definition LCD TV case. Westinghouse Digital will not be liable for damage resulting from use of non-ammonia, non-alcohol based glass cleaner onto a clean, soft lint...To clean the case: 1. APPENDIX: Cleaninq the Hiqh Definition LCD TV • MAKE SURE THE HIGH DEFINITION LCD TV IS TURNED OFF • NEVER SPRAY OR POUR ANY LIQUID DIRECTLY ONTO THE SCREEN OR CASE To clean the screen: 1. Disclaimer Westinghouse Digital does not recommend the use of non-ammonia, non-...
...clean, soft lint-free cloth, then wipe the surface. Some chemical cleaners have been reported to damage the screen and or High Definition LCD TV case. Westinghouse Digital will not be liable for damage resulting from use of non-ammonia, non-alcohol based glass cleaner onto a clean, soft lint...To clean the case: 1. APPENDIX: Cleaninq the Hiqh Definition LCD TV • MAKE SURE THE HIGH DEFINITION LCD TV IS TURNED OFF • NEVER SPRAY OR POUR ANY LIQUID DIRECTLY ONTO THE SCREEN OR CASE To clean the screen: 1. Disclaimer Westinghouse Digital does not recommend the use of non-ammonia, non-...


