

Camera Manual
Page 1
All rights reserved. All other trademarks are registered trademarks of their respective companies. Windows and the Windows logo are the property of Microsoft Corporation. ViviCam T135 3D Digital Camera User Manual © 2009-2011 Sakar International, Inc.
All rights reserved. All other trademarks are registered trademarks of their respective companies. Windows and the Windows logo are the property of Microsoft Corporation. ViviCam T135 3D Digital Camera User Manual © 2009-2011 Sakar International, Inc.

Camera Manual
Page 3
... 32GB) for purchasing this manual carefully first in Lithium-Ion Battery (not shown) Note: SD Memory Card and batteries not included. 2 What's Included 1. Wrist Strap 6. 3D Glasses 7. Vivitar makes capturing those special moments as easy as possible...
... 32GB) for purchasing this manual carefully first in Lithium-Ion Battery (not shown) Note: SD Memory Card and batteries not included. 2 What's Included 1. Wrist Strap 6. 3D Glasses 7. Vivitar makes capturing those special moments as easy as possible...
Camera Manual
Page 4
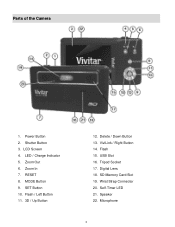
Shutter Button 3. Flash 15. LED / Charge Indicator 5. ViviLink / Right Button 14. Wrist Strap Connector 20. Speaker 22. MODE Button 9. Tripod Socket 17. Self-Timer LED 21. Zoom Out 6. Zoom In 7. Digital Lens 18. Power Button 2. Parts of the Camera 1. RESET 8. Microphone 3 Delete / Down Button 13. USB Slot 16. SET Button 10. SD Memory Card Slot 19. LCD Screen 4. Flash / Left Button 11. 3D / Up Button 12.
Shutter Button 3. Flash 15. LED / Charge Indicator 5. ViviLink / Right Button 14. Wrist Strap Connector 20. Speaker 22. MODE Button 9. Tripod Socket 17. Self-Timer LED 21. Zoom Out 6. Zoom In 7. Digital Lens 18. Power Button 2. Parts of the Camera 1. RESET 8. Microphone 3 Delete / Down Button 13. USB Slot 16. SET Button 10. SD Memory Card Slot 19. LCD Screen 4. Flash / Left Button 11. 3D / Up Button 12.

Camera Manual
Page 15
... your photos in Photo Capture Mode by default. This indicates that the 3D Photo Capture Mode is first powered ON, the camera will be saved to the camera‟s SD memory ... on the right side of the LCD screen: 3) Click the Shutter button to take your 3D glasses (included) in order to zoom in 3D as you would like to capture. 2) Press the T/Zoom In and W/Zoom Out buttons ... side of the zoom buttons may vary per camera model. Note: The actual shape of the LCD screen. The 3D Icon will appear on the LCD screen in /out if desired. Taking a Picture 1) While in Photo Capture mode...
... your photos in Photo Capture Mode by default. This indicates that the 3D Photo Capture Mode is first powered ON, the camera will be saved to the camera‟s SD memory ... on the right side of the LCD screen: 3) Click the Shutter button to take your 3D glasses (included) in order to zoom in 3D as you would like to capture. 2) Press the T/Zoom In and W/Zoom Out buttons ... side of the zoom buttons may vary per camera model. Note: The actual shape of the LCD screen. The 3D Icon will appear on the LCD screen in /out if desired. Taking a Picture 1) While in Photo Capture mode...
Camera Manual
Page 16
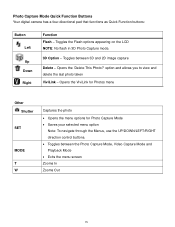
...; Saves your selected menu option Note: To navigate through the Menus, use the UP/DOWN/LEFT/RIGHT direction control buttons. Toggles between 3D and 2D image capture Delete - Opens the „Delete This Photo?‟ option and allows you to view and delete the last photo taken ViviLink...as Quick Function buttons: Button Left Up Down Right Function Flash - Toggles the Flash options appearing on the LCD NOTE: No flash in 3D Photo Capture mode. 3D Option - Toggles between the Photo Capture Mode, Video Capture Mode and Playback Mode Exits the menu screen Zooms In Zooms Out 15...
...; Saves your selected menu option Note: To navigate through the Menus, use the UP/DOWN/LEFT/RIGHT direction control buttons. Toggles between 3D and 2D image capture Delete - Opens the „Delete This Photo?‟ option and allows you to view and delete the last photo taken ViviLink...as Quick Function buttons: Button Left Up Down Right Function Flash - Toggles the Flash options appearing on the LCD NOTE: No flash in 3D Photo Capture mode. 3D Option - Toggles between the Photo Capture Mode, Video Capture Mode and Playback Mode Exits the menu screen Zooms In Zooms Out 15...
Camera Manual
Page 17
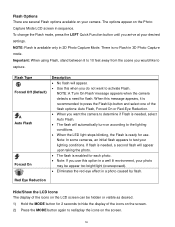
... appears to the lighting conditions. When the LED light stops blinking, the Flash is needed , a second flash will appear. Use this option in 3D Photo Capture mode. The options appear on the screen. 16 Flash Type Forced Off (Default) A Auto Flash Forced On Description No flash will appear...
... appears to the lighting conditions. When the LED light stops blinking, the Flash is needed , a second flash will appear. Use this option in 3D Photo Capture mode. The options appear on the screen. 16 Flash Type Forced Off (Default) A Auto Flash Forced On Description No flash will appear...
Camera Manual
Page 18
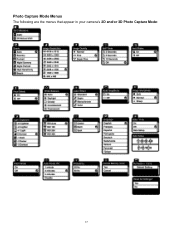
Photo Capture Mode Menus The following are the menus that appear in your camera‟s 2D and/or 3D Photo Capture Mode: 17
Photo Capture Mode Menus The following are the menus that appear in your camera‟s 2D and/or 3D Photo Capture Mode: 17

Camera Manual
Page 19
...to scroll and select the Scene menu. 10) Press the UP or DOWN direction control buttons to scroll through the menu options. 3D Calibration - (3D Photo Capture only) The 3D Calibration Menu allows you would like to override it ‟s ON) to capture your current environment. If however, you to ... Remember that let your camera to adapt properly to your photos. Select „Auto‟ to use the LEFT/RIGHT buttons to control the 3D coordinates and 3D effect. 4) Press the SET button to select and save the desired option. 12) A selected option icon will appear on the selected item. ...
...to scroll and select the Scene menu. 10) Press the UP or DOWN direction control buttons to scroll through the menu options. 3D Calibration - (3D Photo Capture only) The 3D Calibration Menu allows you would like to override it ‟s ON) to capture your current environment. If however, you to ... Remember that let your camera to adapt properly to your photos. Select „Auto‟ to use the LEFT/RIGHT buttons to control the 3D coordinates and 3D effect. 4) Press the SET button to select and save the desired option. 12) A selected option icon will appear on the selected item. ...
Camera Manual
Page 20
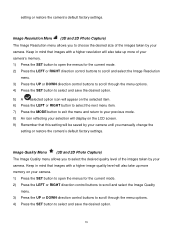
Image Quality Menu (3D and 2D Photo Capture) The Image Quality menu allows you manually change the setting or restore the camera‟s default factory settings. Keep in mind .... 7) Press the MODE button to exit the menu and return to choose the desired size of the images taken by your camera. Image Resolution Menu (3D and 2D Photo Capture) The Image Resolution menu allows you to your previous mode. 8) An icon reflecting your selection will display on the LCD screen...
Image Quality Menu (3D and 2D Photo Capture) The Image Quality menu allows you manually change the setting or restore the camera‟s default factory settings. Keep in mind .... 7) Press the MODE button to exit the menu and return to choose the desired size of the images taken by your camera. Image Resolution Menu (3D and 2D Photo Capture) The Image Resolution menu allows you to your previous mode. 8) An icon reflecting your selection will display on the LCD screen...
Camera Manual
Page 21
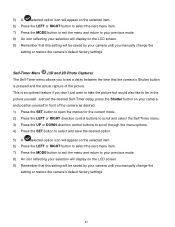
... setting will be saved by your camera until you manually change the setting or restore the camera‟s default factory settings. 20 Self-Timer Menu (3D and 2D Photo Capture) The Self-Timer menu allows you to set the desired Self-Timer delay, press the Shutter button on your camera and...
... setting will be saved by your camera until you manually change the setting or restore the camera‟s default factory settings. 20 Self-Timer Menu (3D and 2D Photo Capture) The Self-Timer menu allows you to set the desired Self-Timer delay, press the Shutter button on your camera and...
Camera Manual
Page 22
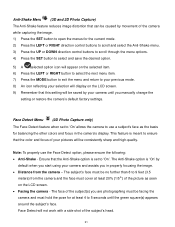
... camera until the green square(s) appears around the subject‟s face. The face of the subject(s) you in the camera‟s display. Anti-Shake Menu (3D and 2D Photo Capture) The Anti-Shake feature reduces image distortion that can be caused by movement of the camera while capturing the image. 1) Press...
... camera until the green square(s) appears around the subject‟s face. The face of the subject(s) you in the camera‟s display. Anti-Shake Menu (3D and 2D Photo Capture) The Anti-Shake feature reduces image distortion that can be caused by movement of the camera while capturing the image. 1) Press...

Camera Manual
Page 24
Multi SnapShots Menu (3D and 2D Photo Capture) When enabled, the Multi SnapShots feature allows you to take six rapid snapshots in a sporting event or other scenes with a single ...
Multi SnapShots Menu (3D and 2D Photo Capture) When enabled, the Multi SnapShots feature allows you to take six rapid snapshots in a sporting event or other scenes with a single ...
Camera Manual
Page 25
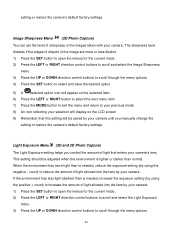
... select the next menu item. 7) Press the MODE button to exit the menu and return to scroll through the menu options. 24 Light Exposure Menu (3D and 2D Photo Capture) The Light Exposure setting helps you manually change the setting or restore the camera‟s default factory settings. Image Sharpness Menu...
... select the next menu item. 7) Press the MODE button to exit the menu and return to scroll through the menu options. 24 Light Exposure Menu (3D and 2D Photo Capture) The Light Exposure setting helps you manually change the setting or restore the camera‟s default factory settings. Image Sharpness Menu...

Camera Manual
Page 26
... mode. 8) An icon reflecting your selection will display on the LCD screen 9) Remember that your camera has to light in the surrounding environment. ISO Menu (3D and 2D Photo Capture) The ISO menu allows you to set the level of the images that this setting will be more sensitive to light...
... mode. 8) An icon reflecting your selection will display on the LCD screen 9) Remember that your camera has to light in the surrounding environment. ISO Menu (3D and 2D Photo Capture) The ISO menu allows you to set the level of the images that this setting will be more sensitive to light...
Camera Manual
Page 27
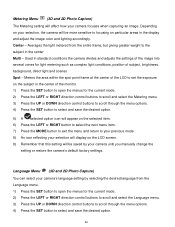
Language Menu (3D and 2D Photo Capture) You can select your camera‟s language setting by your selection will display on the LCD screen. 9) Remember that this setting ... center of the LCD to set the exposure on the subject in the center of subject, brightness, background, direct light and scenes Spot - Metering Menu (3D and 2D Photo Capture) The Metering setting will affect how your selection, the camera will be saved by selecting the desired language from the entire...
Language Menu (3D and 2D Photo Capture) You can select your camera‟s language setting by your selection will display on the LCD screen. 9) Remember that this setting ... center of the LCD to set the exposure on the subject in the center of subject, brightness, background, direct light and scenes Spot - Metering Menu (3D and 2D Photo Capture) The Metering setting will affect how your selection, the camera will be saved by selecting the desired language from the entire...

Camera Manual
Page 28
Date/Time Menu (3D and 2D Photo Capture) When you capture an image with your camera, the image will include a time stamp with your camera. The timestamp will appear ...
Date/Time Menu (3D and 2D Photo Capture) When you capture an image with your camera, the image will include a time stamp with your camera. The timestamp will appear ...

Camera Manual
Page 29
... will open the menus for beeps heard during the Self-Timer countdown) that this setting will be saved by your previous screen. Silent Mode Menu (3D and 2D Photo Capture) You have finished setting the date and time, press the SET button to save the desired option. 5) A selected option icon will... buttons. 6) For each field in order to conserve you manually change the setting or restore the camera‟s default factory settings. Auto Power Off Menu (3D and 2D Photo Capture) You can use the Auto Power Off feature in the menu, use the UP and DOWN navigation buttons to set the...
... will open the menus for beeps heard during the Self-Timer countdown) that this setting will be saved by your previous screen. Silent Mode Menu (3D and 2D Photo Capture) You have finished setting the date and time, press the SET button to save the desired option. 5) A selected option icon will... buttons. 6) For each field in order to conserve you manually change the setting or restore the camera‟s default factory settings. Auto Power Off Menu (3D and 2D Photo Capture) You can use the Auto Power Off feature in the menu, use the UP and DOWN navigation buttons to set the...
Camera Manual
Page 30
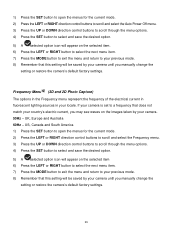
UK, Europe and Australia 60Hz - Frequency Menu (3D and 2D Photo Capture) The options in the Frequency menu represent the frequency of the electrical current in fluorescent lighting sources in your camera. 50Hz - ...
UK, Europe and Australia 60Hz - Frequency Menu (3D and 2D Photo Capture) The options in the Frequency menu represent the frequency of the electrical current in fluorescent lighting sources in your camera. 50Hz - ...
Camera Manual
Page 31
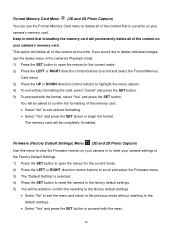
Firmware (Factory Default Settings) Menu (3D and 2D Photo Capture) Use this menu to view the Firmware version on your camera or to reset your camera settings to the Factory Default ... settings. Select "Yes" and press the SET button to proceed with the format, select "Yes" and press the SET button. Format Memory Card Menu (3D and 2D Photo Capture) You can use the delete menu in mind that is selected. 4) Press the SET button to reset the camera to the...
Firmware (Factory Default Settings) Menu (3D and 2D Photo Capture) Use this menu to view the Firmware version on your camera or to reset your camera settings to the Factory Default ... settings. Select "Yes" and press the SET button to proceed with the format, select "Yes" and press the SET button. Format Memory Card Menu (3D and 2D Photo Capture) You can use the delete menu in mind that is selected. 4) Press the SET button to reset the camera to the...
Camera Manual
Page 33
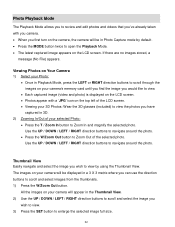
...;ve already taken with a „JPG‟ icon on the top left of the LCD screen. Viewing your 3D Photos: Wear the 3D glasses (included) to view the photos you have captured in 3D. 2) Zooming In/Out of the selected photo. Use the UP / DOWN / LEFT / RIGHT direction buttons to navigate around...
...;ve already taken with a „JPG‟ icon on the top left of the LCD screen. Viewing your 3D Photos: Wear the 3D glasses (included) to view the photos you have captured in 3D. 2) Zooming In/Out of the selected photo. Use the UP / DOWN / LEFT / RIGHT direction buttons to navigate around...
