
User Manual
Page 2
... document. Once green indicator light is on, turn system on set up your gTablet before using for purchasing the gTablet! You must fully charge your wireless network, and configuring user profiles. 4. For additional detailed instructions on by pressing the power button (shown below ). 2. ICONS Caution: This icon warns against potential damage to the gTablet and to note. QUICK START 1. Follow the prompts...
... document. Once green indicator light is on, turn system on set up your gTablet before using for purchasing the gTablet! You must fully charge your wireless network, and configuring user profiles. 4. For additional detailed instructions on by pressing the power button (shown below ). 2. ICONS Caution: This icon warns against potential damage to the gTablet and to note. QUICK START 1. Follow the prompts...
User Manual
Page 4
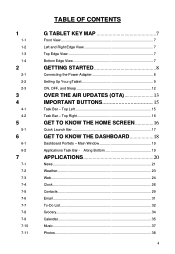
... Left 15 Task Bar - 1 1-1 1-2 1-3 1-4 2 2-1 2-2 2-3 3 4 4-1 4-2 5 5-1 6 6-1 6-2 7 7-1 7-2 7-3 7-4 7-5 7-6 7-7 7-8 7-9 7-10 7-11 TABLE OF CONTENTS G TABLET KEY MAP 7 Front View 7 Left and Right Edge View 7 Top Edge View 7 Bottom Edge View 7 GETTING STARTED 8 Connecting the Power Adapter 8 Setting Up Your gTablet 9 ON, OFF, and Sleep 12 OVER THE AIR UPDATES (OTA 13 IMPORTANT BUTTONS 15 Task Bar - Top Right 16 GET TO KNOW THE HOME SCREEN 16 Quick Launch Bar 17 GET TO...
... Left 15 Task Bar - 1 1-1 1-2 1-3 1-4 2 2-1 2-2 2-3 3 4 4-1 4-2 5 5-1 6 6-1 6-2 7 7-1 7-2 7-3 7-4 7-5 7-6 7-7 7-8 7-9 7-10 7-11 TABLE OF CONTENTS G TABLET KEY MAP 7 Front View 7 Left and Right Edge View 7 Top Edge View 7 Bottom Edge View 7 GETTING STARTED 8 Connecting the Power Adapter 8 Setting Up Your gTablet 9 ON, OFF, and Sleep 12 OVER THE AIR UPDATES (OTA 13 IMPORTANT BUTTONS 15 Task Bar - Top Right 16 GET TO KNOW THE HOME SCREEN 16 Quick Launch Bar 17 GET TO...
User Manual
Page 5
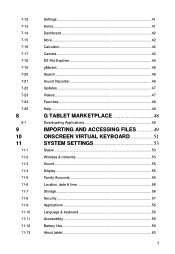
...-13 Settings 41 Home 41 Dashboard 42 More 42 Calculator 42 Camera 42 ES File Explorer 44 gMarket 46 Search 46 Sound Recorder 46 Updates 47 Videos 47 Favorites 48 Help 48 G TABLET MARKETPLACE 48 Downloading Applications 48 IMPORTING AND ACCESSING FILES 49 ONSCREEN VIRTUAL KEYBOARD 51 SYSTEM SETTINGS 53 Status 53 Wireless & networks 53 Sound 55 Display 55 Family Accounts 56 Location, date & time 56 Storage 56 Security 57 Applications 58 Language & keyboard 58 Accessibility 59 Battery Use...
...-13 Settings 41 Home 41 Dashboard 42 More 42 Calculator 42 Camera 42 ES File Explorer 44 gMarket 46 Search 46 Sound Recorder 46 Updates 47 Videos 47 Favorites 48 Help 48 G TABLET MARKETPLACE 48 Downloading Applications 48 IMPORTING AND ACCESSING FILES 49 ONSCREEN VIRTUAL KEYBOARD 51 SYSTEM SETTINGS 53 Status 53 Wireless & networks 53 Sound 55 Display 55 Family Accounts 56 Location, date & time 56 Storage 56 Security 57 Applications 58 Language & keyboard 58 Accessibility 59 Battery Use...
User Manual
Page 7
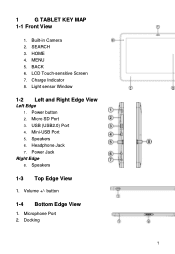
BACK 6. Power button 2. Micro SD Port 3. MENU 5. Mini-USB Port 5. Speakers 1-3 Top Edge View 1. Docking 7 LCD Touch-sensitive Screen 7. USB (USB2.0) Port 4. button 1-4 Bottom Edge View 1. Speakers 6. Headphone Jack 7. Charge Indicator 8. SEARCH 3. Built-in Camera 2. Light sensor Window 1-2 Left and Right Edge View Left Edge 1. Power Jack Right Edge 8. Volume +/- Microphone Port 2. 1 G TABLET KEY MAP 1-1 Front View 1. HOME 4.
BACK 6. Power button 2. Micro SD Port 3. MENU 5. Mini-USB Port 5. Speakers 1-3 Top Edge View 1. Docking 7 LCD Touch-sensitive Screen 7. USB (USB2.0) Port 4. button 1-4 Bottom Edge View 1. Speakers 6. Headphone Jack 7. Charge Indicator 8. SEARCH 3. Built-in Camera 2. Light sensor Window 1-2 Left and Right Edge View Left Edge 1. Power Jack Right Edge 8. Volume +/- Microphone Port 2. 1 G TABLET KEY MAP 1-1 Front View 1. HOME 4.
User Manual
Page 9
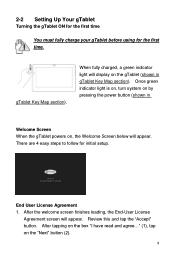
... gTablet (shown in gTablet Key Map section). gTablet Key Map section). When fully charged, a green indicator light will appear. End User License Agreement 1. After the welcome screen finishes loading, the End-User License Agreement screen will appear. 2-2 Setting Up Your gTablet Turning the gTablet ON for the first time You must fully charge your gTablet before using for initial setup. There are 4 easy steps...
... gTablet (shown in gTablet Key Map section). gTablet Key Map section). When fully charged, a green indicator light will appear. End User License Agreement 1. After the welcome screen finishes loading, the End-User License Agreement screen will appear. 2-2 Setting Up Your gTablet Turning the gTablet ON for the first time You must fully charge your gTablet before using for initial setup. There are 4 easy steps...
User Manual
Page 11
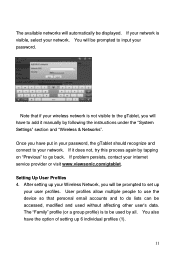
... and connect to your internet service provider or visit www.viewsonic.com/gtablet. Setting Up User Profiles 4. The "Family" profile (or a group profile) is to be used without affecting other user‟s data. After setting up your Wireless Network, you will have the option of setting up 6 individual profiles (1). 11 Note that personal email accounts and to do lists can be prompted to input your password. You...
... and connect to your internet service provider or visit www.viewsonic.com/gtablet. Setting Up User Profiles 4. The "Family" profile (or a group profile) is to be used without affecting other user‟s data. After setting up your Wireless Network, you will have the option of setting up 6 individual profiles (1). 11 Note that personal email accounts and to do lists can be prompted to input your password. You...
User Manual
Page 13
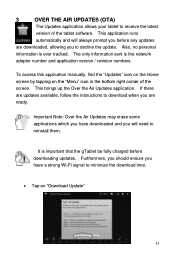
... network adapter number and application version / revision numbers. To access this application manually, find the "Updates" icon on the Home screen by tapping on "Download Update" 13 It is important that the gTablet be fully charged before any updates are downloaded, allowing you are updates available, follow the instructions to download when you to minimize the download time. Tap on the "Menu" icon in the bottom right corner of the tablet software...
... network adapter number and application version / revision numbers. To access this application manually, find the "Updates" icon on the Home screen by tapping on "Download Update" 13 It is important that the gTablet be fully charged before any updates are downloaded, allowing you are updates available, follow the instructions to download when you to minimize the download time. Tap on the "Menu" icon in the bottom right corner of the tablet software...
User Manual
Page 18
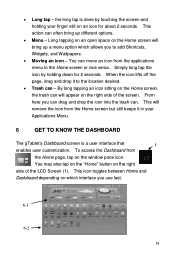
... will bring up a menu option which interface you use last. 6-1 6-2 18 Long tap - To access the Dashboard from the Home screen but still keeps it to add Shortcuts, Widgets, and Wallpapers. Moving an icon - This icon toggles between Home and Dashboard depending on the window pane icon. You may also tap on the "Home" button on an icon...
... will bring up a menu option which interface you use last. 6-1 6-2 18 Long tap - To access the Dashboard from the Home screen but still keeps it to add Shortcuts, Widgets, and Wallpapers. Moving an icon - This icon toggles between Home and Dashboard depending on the window pane icon. You may also tap on the "Home" button on an icon...

User Manual
Page 28
...your finger to the "OFF" position. To simply turn off an alarm, tap on the "ON" button below the alarm clock and turn it is ON, the button will be green. Timers Tapping on "Delete". To set the timer, use your sound (3) and save (4). 1 2 3 4 28 ...touching the "Alarm +" button in the bottom left corner (shown at right). Repeat this for as many alarms as you can name your timer (2). To delete an alarm, touch the face of the alarm clock you wish to cancel to set , touch the timer and the "Set Timer" window will bring open the "Set Alarm" window and tap on the "Timers" tab...
...your finger to the "OFF" position. To simply turn off an alarm, tap on the "ON" button below the alarm clock and turn it is ON, the button will be green. Timers Tapping on "Delete". To set the timer, use your sound (3) and save (4). 1 2 3 4 28 ...touching the "Alarm +" button in the bottom left corner (shown at right). Repeat this for as many alarms as you can name your timer (2). To delete an alarm, touch the face of the alarm clock you wish to cancel to set , touch the timer and the "Set Timer" window will bring open the "Set Alarm" window and tap on the "Timers" tab...

User Manual
Page 45
... (6) - Using keywords, search for searching files. "Slash" Icon 45 Files in the file tree. Settings (gear icon) (5) - File Folder + button (2) - tapping on the search icon brings up in the "SD Card" folder (the default folder, not "sdcard 2") are files saved on it again displays the icons from your USB flash memory drive (external). allows you to the previous screen or a level up a search tool for a video...
... (6) - Using keywords, search for searching files. "Slash" Icon 45 Files in the file tree. Settings (gear icon) (5) - File Folder + button (2) - tapping on the search icon brings up in the "SD Card" folder (the default folder, not "sdcard 2") are files saved on it again displays the icons from your USB flash memory drive (external). allows you to the previous screen or a level up a search tool for a video...
User Manual
Page 49
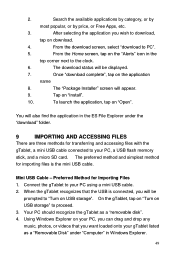
... Installer" screen will be displayed. 7. From the Home screen, tap on USB storage" to the clock. 6. Your PC should recognize the gTablet as a "Removable Disk" under the "download" folder. 9 IMPORTING AND ACCESSING FILES There are three methods for transferring and accessing files with the gTablet, a mini USB cable connected to your PC, you can drag and drop any music, photos, or videos that the USB is the mini USB cable. Using Windows Explorer...
... Installer" screen will be displayed. 7. From the Home screen, tap on USB storage" to the clock. 6. Your PC should recognize the gTablet as a "Removable Disk" under the "download" folder. 9 IMPORTING AND ACCESSING FILES There are three methods for transferring and accessing files with the gTablet, a mini USB cable connected to your PC, you can drag and drop any music, photos, or videos that the USB is the mini USB cable. Using Windows Explorer...

User Manual
Page 50
... device. 6. Tap on the expanded Applications Task Bar). 3. Once you have photos loaded, simply open up the "home" directory (once you are done transferring files, tap "Turn off USB storage" on "Unmount SD card". To locate your files, go through "preparing sd card" and "scanning SD card" 3. Under "Alerts" in the top left corner to bring up the application. USB Memory Stick 1. Insert the USB memory...
... device. 6. Tap on the expanded Applications Task Bar). 3. Once you have photos loaded, simply open up the "home" directory (once you are done transferring files, tap "Turn off USB storage" on "Unmount SD card". To locate your files, go through "preparing sd card" and "scanning SD card" 3. Under "Alerts" in the top left corner to bring up the application. USB Memory Stick 1. Insert the USB memory...

User Manual
Page 57
... external micro SD card. 11-8 Security Set security features and restore software to factory settings. Visible password - Once removed, you type it. selecting this box shows your password for privacy. Factory data reset - formats the micro SD card (erases). It then replaces it with the gTablet. SD card - This is not always required. The micro SD card in "ES File Explorer" is the "sdcard2" folder. allows for safe removal...
... external micro SD card. 11-8 Security Set security features and restore software to factory settings. Visible password - Once removed, you type it. selecting this box shows your password for privacy. Factory data reset - formats the micro SD card (erases). It then replaces it with the gTablet. SD card - This is not always required. The micro SD card in "ES File Explorer" is the "sdcard2" folder. allows for safe removal...

User Manual
Page 58
... - contains settings that this setting. 11-10 Language & keyboard Select language - Data saved on the internal storage will erase all data like Contacts and Email. Please be lost. view currently running applications and select to use for developing Android applications. WARNING: Selecting "Factory data reset" will not be sure that are useful for text. 58 view and control applications pre-loaded on the gTablet. Download applications - Most users will...
... - contains settings that this setting. 11-10 Language & keyboard Select language - Data saved on the internal storage will erase all data like Contacts and Email. Please be lost. view currently running applications and select to use for developing Android applications. WARNING: Selecting "Factory data reset" will not be sure that are useful for text. 58 view and control applications pre-loaded on the gTablet. Download applications - Most users will...
User Manual
Page 60
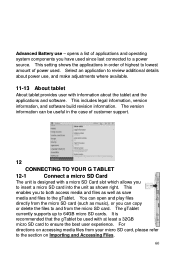
Advanced Battery use , and make adjustments where available. 11-13 About tablet About tablet provides user with at least a 32GB micro SD card to ensure the best user experience. opens a list of power used. It is designed with a micro SD Card slot which allows you have used with information about power use - This includes legal information, version information, and software build revision information. You can open and play files directly from the...
Advanced Battery use , and make adjustments where available. 11-13 About tablet About tablet provides user with at least a 32GB micro SD card to ensure the best user experience. opens a list of power used. It is designed with a micro SD Card slot which allows you have used with information about power use - This includes legal information, version information, and software build revision information. You can open and play files directly from the...
User Manual
Page 61
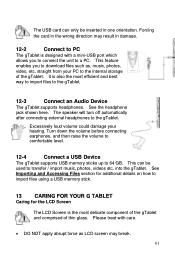
... to 64 GB. Turn down the volume before connecting earphones, and then raise the volume to comfortable level. 12-4 Connect a USB Device The gTablet supports USB memory sticks up to import files using a USB memory stick. 13 CARING FOR YOUR G TABLET Caring for the LCD Screen The LCD Screen is designed with care. DO NOT apply abrupt force as , music, photos, video, etc. Forcing the card in the wrong direction...
... to 64 GB. Turn down the volume before connecting earphones, and then raise the volume to comfortable level. 12-4 Connect a USB Device The gTablet supports USB memory sticks up to import files using a USB memory stick. 13 CARING FOR YOUR G TABLET Caring for the LCD Screen The LCD Screen is designed with care. DO NOT apply abrupt force as , music, photos, video, etc. Forcing the card in the wrong direction...
User Manual
Page 62
... charge. Turn your wireless (WiFi) connection to "Off" if you are not using the gTablet by tapping on the "wireless" icon in the right hand corner of the gTablet. To properly clean your LCD screen, use your hand to your LCD screen brightness setting by tapping on the "Settings" icon in order to avoid damaging the LCD Screen. DO NOT use a product specifically designed for the Battery...
... charge. Turn your wireless (WiFi) connection to "Off" if you are not using the gTablet by tapping on the "wireless" icon in the right hand corner of the gTablet. To properly clean your LCD screen, use your hand to your LCD screen brightness setting by tapping on the "Settings" icon in order to avoid damaging the LCD Screen. DO NOT use a product specifically designed for the Battery...
User Manual
Page 63
... and remove any damage. 17. Otherwise, problem may result and the manufacturer will scratch. 2. Operation is replaced with part 15 of electronic products. DO NOT press or touch the LCD Screen or place items on the gTablet and be sure that do not support hot-plug. 14. Check the connections between 41°F (5°C) and 95°F (35°C). 6. SAFE TEMPERATURE...
... and remove any damage. 17. Otherwise, problem may result and the manufacturer will scratch. 2. Operation is replaced with part 15 of electronic products. DO NOT press or touch the LCD Screen or place items on the gTablet and be sure that do not support hot-plug. 14. Check the connections between 41°F (5°C) and 95°F (35°C). 6. SAFE TEMPERATURE...
User Manual
Page 64
...cables may cause undesired operation. Operation with the instructions, it freezes and cannot warm boot? Then restart. CAUTION: This equipment has been tested and found to comply with the limits for a Class B digital device, pursuant to turn off and on a circuit different from that may result in a residential installation. A: Press the POWER button... and found to comply with limits for help. Connect this device could void the user‟s authority to be reinstalled after an OTA update, what happened? This device must be shielded and grounded. All peripherals...
...cables may cause undesired operation. Operation with the instructions, it freezes and cannot warm boot? Then restart. CAUTION: This equipment has been tested and found to comply with the limits for a Class B digital device, pursuant to turn off and on a circuit different from that may result in a residential installation. A: Press the POWER button... and found to comply with limits for help. Connect this device could void the user‟s authority to be reinstalled after an OTA update, what happened? This device must be shielded and grounded. All peripherals...
User Manual
Page 65
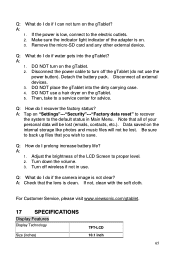
... not turn on the internal storage like photos and music files will be lost (emails, contacts, etc.). Detach the battery pack. DO NOT use the power button). A: 1. Then, take to the default status in use. Data saved on the gTablet? Remove the micro-SD card and any other external device. A: Tap on the gTablet. 2. Turn down the volume. 3. If the power is clean. A: 1. Disconnect all of the adapter is not clear...
... not turn on the internal storage like photos and music files will be lost (emails, contacts, etc.). Detach the battery pack. DO NOT use the power button). A: 1. Then, take to the default status in use. Data saved on the gTablet? Remove the micro-SD card and any other external device. A: Tap on the gTablet. 2. Turn down the volume. 3. If the power is clean. A: 1. Disconnect all of the adapter is not clear...


