
User Guide
Page 11
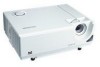
Rear View 12 3 4 5 1 Security lock 2 Kensington lock 3 AC power socket 4 Connection ports 5 Ventilation holes (exhaust) Bottom View 1 2 1 Ceiling mount 2 Tilt-adjustment feet „ This projector can be used with a ceiling mount for information to mount the projector on a ceiling. The ceiling mount is not included in the package. „ Contact your dealer for support. ViewSonic 8 PJD6210/PJD6210-WH
Rear View 12 3 4 5 1 Security lock 2 Kensington lock 3 AC power socket 4 Connection ports 5 Ventilation holes (exhaust) Bottom View 1 2 1 Ceiling mount 2 Tilt-adjustment feet „ This projector can be used with a ceiling mount for information to mount the projector on a ceiling. The ceiling mount is not included in the package. „ Contact your dealer for support. ViewSonic 8 PJD6210/PJD6210-WH

User Guide
Page 27
...Loosen the two screws from the mount. 4 Place a protective sheet (cloth) 5 beneath the projector. Insert a new lamp module into the projector and tighten the screws. 7. Turn on after the warm-up the handle, and then pull out the lamp unit by the handle. 6. ViewSonic 24 PJD6210/PJD6210-WH Unplug the power cord.... „ If the projector is made of glass, do not drop the unit and do not scratch the glass. „ Do not ...
...Loosen the two screws from the mount. 4 Place a protective sheet (cloth) 5 beneath the projector. Insert a new lamp module into the projector and tighten the screws. 7. Turn on after the warm-up the handle, and then pull out the lamp unit by the handle. 6. ViewSonic 24 PJD6210/PJD6210-WH Unplug the power cord.... „ If the projector is made of glass, do not drop the unit and do not scratch the glass. „ Do not ...

