

Toshiba User's Guide for Satellite X205
Page 5
...and the telephone number of service may be a 900 number or any other number for which charges exceed local or long-distance transmission charges.) In order to program this information into your fax transmission, refer to the fax software instructions installed on this equipment...utility commission, public service commission or corporation commission for any person to use a computer or other electronic device, including Fax machines, to send any changes necessary to maintain uninterrupted service. If these changes might affect your service or the operation of Toshiba, or the Toshiba Support...
...and the telephone number of service may be a 900 number or any other number for which charges exceed local or long-distance transmission charges.) In order to program this information into your fax transmission, refer to the fax software instructions installed on this equipment...utility commission, public service commission or corporation commission for any person to use a computer or other electronic device, including Fax machines, to send any changes necessary to maintain uninterrupted service. If these changes might affect your service or the operation of Toshiba, or the Toshiba Support...

Toshiba User's Guide for Satellite X205
Page 28
... 47 Opening the display panel 47 Your computer's features and specifications ....49 Turning on the power 49 Adding memory (optional 50 Installing a memory module 50 Removing a memory module 56 Checking total memory 57 Using the TouchPad 58 Scrolling with the TouchPad 59 Control buttons 59 Disabling or enabling the TouchPad 59 Using the Dual Mode Pad 59 Using Dual Mode 59 Using external display devices 62 Connecting the display device 62 Directing the display output when you turn on the computer 66 Adjusting the quality of the external display......67 Using an external keyboard...
... 47 Opening the display panel 47 Your computer's features and specifications ....49 Turning on the power 49 Adding memory (optional 50 Installing a memory module 50 Removing a memory module 56 Checking total memory 57 Using the TouchPad 58 Scrolling with the TouchPad 59 Control buttons 59 Disabling or enabling the TouchPad 59 Using the Dual Mode Pad 59 Using Dual Mode 59 Using external display devices 62 Connecting the display device 62 Directing the display output when you turn on the computer 66 Adjusting the quality of the external display......67 Using an external keyboard...

Toshiba User's Guide for Satellite X205
Page 44
... the power plug (and extension cable plug if used) has been fully inserted into the socket, to remove a plug from a socket. Failure to operate. Be careful if you may want to: ❖ Add more memory (see "Adding memory (optional)" on page 50) ❖ Connect a mouse (see "Using a mouse" on page 67) ❖ Connect a full-size keyboard (see "Using an external keyboard" on page 67) ❖ Connect an external monitor (see "Using external display devices...
... the power plug (and extension cable plug if used) has been fully inserted into the socket, to remove a plug from a socket. Failure to operate. Be careful if you may want to: ❖ Add more memory (see "Adding memory (optional)" on page 50) ❖ Connect a mouse (see "Using a mouse" on page 67) ❖ Connect a full-size keyboard (see "Using an external keyboard" on page 67) ❖ Connect an external monitor (see "Using external display devices...
Toshiba User's Guide for Satellite X205
Page 52
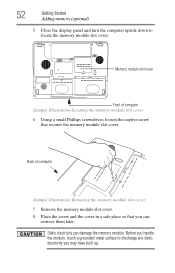
... handle the module, touch a grounded metal surface to locate the memory module slot cover. 52 Getting Started Adding memory (optional) 5 Close the display panel and turn the computer upside down to discharge any static electricity you can damage the memory module. Static electricity can retrieve them later. Memory module slot cover Front of computer (Sample Illustration) Removing the memory module slot cover 7 Remove the memory module slot cover. 8 Place the screw and the cover in a safe place so that secures the memory module slot cover.
... handle the module, touch a grounded metal surface to locate the memory module slot cover. 52 Getting Started Adding memory (optional) 5 Close the display panel and turn the computer upside down to discharge any static electricity you can damage the memory module. Static electricity can retrieve them later. Memory module slot cover Front of computer (Sample Illustration) Removing the memory module slot cover 7 Remove the memory module slot cover. 8 Place the screw and the cover in a safe place so that secures the memory module slot cover.
Toshiba User's Guide for Satellite X205
Page 55
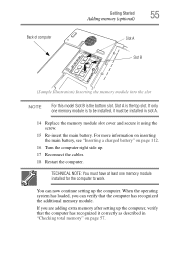
... additional memory module. TECHNICAL NOTE: You must be installed, it using the screw. 15 Re-insert the main battery. Slot A is the bottom slot. Back of computer Getting Started Adding memory (optional) 55 Slot A Slot B (Sample Illustration) Inserting the memory module into the slot NOTE For this model Slot B is the top slot. You can verify that the computer has recognized it correctly as described in slot A. 14 Replace the memory module slot cover...
... additional memory module. TECHNICAL NOTE: You must be installed, it using the screw. 15 Re-insert the main battery. Slot A is the bottom slot. Back of computer Getting Started Adding memory (optional) 55 Slot A Slot B (Sample Illustration) Inserting the memory module into the slot NOTE For this model Slot B is the top slot. You can verify that the computer has recognized it correctly as described in slot A. 14 Replace the memory module slot cover...
Toshiba User's Guide for Satellite X205
Page 56
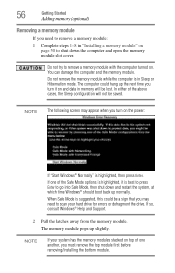
... Sleep configuration will be a sign that you may appear when you turn it is highlighted, then press Enter. The computer could be lost. 56 Getting Started Adding memory (optional) Removing a memory module If you need to scan your system has the memory modules stacked on the power: If "Start Windows® Normally" is best to press Enter to go into Safe Mode, then shut down the computer and open the memory module slot cover...
... Sleep configuration will be a sign that you may appear when you turn it is highlighted, then press Enter. The computer could be lost. 56 Getting Started Adding memory (optional) Removing a memory module If you need to scan your system has the memory modules stacked on the power: If "Start Windows® Normally" is best to press Enter to go into Safe Mode, then shut down the computer and open the memory module slot cover...
Toshiba User's Guide for Satellite X205
Page 57
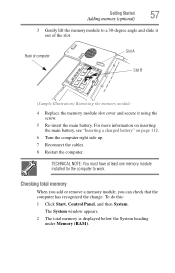
... has recognized the change. The System window appears. 2 The total memory is displayed below the System heading under Memory (RAM). For more information on inserting the main battery, see "Inserting a charged battery" on page 112. 6 Turn the computer right side up. 7 Reconnect the cables. 8 Restart the computer. To do this: 1 Click Start, Control Panel, and then System. Getting Started Adding memory (optional) 57 3 Gently lift the memory module to work.
... has recognized the change. The System window appears. 2 The total memory is displayed below the System heading under Memory (RAM). For more information on inserting the main battery, see "Inserting a charged battery" on page 112. 6 Turn the computer right side up. 7 Reconnect the cables. 8 Restart the computer. To do this: 1 Click Start, Control Panel, and then System. Getting Started Adding memory (optional) 57 3 Gently lift the memory module to work.
Toshiba User's Guide for Satellite X205
Page 58
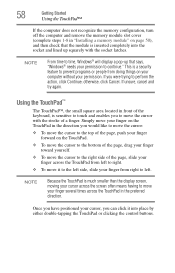
58 Getting Started Using the TouchPad™ If the computer does not recognize the memory configuration, turn off the computer and remove the memory module slot cover (complete steps 1-8 in "Installing a memory module" on page 50), and then check that says, "Windows® needs your permission to continue." Using the TouchPad™ The TouchPad™, the small square area located in front of the keyboard, is sensitive to touch and enables you were trying...
58 Getting Started Using the TouchPad™ If the computer does not recognize the memory configuration, turn off the computer and remove the memory module slot cover (complete steps 1-8 in "Installing a memory module" on page 50), and then check that says, "Windows® needs your permission to continue." Using the TouchPad™ The TouchPad™, the small square area located in front of the keyboard, is sensitive to touch and enables you were trying...
Toshiba User's Guide for Satellite X205
Page 63
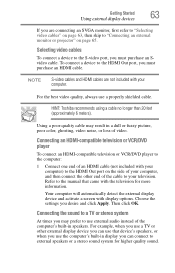
... external monitor or projector" on the side of an HDMI cable (not included with display options. NOTE S-video cables and HDMI cables are connecting an SVGA monitor, first refer to "Selecting video cables" on page 63, then skip to the HDMI Out port, you must purchase an Svideo cable. Refer to the HDMI Out port on page 65. Your computer will automatically detect the external display device and activate a screen with your computer. Getting Started Using external display devices...
... external monitor or projector" on the side of an HDMI cable (not included with display options. NOTE S-video cables and HDMI cables are connecting an SVGA monitor, first refer to "Selecting video cables" on page 63, then skip to the HDMI Out port, you must purchase an Svideo cable. Refer to the HDMI Out port on page 65. Your computer will automatically detect the external display device and activate a screen with your computer. Getting Started Using external display devices...
Toshiba User's Guide for Satellite X205
Page 162
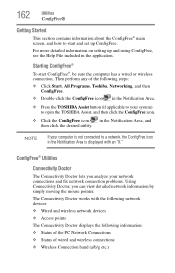
... wireless network devices ❖ Access points The Connectivity Doctor displays the following information: ❖ Status of the PC Network Connections ❖ Status of the following steps: ❖ Click Start, All Programs, Toshiba, Networking, and then ConfigFree. ❖ Double-click the ConfigFree icon in the Notification Area. ❖ Press the TOSHIBA Assist button (if applicable to your network connections and fix network connection problems. Using Connectivity Doctor, you analyze your system) to open...
... wireless network devices ❖ Access points The Connectivity Doctor displays the following information: ❖ Status of the PC Network Connections ❖ Status of the following steps: ❖ Click Start, All Programs, Toshiba, Networking, and then ConfigFree. ❖ Double-click the ConfigFree icon in the Notification Area. ❖ Press the TOSHIBA Assist button (if applicable to your network connections and fix network connection problems. Using Connectivity Doctor, you analyze your system) to open...
Toshiba User's Guide for Satellite X205
Page 163
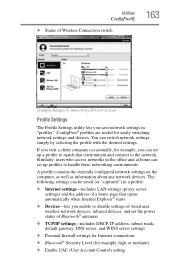
..., default gateway, DNS server, and WINS server settings ❖ Personal firewall settings for Internet connections ❖ Bluetooth® Security Level (for easily switching network settings and devices. ConfigFree® profiles are useful for example, high or medium) ❖ Enable UAC (User Account Control) setting Utilities ConfigFree® ❖ Status of Wireless Connection switch 163 (Sample Image) Connectivity Doctor screen Profile Settings The Profile Settings utility lets you enable or disable settings of wired and wireless network devices, infrared devices, and set...
..., default gateway, DNS server, and WINS server settings ❖ Personal firewall settings for Internet connections ❖ Bluetooth® Security Level (for easily switching network settings and devices. ConfigFree® profiles are useful for example, high or medium) ❖ Enable UAC (User Account Control) setting Utilities ConfigFree® ❖ Status of Wireless Connection switch 163 (Sample Image) Connectivity Doctor screen Profile Settings The Profile Settings utility lets you enable or disable settings of wired and wireless network devices, infrared devices, and set...
Toshiba User's Guide for Satellite X205
Page 169
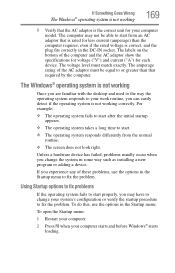
... of the AC adaptor must match exactly. Using Startup options to fix problems If the operating system fails to fix the problem. To open the Startup menu: 1 Restart your computer. 2 Press F8 when your system's configuration or verify the startup procedure to start from the normal routine. ❖ The screen does not look right. Unless a hardware device has failed, problems usually occur when you can easily detect if...
... of the AC adaptor must match exactly. Using Startup options to fix problems If the operating system fails to fix the problem. To open the Startup menu: 1 Restart your computer. 2 Press F8 when your system's configuration or verify the startup procedure to start from the normal routine. ❖ The screen does not look right. Unless a hardware device has failed, problems usually occur when you can easily detect if...
Toshiba User's Guide for Satellite X205
Page 173
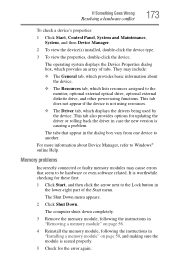
... from one device to the Lock button in the lower-right part of tabs. This tab also provides options for the error again. Memory problems Incorrectly connected or faulty memory modules may include: ❖ The General tab, which provides basic information about Device Manager, refer to the monitor, optional external optical drive, optional external diskette drive, and other power-using resources. ❖ The Driver tab, which provides an array of the Start menu. This tab...
... from one device to the Lock button in the lower-right part of tabs. This tab also provides options for the error again. Memory problems Incorrectly connected or faulty memory modules may include: ❖ The General tab, which provides basic information about Device Manager, refer to the monitor, optional external optical drive, optional external diskette drive, and other power-using resources. ❖ The Driver tab, which provides an array of the Start menu. This tab...
Toshiba User's Guide for Satellite X205
Page 176
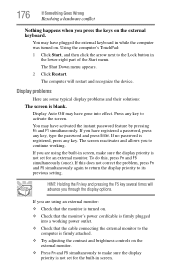
...-right part of the Start menu. If you are using an external monitor: ❖ Check that the monitor is turned on. ❖ Check that the cable connecting the external monitor to the computer is firmly attached. ❖ Try adjusting the contrast and brightness controls on . If you have gone into a working . The Shut Down menu appears. 2 Click Restart. Press any key, type the password and press Enter. If you through the display options...
...-right part of the Start menu. If you are using an external monitor: ❖ Check that the monitor is turned on. ❖ Check that the cable connecting the external monitor to the computer is firmly attached. ❖ Try adjusting the contrast and brightness controls on . If you have gone into a working . The Shut Down menu appears. 2 Click Restart. Press any key, type the password and press Enter. If you through the display options...
Toshiba User's Guide for Satellite X205
Page 181
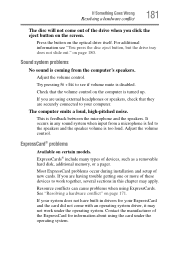
... installation and setup of devices, such as a removable hard disk, additional memory, or a pager. on page 171. This is disabled. ExpressCards® include many types of new cards. Try pressing Fn + Esc to your ExpressCard and the card did not come out of the drive when you click the eject button on certain models. See "Resolving a hardware conflict" on page 180. Adjust the volume control. If you are having trouble...
... installation and setup of devices, such as a removable hard disk, additional memory, or a pager. on page 171. This is disabled. ExpressCards® include many types of new cards. Try pressing Fn + Esc to your ExpressCard and the card did not come out of the drive when you click the eject button on certain models. See "Resolving a hardware conflict" on page 180. Adjust the volume control. If you are having trouble...
Toshiba User's Guide for Satellite X205
Page 184
... the computer is firmly connected to the computer's modem port and the telephone line jack. If you could create and attempt to print a short test file using Notepad. Contact the software manufacturer for information on certain models) This section lists common modem problems. The modem will print. Make sure the cable from the way they print it. Turn the printer back on...
... the computer is firmly connected to the computer's modem port and the telephone line jack. If you could create and attempt to print a short test file using Notepad. Contact the software manufacturer for information on certain models) This section lists common modem problems. The modem will print. Make sure the cable from the way they print it. Turn the printer back on...
Toshiba User's Guide for Satellite X205
Page 222
... keys that activates a memory resident program. hot swapping - A small image displayed on the network. Internet - K keyboard shortcut - It is running and have the operating system automatically recognize the change. I icon - The decentralized, world-wide network of data. LAN (local area network) - L L1 (level one) cache - See also cache, CPU cache, L2 cache. Interlaced monitors take two passes to help improve processing speed. A feature of many Toshiba notebook...
... keys that activates a memory resident program. hot swapping - A small image displayed on the network. Internet - K keyboard shortcut - It is running and have the operating system automatically recognize the change. I icon - The decentralized, world-wide network of data. LAN (local area network) - L L1 (level one) cache - See also cache, CPU cache, L2 cache. Interlaced monitors take two passes to help improve processing speed. A feature of many Toshiba notebook...

Toshiba User's Guide for Satellite X205
Page 228
... 83 battery changing 110 charge indicator light 46, 104 charge not lasting 175 charging 44, 47 conserving power 107 disposal 115 low charge 106 monitoring power 46, 104 not charging 174 228 notification 107 power plan 204 power plan hot key 109 real-time clock (RTC) 101 removing 110 BIOS Setup see TOSHIBA Hardware Setup Bridge Media Adapter inserting memory media 130 removing memory media 130 button power 49 start 119 C CD playing an audio 96 CD, using 92 character keys 84 charging the battery 47 checking device...
... 83 battery changing 110 charge indicator light 46, 104 charge not lasting 175 charging 44, 47 conserving power 107 disposal 115 low charge 106 monitoring power 46, 104 not charging 174 228 notification 107 power plan 204 power plan hot key 109 real-time clock (RTC) 101 removing 110 BIOS Setup see TOSHIBA Hardware Setup Bridge Media Adapter inserting memory media 130 removing memory media 130 button power 49 start 119 C CD playing an audio 96 CD, using 92 character keys 84 charging the battery 47 checking device...

Toshiba User's Guide for Satellite X205
Page 229
... connecting to a power source 44 connection set up 121 control buttons 59 Ctrl keys 84 D desktop creating new icon 118 major features 118 desktop exploration 117 desktop icons 118 Device Manager 172 checking properties 172 devices keyboard 67 mouse 67 Disk Defragmenter 179 disk drive corrupted/damaged data files 179 missing files/trouble accessing a disk 178 running slow 179 diskette drive cannot insert a diskette 179 cannot read a diskette 179 connecting 69 external, connecting 69 display...
... connecting to a power source 44 connection set up 121 control buttons 59 Ctrl keys 84 D desktop creating new icon 118 major features 118 desktop exploration 117 desktop icons 118 Device Manager 172 checking properties 172 devices keyboard 67 mouse 67 Disk Defragmenter 179 disk drive corrupted/damaged data files 179 missing files/trouble accessing a disk 178 running slow 179 diskette drive cannot insert a diskette 179 cannot read a diskette 179 connecting 69 external, connecting 69 display...
Toshiba User's Guide for Satellite X205
Page 231
... mouse installing 67 mouse utility 144 N network accessing 121 Connect to the Internet Wizard 121 networking wireless 120 Notification Area 119 O Opening the display panel 47 optical disc positioning 95 optical discs handling 95 inserting 94 removing 98 optical drive problems 180 troubleshooting 180 using 92 optical media recording 97 other documentation 38 P password deleting a supervisor 140 disabling a user 141 setting a user 140 supervisor set up 139 types 138 passwords instant, using 138 setting 138 port RGB 62 power computer will not start 166 connecting cable...
... mouse installing 67 mouse utility 144 N network accessing 121 Connect to the Internet Wizard 121 networking wireless 120 Notification Area 119 O Opening the display panel 47 optical disc positioning 95 optical discs handling 95 inserting 94 removing 98 optical drive problems 180 troubleshooting 180 using 92 optical media recording 97 other documentation 38 P password deleting a supervisor 140 disabling a user 141 setting a user 140 supervisor set up 139 types 138 passwords instant, using 138 setting 138 port RGB 62 power computer will not start 166 connecting cable...


