User Manual
Page 32
...port 135 Using an expansion device 135 Using an Optional Toshiba Express Port Replicator with your computer 135 Chapter 5: Toshiba Utilities 136 TOSHIBA Assist 137 Connect 138 Secure 139 Protect & Fix 140 Optimize 141 TOSHIBA Application Installer 142 Setting passwords 143 Using an instant... 144 Using a user password 144 Deleting a user password 146 TOSHIBA PC Diagnostic Tool Utility 147 TOSHIBA HDD Protection Utility 148 TOSHIBA SD™ Memory Card Format Utility .........149 TOSHIBA SD™ Memory Boot Utility 150 Booting from a bootable SD card 151 Mouse Utility 152...
...port 135 Using an expansion device 135 Using an Optional Toshiba Express Port Replicator with your computer 135 Chapter 5: Toshiba Utilities 136 TOSHIBA Assist 137 Connect 138 Secure 139 Protect & Fix 140 Optimize 141 TOSHIBA Application Installer 142 Setting passwords 143 Using an instant... 144 Using a user password 144 Deleting a user password 146 TOSHIBA PC Diagnostic Tool Utility 147 TOSHIBA HDD Protection Utility 148 TOSHIBA SD™ Memory Card Format Utility .........149 TOSHIBA SD™ Memory Boot Utility 150 Booting from a bootable SD card 151 Mouse Utility 152...

User Manual
Page 57
... bottom module. 3 Gently lift the memory module to go into Safe Mode, then shut down and restart the system, at which time Windows® should boot back up slightly. NOTE If your hard drive for errors or defragment the drive. If one another, you turn on the power: If "Start Windows...® Normally" is best to press Enter to a 30-degree angle and slide it is highlighted, then press Enter. Getting Started 57 Adding memory (optional) NOTE The following screen may need to scan your system has the memory modules stacked on top of one of the Safe Mode...
... bottom module. 3 Gently lift the memory module to go into Safe Mode, then shut down and restart the system, at which time Windows® should boot back up slightly. NOTE If your hard drive for errors or defragment the drive. If one another, you turn on the power: If "Start Windows...® Normally" is best to press Enter to a 30-degree angle and slide it is highlighted, then press Enter. Getting Started 57 Adding memory (optional) NOTE The following screen may need to scan your system has the memory modules stacked on top of one of the Safe Mode...
User Manual
Page 65
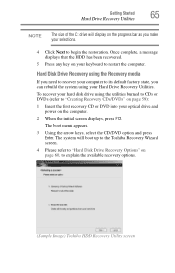
The boot menu appears. 3 Using the arrow keys, select the CD/DVD option and press Enter. Hard Disk Drive Recovery using the Recovery media If you need to recover your computer to its default factory state, you make .... Getting Started 65 Hard Drive Recovery Utilities NOTE The size of the C: drive will boot up to the Toshiba Recovery Wizard screen. 4 Please refer to "Hard Disk Drive Recovery Options" on page 60, to explain the available recovery options. (Sample Image) Toshiba HDD Recovery Utility screen The system will display on your selections. 4 Click Next...
The boot menu appears. 3 Using the arrow keys, select the CD/DVD option and press Enter. Hard Disk Drive Recovery using the Recovery media If you need to recover your computer to its default factory state, you make .... Getting Started 65 Hard Drive Recovery Utilities NOTE The size of the C: drive will boot up to the Toshiba Recovery Wizard screen. 4 Please refer to "Hard Disk Drive Recovery Options" on page 60, to explain the available recovery options. (Sample Image) Toshiba HDD Recovery Utility screen The system will display on your selections. 4 Click Next...

User Manual
Page 136
..., set additional options, or change default options. Together, these allow you to reconfigure your individual needs. These utilities are described in this chapter. ❖ TOSHIBA Assist ❖ TOSHIBA Application Installer ❖ User password ❖ TOSHIBA PC Diagnostic Tool Utility ❖ TOSHIBA HDD Protection Utility ❖ TOSHIBA SD™ Memory Card Format Utility ❖ TOSHIBA SD™ Memory Boot Utility...
..., set additional options, or change default options. Together, these allow you to reconfigure your individual needs. These utilities are described in this chapter. ❖ TOSHIBA Assist ❖ TOSHIBA Application Installer ❖ User password ❖ TOSHIBA PC Diagnostic Tool Utility ❖ TOSHIBA HDD Protection Utility ❖ TOSHIBA SD™ Memory Card Format Utility ❖ TOSHIBA SD™ Memory Boot Utility...
User Manual
Page 150
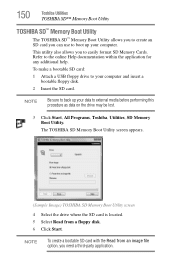
... may be lost. 3 Click Start, All Programs, Toshiba, Utilities, SD Memory Boot Utility. The TOSHIBA SD Memory Boot Utility screen appears. (Sample Image) TOSHIBA SD Memory Boot Utility screen 4 Select the drive where the SD card is located. 5 Select Read from an image file option, you can use to boot up your computer and insert a bootable floppy disk...
... may be lost. 3 Click Start, All Programs, Toshiba, Utilities, SD Memory Boot Utility. The TOSHIBA SD Memory Boot Utility screen appears. (Sample Image) TOSHIBA SD Memory Boot Utility screen 4 Select the drive where the SD card is located. 5 Select Read from an image file option, you can use to boot up your computer and insert a bootable floppy disk...
User Manual
Page 151
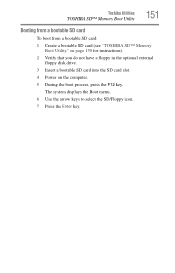
The system displays the Boot menu. 6 Use the arrow keys to select the SD/Floppy icon. 7 Press the Enter key. Toshiba Utilities TOSHIBA SD™ Memory Boot Utility 151 Booting from a bootable SD card To boot from a bootable SD card: 1 Create a bootable SD card (see "TOSHIBA SD™ Memory Boot Utility" on page 150 for instructions). 2 Verify that you do not have a floppy in the optional external floppy disk drive. 3 Insert a bootable SD card into the SD card slot. 4 Power on the computer. 5 During the boot process, press the F12 key.
The system displays the Boot menu. 6 Use the arrow keys to select the SD/Floppy icon. 7 Press the Enter key. Toshiba Utilities TOSHIBA SD™ Memory Boot Utility 151 Booting from a bootable SD card To boot from a bootable SD card: 1 Create a bootable SD card (see "TOSHIBA SD™ Memory Boot Utility" on page 150 for instructions). 2 Verify that you do not have a floppy in the optional external floppy disk drive. 3 Insert a bootable SD card into the SD card slot. 4 Power on the computer. 5 During the boot process, press the F12 key.
User Manual
Page 154
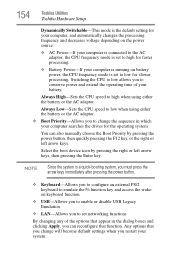
...-Allows you to change will become default settings when you to conserve power and extend the operating time of the options that function. Select the boot device icon by pressing the power button, then quickly pressing the F12 key, or the right or left arrow keys, then ...any of your system. Always High-Sets the CPU speed to high when using either the battery or the AC adaptor. 154 Toshiba Utilities Toshiba Hardware Setup Dynamically Switchable-This mode is the default setting for your computer, and automatically changes the processing frequency and decreases voltage depending...
...-Allows you to change will become default settings when you to conserve power and extend the operating time of the options that function. Select the boot device icon by pressing the power button, then quickly pressing the F12 key, or the right or left arrow keys, then ...any of your system. Always High-Sets the CPU speed to high when using either the battery or the AC adaptor. 154 Toshiba Utilities Toshiba Hardware Setup Dynamically Switchable-This mode is the default setting for your computer, and automatically changes the processing frequency and decreases voltage depending...
User Manual
Page 163
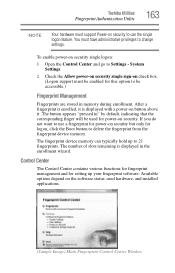
...is enrolled, it . The fingerprint device memory can typically hold up your fingerprint software. Toshiba Utilities Fingerprint Authentication Utility 163 NOTE Your hardware must support Power-on the software status, used... remaining is displayed with a power-on security but only for logon, click the Boot button to 21 fingerprints. Control Center The Control Center contains various functions for fingerprint ...and for power-on button above it is displayed in memory during enrollment. Available options depend on security to change settings. System Settings. 2 Check the Allow power-on...
...is enrolled, it . The fingerprint device memory can typically hold up your fingerprint software. Toshiba Utilities Fingerprint Authentication Utility 163 NOTE Your hardware must support Power-on the software status, used... remaining is displayed with a power-on security but only for logon, click the Boot button to 21 fingerprints. Control Center The Control Center contains various functions for fingerprint ...and for power-on button above it is displayed in memory during enrollment. Available options depend on security to change settings. System Settings. 2 Check the Allow power-on...
User Manual
Page 177
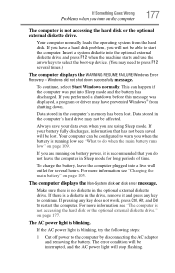
... may have a hard disk problem, you performed a shutdown before this message was put into the optional external diskette drive and press F12 when the machine starts and use the arrow keys to select the boot-up device. (You may not be configured to start the computer. For more information see "Charging... the main battery" on page 105. The AC power light is not accessing the hard disk or the optional external diskette drive." Windows did not shut ...
... may have a hard disk problem, you performed a shutdown before this message was put into the optional external diskette drive and press F12 when the machine starts and use the arrow keys to select the boot-up device. (You may not be configured to start the computer. For more information see "Charging... the main battery" on page 105. The AC power light is not accessing the hard disk or the optional external diskette drive." Windows did not shut ...
User Manual
Page 179
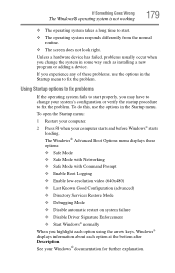
... or adding a device. To do this, use the options in the Startup menu. If you experience any of these options: ❖ Safe Mode ❖ Safe Mode with Networking ❖ Safe Mode with Command Prompt ❖ Enable Boot Logging ❖ Enable low-resolution video (640x480) ❖... each option using the arrow keys, Windows® displays information about each option at the bottom after Description. Using Startup options to fix problems If the operating system fails to fix the problem. The Windows® Advanced Boot Options menu displays these problems, use the options in...
... or adding a device. To do this, use the options in the Startup menu. If you experience any of these options: ❖ Safe Mode ❖ Safe Mode with Networking ❖ Safe Mode with Command Prompt ❖ Enable Boot Logging ❖ Enable low-resolution video (640x480) ❖... each option using the arrow keys, Windows® displays information about each option at the bottom after Description. Using Startup options to fix problems If the operating system fails to fix the problem. The Windows® Advanced Boot Options menu displays these problems, use the options in...


