Satellite U500 (PSU82U) Resource Guide
Page 3
... please make periodic back-up and usage instructions in the applicable user guides and/or manuals enclosed or provided electronically. Model: Satellite® U500 Series Recordable and/or ReWritable Drive(s) and Associated Software Warranty The computer system you must read and follow all set-up...NETWORK SYSTEMS OR REMOVABLE STORAGE MEDIA ARISING OUT OF OR RESULTING FROM THE USE OF THE PRODUCT, EVEN IF ADVISED OF THE POSSIBILITY THEREOF. TOSHIBA DISCLAIMS ANY LIABILITY FOR THE FAILURE TO COPY OR TRANSFER THE DATA CORRECTLY. 3 Handling the cord on the hard disk or other storage devices...
... please make periodic back-up and usage instructions in the applicable user guides and/or manuals enclosed or provided electronically. Model: Satellite® U500 Series Recordable and/or ReWritable Drive(s) and Associated Software Warranty The computer system you must read and follow all set-up...NETWORK SYSTEMS OR REMOVABLE STORAGE MEDIA ARISING OUT OF OR RESULTING FROM THE USE OF THE PRODUCT, EVEN IF ADVISED OF THE POSSIBILITY THEREOF. TOSHIBA DISCLAIMS ANY LIABILITY FOR THE FAILURE TO COPY OR TRANSFER THE DATA CORRECTLY. 3 Handling the cord on the hard disk or other storage devices...
Satellite U500 (PSU82U) Resource Guide
Page 8
... to carefully control parameters that have been manipulated by an unauthorized party (i.e., patches, utilities, or code (including open source code modifications) which have not been validated by third parties of the software provided in your computer. Intel's wireless WiMAX™ EEPROM, firmware, and software driver are available on availability and network limitations. Japan USA WiMAX™ connectivity requires a WiMAX™ enabled device and subscription...
... to carefully control parameters that have been manipulated by an unauthorized party (i.e., patches, utilities, or code (including open source code modifications) which have not been validated by third parties of the software provided in your computer. Intel's wireless WiMAX™ EEPROM, firmware, and software driver are available on availability and network limitations. Japan USA WiMAX™ connectivity requires a WiMAX™ enabled device and subscription...
Satellite U500 (PSU82U) Resource Guide
Page 13
... Italy Kazakhstan Kyrgyzstan Lesotho Luxembourg Malta Morocco New Zealand Oman Papua New Guinea Philippines Puerto Rico Saudi Arabia Ad-hoc mode provides a direct communication between two client devices without a Wireless LAN Access Point. ❖ This device must not be used with the local technical support staff responsible for European Community operation. The Access Point's radar detection feature will operate under the control of radar.
... Italy Kazakhstan Kyrgyzstan Lesotho Luxembourg Malta Morocco New Zealand Oman Papua New Guinea Philippines Puerto Rico Saudi Arabia Ad-hoc mode provides a direct communication between two client devices without a Wireless LAN Access Point. ❖ This device must not be used with the local technical support staff responsible for European Community operation. The Access Point's radar detection feature will operate under the control of radar.
Satellite U500 (PSU82U) Resource Guide
Page 24
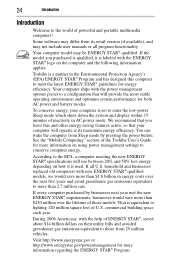
... of the Toshiba User's Guide for both AC power and battery modes. If every computer purchased by pressing the power button. 24 Introduction Introduction Welcome to the world of ENERGY STAR®, saved about $14 billion dollars on using power management settings to conserve computer energy. If all program functionality. commercial building space each year. During 2006 Americans, with the power management options preset to a configuration that...
... of the Toshiba User's Guide for both AC power and battery modes. If every computer purchased by pressing the power button. 24 Introduction Introduction Welcome to the world of ENERGY STAR®, saved about $14 billion dollars on using power management settings to conserve computer energy. If all program functionality. commercial building space each year. During 2006 Americans, with the power management options preset to a configuration that...

Satellite U500 (PSU82U) Resource Guide
Page 31
... the module(s) to cool to step 3. 1 Click Start. Slot B is the bottom slot. Avoid touching the cover, the module(s), and the surrounding area before replacing it must be installed in Sleep or Hibernation mode, data will need a small Phillips screwdriver for this model, Slot A is the top slot. The computer has two memory slots-Slot A and Slot B. For this procedure. Adding memory (optional) 31 Installing a memory module Memory modules can install one memory module is in Slot A. If you install or remove a memory module, turn...
... the module(s) to cool to step 3. 1 Click Start. Slot B is the bottom slot. Avoid touching the cover, the module(s), and the surrounding area before replacing it must be installed in Sleep or Hibernation mode, data will need a small Phillips screwdriver for this model, Slot A is the top slot. The computer has two memory slots-Slot A and Slot B. For this procedure. Adding memory (optional) 31 Installing a memory module Memory modules can install one memory module is in Slot A. If you install or remove a memory module, turn...
Satellite U500 (PSU82U) Resource Guide
Page 32
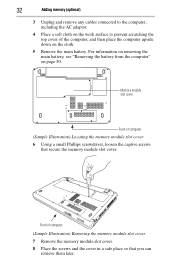
... the cover in a safe place so that secure the memory module slot cover. 32 Adding memory (optional) 3 Unplug and remove any cables connected to the computer, including the AC adaptor. 4 Place a soft cloth on the work surface to prevent scratching the top cover of the computer, and then place the computer upside down on page 50. Front of computer (Sample Illustration) Locating the memory module slot cover 6 Using a small...
... the cover in a safe place so that secure the memory module slot cover. 32 Adding memory (optional) 3 Unplug and remove any cables connected to the computer, including the AC adaptor. 4 Place a soft cloth on the work surface to prevent scratching the top cover of the computer, and then place the computer upside down on page 50. Front of computer (Sample Illustration) Locating the memory module slot cover 6 Using a small...
Satellite U500 (PSU82U) Resource Guide
Page 33
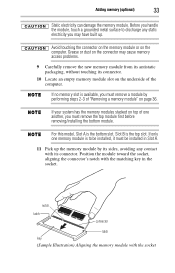
... Locate an empty memory module slot on the underside of the computer. notch latch connector latch key (Sample Illustration) Aligning the memory module with its connector. If only one another, you may cause memory access problems. 9 Carefully remove the new memory module from its antistatic packaging, without touching its sides, avoiding any static electricity you must remove the top module first before removing/installing the bottom module. Position the module toward...
... Locate an empty memory module slot on the underside of the computer. notch latch connector latch key (Sample Illustration) Aligning the memory module with its connector. If only one another, you may cause memory access problems. 9 Carefully remove the new memory module from its antistatic packaging, without touching its sides, avoiding any static electricity you must remove the top module first before removing/installing the bottom module. Position the module toward...
Satellite U500 (PSU82U) Resource Guide
Page 35
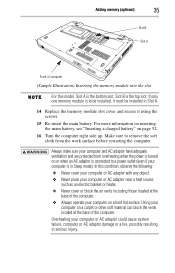
... is connected to remove the soft cloth from the work surface before restarting the computer. Slot B is to be installed, it must be installed in Slot A. 14 Replace the memory module slot cover and secure it using the screws. 15 Re-insert the main battery. Always make sure your computer and AC adaptor have adequate ventilation and are protected from overheating when the power is turned on...
... is connected to remove the soft cloth from the work surface before restarting the computer. Slot B is to be installed, it must be installed in Slot A. 14 Replace the memory module slot cover and secure it using the screws. 15 Re-insert the main battery. Always make sure your computer and AC adaptor have adequate ventilation and are protected from overheating when the power is turned on...
Satellite U500 (PSU82U) Resource Guide
Page 36
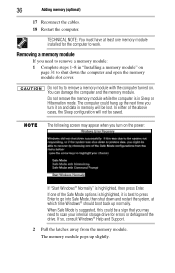
... need to scan your internal storage drive for the computer to go into Safe Mode, then shut down the computer and open the memory module slot cover. The memory module pops up normally. 36 Adding memory (optional) 17 Reconnect the cables. 18 Restart the computer. In either of the Safe Mode options is highlighted, then press Enter. If so, consult Windows® Help and Support. 2 Pull the latches away from the memory module...
... need to scan your internal storage drive for the computer to go into Safe Mode, then shut down the computer and open the memory module slot cover. The memory module pops up normally. 36 Adding memory (optional) 17 Reconnect the cables. 18 Restart the computer. In either of the Safe Mode options is highlighted, then press Enter. If so, consult Windows® Help and Support. 2 Pull the latches away from the memory module...
Satellite U500 (PSU82U) Resource Guide
Page 37
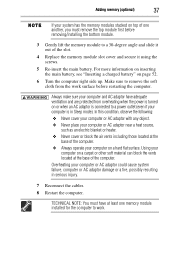
... power is turned on page 52. 6 Turn the computer right side up. TECHNICAL NOTE: You must remove the top module first before restarting the computer. For more information on inserting the main battery, see "Inserting a charged battery" on or when an AC adaptor is connected to a 30-degree angle and slide it out of the slot. 4 Replace the memory module slot cover and secure it using...
... power is turned on page 52. 6 Turn the computer right side up. TECHNICAL NOTE: You must remove the top module first before restarting the computer. For more information on inserting the main battery, see "Inserting a charged battery" on or when an AC adaptor is connected to a 30-degree angle and slide it out of the slot. 4 Replace the memory module slot cover and secure it using...
Satellite U500 (PSU82U) Resource Guide
Page 39
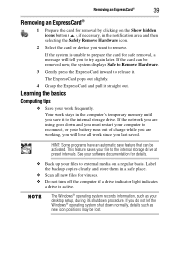
... the internal storage drive. If the network you are working, you will tell you to try again later. Learning the basics Computing tips ❖ Save your computer to external media on the Show hidden icons button ( ), if necessary, in the notification area and then selecting the Safely Remove Hardware icon. 2 Select the card or device you want to release it. The Windows® operating...
... the internal storage drive. If the network you are working, you will tell you to try again later. Learning the basics Computing tips ❖ Save your computer to external media on the Show hidden icons button ( ), if necessary, in the notification area and then selecting the Safely Remove Hardware icon. 2 Select the card or device you want to release it. The Windows® operating...
Satellite U500 (PSU82U) Resource Guide
Page 42
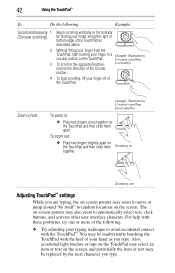
... apart on -screen pointer may be replaced by itself" to automatically select text, click buttons, and activate other user interface elements. The on the TouchPad and then slide them apart. Also, accidental light touches or taps on the TouchPad may select an item or text on -screen pointer may be inadvertently brushing the TouchPad with the TouchPad™. Zooming out Adjusting TouchPad™ settings While you are typing...
... apart on -screen pointer may be replaced by itself" to automatically select text, click buttons, and activate other user interface elements. The on the TouchPad and then slide them apart. Also, accidental light touches or taps on the TouchPad may select an item or text on -screen pointer may be inadvertently brushing the TouchPad with the TouchPad™. Zooming out Adjusting TouchPad™ settings While you are typing...
Satellite U500 (PSU82U) Resource Guide
Page 43
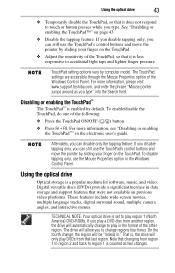
... Windows Control Panel. Digital versatile discs (DVDs) provide a significant increase in the format of the other region. That is, the drive will be "locked in the electronic user's guide. For more information, see "Disabling or enabling the TouchPad™" in ." To enable/disable the TouchPad, do one of the Windows Control Panel. For more information, please visit www.support.toshiba.com, and enter the phrase "Mouse pointer jumps around as two changes. Using the optical drive...
... Windows Control Panel. Digital versatile discs (DVDs) provide a significant increase in the format of the other region. That is, the drive will be "locked in the electronic user's guide. For more information, see "Disabling or enabling the TouchPad™" in ." To enable/disable the TouchPad, do one of the Windows Control Panel. For more information, please visit www.support.toshiba.com, and enter the phrase "Mouse pointer jumps around as two changes. Using the optical drive...
Satellite U500 (PSU82U) Resource Guide
Page 44
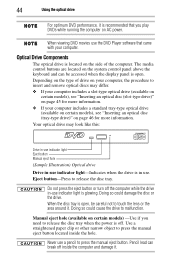
Depending on the type of the computer. Eject button-Press to malfunction. Never use the DVD Player software that you need to release the disc tray when the power is open , be accessed when the display panel is off the computer while the drive in-use indicator light is in -use . The media control buttons are located on your computer, the procedure to touch the lens or the area around it. Doing so...
Depending on the type of the computer. Eject button-Press to malfunction. Never use the DVD Player software that you need to release the disc tray when the power is open , be accessed when the display panel is off the computer while the drive in-use indicator light is in -use . The media control buttons are located on your computer, the procedure to touch the lens or the area around it. Doing so...
Satellite U500 (PSU82U) Resource Guide
Page 48
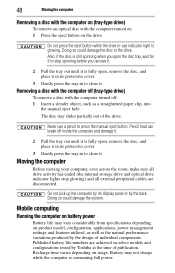
... all drive activity has ended (the internal storage drive and optical drive indicator lights stop spinning before you open , remove the disc, and place it in its protective cover. 3 Gently press the tray in to press the manual eject button. Mobile computing Running the computer on the drive. Battery may vary considerably from specifications depending on usage. Do not press the eject button while the drive in-use a pencil...
... all drive activity has ended (the internal storage drive and optical drive indicator lights stop spinning before you open , remove the disc, and place it in its protective cover. 3 Gently press the tray in to press the manual eject button. Mobile computing Running the computer on the drive. Battery may vary considerably from specifications depending on usage. Do not press the eject button while the drive in-use a pencil...
Satellite U500 (PSU82U) Resource Guide
Page 50
... power button light flashes amber, it in Hibernation mode according to the instructions in "Using and configuring Hibernation mode" in the electronic user's guide. Your computer's Power Options utility can be used to select a power level setting that the system is using the Windows® operating system Sleep command). The battery pack's internal protective device could also damage the battery pack and computer. ❖ Never expose a battery pack to confuse the battery light ( ), the ON/OFF light ( ), and the power button light...
... power button light flashes amber, it in Hibernation mode according to the instructions in "Using and configuring Hibernation mode" in the electronic user's guide. Your computer's Power Options utility can be used to select a power level setting that the system is using the Windows® operating system Sleep command). The battery pack's internal protective device could also damage the battery pack and computer. ❖ Never expose a battery pack to confuse the battery light ( ), the ON/OFF light ( ), and the power button light...

Satellite U500 (PSU82U) Resource Guide
Page 56
... or installed a charged battery. When this happens turning the power on . A keypad overlay may occur when you have gone into effect. The keyboard produces unexpected characters. Display Auto Off may be on. If you turn off the cursor control overlay light, or Fn + F11 to fix" on page 55). Verify that the computer is connected to the problem instead of the keys. If the indicator...
... or installed a charged battery. When this happens turning the power on . A keypad overlay may occur when you have gone into effect. The keyboard produces unexpected characters. Display Auto Off may be on. If you turn off the cursor control overlay light, or Fn + F11 to fix" on page 55). Verify that the computer is connected to the problem instead of the keys. If the indicator...

Satellite U500 (PSU82U) Resource Guide
Page 57
... (once). If you are using the built-in screen, make sure the display priority is not set for information about how to continue working power outlet. ❖ Check that the cable connecting the external monitor to the computer is firmly attached. ❖ Try adjusting the contrast and brightness controls on . ❖ Check that may appear on battery power. This is manufactured using highprecision technology. If something goes...
... (once). If you are using the built-in screen, make sure the display priority is not set for information about how to continue working power outlet. ❖ Check that the cable connecting the external monitor to the computer is firmly attached. ❖ Try adjusting the contrast and brightness controls on . ❖ Check that may appear on battery power. This is manufactured using highprecision technology. If something goes...
Satellite U500 (PSU82U) Resource Guide
Page 61
...; 54 changing 50 charge indicator light 49 disposal 54 installing 50, 52 maintaining 53 monitoring power 49 notification 50 real-time clock (RTC) 49 removing 50 safety precautions 52 buttons eject, optical drive 44 Media control buttons 45 C Call2Recycle™ battery 54 CDs inserting 46 changing main battery 50 compact discs handling 45 inserting 46 compact discs (slot-type drive) removing 46 computer moving 48 setting up 31 computing tips 39 61 connecting AC...
...; 54 changing 50 charge indicator light 49 disposal 54 installing 50, 52 maintaining 53 monitoring power 49 notification 50 real-time clock (RTC) 49 removing 50 safety precautions 52 buttons eject, optical drive 44 Media control buttons 45 C Call2Recycle™ battery 54 CDs inserting 46 changing main battery 50 compact discs handling 45 inserting 46 compact discs (slot-type drive) removing 46 computer moving 48 setting up 31 computing tips 39 61 connecting AC...
Satellite U500 (PSU82U) Resource Guide
Page 62
... manual eject hole optical drive 44 memory module installation 31 installing 30 inserting into socket 33 removing 36 removing cover 32 monitor problems monitor not working 57 moving the computer 48 N notification low battery 50 O optical disc handling 47 inserting (slot-type drive) 45 inserting (tray-type drive) 46 positioning 47 optical drive drive in-use indicator light 44 eject button 44 inserting discs 46 manual eject hole 44 removing 46 removing disc 48 using 43 P power cable connectors 60 computer will not start 56 connecting cable...
... manual eject hole optical drive 44 memory module installation 31 installing 30 inserting into socket 33 removing 36 removing cover 32 monitor problems monitor not working 57 moving the computer 48 N notification low battery 50 O optical disc handling 47 inserting (slot-type drive) 45 inserting (tray-type drive) 46 positioning 47 optical drive drive in-use indicator light 44 eject button 44 inserting discs 46 manual eject hole 44 removing 46 removing disc 48 using 43 P power cable connectors 60 computer will not start 56 connecting cable...


