Satellite U500 (PSU82U) Resource Guide
Page 3
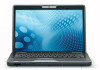
... CORRECTLY. Model: Satellite® U500 Series Recordable and/or ReWritable Drive(s) and Associated Software Warranty The computer system you fail to cause birth defects or other storage devices as a precaution against possible failures, alteration, or loss of Stored Data For your important data, please make periodic back-up and usage instructions in the applicable user guides and/or manuals enclosed or...
... CORRECTLY. Model: Satellite® U500 Series Recordable and/or ReWritable Drive(s) and Associated Software Warranty The computer system you fail to cause birth defects or other storage devices as a precaution against possible failures, alteration, or loss of Stored Data For your important data, please make periodic back-up and usage instructions in the applicable user guides and/or manuals enclosed or...
Satellite U500 (PSU82U) Resource Guide
Page 8
..., utilities, or code with the wireless WiMAX™ adapters (e.g., the EEPROM and firmware). Do not use this equipment except in the countries/regions in binary format with the Intel® wireless WiMAX™ adapters that they are engineered, manufactured, tested, and quality checked to ensure that affect radio operation and to purchase additional software or hardware at extra cost. WiMAX™ connectivity may...
..., utilities, or code with the wireless WiMAX™ adapters (e.g., the EEPROM and firmware). Do not use this equipment except in the countries/regions in binary format with the Intel® wireless WiMAX™ adapters that they are engineered, manufactured, tested, and quality checked to ensure that affect radio operation and to purchase additional software or hardware at extra cost. WiMAX™ connectivity may...
Satellite U500 (PSU82U) Resource Guide
Page 13
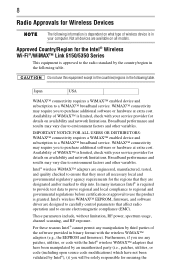
... Community. Do not use this device. Ad-hoc mode provides a direct communication between two client devices without a Wireless LAN Access Point. ❖ This device must not be used with the local technical support staff responsible for the wireless network to ensure the Access Point device(s) are properly configured for the Realtek® RTL8192E This equipment is approved to avoid operating on a channel free of this equipment except...
... Community. Do not use this device. Ad-hoc mode provides a direct communication between two client devices without a Wireless LAN Access Point. ❖ This device must not be used with the local technical support staff responsible for the wireless network to ensure the Access Point device(s) are properly configured for the Realtek® RTL8192E This equipment is approved to avoid operating on a channel free of this equipment except...
Satellite U500 (PSU82U) Resource Guide
Page 24
... energy depending on how it is set to enter the low-power Sleep mode which shuts down the system and display within 15 minutes of U.S. According to the EPA, a computer meeting the new ENERGY STAR® specifications will operate at its retail version (if available), and may be ENERGY STAR® qualified. That is used. Toshiba is a partner in the Environmental...
... energy depending on how it is set to enter the low-power Sleep mode which shuts down the system and display within 15 minutes of U.S. According to the EPA, a computer meeting the new ENERGY STAR® specifications will operate at its retail version (if available), and may be ENERGY STAR® qualified. That is used. Toshiba is a partner in the Environmental...

Satellite U500 (PSU82U) Resource Guide
Page 31
... you install or remove a memory module, turn off . Slot B is the bottom slot. If the computer is in Sleep or Hibernation mode, data will need a small Phillips screwdriver for this model, Slot A is the top slot. Installing a memory module with the computer's power on , begin at step 1; Adding memory (optional) 31 Installing a memory module Memory modules can install one memory module is in good condition. Allow the module(s) to cool to step 3. 1 Click Start. Before you install or remove a memory module while the...
... you install or remove a memory module, turn off . Slot B is the bottom slot. If the computer is in Sleep or Hibernation mode, data will need a small Phillips screwdriver for this model, Slot A is the top slot. Installing a memory module with the computer's power on , begin at step 1; Adding memory (optional) 31 Installing a memory module Memory modules can install one memory module is in good condition. Allow the module(s) to cool to step 3. 1 Click Start. Before you install or remove a memory module while the...
Satellite U500 (PSU82U) Resource Guide
Page 32
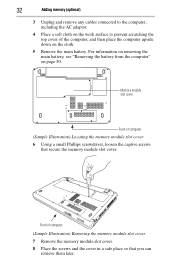
... on removing the main battery, see "Removing the battery from the computer" on the cloth. 5 Remove the main battery. Memory module slot cover Front of computer (Sample Illustration) Locating the memory module slot cover 6 Using a small Phillips screwdriver, loosen the captive screws that you can retrieve them later. 32 Adding memory (optional) 3 Unplug and remove any cables connected to the computer, including the AC adaptor. 4 Place a soft cloth on the work surface...
... on removing the main battery, see "Removing the battery from the computer" on the cloth. 5 Remove the main battery. Memory module slot cover Front of computer (Sample Illustration) Locating the memory module slot cover 6 Using a small Phillips screwdriver, loosen the captive screws that you can retrieve them later. 32 Adding memory (optional) 3 Unplug and remove any cables connected to the computer, including the AC adaptor. 4 Place a soft cloth on the work surface...
Satellite U500 (PSU82U) Resource Guide
Page 33
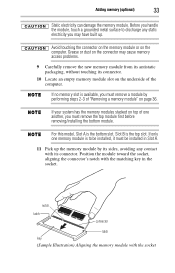
... cause memory access problems. 9 Carefully remove the new memory module from its antistatic packaging, without touching its connector. Adding memory (optional) 33 Static electricity can damage the memory module. For this model, Slot A is to discharge any contact with its connector. 10 Locate an empty memory module slot on the computer. Before you handle the module, touch a grounded metal surface to be installed, it must remove the top module first before removing/installing the bottom module.
... cause memory access problems. 9 Carefully remove the new memory module from its antistatic packaging, without touching its connector. Adding memory (optional) 33 Static electricity can damage the memory module. For this model, Slot A is to discharge any contact with its connector. 10 Locate an empty memory module slot on the computer. Before you handle the module, touch a grounded metal surface to be installed, it must remove the top module first before removing/installing the bottom module.
Satellite U500 (PSU82U) Resource Guide
Page 35
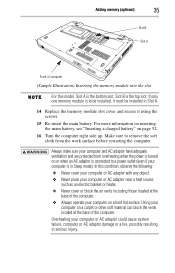
... resulting in Sleep mode). For more information on inserting the main battery, see "Inserting a charged battery" on a hard flat surface. Always make sure your computer is to be installed, it must be installed in Slot A. 14 Replace the memory module slot cover and secure it using the screws. 15 Re-insert the main battery. Using your computer on or when an AC adaptor is connected to remove the soft cloth...
... resulting in Sleep mode). For more information on inserting the main battery, see "Inserting a charged battery" on a hard flat surface. Always make sure your computer is to be installed, it must be installed in Slot A. 14 Replace the memory module slot cover and secure it using the screws. 15 Re-insert the main battery. Using your computer on or when an AC adaptor is connected to remove the soft cloth...
Satellite U500 (PSU82U) Resource Guide
Page 36
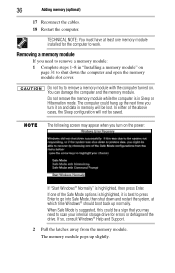
... turn on the power: If "Start Windows® Normally" is in "Installing a memory module" on and data in memory will not be lost. Do not try to work. The computer could be a sign that you need to go into Safe Mode, then shut down the computer and open the memory module slot cover. If so, consult Windows® Help and Support. 2 Pull the latches away from the memory module. The following screen...
... turn on the power: If "Start Windows® Normally" is in "Installing a memory module" on and data in memory will not be lost. Do not try to work. The computer could be a sign that you need to go into Safe Mode, then shut down the computer and open the memory module slot cover. If so, consult Windows® Help and Support. 2 Pull the latches away from the memory module. The following screen...
Satellite U500 (PSU82U) Resource Guide
Page 37
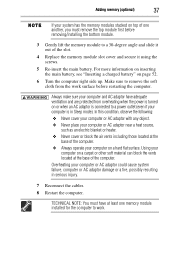
... one memory module installed for the computer to work surface before removing/installing the bottom module. 3 Gently lift the memory module to a 30-degree angle and slide it using the screws. 5 Re-insert the main battery. For more information on inserting the main battery, see "Inserting a charged battery" on or when an AC adaptor is connected to remove the soft cloth from overheating when the power is...
... one memory module installed for the computer to work surface before removing/installing the bottom module. 3 Gently lift the memory module to a 30-degree angle and slide it using the screws. 5 Re-insert the main battery. For more information on inserting the main battery, see "Inserting a charged battery" on or when an AC adaptor is connected to remove the soft cloth from overheating when the power is...
Satellite U500 (PSU82U) Resource Guide
Page 39
... the Safely Remove Hardware icon. 2 Select the card or device you want to the internal storage drive at preset intervals. See your software documentation for details. ❖ Back up your work since you to release it straight out. If the system is unable to prepare the card for viruses. ❖ Do not turn off the computer if a drive indicator light indicates a drive is active. The Windows® operating system...
... the Safely Remove Hardware icon. 2 Select the card or device you want to the internal storage drive at preset intervals. See your software documentation for details. ❖ Back up your work since you to release it straight out. If the system is unable to prepare the card for viruses. ❖ Do not turn off the computer if a drive indicator light indicates a drive is active. The Windows® operating system...
Satellite U500 (PSU82U) Resource Guide
Page 42
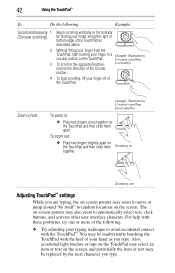
... the TouchPad as you type. Also, accidental light touches or taps on the TouchPad may select an item or text on the screen, and potentially the item or text may also seem to random locations on -screen pointer may be replaced by itself" to automatically select text, click buttons, and activate other user interface elements. Zooming out Adjusting TouchPad™ settings While you are typing, the...
... the TouchPad as you type. Also, accidental light touches or taps on the TouchPad may select an item or text on the screen, and potentially the item or text may also seem to random locations on -screen pointer may be replaced by itself" to automatically select text, click buttons, and activate other user interface elements. Zooming out Adjusting TouchPad™ settings While you are typing, the...
Satellite U500 (PSU82U) Resource Guide
Page 43
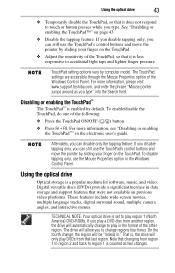
... play region 1 (North America) DVD-ROMs. If you play a DVD disc from another region, the drive will be "locked in." Disabling or enabling the TouchPad™ The TouchPad™ is a popular medium for software, music, and video. For more information, please visit www.support.toshiba.com, and enter the phrase "Mouse pointer jumps around as two changes. Using the optical drive Optical storage is enabled by sliding your finger on...
... play region 1 (North America) DVD-ROMs. If you play a DVD disc from another region, the drive will be "locked in." Disabling or enabling the TouchPad™ The TouchPad™ is a popular medium for software, music, and video. For more information, please visit www.support.toshiba.com, and enter the phrase "Mouse pointer jumps around as two changes. Using the optical drive Optical storage is enabled by sliding your finger on...
Satellite U500 (PSU82U) Resource Guide
Page 44
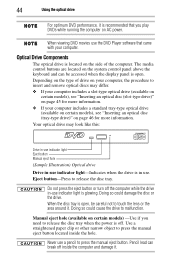
... insert and remove optical discs may look like this: Drive in-use indicator light Eject button Manual eject hole (Sample Illustration) Optical drive Drive in-use indicator light-Indicates when the drive is in -use . Do not press the eject button or turn off . 44 Using the optical drive For optimum DVD performance, it is recommended that came with your computer. When viewing DVD movies use the DVD Player software that you play DVDs while running...
... insert and remove optical discs may look like this: Drive in-use indicator light Eject button Manual eject hole (Sample Illustration) Optical drive Drive in-use indicator light-Indicates when the drive is in -use . Do not press the eject button or turn off . 44 Using the optical drive For optimum DVD performance, it is recommended that came with your computer. When viewing DVD movies use the DVD Player software that you play DVDs while running...
Satellite U500 (PSU82U) Resource Guide
Page 48
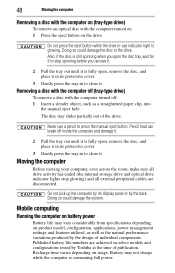
... battery power Battery life may not charge while the computer is fully open the disc tray, wait for it to stop glowing) and all external peripheral cables are achieved on usage. Pencil lead can break off (tray-type drive) To remove a disc with the computer turned on: 1 Press the eject button on product model, configuration, applications, power management settings and features utilized, as well as a straightened paper clip, into the manual...
... battery power Battery life may not charge while the computer is fully open the disc tray, wait for it to stop glowing) and all external peripheral cables are achieved on usage. Pencil lead can break off (tray-type drive) To remove a disc with the computer turned on: 1 Press the eject button on product model, configuration, applications, power management settings and features utilized, as well as a straightened paper clip, into the manual...
Satellite U500 (PSU82U) Resource Guide
Page 50
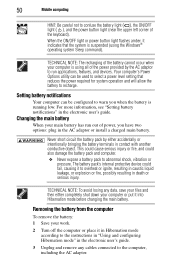
... configured to warn you have two options: plug in the electronic user's guide. Changing the main battery When your main battery has run applications, features, and devices. Your computer's Power Options utility can be used to select a power level setting that the system is running low. When the ON/OFF light or power button light flashes amber, it into Hibernation mode before changing the main battery. TECHNICAL NOTE: The recharging of the keyboard...
... configured to warn you have two options: plug in the electronic user's guide. Changing the main battery When your main battery has run applications, features, and devices. Your computer's Power Options utility can be used to select a power level setting that the system is running low. When the ON/OFF light or power button light flashes amber, it into Hibernation mode before changing the main battery. TECHNICAL NOTE: The recharging of the keyboard...

Satellite U500 (PSU82U) Resource Guide
Page 56
... to activate the screen. Make sure you attached the AC adaptor and power cord/cable properly or installed a charged battery. Then shut down the computer via software, or follow the steps if your mouse on an area where you press a key nothing happens. 56 If something goes wrong Problems when you turn on the computer These problems may be in Sleep mode and have activated the instant password...
... to activate the screen. Make sure you attached the AC adaptor and power cord/cable properly or installed a charged battery. Then shut down the computer via software, or follow the steps if your mouse on an area where you press a key nothing happens. 56 If something goes wrong Problems when you turn on the computer These problems may be in Sleep mode and have activated the instant password...

Satellite U500 (PSU82U) Resource Guide
Page 57
... quality control. Any small bright dots that the cable connecting the external monitor to the computer is firmly attached. ❖ Try adjusting the contrast and brightness controls on the external monitor. ❖ Press Fn and F5 simultaneously to continue working power outlet. ❖ Check that may appear on your display are using an external monitor: ❖ Check that the monitor is turned on your screen display when you to make sure the display...
... quality control. Any small bright dots that the cable connecting the external monitor to the computer is firmly attached. ❖ Try adjusting the contrast and brightness controls on the external monitor. ❖ Press Fn and F5 simultaneously to continue working power outlet. ❖ Check that may appear on your display are using an external monitor: ❖ Check that the monitor is turned on your screen display when you to make sure the display...
Satellite U500 (PSU82U) Resource Guide
Page 61
...; 54 changing 50 charge indicator light 49 disposal 54 installing 50, 52 maintaining 53 monitoring power 49 notification 50 real-time clock (RTC) 49 removing 50 safety precautions 52 buttons eject, optical drive 44 Media control buttons 45 C Call2Recycle™ battery 54 CDs inserting 46 changing main battery 50 compact discs handling 45 inserting 46 compact discs (slot-type drive) removing 46 computer moving 48 setting up 31 computing tips 39 61 connecting AC...
...; 54 changing 50 charge indicator light 49 disposal 54 installing 50, 52 maintaining 53 monitoring power 49 notification 50 real-time clock (RTC) 49 removing 50 safety precautions 52 buttons eject, optical drive 44 Media control buttons 45 C Call2Recycle™ battery 54 CDs inserting 46 changing main battery 50 compact discs handling 45 inserting 46 compact discs (slot-type drive) removing 46 computer moving 48 setting up 31 computing tips 39 61 connecting AC...
Satellite U500 (PSU82U) Resource Guide
Page 62
... manual eject hole optical drive 44 memory module installation 31 installing 30 inserting into socket 33 removing 36 removing cover 32 monitor problems monitor not working 57 moving the computer 48 N notification low battery 50 O optical disc handling 47 inserting (slot-type drive) 45 inserting (tray-type drive) 46 positioning 47 optical drive drive in-use indicator light 44 eject button 44 inserting discs 46 manual eject hole 44 removing 46 removing disc 48 using 43 P power cable connectors 60 computer will not start 56 connecting cable...
... manual eject hole optical drive 44 memory module installation 31 installing 30 inserting into socket 33 removing 36 removing cover 32 monitor problems monitor not working 57 moving the computer 48 N notification low battery 50 O optical disc handling 47 inserting (slot-type drive) 45 inserting (tray-type drive) 46 positioning 47 optical drive drive in-use indicator light 44 eject button 44 inserting discs 46 manual eject hole 44 removing 46 removing disc 48 using 43 P power cable connectors 60 computer will not start 56 connecting cable...


