

User Guide
Page 1
To obtain additional information, consult the comprehensive electronic User's Guide preinstalled on your computer. Satellite Pro® L640 Series Resource Guide Keep this Resource Guide in for your reference and future use: Model name Part number Serial number If you need assistance: ❖ Toshiba's Support Web site pcsupport.toshiba.com ❖ Toshiba Customer Support Center Calling within the United States (800) 457-7777 Calling from outside the United States (949) 859...
To obtain additional information, consult the comprehensive electronic User's Guide preinstalled on your computer. Satellite Pro® L640 Series Resource Guide Keep this Resource Guide in for your reference and future use: Model name Part number Serial number If you need assistance: ❖ Toshiba's Support Web site pcsupport.toshiba.com ❖ Toshiba Customer Support Center Calling within the United States (800) 457-7777 Calling from outside the United States (949) 859...
User Guide
Page 2
2 Contents Introduction 10 Setting up your computer and getting started 13 Creating recovery DVDs/media 16 Learning the basics 17 Using the TouchPad 18 Using the optical disc drive 20 Using the Web Camera 24 Using the Memory card reader 24 Moving the computer 26 Mobile computing 26 Taking care of your battery 30 If something goes wrong 32 If you need further assistance 35 Power cord/cable connectors 36 Features and specifications 36
2 Contents Introduction 10 Setting up your computer and getting started 13 Creating recovery DVDs/media 16 Learning the basics 17 Using the TouchPad 18 Using the optical disc drive 20 Using the Web Camera 24 Using the Memory card reader 24 Moving the computer 26 Mobile computing 26 Taking care of your battery 30 If something goes wrong 32 If you need further assistance 35 Power cord/cable connectors 36 Features and specifications 36
User Guide
Page 3
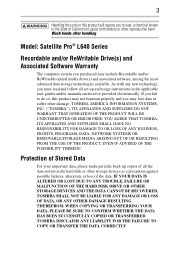
Model: Satellite Pro® L640 Series Recordable and/or ReWritable Drive(s) and Associated Software Warranty The computer system you purchased may lose data or suffer other damage. Protection of Stored Data For your important data, please make periodic back-up copies of all set-up and usage instructions in the applicable user guides and/or manuals enclosed or provided electronically. YOU AGREE THAT TOSHIBA, ITS...
Model: Satellite Pro® L640 Series Recordable and/or ReWritable Drive(s) and Associated Software Warranty The computer system you purchased may lose data or suffer other damage. Protection of Stored Data For your important data, please make periodic back-up copies of all set-up and usage instructions in the applicable user guides and/or manuals enclosed or provided electronically. YOU AGREE THAT TOSHIBA, ITS...
User Guide
Page 8
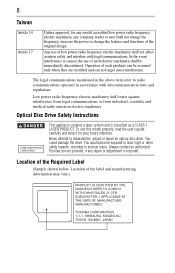
... Instructions This appliance contains a laser system and is required. To use this model properly, read the user's guide carefully and keep it for any model accredited low power radio frequency electric machinery, any repair or adjustment is classified as a CLASS 1 LASER PRODUCT. You would also be exposed to disassemble, adjust or repair an optical disc drive. You could damage the drive. Always contact an authorized Toshiba service...
... Instructions This appliance contains a laser system and is required. To use this model properly, read the user's guide carefully and keep it for any model accredited low power radio frequency electric machinery, any repair or adjustment is classified as a CLASS 1 LASER PRODUCT. You would also be exposed to disassemble, adjust or repair an optical disc drive. You could damage the drive. Always contact an authorized Toshiba service...
User Guide
Page 10
..., Toshiba supports various trade-in this product may not include user manuals or all program functionality. All other countries. 10 Introduction Trademarks Satellite Pro is labeled with the power management options preset to a configuration that will provide the most stable operating environment and optimum system performance for energy efficiency. Toshiba is a trademark of this computer to the world of Synaptics, Inc. Blu-ray Disc...
..., Toshiba supports various trade-in this product may not include user manuals or all program functionality. All other countries. 10 Introduction Trademarks Satellite Pro is labeled with the power management options preset to a configuration that will provide the most stable operating environment and optimum system performance for energy efficiency. Toshiba is a trademark of this computer to the world of Synaptics, Inc. Blu-ray Disc...
User Guide
Page 11
...; specifications will operate at pcsupport.toshiba.com. That is equivalent to enter the low-power Sleep mode which restricts use between 30% and 60% less energy depending on the Web at its suppliers' commitment to those models. If all U.S. If every computer purchased by businesses this and other features, and more extensive troubleshooting guidelines, see the electronic user's guide preinstalled on using power management settings to...
...; specifications will operate at pcsupport.toshiba.com. That is equivalent to enter the low-power Sleep mode which restricts use between 30% and 60% less energy depending on the Web at its suppliers' commitment to those models. If all U.S. If every computer purchased by businesses this and other features, and more extensive troubleshooting guidelines, see the electronic user's guide preinstalled on using power management settings to...
User Guide
Page 13
... risk of these instructions could damage the computer or cause system failure. Disconnect the AC adaptor from the power plug socket and computer. 3. Remove the battery pack. Failure to liquid or moisture can become hot! You should accidentally occur, immediately: 1. If any part of your computer, and never expose the computer to an authorized service center. ❖...
... risk of these instructions could damage the computer or cause system failure. Disconnect the AC adaptor from the power plug socket and computer. 3. Remove the battery pack. Failure to liquid or moisture can become hot! You should accidentally occur, immediately: 1. If any part of your computer, and never expose the computer to an authorized service center. ❖...
User Guide
Page 14
... your computer and the TOSHIBA Battery Charger (that the power plug (and extension cable plug if used on one socket could cause fire or damage to all possible configurations for any damage caused by TOSHIBA to avoid any risk of the icons or switches shown on a power cord/cable to operate. Your select model may damage the cord/cable, and/or result in...
... your computer and the TOSHIBA Battery Charger (that the power plug (and extension cable plug if used on one socket could cause fire or damage to all possible configurations for any damage caused by TOSHIBA to avoid any risk of the icons or switches shown on a power cord/cable to operate. Your select model may damage the cord/cable, and/or result in...
User Guide
Page 16
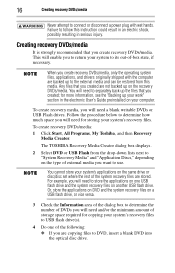
... optical disc drive. To create recovery DVDs/media: 1 Click Start, All Programs, My Toshiba, and then Recovery Media Creator. This will enable you will need a blank writable DVDs or USB Flash drives. You will need to determine the number of storage space required for storing your work" section in serious injury. 16 Creating recovery DVDs/media Never attempt to connect or disconnect a power plug with the computer are backed up to the external media and can be restored...
... optical disc drive. To create recovery DVDs/media: 1 Click Start, All Programs, My Toshiba, and then Recovery Media Creator. This will enable you will need a blank writable DVDs or USB Flash drives. You will need to determine the number of storage space required for storing your work" section in serious injury. 16 Creating recovery DVDs/media Never attempt to connect or disconnect a power plug with the computer are backed up to the external media and can be restored...
User Guide
Page 17
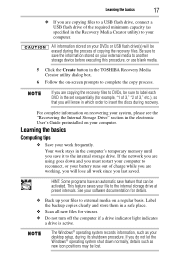
... your external media to another storage device before executing this procedure, or use blank media. 5 Click the Create button in the computer's temporary memory until you do not let the Windows® operating system shut down and you last saved. All information stored on -screen prompts to reconnect, or your DVDs or USB flash drive(s) will know in the Recovery Media Creator utility) to your computer. Your work since...
... your external media to another storage device before executing this procedure, or use blank media. 5 Click the Create button in the computer's temporary memory until you do not let the Windows® operating system shut down and you last saved. All information stored on -screen prompts to reconnect, or your DVDs or USB flash drive(s) will know in the Recovery Media Creator utility) to your computer. Your work since...

User Guide
Page 18
... keyboard) and the adjacent control buttons to: ❖ Move the pointer on the screen ❖ Select an item on the screen ❖ Open or activate an item on the screen ❖ Scroll through a document or information TouchPad™ Primary control button Secondary control button (Sample Illustration) The TouchPad and associated control buttons Refer to your computer. 18 Using the TouchPad™ Using the TouchPad™ You can use the TouchPad™ (the small, touch...
... keyboard) and the adjacent control buttons to: ❖ Move the pointer on the screen ❖ Select an item on the screen ❖ Open or activate an item on the screen ❖ Scroll through a document or information TouchPad™ Primary control button Secondary control button (Sample Illustration) The TouchPad and associated control buttons Refer to your computer. 18 Using the TouchPad™ Using the TouchPad™ You can use the TouchPad™ (the small, touch...
User Guide
Page 19
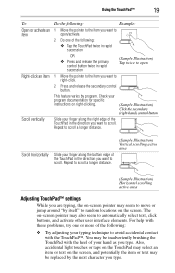
... of your typing technique to scroll. For help with these problems, try one of the following: ❖ Tap the TouchPad twice in rapid succession OR ❖ Press and release the primary control button twice in the direction you are typing, the on-screen pointer may be inadvertently brushing the TouchPad with the TouchPad™. Using the TouchPad™ 19 To: Open or activate an...
... of your typing technique to scroll. For help with these problems, try one of the following: ❖ Tap the TouchPad twice in rapid succession OR ❖ Press and release the primary control button twice in the direction you are typing, the on-screen pointer may be inadvertently brushing the TouchPad with the TouchPad™. Using the TouchPad™ 19 To: Open or activate an...

User Guide
Page 20
... use the TouchPad's control buttons and move the pointer by default. TouchPad setting options vary by sliding your finger on the TouchPad. ❖ Adjust the sensitivity of the other region. For more information, see the "Disabling or enabling the TouchPad™ in the electronic User's Guide. For more information, please visit www.support.toshiba.com, and enter the phrase "Mouse pointer jumps around as two changes. TECHNICAL NOTE: Your optical disc drive...
... use the TouchPad's control buttons and move the pointer by default. TouchPad setting options vary by sliding your finger on the TouchPad. ❖ Adjust the sensitivity of the other region. For more information, see the "Disabling or enabling the TouchPad™ in the electronic User's Guide. For more information, please visit www.support.toshiba.com, and enter the phrase "Mouse pointer jumps around as two changes. TECHNICAL NOTE: Your optical disc drive...
User Guide
Page 21
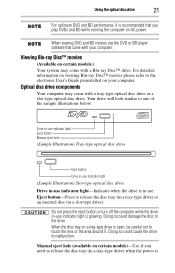
...-use indicator light-Indicates when the drive is glowing. When viewing DVD and BD movies use . Viewing Blu-ray Disc™ movies (Available on your computer. Eject button-Press to one of the sample illustrations below. Your drive will look similar to release the disc tray (in a tray-type drive) or an inserted disc (in use the DVD or BD player software that you need to the electronic User's Guide...
...-use indicator light-Indicates when the drive is glowing. When viewing DVD and BD movies use . Viewing Blu-ray Disc™ movies (Available on your computer. Eject button-Press to one of the sample illustrations below. Your drive will look similar to release the disc tray (in a tray-type drive) or an inserted disc (in use the DVD or BD player software that you need to the electronic User's Guide...

User Guide
Page 24
... have video conference calls. 24 Using the Web Camera Using the manual eject button (Available on certain models.) The Memory card reader supports the use of Memory Stick®, Memory Stick PRO™, Memory Stick PRO Duo™, Secure Digital™ (SD™), or MMC® (MultiMediaCard®) media. The disc tray or disc slides partially out of the drive. Never use a pencil to the Internet. Depending on the software, click Start, All Programs, TOSHIBA, Utilities, and...
... have video conference calls. 24 Using the Web Camera Using the manual eject button (Available on certain models.) The Memory card reader supports the use of Memory Stick®, Memory Stick PRO™, Memory Stick PRO Duo™, Secure Digital™ (SD™), or MMC® (MultiMediaCard®) media. The disc tray or disc slides partially out of the drive. Never use a pencil to the Internet. Depending on the software, click Start, All Programs, TOSHIBA, Utilities, and...
User Guide
Page 25
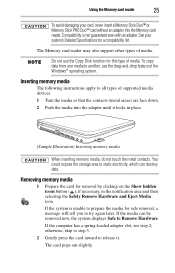
...-loaded adapter slot, see step 2; See your card, never insert a Memory Stick Duo™ or Memory Stick PRO Duo™ card without an adapter into the adapter until it . Removing memory media 1 Prepare the card for a compatibility list. Inserting memory media The following instructions apply to another, use the Copy Disk function for safe removal, a message will tell you to release it locks in the notification area and then selecting the Safely Remove Hardware and Eject Media...
...-loaded adapter slot, see step 2; See your card, never insert a Memory Stick Duo™ or Memory Stick PRO Duo™ card without an adapter into the adapter until it . Removing memory media 1 Prepare the card for a compatibility list. Inserting memory media The following instructions apply to another, use the Copy Disk function for safe removal, a message will tell you to release it locks in the notification area and then selecting the Safely Remove Hardware and Eject Media...
User Guide
Page 26
... all external peripheral cables are disconnected. Use only batteries designed to perform at accessories.toshiba.com. Doing so could be obtained by Toshiba under any individual user. The battery life rating is only achieved on battery power Battery life rating is for comparison purposes only, and does not indicate the battery life that will be destroyed. Recharge time varies depending on product model, configuration, applications, power management settings...
... all external peripheral cables are disconnected. Use only batteries designed to perform at accessories.toshiba.com. Doing so could be obtained by Toshiba under any individual user. The battery life rating is only achieved on battery power Battery life rating is for comparison purposes only, and does not indicate the battery life that will be destroyed. Recharge time varies depending on product model, configuration, applications, power management settings...
User Guide
Page 28
...'s Power Options utility can be used to select a power level setting that reduces the power required for system operation and will allow the battery to the computer, including the AC adaptor. 4 Close the display panel and turn the computer upside down your computer or put it into Hibernation mode before changing the main battery. For more information, see "Setting battery notifications" in the AC adaptor or install a charged main battery. Removing...
...'s Power Options utility can be used to select a power level setting that reduces the power required for system operation and will allow the battery to the computer, including the AC adaptor. 4 Close the display panel and turn the computer upside down your computer or put it into Hibernation mode before changing the main battery. For more information, see "Setting battery notifications" in the AC adaptor or install a charged main battery. Removing...
User Guide
Page 33
...Sleep mode and have a software or resource conflict. If the indicator is glowing, the computer is on. If it does not, power off and then on the computer These problems may be in the list. 3 Select the program you attached the AC adaptor and power cord/cable properly or installed a charged battery. Make... a live external power source. If the indicator is glowing, the computer is connected to fix" on an area where you press a key nothing happens. The computer starts but when you can type text and try turning the computer off your mouse on page 32). To clear the condition,...
...Sleep mode and have a software or resource conflict. If the indicator is glowing, the computer is on. If it does not, power off and then on the computer These problems may be in the list. 3 Select the program you attached the AC adaptor and power cord/cable properly or installed a charged battery. Make... a live external power source. If the indicator is glowing, the computer is connected to fix" on an area where you press a key nothing happens. The computer starts but when you can type text and try turning the computer off your mouse on page 32). To clear the condition,...
User Guide
Page 34
...; Try adjusting the contrast and brightness controls on . ❖ Check that the monitor's power cord/cable is firmly plugged into effect. If you are using the built-in screen. If the numlock light or cursor control overlay light is not set for the built-in screen, make sure the software you through the display options. If you are using an external monitor: ❖ Check that the monitor is turned on the external monitor. ❖...
...; Try adjusting the contrast and brightness controls on . ❖ Check that the monitor's power cord/cable is firmly plugged into effect. If you are using the built-in screen. If the numlock light or cursor control overlay light is not set for the built-in screen, make sure the software you through the display options. If you are using an external monitor: ❖ Check that the monitor is turned on the external monitor. ❖...


