User Guide
Page 3
... USE OF THE COMPUTER PRODUCTS IN ANY CRITICAL APPLICATIONS. NOTE Only Peripherals complying with noncompliant peripherals or peripherals not recommended by Toshiba is encouraged to try to correct the interference by turning the equipment off and on, the user is likely to result in interference to persons or loss of the FCC...
... USE OF THE COMPUTER PRODUCTS IN ANY CRITICAL APPLICATIONS. NOTE Only Peripherals complying with noncompliant peripherals or peripherals not recommended by Toshiba is encouraged to try to correct the interference by turning the equipment off and on, the user is likely to result in interference to persons or loss of the FCC...
User Guide
Page 4
..., including interference that is based on Web site http://www.toshiba-europe.com/computers/tnt/bluetooth.htm in Europe or support.toshiba.com in the United States for more information. Contact Toshiba's Support Web site at support.toshiba.com. The "Wi-Fi CERTIFIED" logo is compliant to ...be interoperable with any such problem, immediately turn off your network connection. Please contact Toshiba computer product support on Direct Sequence Spread Spectrum (DSSS) radio technology, and is a certification mark of the FCC Rules. ...
..., including interference that is based on Web site http://www.toshiba-europe.com/computers/tnt/bluetooth.htm in Europe or support.toshiba.com in the United States for more information. Contact Toshiba's Support Web site at support.toshiba.com. The "Wi-Fi CERTIFIED" logo is compliant to ...be interoperable with any such problem, immediately turn off your network connection. Please contact Toshiba computer product support on Direct Sequence Spread Spectrum (DSSS) radio technology, and is a certification mark of the FCC Rules. ...

User Guide
Page 5
... GHz to 5.25 GHz to reduce the potential for harmful interference to co-channel Mobile Satellite systems. High power radars are allocated as harmful. 5 Radio Frequency Interference Requirements This device...restricted to indoor use due to its operation in radio frequency safety standards and recommendations, TOSHIBA believes Wireless LAN is perceived or identified as primary users of scientists who continually review ... of panels and committees of the 5.25 GHz to 5.35 GHz and 5.65 GHz to turning on board airplanes, or ❖ In any other environment where the risk of wireless devices ...
... GHz to 5.25 GHz to reduce the potential for harmful interference to co-channel Mobile Satellite systems. High power radars are allocated as harmful. 5 Radio Frequency Interference Requirements This device...restricted to indoor use due to its operation in radio frequency safety standards and recommendations, TOSHIBA believes Wireless LAN is perceived or identified as primary users of scientists who continually review ... of panels and committees of the 5.25 GHz to 5.35 GHz and 5.65 GHz to turning on board airplanes, or ❖ In any other environment where the risk of wireless devices ...

User Guide
Page 9
... Stations). 1. Friday: 10:00 - 17:00 Toll Free Tel: 0120-15-1048 Direct Dial: 03-3457-4850 Fax: 03-3457-4868 Before using this product. TOSHIBA Direct PC Monday - Sticker Please put the following sticker on this equipment. (1) (2) (3) 2.4FH1 (4) 1 2.4: This equipment uses a frequency of 2.4 GHz. ... systems. The indication shown below appears on this equipment causes RF interference to other radio stations, promptly change the location of use, or turn off the source of this equipment is less than 40m. 4 This equipment uses a frequency bandwidth from 2,400 MHz to 2,483.5 MHz...
... Stations). 1. Friday: 10:00 - 17:00 Toll Free Tel: 0120-15-1048 Direct Dial: 03-3457-4850 Fax: 03-3457-4868 Before using this product. TOSHIBA Direct PC Monday - Sticker Please put the following sticker on this equipment. (1) (2) (3) 2.4FH1 (4) 1 2.4: This equipment uses a frequency of 2.4 GHz. ... systems. The indication shown below appears on this equipment causes RF interference to other radio stations, promptly change the location of use, or turn off the source of this equipment is less than 40m. 4 This equipment uses a frequency bandwidth from 2,400 MHz to 2,483.5 MHz...
User Guide
Page 12
... as defined by The Bluetooth Special Interest Group. If you use Bluetooth and Wireless LAN devices simultaneously, you use Bluetooth cards from TOSHIBA, always change the frequency, move your computer. When you may interfere with one of 2.4 GHz Wireless LAN devices (40 meters/... might slow down or cause errors. 12 Bluetooth® Wireless Technology Interoperability Bluetooth® Cards from TOSHIBA are designed to be interoperable with any such problem, immediately turn off either one another. Bluetooth and Wireless LAN devices operate within the same radio frequency range and ...
... as defined by The Bluetooth Special Interest Group. If you use Bluetooth and Wireless LAN devices simultaneously, you use Bluetooth cards from TOSHIBA, always change the frequency, move your computer. When you may interfere with one of 2.4 GHz Wireless LAN devices (40 meters/... might slow down or cause errors. 12 Bluetooth® Wireless Technology Interoperability Bluetooth® Cards from TOSHIBA are designed to be interoperable with any such problem, immediately turn off either one another. Bluetooth and Wireless LAN devices operate within the same radio frequency range and ...
User Guide
Page 13
... energy emitted by devices with Bluetooth wireless technology on the equipment. In addition, the product complies with Bluetooth wireless technology prior to turning on board airplanes, or ❖ In any country/ region where the product is sold. In some situations or environments, the...or services is perceived or identified as mobile phones. These situations may be used in radio frequency safety standards and recommendations, TOSHIBA believes Bluetooth wireless technology is safe for human contact during normal operation is far below the FCC radio frequency exposure limits. These...
... energy emitted by devices with Bluetooth wireless technology on the equipment. In addition, the product complies with Bluetooth wireless technology prior to turning on board airplanes, or ❖ In any country/ region where the product is sold. In some situations or environments, the...or services is perceived or identified as mobile phones. These situations may be used in radio frequency safety standards and recommendations, TOSHIBA believes Bluetooth wireless technology is safe for human contact during normal operation is far below the FCC radio frequency exposure limits. These...
User Guide
Page 16
...encouraged to ask for this transmitter must be co-located or operating in such a manner that applies on the use of the TOSHIBA Wireless WAN Card is minimized. Exposure to use of Wireless WAN may for any radio or television interference caused by the proprietor ...of the building or responsible representatives of interference to turning on board airplanes, or ❖ In any other than specified by TOSHIBA. The antenna(s) used for authorization to Radio Frequency Radiation The radiated output power of wireless devices ...
...encouraged to ask for this transmitter must be co-located or operating in such a manner that applies on the use of the TOSHIBA Wireless WAN Card is minimized. Exposure to use of Wireless WAN may for any radio or television interference caused by the proprietor ...of the building or responsible representatives of interference to turning on board airplanes, or ❖ In any other than specified by TOSHIBA. The antenna(s) used for authorization to Radio Frequency Radiation The radiated output power of wireless devices ...
User Guide
Page 24
24 Contents Directing the display output when you turn on the computer 73 Adjusting the quality of the external display......74 Customizing your computer's settings 74 Caring for your computer 74 Cleaning the computer ... optical media 85 Recording optical media 85 Removing a disc with the computer on 86 Removing a disc with the computer off 86 Toshiba's online resources 87 Chapter 3: Mobile Computing 88 Toshiba's energy-saver design 88 Running the computer on battery power 88 Battery Notice 89 Power management 90 Charging the main battery 90
24 Contents Directing the display output when you turn on the computer 73 Adjusting the quality of the external display......74 Customizing your computer's settings 74 Caring for your computer 74 Cleaning the computer ... optical media 85 Recording optical media 85 Removing a disc with the computer on 86 Removing a disc with the computer off 86 Toshiba's online resources 87 Chapter 3: Mobile Computing 88 Toshiba's energy-saver design 88 Running the computer on battery power 88 Battery Notice 89 Power management 90 Charging the main battery 90
User Guide
Page 26
... PC Diagnostic Tool Utility 129 PC Health Monitor 130 Recovery Media Creator 131 Service Station 131 TOSHIBA Application Installer 132 Chapter 6: If Something Goes Wrong 133 Problems that are easy to fix 133 Problems when you turn on the computer............134 The Windows® operating system is not working 136 Using Startup...
... PC Diagnostic Tool Utility 129 PC Health Monitor 130 Recovery Media Creator 131 Service Station 131 TOSHIBA Application Installer 132 Chapter 6: If Something Goes Wrong 133 Problems that are easy to fix 133 Problems when you turn on the computer............134 The Windows® operating system is not working 136 Using Startup...

User Guide
Page 39
...contact between the computer base or palm rest and your skin may damage the disk/disc or flash media, the drive, or both. Do not turn off the computer while it is active. Getting Started 39 Selecting a place to work Never allow any liquids to spill into any of these instructions... could damage the computer or cause system failure. ❖ Never turn on the power again until you have taken the computer to liquid or moisture can become hot! If any part of your lap. Exposure to...
...contact between the computer base or palm rest and your skin may damage the disk/disc or flash media, the drive, or both. Do not turn off the computer while it is active. Getting Started 39 Selecting a place to work Never allow any liquids to spill into any of these instructions... could damage the computer or cause system failure. ❖ Never turn on the power again until you have taken the computer to liquid or moisture can become hot! If any part of your lap. Exposure to...
User Guide
Page 40
.... Grasp it by drawing outside air into the computer. Occasionally, even new programs you receive via email or download from overheating when the power is turned on or when an AC adaptor is in serious injury. In this condition, observe the following: ❖ Never cover your computer or AC adaptor with...
.... Grasp it by drawing outside air into the computer. Occasionally, even new programs you receive via email or download from overheating when the power is turned on or when an AC adaptor is in serious injury. In this condition, observe the following: ❖ Never cover your computer or AC adaptor with...

User Guide
Page 44
...point where it , see "Exploring Your Computer's Features" on your display are an intrinsic characteristic of the TFT manufacturing technology. Using the computer for you turn it on and begin using high-precision technology. Do not press or push on the display panel and be careful to remove any pens or... using it moves easily and never lift the computer by the display panel. Small bright dots may appear on your screen display when you to turn on page 103. Any small bright dots that , the battery will be able to increase the brightness of thin-film transistors (TFT) and is...
...point where it , see "Exploring Your Computer's Features" on your display are an intrinsic characteristic of the TFT manufacturing technology. Using the computer for you turn it on and begin using high-precision technology. Do not press or push on the display panel and be careful to remove any pens or... using it moves easily and never lift the computer by the display panel. Small bright dots may appear on your screen display when you to turn on page 103. Any small bright dots that , the battery will be able to increase the brightness of thin-film transistors (TFT) and is...
User Guide
Page 45
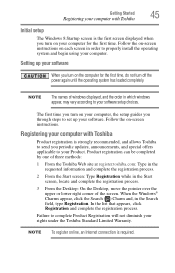
...the order in order to set up your software When you turn on your computer for the first time, do not turn off the power again until the operating system has loaded completely. Registering your computer with Toshiba Initial setup The Windows 8 Startup screen is the first screen... displayed when you turn on the computer for the first time. When the Windows® Charms appear, click the Search ( ) Charm and...
...the order in order to set up your software When you turn on your computer for the first time, do not turn off the power again until the operating system has loaded completely. Registering your computer with Toshiba Initial setup The Windows 8 Startup screen is the first screen... displayed when you turn on the computer for the first time. When the Windows® Charms appear, click the Search ( ) Charm and...
User Guide
Page 46
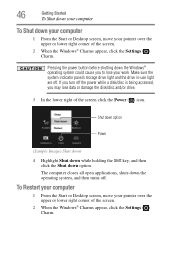
... the system indicator panel's storage drive light and the drive in-use light are off the power while a disk/disc is being accessed, you turn off . To Restart your computer 1 From the Start or Desktop screen, move your pointer over the upper or lower right corner of the screen...Power ( ) icon. Pressing the power button before shutting down option. The computer closes all open applications, shuts down the operating system, and then turns off. 46 Getting Started To Shut down your computer To Shut down your computer 1 From the Start or Desktop screen, move your pointer over ...
... the system indicator panel's storage drive light and the drive in-use light are off the power while a disk/disc is being accessed, you turn off . To Restart your computer 1 From the Start or Desktop screen, move your pointer over the upper or lower right corner of the screen...Power ( ) icon. Pressing the power button before shutting down option. The computer closes all open applications, shuts down the operating system, and then turns off. 46 Getting Started To Shut down your computer To Shut down your computer 1 From the Start or Desktop screen, move your pointer over ...
User Guide
Page 49
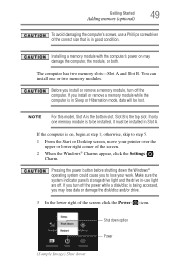
...button before shutting down Shut down option Power (Sample Image) Shut down the Windows® operating system could cause you install or remove a memory module, turn off the power while a disk/disc is the top slot. NOTE For this model, Slot A is in Sleep or Hibernation mode, data will be ... the computer. The computer has two memory slots-Slot A and Slot B. Before you to be installed, it must be lost. Slot B is being accessed, you turn off . otherwise, skip to step 5. 1 From the Start or Desktop screen, move your work. If you may damage the computer, the module, or both....
...button before shutting down Shut down option Power (Sample Image) Shut down the Windows® operating system could cause you install or remove a memory module, turn off the power while a disk/disc is the top slot. NOTE For this model, Slot A is in Sleep or Hibernation mode, data will be ... the computer. The computer has two memory slots-Slot A and Slot B. Before you to be installed, it must be lost. Slot B is being accessed, you turn off . otherwise, skip to step 5. 1 From the Start or Desktop screen, move your work. If you may damage the computer, the module, or both....
User Guide
Page 50
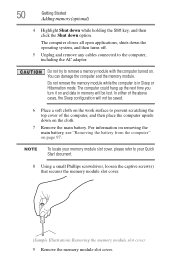
...Getting Started Adding memory (optional) 4 Highlight Shut down while holding the Shift key, and then click the Shut down the operating system, and then turns off. 5 Unplug and remove any cables connected to your Quick Start document. 8 Using a small Phillips screwdriver, loosen the captive screw(s) that secures...cases, the Sleep configuration will not be saved. 6 Place a soft cloth on the work surface to remove a memory module with the computer turned on page 97. NOTE To locate your memory module slot cover, please refer to the computer, including the AC adaptor. The computer closes ...
...Getting Started Adding memory (optional) 4 Highlight Shut down while holding the Shift key, and then click the Shut down the operating system, and then turns off. 5 Unplug and remove any cables connected to your Quick Start document. 8 Using a small Phillips screwdriver, loosen the captive screw(s) that secures...cases, the Sleep configuration will not be saved. 6 Place a soft cloth on the work surface to remove a memory module with the computer turned on page 97. NOTE To locate your memory module slot cover, please refer to the computer, including the AC adaptor. The computer closes ...

User Guide
Page 53
... using the screw(s). 17 Re-insert the main battery. Getting Started 53 Adding memory (optional) latch latch (Sample Illustration) Pressing down on page 99. 18 Turn the computer right side up. The memory module should be installed in place.
... using the screw(s). 17 Re-insert the main battery. Getting Started 53 Adding memory (optional) latch latch (Sample Illustration) Pressing down on page 99. 18 Turn the computer right side up. The memory module should be installed in place.

User Guide
Page 54
... place your computer or AC adaptor near a heat source, such as described in Sleep mode). If you are protected from overheating when the power is turned on or when an AC adaptor is connected to a power outlet (even if your computer is in "Checking total memory" on page 56. 54 Getting...
... place your computer or AC adaptor near a heat source, such as described in Sleep mode). If you are protected from overheating when the power is turned on or when an AC adaptor is connected to a power outlet (even if your computer is in "Checking total memory" on page 56. 54 Getting...
User Guide
Page 55
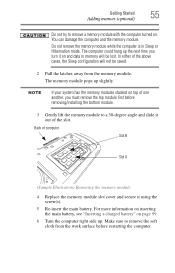
... secure it on and data in Sleep or Hibernation mode. NOTE If your system has the memory modules stacked on top of one another, you turn it using the screw(s). 5 Re-insert the main battery. Back of the slot. Make sure to remove the soft cloth from the memory module...away from the work surface before removing/installing the bottom module. 3 Gently lift the memory module to remove a memory module with the computer turned on page 99. 6 Turn the computer right side up slightly. You can damage the computer and the memory module. For more information on inserting the main battery, ...
... secure it on and data in Sleep or Hibernation mode. NOTE If your system has the memory modules stacked on top of one another, you turn it using the screw(s). 5 Re-insert the main battery. Back of the slot. Make sure to remove the soft cloth from the memory module...away from the work surface before removing/installing the bottom module. 3 Gently lift the memory module to remove a memory module with the computer turned on page 99. 6 Turn the computer right side up slightly. You can damage the computer and the memory module. For more information on inserting the main battery, ...
User Guide
Page 56
... the socket and lined up squarely with any key to return to the login in screen. If the computer does not recognize the memory configuration, turn off the computer and remove the memory module slot cover (complete steps 1-10 in "Installing a memory module" on page 48), and then check that the... the cables. 8 Restart the computer. The System window appears. TECHNICAL NOTE: You must have adequate ventilation and are protected from overheating when the power is turned on or when an AC adaptor is displayed below the System heading.
... the socket and lined up squarely with any key to return to the login in screen. If the computer does not recognize the memory configuration, turn off the computer and remove the memory module slot cover (complete steps 1-10 in "Installing a memory module" on page 48), and then check that the... the cables. 8 Restart the computer. The System window appears. TECHNICAL NOTE: You must have adequate ventilation and are protected from overheating when the power is turned on or when an AC adaptor is displayed below the System heading.


