User Guide
Page 2
..., this product will expose you purchased may lose data or suffer other reproductive harm. TOSHIBA DISCLAIMS ANY LIABILITY FOR THE FAILURE TO COPY OR TRANSFER THE DATA CORRECTLY. Model: Satellite®/Satellite Pro® P700 Series Recordable and/or ReWritable Drive(s) and Associated Software Warranty The computer system you to lead, a chemical known to...
..., this product will expose you purchased may lose data or suffer other reproductive harm. TOSHIBA DISCLAIMS ANY LIABILITY FOR THE FAILURE TO COPY OR TRANSFER THE DATA CORRECTLY. Model: Satellite®/Satellite Pro® P700 Series Recordable and/or ReWritable Drive(s) and Associated Software Warranty The computer system you to lead, a chemical known to...
User Guide
Page 27
You could damage the drive. Location of Toshiba. 27 Optical Disc Drive Safety Instructions This appliance contains a laser system and is copyrighted by Toshiba America Information Systems, Inc. You would also be reproduced in serious injury. Never attempt to the use this...resulting in any repair or adjustment is assumed, however, with all rights reserved. Location of the information contained herein. ©2011 by Toshiba America Information Systems, Inc. No patent liability is required. Under the copyright laws, this model properly, read the User's Guide carefully...
You could damage the drive. Location of Toshiba. 27 Optical Disc Drive Safety Instructions This appliance contains a laser system and is copyrighted by Toshiba America Information Systems, Inc. You would also be reproduced in serious injury. Never attempt to the use this...resulting in any repair or adjustment is assumed, however, with all rights reserved. Location of the information contained herein. ©2011 by Toshiba America Information Systems, Inc. No patent liability is required. Under the copyright laws, this model properly, read the User's Guide carefully...
User Guide
Page 31
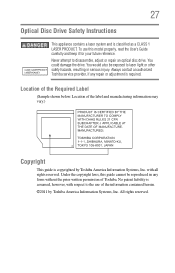
...up your software 50 Registering your computer with Toshiba 51 Adding optional external devices 51 Adding memory (optional 52 Installing a memory module 52 Removing a memory module 59 Checking total memory 61 Recovering the Internal Storage Drive 62 Recovering to out-of-box state (recommended...custom size partition 71 Creating recovery DVDs/media 74 Restoring from recovery DVDs/media 76 Erasing the Internal Storage Drive 78 Checking the internal storage drive operating status 80 Installing drivers and applications 80 Using the touch pad 80 Adjusting touch pad settings 84 Disabling...
...up your software 50 Registering your computer with Toshiba 51 Adding optional external devices 51 Adding memory (optional 52 Installing a memory module 52 Removing a memory module 59 Checking total memory 61 Recovering the Internal Storage Drive 62 Recovering to out-of-box state (recommended...custom size partition 71 Creating recovery DVDs/media 74 Restoring from recovery DVDs/media 76 Erasing the Internal Storage Drive 78 Checking the internal storage drive operating status 80 Installing drivers and applications 80 Using the touch pad 80 Adjusting touch pad settings 84 Disabling...
User Guide
Page 33
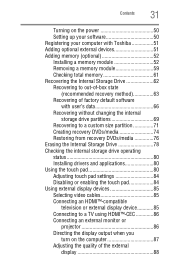
...disc drive components 115 Media control buttons 116 Inserting an optical disc 116 Playing an audio CD 118 Playing optical media 118 Recording optical media 119 Removing a disc with the computer on...........119 Removing a disc with the computer off ..........120 Caring for optical discs 120 Toshiba's ...Setting battery notifications 127 Conserving battery power 128 Power Plans 129 Using a hot key to set the Power Plan 130 Using the TOSHIBA eco power plan 131 Changing the main battery 131 Removing the battery from the computer .......132 Inserting a charged battery 133 Taking care...
...disc drive components 115 Media control buttons 116 Inserting an optical disc 116 Playing an audio CD 118 Playing optical media 118 Recording optical media 119 Removing a disc with the computer on...........119 Removing a disc with the computer off ..........120 Caring for optical discs 120 Toshiba's ...Setting battery notifications 127 Conserving battery power 128 Power Plans 129 Using a hot key to set the Power Plan 130 Using the TOSHIBA eco power plan 131 Changing the main battery 131 Removing the battery from the computer .......132 Inserting a charged battery 133 Taking care...
User Guide
Page 35
Contents 35 USB Sleep and Charge 166 Enabling/Disabling USB Sleep and Charge 168 Power supply mode settings 168 USB Sleep and Music 169 TOSHIBA Button Support 170 TOSHIBA Accessibility 171 Fingerprint Authentication Utility 172 Fingerprint utility limitations 172 Using the Fingerprint Authentication Utility 172 Fingerprint Logon 173 Care and maintenance of your... with Device Manager 186 Checking device properties 186 Memory problems 187 Power and the batteries 187 Keyboard problems 189 Display problems 189 Disk or storage drive problems 191
Contents 35 USB Sleep and Charge 166 Enabling/Disabling USB Sleep and Charge 168 Power supply mode settings 168 USB Sleep and Music 169 TOSHIBA Button Support 170 TOSHIBA Accessibility 171 Fingerprint Authentication Utility 172 Fingerprint utility limitations 172 Using the Fingerprint Authentication Utility 172 Fingerprint Logon 173 Care and maintenance of your... with Device Manager 186 Checking device properties 186 Memory problems 187 Power and the batteries 187 Keyboard problems 189 Display problems 189 Disk or storage drive problems 191
User Guide
Page 36
... Contacting Toshiba 205 Other Toshiba Internet Web sites 205 Toshiba's worldwide offices 206 Appendix A: Hot Keys/TOSHIBA Cards 208 Hot Key Cards 208 Using the Hot Key Cards 209 Hot key functions 209 Optical disk drive 210 Volume Mute 211 Lock (Instant security 212 Power plan 213 Sleep mode 214 Hibernation mode 215 Output (Display...
... Contacting Toshiba 205 Other Toshiba Internet Web sites 205 Toshiba's worldwide offices 206 Appendix A: Hot Keys/TOSHIBA Cards 208 Hot Key Cards 208 Using the Hot Key Cards 209 Hot key functions 209 Optical disk drive 210 Volume Mute 211 Lock (Instant security 212 Power plan 213 Sleep mode 214 Hibernation mode 215 Output (Display...
User Guide
Page 44
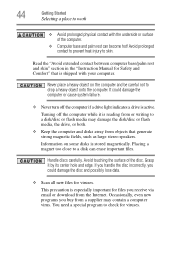
... heavy object on some disks is reading from or writing to a disk/disc or flash media may damage the disk/disc or flash media, the drive, or both. ❖ Keep the computer and disks away from a supplier may contain a computer virus. Turning off the computer if... a drive light indicates a drive is especially important for viruses. Placing a magnet too close to check for Safety and Comfort" that generate strong magnetic fields, such as large stereo speakers....
... heavy object on some disks is reading from or writing to a disk/disc or flash media may damage the disk/disc or flash media, the drive, or both. ❖ Keep the computer and disks away from a supplier may contain a computer virus. Turning off the computer if... a drive light indicates a drive is especially important for viruses. Placing a magnet too close to check for Safety and Comfort" that generate strong magnetic fields, such as large stereo speakers....
User Guide
Page 50
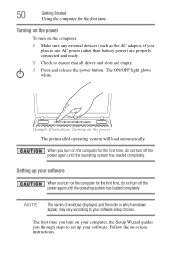
... the power To turn on the computer: 1 Make sure any external devices (such as the AC adaptor, if you through steps to ensure that all drives and slots are empty. 3 Press and release the power button. The ON/OFF light glows white. (Sample Illustration) Turning on -screen instructions. The first time...
... the power To turn on the computer: 1 Make sure any external devices (such as the AC adaptor, if you through steps to ensure that all drives and slots are empty. 3 Press and release the power button. The ON/OFF light glows white. (Sample Illustration) Turning on -screen instructions. The first time...
User Guide
Page 60
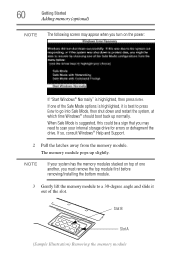
If so, consult Windows® Help and Support. 2 Pull the latches away from the memory module. NOTE If your internal storage drive for errors or defragment the drive. Slot B Slot A (Sample Illustration) Removing the memory module If one another, you turn on top of one of the Safe Mode options is highlighted, it...
If so, consult Windows® Help and Support. 2 Pull the latches away from the memory module. NOTE If your internal storage drive for errors or defragment the drive. Slot B Slot A (Sample Illustration) Removing the memory module If one another, you turn on top of one of the Safe Mode options is highlighted, it...
User Guide
Page 62
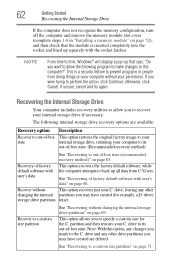
... with the socket latches. This option allows you to specify a custom size for example, a D: drive) storage drive partitions intact. 62 Getting Started Recovering the Internal Storage Drive If the computer does not recognize the memory configuration, turn off the computer and remove the memory module..." on page 71. Recover to its out-of -box state Description This option restores the original factory image to your internal storage drive, returning your permission. The following program to make changes to out-of-box state (recommended recovery method)" on page 63. NOTE ...
... with the socket latches. This option allows you to specify a custom size for example, a D: drive) storage drive partitions intact. 62 Getting Started Recovering the Internal Storage Drive If the computer does not recognize the memory configuration, turn off the computer and remove the memory module..." on page 71. Recover to its out-of -box state Description This option restores the original factory image to your internal storage drive, returning your permission. The following program to make changes to out-of-box state (recommended recovery method)" on page 63. NOTE ...
User Guide
Page 63
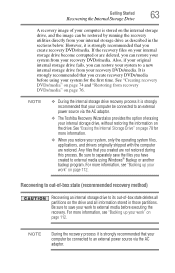
... an external power source via the AC adaptor. ❖ The Toshiba Recovery Wizard also provides the option of erasing your internal storage drive, without restoring the information on page 112. See "Erasing the Internal Storage Drive" on page 112. However, it is strongly recommended that you... originally shipped with the computer are not restored during this process. For more information, see "Backing up your work" on the drive. NOTE During the recovery process it is strongly recommended that your computer be connected to an external power source via the AC adaptor...
... an external power source via the AC adaptor. ❖ The Toshiba Recovery Wizard also provides the option of erasing your internal storage drive, without restoring the information on page 112. See "Erasing the Internal Storage Drive" on page 112. However, it is strongly recommended that you... originally shipped with the computer are not restored during this process. For more information, see "Backing up your work" on the drive. NOTE During the recovery process it is strongly recommended that your computer be connected to an external power source via the AC adaptor...
User Guide
Page 64
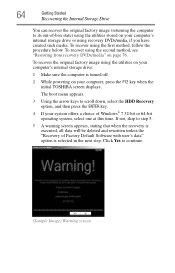
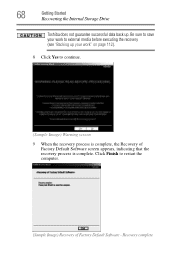
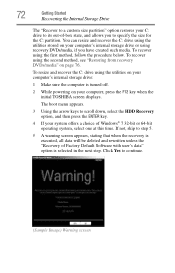
... if you have created such media. To recover the original factory image using the utilities on your computer, press the F12 key when the initial TOSHIBA screen displays. If not, skip to step 5. 5 A warning screen appears, stating that when the recovery is executed, all data will be ...on your system offers a choice of Factory Default Software with user's data" option is turned off. 2 While powering on your computer's internal storage drive: 1 Make sure the computer is selected in the next step. Click Yes to continue. (Sample Image) Warning screen To recover using the first method...
... if you have created such media. To recover the original factory image using the utilities on your computer, press the F12 key when the initial TOSHIBA screen displays. If not, skip to step 5. 5 A warning screen appears, stating that when the recovery is executed, all data will be ...on your system offers a choice of Factory Default Software with user's data" option is turned off. 2 While powering on your computer's internal storage drive: 1 Make sure the computer is selected in the next step. Click Yes to continue. (Sample Image) Warning screen To recover using the first method...
User Guide
Page 65
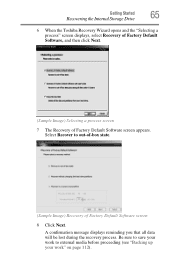
... save your work to out-of-box state. (Sample Image) Recovery of Factory Default Software screen appears. Getting Started 65 Recovering the Internal Storage Drive 6 When the Toshiba Recovery Wizard opens and the "Selecting a process" screen displays, select Recovery of Factory Default Software, and then click Next. (Sample Image) Selecting a process screen...
... save your work to out-of-box state. (Sample Image) Recovery of Factory Default Software screen appears. Getting Started 65 Recovering the Internal Storage Drive 6 When the Toshiba Recovery Wizard opens and the "Selecting a process" screen displays, select Recovery of Factory Default Software, and then click Next. (Sample Image) Selecting a process screen...
User Guide
Page 66
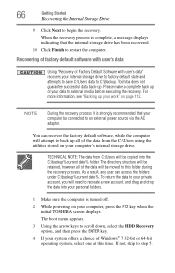
... You can access the folders under C:\backup%current date%. Recovering of factory default software with user's data" recovers your data to C:\Backup. Toshiba does not guarantee successful data back-up of Windows® 7 32-bit or 64-bit operating system, select one at this folder during ...adaptor. If not, skip to restart the computer. When the recovery process is complete, a message displays indicating that your computer's internal storage drive: TECHNICAL NOTE: The data from C:\Users will attempt to back up all of the data will need to begin the recovery. Please make a...
... You can access the folders under C:\backup%current date%. Recovering of factory default software with user's data" recovers your data to C:\Backup. Toshiba does not guarantee successful data back-up of Windows® 7 32-bit or 64-bit operating system, select one at this folder during ...adaptor. If not, skip to restart the computer. When the recovery process is complete, a message displays indicating that your computer's internal storage drive: TECHNICAL NOTE: The data from C:\Users will attempt to back up all of the data will need to begin the recovery. Please make a...
User Guide
Page 67
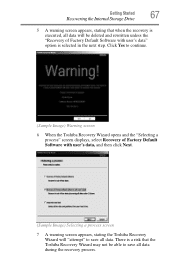
There is selected in the next step. Getting Started 67 Recovering the Internal Storage Drive 5 A warning screen appears, stating that the Toshiba Recovery Wizard may not be deleted and rewritten unless the "Recovery of Factory Default Software with user's data, and then click Next. (Sample Image) ...Selecting a process screen 7 A warning screen appears, stating the Toshiba Recovery Wizard will be able to save all data. Click Yes to continue. (Sample Image) Warning screen 6 When the...
There is selected in the next step. Getting Started 67 Recovering the Internal Storage Drive 5 A warning screen appears, stating that the Toshiba Recovery Wizard may not be deleted and rewritten unless the "Recovery of Factory Default Software with user's data, and then click Next. (Sample Image) ...Selecting a process screen 7 A warning screen appears, stating the Toshiba Recovery Wizard will be able to save all data. Click Yes to continue. (Sample Image) Warning screen 6 When the...
User Guide
Page 68
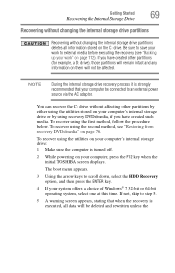
Recovery complete 68 Getting Started Recovering the Internal Storage Drive Toshiba does not guarantee successful data back up your work" on page 112). 8 Click Yes to continue. (Sample Image) Warning screen 9 When the recovery process is complete, the Recovery of Factory Default Software - Click Finish to external media before executing the recovery (see "Backing up . Be sure to save your work to restart the computer. (Sample Image) Recovery of Factory Default Software screen appears, indicating that the recovery process is complete.
Recovery complete 68 Getting Started Recovering the Internal Storage Drive Toshiba does not guarantee successful data back up your work" on page 112). 8 Click Yes to continue. (Sample Image) Warning screen 9 When the recovery process is complete, the Recovery of Factory Default Software - Click Finish to external media before executing the recovery (see "Backing up . Be sure to save your work to restart the computer. (Sample Image) Recovery of Factory Default Software screen appears, indicating that the recovery process is complete.
User Guide
Page 69
... by either using the second method, see "Restoring from recovery DVDs/media" on your computer, press the F12 key when the initial TOSHIBA screen displays. If not, skip to step 5. 5 A warning screen appears, stating that your system offers a choice of Windows® 7 32-bit or 64-bit ...operating system, select one at this time. You can recover the C: drive without changing the internal storage drive partitions deletes all data will not be affected. To recover using the utilities stored on page 76. To recover using the first method...
... by either using the second method, see "Restoring from recovery DVDs/media" on your computer, press the F12 key when the initial TOSHIBA screen displays. If not, skip to step 5. 5 A warning screen appears, stating that your system offers a choice of Windows® 7 32-bit or 64-bit ...operating system, select one at this time. You can recover the C: drive without changing the internal storage drive partitions deletes all data will not be affected. To recover using the utilities stored on page 76. To recover using the first method...
User Guide
Page 70
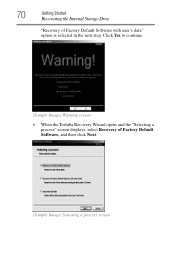
Click Yes to continue. (Sample Image) Warning screen 6 When the Toshiba Recovery Wizard opens and the "Selecting a process" screen displays, select Recovery of Factory Default Software with user's data" option is selected in the next step. 70 Getting Started Recovering the Internal Storage Drive "Recovery of Factory Default Software, and then click Next. (Sample Image) Selecting a process screen
Click Yes to continue. (Sample Image) Warning screen 6 When the Toshiba Recovery Wizard opens and the "Selecting a process" screen displays, select Recovery of Factory Default Software with user's data" option is selected in the next step. 70 Getting Started Recovering the Internal Storage Drive "Recovery of Factory Default Software, and then click Next. (Sample Image) Selecting a process screen
User Guide
Page 71
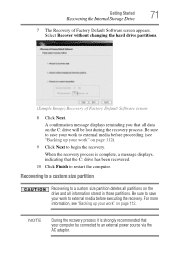
..., a message displays, indicating that your work " on page 112. When the recovery process is strongly recommended that the C: drive has been recovered. 10 Click Finish to an external power source via the AC adaptor. Select Recover without changing the hard... drive partitions. (Sample Image) Recovery of Factory Default Software screen appears. Getting Started 71 Recovering the Internal Storage Drive 7 The Recovery of Factory Default Software screen 8 Click Next. Recovering to a ...
..., a message displays, indicating that your work " on page 112. When the recovery process is strongly recommended that the C: drive has been recovered. 10 Click Finish to an external power source via the AC adaptor. Select Recover without changing the hard... drive partitions. (Sample Image) Recovery of Factory Default Software screen appears. Getting Started 71 Recovering the Internal Storage Drive 7 The Recovery of Factory Default Software screen 8 Click Next. Recovering to a ...
User Guide
Page 72
...recovery DVDs/media" on page 76. You can resize and recover the C: drive using the utilities stored on your computer's internal storage drive or using the utilities on your computer, press the F12 key when the initial TOSHIBA screen displays. The boot menu appears. 3 Using the arrow keys to continue... with user's data" option is turned off. 2 While powering on your computer's internal storage drive: 1 Make sure the computer is selected in the next step. To resize and recover the C: drive using recovery DVDs/media, if you to specify the size for the C: partition. Click Yes ...
...recovery DVDs/media" on page 76. You can resize and recover the C: drive using the utilities stored on your computer's internal storage drive or using the utilities on your computer, press the F12 key when the initial TOSHIBA screen displays. The boot menu appears. 3 Using the arrow keys to continue... with user's data" option is turned off. 2 While powering on your computer's internal storage drive: 1 Make sure the computer is selected in the next step. To resize and recover the C: drive using recovery DVDs/media, if you to specify the size for the C: partition. Click Yes ...

