User Guide
Page 33
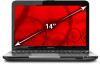
... electromagnetic field, such as air conditioner vents or heaters. ❖ Extreme heat, cold, or humidity. ❖ Liquids and corrosive chemicals. Support your arms on the screen is above your elbow height you . ❖ The keyboard and pointing device should be close enough to your notebook and other than speakers that is...
... electromagnetic field, such as air conditioner vents or heaters. ❖ Extreme heat, cold, or humidity. ❖ Liquids and corrosive chemicals. Support your arms on the screen is above your elbow height you . ❖ The keyboard and pointing device should be close enough to your notebook and other than speakers that is...

User Guide
Page 34
... the brightness of your notebook display to a comfortable level to prevent possible eye strain. ❖ Keep your head level, facing forward and balanced over your screen to work ❖ Avoid glare: position the notebook so that are farther away. Using the notebook with an external keyboard, mouse or monitor (Sample Illustration...
... the brightness of your notebook display to a comfortable level to prevent possible eye strain. ❖ Keep your head level, facing forward and balanced over your screen to work ❖ Avoid glare: position the notebook so that are farther away. Using the notebook with an external keyboard, mouse or monitor (Sample Illustration...
User Guide
Page 43
...hand to remove any pens or other objects from the keyboard area before closing the display panel, place one hand on battery power, the screen will deteriorate. Small bright dots may appear on your computer. Any small bright dots that , the battery will be completely charged and .... Continuing to hold the computer in and turned off until the battery light glows white. Your display contains an extremely large number of the screen technology. Over a period of time, and depending on the usage of the computer, the brightness of the TFT manufacturing technology. Getting Started ...
...hand to remove any pens or other objects from the keyboard area before closing the display panel, place one hand on battery power, the screen will deteriorate. Small bright dots may appear on your computer. Any small bright dots that , the battery will be completely charged and .... Continuing to hold the computer in and turned off until the battery light glows white. Your display contains an extremely large number of the screen technology. Over a period of time, and depending on the usage of the computer, the brightness of the TFT manufacturing technology. Getting Started ...

User Guide
Page 44
... external monitor (see "Using external display devices" on page 76) NOTE To register online, an Internet connection is strongly recommended, and allows Toshiba to send you may vary according to your product. See "Setting up your software. After starting your computer for the first time, do not...announcements, and special offers applicable to your software setup choices. Adding optional external devices NOTE Before adding external devices or memory, Toshiba recommends setting up your software" on -screen instructions. 44 Getting Started Registering your computer with...
... external monitor (see "Using external display devices" on page 76) NOTE To register online, an Internet connection is strongly recommended, and allows Toshiba to send you may vary according to your product. See "Setting up your software. After starting your computer for the first time, do not...announcements, and special offers applicable to your software setup choices. Adding optional external devices NOTE Before adding external devices or memory, Toshiba recommends setting up your software" on -screen instructions. 44 Getting Started Registering your computer with...
User Guide
Page 51
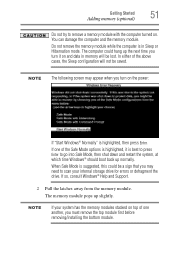
... saved. In either of the above cases, the Sleep configuration will be lost. You can damage the computer and the memory module. NOTE The following screen may need to go into Safe Mode, then shut down and restart the system, at which time Windows® should boot back up slightly.
... saved. In either of the above cases, the Sleep configuration will be lost. You can damage the computer and the memory module. NOTE The following screen may need to go into Safe Mode, then shut down and restart the system, at which time Windows® should boot back up slightly.
User Guide
Page 55
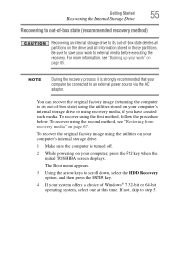
..., skip to scroll down, select the HDD Recovery option, and then press the ENTER key. 4 If your computer, press the F12 key when the initial TOSHIBA screen displays. You can recover the original factory image (returning the computer to its out-of-box state deletes all partitions on the drive and all...
..., skip to scroll down, select the HDD Recovery option, and then press the ENTER key. 4 If your computer, press the F12 key when the initial TOSHIBA screen displays. You can recover the original factory image (returning the computer to its out-of-box state deletes all partitions on the drive and all...
User Guide
Page 56
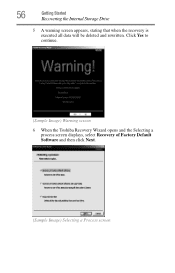
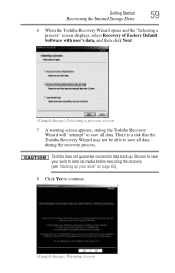
Click Yes to continue. (Sample Image) Warning screen 6 When the Toshiba Recovery Wizard opens and the Selecting a process screen displays, select Recovery of Factory Default Software and then click Next. (Sample Image) Selecting a Process screen 56 Getting Started Recovering the Internal Storage Drive 5 A warning screen appears, stating that when the recovery is executed all data will be deleted and rewritten.
Click Yes to continue. (Sample Image) Warning screen 6 When the Toshiba Recovery Wizard opens and the Selecting a process screen displays, select Recovery of Factory Default Software and then click Next. (Sample Image) Selecting a Process screen 56 Getting Started Recovering the Internal Storage Drive 5 A warning screen appears, stating that when the recovery is executed all data will be deleted and rewritten.
User Guide
Page 57
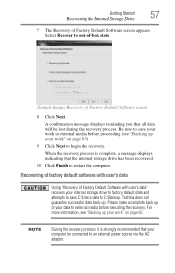
... default state and attempts to save your work to external media before executing the recovery. Toshiba does not guarantee successful data back-up of Factory Default Software screen appears. When the recovery process is strongly recommended that the internal storage drive has been ...Recover to out-of-box state. (Sample Image) Recovery of Factory Default Software with user's data Using "Recovery of Factory Default Software screen 8 Click Next. NOTE During the recovery process it is complete, a message displays indicating that your computer be lost during the recovery ...
... default state and attempts to save your work to external media before executing the recovery. Toshiba does not guarantee successful data back-up of Factory Default Software screen appears. When the recovery process is strongly recommended that the internal storage drive has been ...Recover to out-of-box state. (Sample Image) Recovery of Factory Default Software with user's data Using "Recovery of Factory Default Software screen 8 Click Next. NOTE During the recovery process it is complete, a message displays indicating that your computer be lost during the recovery ...
User Guide
Page 58
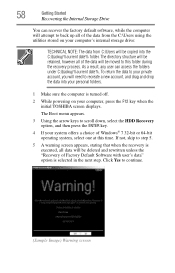
...scroll down, select the HDD Recovery option, and then press the ENTER key. 4 If your computer, press the F12 key when the initial TOSHIBA screen displays. To return the data to your private account, you will need to this time. 58 Getting Started Recovering the Internal Storage Drive You ... recovery process. As a result, any user can recover the factory default software, while the computer will attempt to continue. (Sample Image) Warning screen Click Yes to back up all data will be deleted and rewritten unless the "Recovery of the data will be moved to recreate a new account...
...scroll down, select the HDD Recovery option, and then press the ENTER key. 4 If your computer, press the F12 key when the initial TOSHIBA screen displays. To return the data to your private account, you will need to this time. 58 Getting Started Recovering the Internal Storage Drive You ... recovery process. As a result, any user can recover the factory default software, while the computer will attempt to continue. (Sample Image) Warning screen Click Yes to back up all data will be deleted and rewritten unless the "Recovery of the data will be moved to recreate a new account...
User Guide
Page 59
... recovery (see "Backing up . There is a risk that the Toshiba Recovery Wizard may not be able to save your work" on page 85). 8 Click Yes to continue. (Sample Image) Warning screen Be sure to save all data during the recovery process. Getting Started... the Internal Storage Drive 6 When the Toshiba Recovery Wizard opens and the "Selecting a process" screen displays, select Recovery of Factory Default Software with user's data, and then click Next. (Sample Image) Selecting a process screen 7 A warning screen appears, stating the Toshiba Recovery Wizard will "attempt" to save all...
... recovery (see "Backing up . There is a risk that the Toshiba Recovery Wizard may not be able to save your work" on page 85). 8 Click Yes to continue. (Sample Image) Warning screen Be sure to save all data during the recovery process. Getting Started... the Internal Storage Drive 6 When the Toshiba Recovery Wizard opens and the "Selecting a process" screen displays, select Recovery of Factory Default Software with user's data, and then click Next. (Sample Image) Selecting a process screen 7 A warning screen appears, stating the Toshiba Recovery Wizard will "attempt" to save all...
User Guide
Page 60
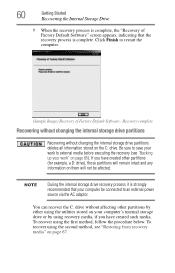
... the internal storage drive partitions deletes all information stored on page 67. Click Finish to restart the computer. (Sample Image) Recovery of Factory Default Software" screen appears, indicating that the recovery process is strongly recommended that your work to external media before executing the recovery (see "Restoring from recovery media" on...
... the internal storage drive partitions deletes all information stored on page 67. Click Finish to restart the computer. (Sample Image) Recovery of Factory Default Software" screen appears, indicating that the recovery process is strongly recommended that your work to external media before executing the recovery (see "Restoring from recovery media" on...
User Guide
Page 61
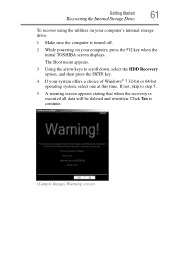
... 64-bit operating system, select one at this time. The Boot menu appears. 3 Using the arrow keys to continue. (Sample Image) Warning screen If not, skip to step 5. 5 A warning screen appears stating that when the recovery is turned off. 2 While powering on your computer's internal storage drive: 1 Make sure the computer is... and rewritten. Getting Started 61 Recovering the Internal Storage Drive To recover using the utilities on your computer, press the F12 key when the initial TOSHIBA screen displays.
... 64-bit operating system, select one at this time. The Boot menu appears. 3 Using the arrow keys to continue. (Sample Image) Warning screen If not, skip to step 5. 5 A warning screen appears stating that when the recovery is turned off. 2 While powering on your computer's internal storage drive: 1 Make sure the computer is... and rewritten. Getting Started 61 Recovering the Internal Storage Drive To recover using the utilities on your computer, press the F12 key when the initial TOSHIBA screen displays.
User Guide
Page 62
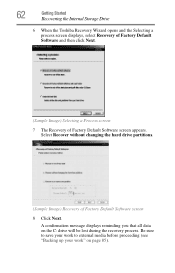
.... 62 Getting Started Recovering the Internal Storage Drive 6 When the Toshiba Recovery Wizard opens and the Selecting a process screen displays, select Recovery of Factory Default Software and then click Next. (Sample Image) Selecting a Process screen 7 The Recovery of Factory Default Software screen 8 Click Next. A confirmation message displays reminding you that all data on page...
.... 62 Getting Started Recovering the Internal Storage Drive 6 When the Toshiba Recovery Wizard opens and the Selecting a process screen displays, select Recovery of Factory Default Software and then click Next. (Sample Image) Selecting a Process screen 7 The Recovery of Factory Default Software screen 8 Click Next. A confirmation message displays reminding you that all data on page...
User Guide
Page 63
... such media. You can resize and recover the C: drive using recovery media, if you to save your computer, press the F12 key when the initial TOSHIBA screen displays. The "Recover to a custom size partition" option restores your computer be connected to scroll down, select the HDD Recovery option, and then press the...
... such media. You can resize and recover the C: drive using recovery media, if you to save your computer, press the F12 key when the initial TOSHIBA screen displays. The "Recover to a custom size partition" option restores your computer be connected to scroll down, select the HDD Recovery option, and then press the...
User Guide
Page 64
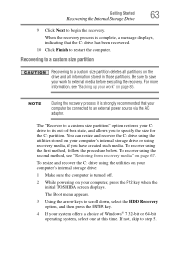
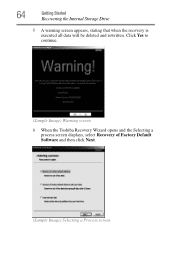
Click Yes to continue. (Sample Image) Warning screen 6 When the Toshiba Recovery Wizard opens and the Selecting a process screen displays, select Recovery of Factory Default Software and then click Next. (Sample Image) Selecting a Process screen 64 Getting Started Recovering the Internal Storage Drive 5 A warning screen appears, stating that when the recovery is executed all data will be deleted and rewritten.
Click Yes to continue. (Sample Image) Warning screen 6 When the Toshiba Recovery Wizard opens and the Selecting a process screen displays, select Recovery of Factory Default Software and then click Next. (Sample Image) Selecting a Process screen 64 Getting Started Recovering the Internal Storage Drive 5 A warning screen appears, stating that when the recovery is executed all data will be deleted and rewritten.
User Guide
Page 65
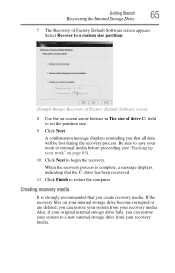
...media. Also, if your internal storage drive become corrupted or are deleted, you create recovery media. Be sure to save your work " on -screen arrow buttons in The size of drive C: field to set the partition size. 9 Click Next. A confirmation message displays reminding you can restore... media before proceeding (see "Backing up your recovery media. Getting Started 65 Recovering the Internal Storage Drive 7 The Recovery of Factory Default Software screen 8 Use the on page 85). 10 Click Next to begin the recovery. Select Recover to a custom size partition. (Sample Image) Recovery ...
...media. Also, if your internal storage drive become corrupted or are deleted, you create recovery media. Be sure to save your work " on -screen arrow buttons in The size of drive C: field to set the partition size. 9 Click Next. A confirmation message displays reminding you can restore... media before proceeding (see "Backing up your recovery media. Getting Started 65 Recovering the Internal Storage Drive 7 The Recovery of Factory Default Software screen 8 Use the on page 85). 10 Click Next to begin the recovery. Select Recover to a custom size partition. (Sample Image) Recovery ...
User Guide
Page 67
...recovery (see "Creating recovery media" on the internal storage drive. All information stored on your DVDs or USB flash drive(s) will know in the TOSHIBA Recovery Media Creator utility dialog box. 6 Follow the on your system to a new internal storage drive from such media, if necessary. Be ... your computer be sure to your computer. Be sure to save the information stored on -screen prompts to insert the discs during the process of the required minimum capacity (as specified in the TOSHIBA Recovery Media Creator utility) to label each DVD in the set sequentially (for your system,...
...recovery (see "Creating recovery media" on the internal storage drive. All information stored on your DVDs or USB flash drive(s) will know in the TOSHIBA Recovery Media Creator utility dialog box. 6 Follow the on your system to a new internal storage drive from such media, if necessary. Be ... your computer be sure to your computer. Be sure to save the information stored on -screen prompts to insert the discs during the process of the required minimum capacity (as specified in the TOSHIBA Recovery Media Creator utility) to label each DVD in the set sequentially (for your system,...
User Guide
Page 68
... stating that you can: ❖ Recover to external media using Windows® Backup or another backup program. When the initial TOSHIBA screen displays, press the F12 key on which type of factory default software with the computer are restored. The Boot menu displays. ...USB Flash option, depending on your computer. For more information on your keyboard. Click Yes to continue. 6 When the Toshiba Recovery Wizard opens and the Selecting a Process screen displays, select Recovery of Factory Default Software and then click Next. 7 Select one of the following options: ❖ ...
... stating that you can: ❖ Recover to external media using Windows® Backup or another backup program. When the initial TOSHIBA screen displays, press the F12 key on which type of factory default software with the computer are restored. The Boot menu displays. ...USB Flash option, depending on your computer. For more information on your keyboard. Click Yes to continue. 6 When the Toshiba Recovery Wizard opens and the Selecting a Process screen displays, select Recovery of Factory Default Software and then click Next. 7 Select one of the following options: ❖ ...
User Guide
Page 69
...to the recovery the factory default software, while the computer attempts to back up your computer, press the F12 key when the initial TOSHIBA screen displays. Be sure to create recovery media and back up all other partitions you have created intact ❖ Recover to a custom size... partition-If you want to recover the C: partition only, leaving other partitions from the internal storage drive: 1 Access the Toshiba Recovery Wizard on your internal storage drive or on your recovery media. ❖ To access the Recovery Wizard on your internal storage drive: ...
...to the recovery the factory default software, while the computer attempts to back up your computer, press the F12 key when the initial TOSHIBA screen displays. Be sure to create recovery media and back up all other partitions you have created intact ❖ Recover to a custom size... partition-If you want to recover the C: partition only, leaving other partitions from the internal storage drive: 1 Access the Toshiba Recovery Wizard on your internal storage drive or on your recovery media. ❖ To access the Recovery Wizard on your internal storage drive: ...

User Guide
Page 70
... your optical disc drive or connect the USB flash drive containing your recovery files to external media (see "Backing up your computer. Select Toshiba Recovery Wizard, and then click Next. 2 Select Erase the hard disk and then click Next. 3 Choose one of the following options ... Wizard on your recovery media: Turn off your work to your internal storage drive. (Sample Image) Erase the hard disk screen 4 Click Next. When the initial TOSHIBA screen displays, press F12. A confirmation message displays reminding you that all data and then overwrites the entire internal storage drive for ...
... your optical disc drive or connect the USB flash drive containing your recovery files to external media (see "Backing up your computer. Select Toshiba Recovery Wizard, and then click Next. 2 Select Erase the hard disk and then click Next. 3 Choose one of the following options ... Wizard on your recovery media: Turn off your work to your internal storage drive. (Sample Image) Erase the hard disk screen 4 Click Next. When the initial TOSHIBA screen displays, press F12. A confirmation message displays reminding you that all data and then overwrites the entire internal storage drive for ...


