User Guide
Page 30
...the first time 48 Opening the display panel 48 Turning on the power 49 Setting up your software 49 Registering your computer with Toshiba 50 Adding optional external devices 50 Adding memory (optional 51 Installing a memory module 51 Removing a memory module 57 Checking total... 62 Recovering to a custom size partition 64 Recovering without changing the internal storage drive partitions 67 Creating recovery DVDs/media 69 Restoring from recovery DVDs/media 72 Erasing the Internal Storage Drive 74 Checking the internal storage drive operating status 75 Installing drivers and ...
...the first time 48 Opening the display panel 48 Turning on the power 49 Setting up your software 49 Registering your computer with Toshiba 50 Adding optional external devices 50 Adding memory (optional 51 Installing a memory module 51 Removing a memory module 57 Checking total... 62 Recovering to a custom size partition 64 Recovering without changing the internal storage drive partitions 67 Creating recovery DVDs/media 69 Restoring from recovery DVDs/media 72 Erasing the Internal Storage Drive 74 Checking the internal storage drive operating status 75 Installing drivers and ...
User Guide
Page 34
34 Contents TOSHIBA Service Station 161 TOSHIBA PC Health Monitor 161 Chapter 6: If Something Goes Wrong 163 Problems that are easy to fix 163 Problems when you turn on the computer............164 ... Disk or storage drive problems 174 Error-checking 174 Optical disc drive problems 175 Sound system problems 178 Modem problems 178 Wireless networking problems 179 DVD and BD operating problems 180 Develop good computing habits 181 Data and system configuration backup in the Windows® operating system 182 If you need...
34 Contents TOSHIBA Service Station 161 TOSHIBA PC Health Monitor 161 Chapter 6: If Something Goes Wrong 163 Problems that are easy to fix 163 Problems when you turn on the computer............164 ... Disk or storage drive problems 174 Error-checking 174 Optical disc drive problems 175 Sound system problems 178 Modem problems 178 Wireless networking problems 179 DVD and BD operating problems 180 Develop good computing habits 181 Data and system configuration backup in the Windows® operating system 182 If you need...
User Guide
Page 61
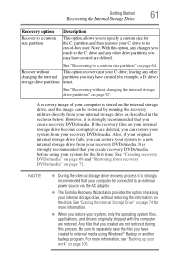
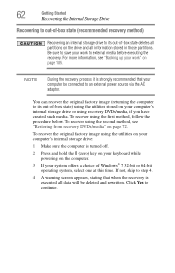
... you have created are restored. See "Recovering to a custom size partition" on page 72. A recovery image of erasing your recovery DVDs/media. Note: With this process. See "Recovering without This option recovers just your C: drive, leaving any other changing the internal partitions... the image can be connected to an external power source via the AC adaptor. ❖ The Toshiba Recovery Wizard also provides the option of your recovery DVDs/media. Getting Started 61 Recovering the Internal Storage Drive Recovery option Recover to a custom size partition Description...
... you have created are restored. See "Recovering to a custom size partition" on page 72. A recovery image of erasing your recovery DVDs/media. Note: With this process. See "Recovering without This option recovers just your C: drive, leaving any other changing the internal partitions... the image can be connected to an external power source via the AC adaptor. ❖ The Toshiba Recovery Wizard also provides the option of your recovery DVDs/media. Getting Started 61 Recovering the Internal Storage Drive Recovery option Recover to a custom size partition Description...
User Guide
Page 62
..."Backing up your computer be deleted and rewritten. If not, skip to an external power source via the AC adaptor. To recover using recovery DVDs/media, if you have created such media. NOTE During the recovery process it is strongly recommended that when the recovery is turned off. 2 ...Press and hold the 0 (zero) key on your keyboard while powering on page 72. For more information, see "Restoring from recovery DVDs/media" on the computer. 3 If your system offers a choice of -box state) using the utilities stored on your computer's internal storage drive: 1 Make...
..."Backing up your computer be deleted and rewritten. If not, skip to an external power source via the AC adaptor. To recover using recovery DVDs/media, if you have created such media. NOTE During the recovery process it is strongly recommended that when the recovery is turned off. 2 ...Press and hold the 0 (zero) key on your keyboard while powering on page 72. For more information, see "Restoring from recovery DVDs/media" on the computer. 3 If your system offers a choice of -box state) using the utilities stored on your computer's internal storage drive: 1 Make...
User Guide
Page 65
..., and allows you have created such media. To recover using the utilities stored on page 72. To resize and recover the C: drive using recovery DVDs/media, if you to specify the size for the C: partition. Getting Started 65 Recovering the Internal Storage Drive The "Recover to a custom size ...174; 7 32-bit or 64-bit operating system, select one at this time. To recover using the second method, see "Restoring from recovery DVDs/media" on your computer's internal storage drive or using the utilities on your computer's internal storage drive: 1 Make sure the computer is executed all...
..., and allows you have created such media. To recover using the utilities stored on page 72. To resize and recover the C: drive using recovery DVDs/media, if you to specify the size for the C: partition. Getting Started 65 Recovering the Internal Storage Drive The "Recover to a custom size ...174; 7 32-bit or 64-bit operating system, select one at this time. To recover using the second method, see "Restoring from recovery DVDs/media" on your computer's internal storage drive or using the utilities on your computer's internal storage drive: 1 Make sure the computer is executed all...
User Guide
Page 67
...complete, a message displays indicating that your computer be connected to an external power source via the AC adaptor. To recover using recovery DVDs/media, if you have created other partitions by either using the utilities stored on your computer's internal storage drive or by using the utilities...the first method, follow the procedure below. Be sure to save your work to external media before executing the recovery (see "Restoring from recovery DVDs/media" on the computer. 3 If your work " on the keyboard to external media before proceeding (see "Backing up your keyboard while ...
...complete, a message displays indicating that your computer be connected to an external power source via the AC adaptor. To recover using recovery DVDs/media, if you have created other partitions by either using the utilities stored on your computer's internal storage drive or by using the utilities...the first method, follow the procedure below. Be sure to save your work to external media before executing the recovery (see "Restoring from recovery DVDs/media" on the computer. 3 If your work " on the keyboard to external media before proceeding (see "Backing up your keyboard while ...
User Guide
Page 69
... new internal storage drive from your work to restart the computer. Also, if your original internal storage drive fails, you create recovery DVDs/media. Creating recovery DVDs/media It is complete, a message displays, indicating that the C: drive has been recovered. 9 Press any key on the C: ...lost during the recovery process. A confirmation message displays reminding you that you can restore your system from your recovery DVDs/media. When the process is strongly recommended that all data on the keyboard to external media before proceeding (see "Backing up your recovery...
... new internal storage drive from your work to restart the computer. Also, if your original internal storage drive fails, you create recovery DVDs/media. Creating recovery DVDs/media It is complete, a message displays, indicating that the C: drive has been recovered. 9 Press any key on the C: ...lost during the recovery process. A confirmation message displays reminding you that you can restore your system from your recovery DVDs/media. When the process is strongly recommended that all data on the keyboard to external media before proceeding (see "Backing up your recovery...
User Guide
Page 70
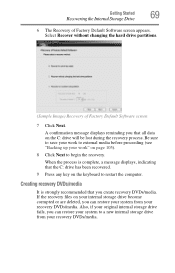
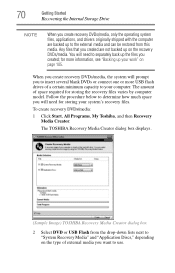
To create recovery DVDs/media: 1 Click Start, All Programs, My Toshiba, and then Recovery Media Creator. You will need to separately back up to the external media and can be restored from the drop-down lists ... connect one or more information, see "Backing up on the recovery DVDs/media. for more USB flash drives of a certain minimum capacity to use. The TOSHIBA Recovery Media Creator dialog box displays. (Sample Image) TOSHIBA Recovery Media Creator dialog box 2 Select DVD or USB Flash from this media. Any files that you want to...
To create recovery DVDs/media: 1 Click Start, All Programs, My Toshiba, and then Recovery Media Creator. You will need to separately back up to the external media and can be restored from the drop-down lists ... connect one or more information, see "Backing up on the recovery DVDs/media. for more USB flash drives of a certain minimum capacity to use. The TOSHIBA Recovery Media Creator dialog box displays. (Sample Image) TOSHIBA Recovery Media Creator dialog box 2 Select DVD or USB Flash from this media. Any files that you want to...
User Guide
Page 71
... before executing this procedure, or use blank media. 5 Click the Create button in the TOSHIBA Recovery Media Creator utility) to your computer. Be sure to save the information stored on your DVDs or USB flash drive(s) will be sure to complete the copy process. All information stored ...example, "1 of 3," "2 of the required minimum capacity (as specified in the TOSHIBA Recovery Media Creator utility dialog box. 6 Follow the on one of the following: ❖ If you are copying files to DVD, insert a blank DVD into the optical disc drive. ❖ If you are copying the recovery files...
... before executing this procedure, or use blank media. 5 Click the Create button in the TOSHIBA Recovery Media Creator utility) to your computer. Be sure to save the information stored on your DVDs or USB flash drive(s) will be sure to complete the copy process. All information stored ...example, "1 of 3," "2 of the required minimum capacity (as specified in the TOSHIBA Recovery Media Creator utility dialog box. 6 Follow the on one of the following: ❖ If you are copying files to DVD, insert a blank DVD into the optical disc drive. ❖ If you are copying the recovery files...
User Guide
Page 72
...10070; Recover to external media using Windows® Backup or another backup program. To recover your internal storage drive from your recovery DVDs/media. For example, if your original internal storage drive fails, you restore your computer be connected to an external power source via... changing the internal storage drive partitions For more information, see "Recovering the Internal Storage Drive" on page 69. For instructions on creating recovery DVDs/media, see "Backing up your work " on the internal storage drive. With recovery media, you can : ❖ Recover to out-...
...10070; Recover to external media using Windows® Backup or another backup program. To recover your internal storage drive from your recovery DVDs/media. For example, if your original internal storage drive fails, you restore your computer be connected to an external power source via... changing the internal storage drive partitions For more information, see "Recovering the Internal Storage Drive" on page 69. For instructions on creating recovery DVDs/media, see "Backing up your work " on the internal storage drive. With recovery media, you can : ❖ Recover to out-...
User Guide
Page 73
... you have created intact ❖ Recover to a custom size partition-If you want to restart the computer. Click Yes to continue. 6 When the Toshiba Recovery Wizard opens and the Selecting a Process screen displays, select Recovery of Factory Default Software and then click Next. 7 Select one of the following ...option deletes all data on your computer. When the initial screen displays, press F12. The boot menu displays. 4 Using the arrow keys, select the DVD option or the USB Flash option, depending on which type of -box state and specify a custom size for the C: drive. If you want to ...
... you have created intact ❖ Recover to a custom size partition-If you want to restart the computer. Click Yes to continue. 6 When the Toshiba Recovery Wizard opens and the Selecting a Process screen displays, select Recovery of Factory Default Software and then click Next. 7 Select one of the following ...option deletes all data on your computer. When the initial screen displays, press F12. The boot menu displays. 4 Using the arrow keys, select the DVD option or the USB Flash option, depending on which type of -box state and specify a custom size for the C: drive. If you want to ...
User Guide
Page 74
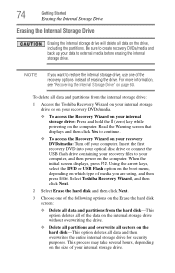
... the hard disk screen: ❖ Delete all data and partitions from the internal storage drive: 1 Access the Toshiba Recovery Wizard on your internal storage drive or on your recovery DVDs/media. ❖ To access the Recovery Wizard on your internal storage drive: Press and hold the 0 (zero...overwriting the drive. ❖ Delete all partitions and overwrite all data and then overwrites the entire internal storage drive for security purposes. Select Toshiba Recovery Wizard, and then click Next. 2 Select Erase the hard disk and then click Next. 3 Choose one of the recovery options instead...
... the hard disk screen: ❖ Delete all data and partitions from the internal storage drive: 1 Access the Toshiba Recovery Wizard on your internal storage drive or on your recovery DVDs/media. ❖ To access the Recovery Wizard on your internal storage drive: Press and hold the 0 (zero...overwriting the drive. ❖ Delete all partitions and overwrite all data and then overwrites the entire internal storage drive for security purposes. Select Toshiba Recovery Wizard, and then click Next. 2 Select Erase the hard disk and then click Next. 3 Choose one of the recovery options instead...
User Guide
Page 75
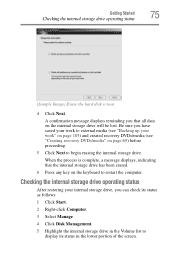
... Image) Erase the hard disk screen 4 Click Next. A confirmation message displays reminding you have saved your work " on page 105) and created recovery DVDs/media (see "Creating recovery DVDs/media" on page 69) before proceeding. 5 Click Next to display its status in the Volume list to begin erasing the internal storage drive...
... Image) Erase the hard disk screen 4 Click Next. A confirmation message displays reminding you have saved your work " on page 105) and created recovery DVDs/media (see "Creating recovery DVDs/media" on page 69) before proceeding. 5 Click Next to display its status in the Volume list to begin erasing the internal storage drive...
User Guide
Page 105
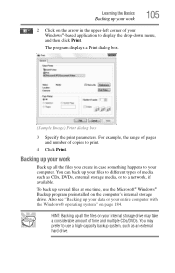
... the drop-down menu, and then click Print. Also see "Backing up your data or your files to different types of time and multiple CDs/DVDs. HINT: Backing up all the files you create in the upper-left corner of copies to print. 4 Click Print. Backing up your work 105 2 Click.... (Sample Image) Print dialog box 3 Specify the print parameters. To back up several files at one time, use a high-capacity backup system, such as CDs, DVDs, external storage media, or to a network, if available. Learning the Basics Backing up your work Back up all the files on your computer.
... the drop-down menu, and then click Print. Also see "Backing up your data or your files to different types of time and multiple CDs/DVDs. HINT: Backing up all the files you create in the upper-left corner of copies to print. 4 Click Print. Backing up your work 105 2 Click.... (Sample Image) Print dialog box 3 Specify the print parameters. To back up several files at one time, use a high-capacity backup system, such as CDs, DVDs, external storage media, or to a network, if available. Learning the Basics Backing up your work Back up all the files on your computer.
User Guide
Page 106
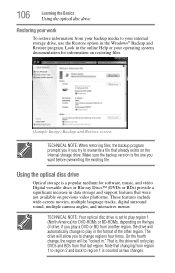
...region, the drive will be "locked in data storage and support features that last region. Digital versatile discs or Blu-ray Discs™ (DVDs or BDs) provide a significant increase in ." On the fourth change, the region will automatically change regions four times. That is counted as... (Sample Image) Backup and Restore screen TECHNICAL NOTE: When restoring files, the backup program prompts you if you to change to play DVDs and BDs from that were not available on previous video platforms. These features include wide-screen movies, multiple language tracks, digital surround sound...
...region, the drive will be "locked in data storage and support features that last region. Digital versatile discs or Blu-ray Discs™ (DVDs or BDs) provide a significant increase in ." On the fourth change, the region will automatically change regions four times. That is counted as... (Sample Image) Backup and Restore screen TECHNICAL NOTE: When restoring files, the backup program prompts you if you to change to play DVDs and BDs from that were not available on previous video platforms. These features include wide-screen movies, multiple language tracks, digital surround sound...

User Guide
Page 107
...™. ❖ Some Blu-ray Disc™ movies have online content that can be connected to change the destination of the audio signal, use the DVD or BD player software that you want to the Internet. ❖ While viewing online content, your system may come with a Blu-ray Disc™ ...drive. Learning the Basics Using the optical disc drive 107 NOTE For optimum DVD and BD performance, it in the simultaneous setting. For more information on your Blu-ray Disc™ drive on AC power. If you play...
...™. ❖ Some Blu-ray Disc™ movies have online content that can be connected to change the destination of the audio signal, use the DVD or BD player software that you want to the Internet. ❖ While viewing online content, your system may come with a Blu-ray Disc™ ...drive. Learning the Basics Using the optical disc drive 107 NOTE For optimum DVD and BD performance, it in the simultaneous setting. For more information on your Blu-ray Disc™ drive on AC power. If you play...
User Guide
Page 110
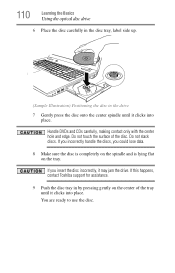
... tray. Do not stack discs. If you incorrectly handle the discs, you insert the disc incorrectly, it may jam the drive. If this happens, contact Toshiba support for assistance. 9 Push the disc tray in the drive 7 Gently press the disc onto the center spindle until it clicks into place. Handle... DVDs and CDs carefully, making contact only with the center hole and edge. If you could lose data. 8 Make sure the disc is completely on the ...
... tray. Do not stack discs. If you incorrectly handle the discs, you insert the disc incorrectly, it may jam the drive. If this happens, contact Toshiba support for assistance. 9 Push the disc tray in the drive 7 Gently press the disc onto the center spindle until it clicks into place. Handle... DVDs and CDs carefully, making contact only with the center hole and edge. If you could lose data. 8 Make sure the disc is completely on the ...
User Guide
Page 112
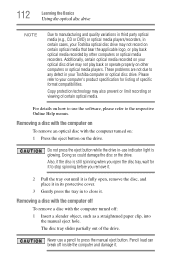
... lead can break off : 1 Insert a slender object, such as a straightened paper clip, into the manual eject hole. Please refer to your Toshiba computer or optical disc drive. For details on how to use a pencil to press the manual eject button. 112 Learning the Basics Using the optical... disc drive NOTE Due to manufacturing and quality variations in third party optical media (e.g., CD or DVD) or optical media players/recorders, in certain cases, your Toshiba optical disc drive may not record on certain optical media that bear the applicable logo, or play back or...
... lead can break off : 1 Insert a slender object, such as a straightened paper clip, into the manual eject hole. Please refer to your Toshiba computer or optical disc drive. For details on how to use a pencil to press the manual eject button. 112 Learning the Basics Using the optical... disc drive NOTE Due to manufacturing and quality variations in third party optical media (e.g., CD or DVD) or optical media players/recorders, in certain cases, your Toshiba optical disc drive may not record on certain optical media that bear the applicable logo, or play back or...
User Guide
Page 115
... to work with your computer or visit the Toshiba Web site at least once a month. To ensure that you play DVDs while running the computer on AC power. Recharge time varies depending on battery power at accessories.toshiba.com. NOTE For optimum optical media performance, ...depending on product model, configuration, applications, power management settings and features utilized, as well as the natural performance variations produced by Toshiba under the specific test settings at maximum capacity and will be obtained by any conditions other than a month), the battery may...
... to work with your computer or visit the Toshiba Web site at least once a month. To ensure that you play DVDs while running the computer on AC power. Recharge time varies depending on battery power at accessories.toshiba.com. NOTE For optimum optical media performance, ...depending on product model, configuration, applications, power management settings and features utilized, as well as the natural performance variations produced by Toshiba under the specific test settings at maximum capacity and will be obtained by any conditions other than a month), the battery may...
User Guide
Page 177
Dual view feature is required for copy protection purposes. Please use Windows Media® player or "TOSHIBA DVD Player" for HD viewing. ❖ Do not place your computer in sleep or hibernate mode while the Blu-ray Disc™ player is running. ...region code of your computer's power cord/cable to compatibility, network settings or other applications during BD playback. ❖ BD player does not support DVD playback. Certain interactive features may vary with high definition content is required and will not play properly. Advanced Access Content System (AACS) keys are ...
Dual view feature is required for copy protection purposes. Please use Windows Media® player or "TOSHIBA DVD Player" for HD viewing. ❖ Do not place your computer in sleep or hibernate mode while the Blu-ray Disc™ player is running. ...region code of your computer's power cord/cable to compatibility, network settings or other applications during BD playback. ❖ BD player does not support DVD playback. Certain interactive features may vary with high definition content is required and will not play properly. Advanced Access Content System (AACS) keys are ...


