User Guide
Page 5
... number provided may not be a 900 number or any changes necessary to maintain uninterrupted service. Fax Branding The following information is to provide you in their equipment, operations or procedures. In order to do this equipment, for which charges exceed local or long-distance transmission charges.) If trouble is resolved. If the equipment is causing harm to the telephone network...
... number provided may not be a 900 number or any changes necessary to maintain uninterrupted service. Fax Branding The following information is to provide you in their equipment, operations or procedures. In order to do this equipment, for which charges exceed local or long-distance transmission charges.) If trouble is resolved. If the equipment is causing harm to the telephone network...
User Guide
Page 30
... custom size partition 64 Recovering without changing the internal storage drive partitions 67 Creating recovery DVDs/media 69 Restoring from recovery DVDs/media 72 Erasing the Internal Storage Drive 74 Checking the internal storage drive operating status 75 Installing drivers and applications 76 Using the TouchPad 76 Adjusting TouchPad™ settings 79 Disabling or enabling the TouchPad 80 Using external display devices 80 Selecting video cables 81 Connecting an HDMI™-compatible television or external display device............81 Connecting an external monitor or projector...
... custom size partition 64 Recovering without changing the internal storage drive partitions 67 Creating recovery DVDs/media 69 Restoring from recovery DVDs/media 72 Erasing the Internal Storage Drive 74 Checking the internal storage drive operating status 75 Installing drivers and applications 76 Using the TouchPad 76 Adjusting TouchPad™ settings 79 Disabling or enabling the TouchPad 80 Using external display devices 80 Selecting video cables 81 Connecting an HDMI™-compatible television or external display device............81 Connecting an external monitor or projector...
User Guide
Page 52
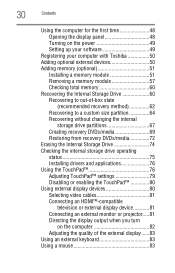
... upside down on the work surface to step 3. 1 Click Start. Slot B is the bottom slot. Before you install or remove a memory module while the computer is to be installed, it must be lost. Start button Shut down button (Sample Image) Shut down button 2 Click the Shut down the operating system, and then turns off the computer using the Start menu. The computer closes all open programs, shuts down button in Slot A.
... upside down on the work surface to step 3. 1 Click Start. Slot B is the bottom slot. Before you install or remove a memory module while the computer is to be installed, it must be lost. Start button Shut down button (Sample Image) Shut down button 2 Click the Shut down the operating system, and then turns off the computer using the Start menu. The computer closes all open programs, shuts down button in Slot A.
User Guide
Page 56
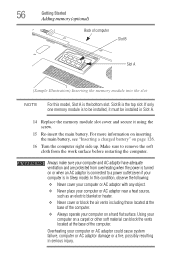
... the work surface before restarting the computer. Make sure to a power outlet (even if your computer or AC adaptor could cause system failure, computer or AC adaptor damage or a fire, possibly resulting in Slot A. 14 Replace the memory module slot cover and secure it must be installed in serious injury. 56 Getting Started Adding memory (optional) Back of computer Slot B Slot A (Sample Illustration) Inserting the memory module...
... the work surface before restarting the computer. Make sure to a power outlet (even if your computer or AC adaptor could cause system failure, computer or AC adaptor damage or a fire, possibly resulting in Slot A. 14 Replace the memory module slot cover and secure it must be installed in serious injury. 56 Getting Started Adding memory (optional) Back of computer Slot B Slot A (Sample Illustration) Inserting the memory module...
User Guide
Page 59
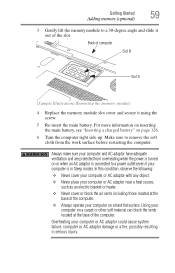
... AC adaptor is connected to a power outlet (even if your computer or AC adaptor could cause system failure, computer or AC adaptor damage or a fire, possibly resulting in Sleep mode). Overheating your computer is in serious injury. Back of computer Slot B Slot A (Sample Illustration) Removing the memory module 4 Replace the memory module slot cover and secure it out of the computer. Always make sure your...
... AC adaptor is connected to a power outlet (even if your computer or AC adaptor could cause system failure, computer or AC adaptor damage or a fire, possibly resulting in Sleep mode). Overheating your computer is in serious injury. Back of computer Slot B Slot A (Sample Illustration) Removing the memory module 4 Replace the memory module slot cover and secure it out of the computer. Always make sure your...
User Guide
Page 60
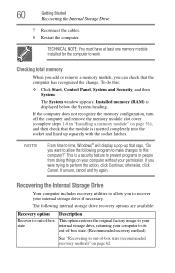
...; Click Start, Control Panel, System and Security, and then System. Recovering the Internal Storage Drive Your computer includes recovery utilities to allow you want to allow the following internal storage drive recovery options are available: Recovery option Recover to time, Windows® will display a pop-up squarely with the socket latches. If the computer does not recognize the memory configuration, turn off the computer and remove the memory module slot cover (complete steps 1-8 in "Installing a memory module" on...
...; Click Start, Control Panel, System and Security, and then System. Recovering the Internal Storage Drive Your computer includes recovery utilities to allow you want to allow the following internal storage drive recovery options are available: Recovery option Recover to time, Windows® will display a pop-up squarely with the socket latches. If the computer does not recognize the memory configuration, turn off the computer and remove the memory module slot cover (complete steps 1-8 in "Installing a memory module" on...
User Guide
Page 81
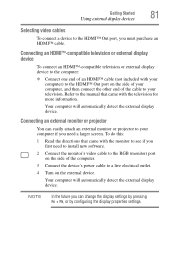
... for more information. Your computer will automatically detect the external display device. Refer to the HDMI™ Out port, you need to install new software. 2 Connect the monitor's video cable to the RGB (monitor) port on the side of the computer. 3 Connect the device's power cable to the HDMI™ Out port on the external device. Your computer will automatically detect the external display device. Getting Started 81 Using external display devices Selecting video cables To connect a device to the manual that came with your television.
... for more information. Your computer will automatically detect the external display device. Refer to the HDMI™ Out port, you need to install new software. 2 Connect the monitor's video cable to the RGB (monitor) port on the side of the computer. 3 Connect the device's power cable to the HDMI™ Out port on the external device. Your computer will automatically detect the external display device. Getting Started 81 Using external display devices Selecting video cables To connect a device to the manual that came with your television.
User Guide
Page 108
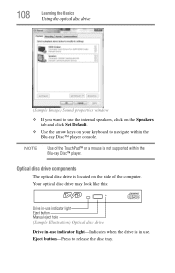
... Basics Using the optical disc drive (Sample Image) Sound properties window ❖ If you want to use the internal speakers, click on the Speakers tab and click Set Default. ❖ Use the arrow keys on the side of the TouchPad™ or a mouse is in use. Your optical disc drive may look like this: Drive in-use indicator light Eject button Manual eject hole (Sample Illustration) Optical disc drive Drive in-use indicator light-Indicates when the drive is not supported...
... Basics Using the optical disc drive (Sample Image) Sound properties window ❖ If you want to use the internal speakers, click on the Speakers tab and click Set Default. ❖ Use the arrow keys on the side of the TouchPad™ or a mouse is in use. Your optical disc drive may look like this: Drive in-use indicator light Eject button Manual eject hole (Sample Illustration) Optical disc drive Drive in-use indicator light-Indicates when the drive is not supported...
User Guide
Page 111
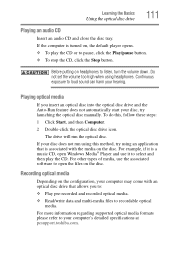
..., open the files on the disc. The drive will run using this , follow these steps: 1 Click Start, and then Computer. 2 Double-click the optical disc drive icon. If the computer is turned on the configuration, your disc, try using headphones. Learning the Basics Using the optical disc drive 111 Playing an audio CD Insert an audio CD and close the disc tray. For more information regarding supported optical media formats...
..., open the files on the disc. The drive will run using this , follow these steps: 1 Click Start, and then Computer. 2 Double-click the optical disc drive icon. If the computer is turned on the configuration, your disc, try using headphones. Learning the Basics Using the optical disc drive 111 Playing an audio CD Insert an audio CD and close the disc tray. For more information regarding supported optical media formats...

User Guide
Page 152
... the User Password icon. 4 Click Registered. 5 Enter your password, and then enter it again to verify. 6 Click OK. 7 Click OK to remove the user password. The TOSHIBA Assist window appears. 2 On the left side, click the Secure tab. 3 Click the User Password icon. 4 Click Not Registered. 5 Follow the on-screen instructions to exit. 152 Utilities Setting passwords To register a password for the power-on password function: 1 Click Start, All Programs, TOSHIBA, Utilities, and then TOSHIBA...
... the User Password icon. 4 Click Registered. 5 Enter your password, and then enter it again to verify. 6 Click OK. 7 Click OK to remove the user password. The TOSHIBA Assist window appears. 2 On the left side, click the Secure tab. 3 Click the User Password icon. 4 Click Not Registered. 5 Follow the on-screen instructions to exit. 152 Utilities Setting passwords To register a password for the power-on password function: 1 Click Start, All Programs, TOSHIBA, Utilities, and then TOSHIBA...
User Guide
Page 161
... device operation time and number of actuations or status changes (e.g.: number of power button and Fn key combination uses, and AC adaptor, battery, LCD, fan, HDD, sound volume, wireless communication switch, docking and USB information), date of the total hard disk capacity (approximately 3 MB or less per year). It may use this information for various devices). Those countries may or may be used to the use , and also computer and device usage (e.g.: power settings, battery temperature and recharging, CPU, memory...
... device operation time and number of actuations or status changes (e.g.: number of power button and Fn key combination uses, and AC adaptor, battery, LCD, fan, HDD, sound volume, wireless communication switch, docking and USB information), date of the total hard disk capacity (approximately 3 MB or less per year). It may use this information for various devices). Those countries may or may be used to the use , and also computer and device usage (e.g.: power settings, battery temperature and recharging, CPU, memory...
User Guide
Page 167
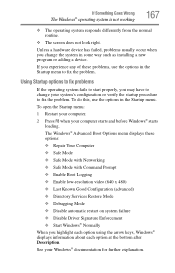
... these options: ❖ Repair Your Computer ❖ Safe Mode ❖ Safe Mode with Networking ❖ Safe Mode with Command Prompt ❖ Enable Boot Logging ❖ Enable low-resolution video (640 x 480) ❖ Last Known Good Configuration (advanced) ❖ Directory Services Restore Mode ❖ Debugging Mode ❖ Disable automatic restart on system failure ❖ Disable Driver Signature Enforcement ❖ Start Windows® Normally When you change your Windows® documentation for further explanation. Unless a hardware device has failed, problems...
... these options: ❖ Repair Your Computer ❖ Safe Mode ❖ Safe Mode with Networking ❖ Safe Mode with Command Prompt ❖ Enable Boot Logging ❖ Enable low-resolution video (640 x 480) ❖ Last Known Good Configuration (advanced) ❖ Directory Services Restore Mode ❖ Debugging Mode ❖ Disable automatic restart on system failure ❖ Disable Driver Signature Enforcement ❖ Start Windows® Normally When you change your Windows® documentation for further explanation. Unless a hardware device has failed, problems...
User Guide
Page 172
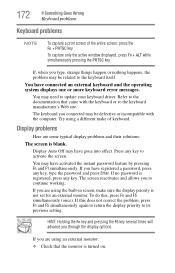
... type, strange things happen or nothing happens, the problem may need to continue working. To capture only the active window displayed, press Fn + ALT while simultaneously pressing the PRTSC key. Display Auto Off may have gone into effect. Display problems Here are some typical display problems and their solutions: The screen is registered, press any key to its previous setting. Press any key. If you to update your keyboard driver...
... type, strange things happen or nothing happens, the problem may need to continue working. To capture only the active window displayed, press Fn + ALT while simultaneously pressing the PRTSC key. Display Auto Off may have gone into effect. Display problems Here are some typical display problems and their solutions: The screen is registered, press any key to its previous setting. Press any key. If you to update your keyboard driver...
User Guide
Page 214
... operating system automatically recognize the change. An interface used to perform a task instead of using this function, if connected with the Fn key can set system options or control system parameters, such as a mouse. See also Sleep, Suspend. One A/V component can control another while using a pointing device such as the battery save mode. (2) A key or combination of many Toshiba computers that you turn on the computer again, your work is refreshed. hot key...
... operating system automatically recognize the change. An interface used to perform a task instead of using this function, if connected with the Fn key can set system options or control system parameters, such as a mouse. See also Sleep, Suspend. One A/V component can control another while using a pointing device such as the battery save mode. (2) A key or combination of many Toshiba computers that you turn on the computer again, your work is refreshed. hot key...
User Guide
Page 221
... adaptor 45 AC power 116 AC power light 45 accessing network 135 adding memory check total memory 60 memory (optional) 51 optional external devices 50 adequate ventilation cooling fan 44 adjusting TouchPad™ settings 79 Application Cards 192 audio features 137 B backing up files 98, 105 battery battery life 115 Call2Recycle™ 130 care 127, 128 changing 124 charge indicator light 46 charge not lasting 171 charge time 116 charger 116 charging 47, 116 charging the real-time...
... adaptor 45 AC power 116 AC power light 45 accessing network 135 adding memory check total memory 60 memory (optional) 51 optional external devices 50 adequate ventilation cooling fan 44 adjusting TouchPad™ settings 79 Application Cards 192 audio features 137 B backing up files 98, 105 battery battery life 115 Call2Recycle™ 130 care 127, 128 changing 124 charge indicator light 46 charge not lasting 171 charge time 116 charger 116 charging 47, 116 charging the real-time...
User Guide
Page 222
... RTC memory 115 running computer on battery power 114 safety precautions 127 setting notifications 120 battery indicator light 119 BIOS Setup see TOSHIBA Hardware Setup Blu-ray Disc™ using 107 button eject, optical disc drive 108 power 49 Shut down 52, 87 start 133 C Call2Recycle™ battery 130 caring for your computer 95 changing battery 124 character keys 99 charging the battery 47 checking device properties 169 cleaning the computer 95 communications network connection 135 set up 134...
... RTC memory 115 running computer on battery power 114 safety precautions 127 setting notifications 120 battery indicator light 119 BIOS Setup see TOSHIBA Hardware Setup Blu-ray Disc™ using 107 button eject, optical disc drive 108 power 49 Shut down 52, 87 start 133 C Call2Recycle™ battery 130 caring for your computer 95 changing battery 124 character keys 99 charging the battery 47 checking device properties 169 cleaning the computer 95 communications network connection 135 set up 134...
User Guide
Page 223
... (monitor) port 80 external display, adjusting 83 F FAT (File Allocation Table) 174 file extensions using 104 files backing up 98, 105 file names 104 printing 104 restore 106 saving 103 using a file extension 104 function keys 99 H headphones using 138 Help and Support Windows® operating system 168 Hibernation mode 86 configuring 90 configuring options 90 hot key 198 powering down 90 Shut down 90 starting again from 92 using 90 hot key disabling or enabling wireless devices 201
... (monitor) port 80 external display, adjusting 83 F FAT (File Allocation Table) 174 file extensions using 104 files backing up 98, 105 file names 104 printing 104 restore 106 saving 103 using a file extension 104 function keys 99 H headphones using 138 Help and Support Windows® operating system 168 Hibernation mode 86 configuring 90 configuring options 90 hot key 198 powering down 90 Shut down 90 starting again from 92 using 90 hot key disabling or enabling wireless devices 201
User Guide
Page 224
... working 164 special Windows® keys 100 troubleshooting 172 using 98 keyboard, external 83 keys Ctrl Fn Alt 99 function keys 99 L LEDs system indicator lights 119 AC adaptor light 118 AC power light 45, 46 battery light 46, 47 ON/OFF light 49, 90, 92, 95 Web Camera light 138 lock computer, using 96 M maintaining your battery 128 manual eject hole optical disc drive 109 memory adding (optional) 51 check total memory 60 problem solving 170 removing memory module slot cover 53 Memory card reader inserting memory media 140 removing memory media 140 using...
... working 164 special Windows® keys 100 troubleshooting 172 using 98 keyboard, external 83 keys Ctrl Fn Alt 99 function keys 99 L LEDs system indicator lights 119 AC adaptor light 118 AC power light 45, 46 battery light 46, 47 ON/OFF light 49, 90, 92, 95 Web Camera light 138 lock computer, using 96 M maintaining your battery 128 manual eject hole optical disc drive 109 memory adding (optional) 51 check total memory 60 problem solving 170 removing memory module slot cover 53 Memory card reader inserting memory media 140 removing memory media 140 using...
User Guide
Page 226
226 Index power button 49 power management 116 optimum performance 116 power plans selecting power plan options 122 using a hot key 123 power saving options 121 powering down using Hibernate 90 using Sleep 93 precautions safety 42 printer connecting 83 setting up 84 USB-compatible 83 printing a file 104 problem solving AC power 170 battery charge does not last 171 battery not charging 171 changing display properties 173 checking device properties 169 computer will not power up 164 contacting Toshiba 186...
226 Index power button 49 power management 116 optimum performance 116 power plans selecting power plan options 122 using a hot key 123 power saving options 121 powering down using Hibernate 90 using Sleep 93 precautions safety 42 printer connecting 83 setting up 84 USB-compatible 83 printing a file 104 problem solving AC power 170 battery charge does not last 171 battery not charging 171 changing display properties 173 checking device properties 169 computer will not power up 164 contacting Toshiba 186...
User Guide
Page 228
...Recognition Utility 153 TOSHIBA Hardware Setup 156 TOSHIBA PC Diagnostic Tool Utility 154 TOSHIBA PC Health Monitor 161 TOSHIBA Service Station 161 TOSHIBA Zooming Utility 158 TouchPad™ using 76 traveling tips 130 troubleshooting external keyboard 172 keyboard 172 optical disc drive 175 turning off computer 85 computer more quickly 88 options 85 turning on power 49 U USB-compatible printer 83 user password, deleting 152 user password, setting 151 using a microphone 137 computer lock 96 DVDs 106 Hibernation mode 90 hot key to set a power plan 123 Memory card reader 139 optical disc drive...
...Recognition Utility 153 TOSHIBA Hardware Setup 156 TOSHIBA PC Diagnostic Tool Utility 154 TOSHIBA PC Health Monitor 161 TOSHIBA Service Station 161 TOSHIBA Zooming Utility 158 TouchPad™ using 76 traveling tips 130 troubleshooting external keyboard 172 keyboard 172 optical disc drive 175 turning off computer 85 computer more quickly 88 options 85 turning on power 49 U USB-compatible printer 83 user password, deleting 152 user password, setting 151 using a microphone 137 computer lock 96 DVDs 106 Hibernation mode 90 hot key to set a power plan 123 Memory card reader 139 optical disc drive...


