User Manual
Page 20
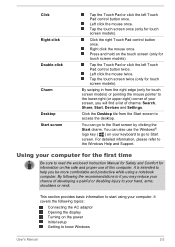
... for touch screen models). Tap the Touch Pad or click the left Touch Pad control button once. Left click the mouse twice. For detailed information, please refer to your chance of charms: Search, Share, Start, Devices and Settings. This section provides basic information to start using a notebook computer. Press and hold on the safe and proper use the Windows® logo key ( ) on the power Initial setup Getting to read the enclosed Instruction Manual...
... for touch screen models). Tap the Touch Pad or click the left Touch Pad control button once. Left click the mouse twice. For detailed information, please refer to your chance of charms: Search, Share, Start, Devices and Settings. This section provides basic information to start using a notebook computer. Press and hold on the safe and proper use the Windows® logo key ( ) on the power Initial setup Getting to read the enclosed Instruction Manual...
User Manual
Page 27
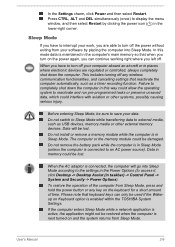
... not remove the battery pack while the computer is next turned on the power again, you can only be sure to save your work, you have to external media, such as a timer recording function. To restore the operation of the computer from Sleep Mode, press and hold the power button or any wireless communication functionalities, and cancelling settings that when you left off the power without exiting from Sleep Mode. User's Manual 2-9
... not remove the battery pack while the computer is next turned on the power again, you can only be sure to save your work, you have to external media, such as a timer recording function. To restore the operation of the computer from Sleep Mode, press and hold the power button or any wireless communication functionalities, and cancelling settings that when you left off the power without exiting from Sleep Mode. User's Manual 2-9
User Manual
Page 29
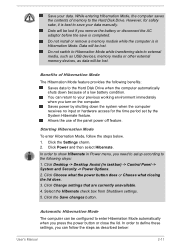
... order to define these settings, you can be lost . Do not switch to Hibernation Mode while transferring data to enter Hibernation Mode automatically when you press the power button or close the lid. Starting Hibernation Mode To enter Hibernation Mode, follow the steps as data will be configured to external media, such as USB devices, memory media or other external memory devices, as described below . 1. Click Desktop -> Desktop Assist (in Power menu, you need to setup...
... order to define these settings, you can be lost . Do not switch to Hibernation Mode while transferring data to enter Hibernation Mode automatically when you press the power button or close the lid. Starting Hibernation Mode To enter Hibernation Mode, follow the steps as data will be configured to external media, such as USB devices, memory media or other external memory devices, as described below . 1. Click Desktop -> Desktop Assist (in Power menu, you need to setup...
User Manual
Page 48
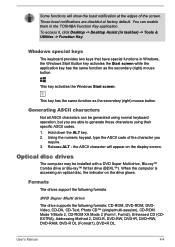
... is accessing an optical disc, the indicator on the display screen. Windows special keys The keyboard provides two keys that have special functions in taskbar) -> Tools & Utilities -> Function Key. Generating ASCII characters Not all ASCII characters can enable them in the TOSHIBA Function Key application. the ASCII character will show the toast notification at factory default. Optical disc drives The computer may be generated using their specific ASCII codes. 1. Formats The drives support the following formats: CD-ROM, DVD-ROM, DVDVideo...
... is accessing an optical disc, the indicator on the display screen. Windows special keys The keyboard provides two keys that have special functions in taskbar) -> Tools & Utilities -> Function Key. Generating ASCII characters Not all ASCII characters can enable them in the TOSHIBA Function Key application. the ASCII character will show the toast notification at factory default. Optical disc drives The computer may be generated using their specific ASCII codes. 1. Formats The drives support the following formats: CD-ROM, DVD-ROM, DVDVideo...
User Manual
Page 59
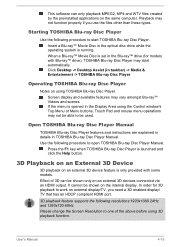
... to work on an external 3D device feature is opened in TOSHIBA Blu-ray Disc Player Manual. If the menu is only provided with Blu-ray™ drive), TOSHIBA Blu-ray Disc Player may not be shown only on using the Control window's Top Menu or Menu buttons, Touch Pad and mouse menu operations may start TOSHIBA Blu-ray Disc Player. Effect of the above before using 3D playback function. User's Manual 4-15 Press the F1 key when TOSHIBA Blu-ray Disc...
... to work on an external 3D device feature is opened in TOSHIBA Blu-ray Disc Player Manual. If the menu is only provided with Blu-ray™ drive), TOSHIBA Blu-ray Disc Player may not be shown only on using the Control window's Top Menu or Menu buttons, Touch Pad and mouse menu operations may start TOSHIBA Blu-ray Disc Player. Effect of the above before using 3D playback function. User's Manual 4-15 Press the F1 key when TOSHIBA Blu-ray Disc...
User Manual
Page 63
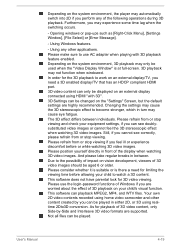
.... This software can be used when the "Video Display Window" is there a need a 3D enabled display/TV that has an HDCP compliant HDMI port. 3D video content can be changed on the "Settings" Screen, but the default settings are supported. Please refrain from or stop viewing if you can playback MPEG2, MP4, and WTV files. Please use AC adapter when playing with 3D". 3D Settings can only be displayed on an external display connected using HDMI...
.... This software can be used when the "Video Display Window" is there a need a 3D enabled display/TV that has an HDCP compliant HDMI port. 3D video content can be changed on the "Settings" Screen, but the default settings are supported. Please refrain from or stop viewing if you can playback MPEG2, MP4, and WTV files. Please use AC adapter when playing with 3D". 3D Settings can only be displayed on an external display connected using HDMI...
User Manual
Page 64
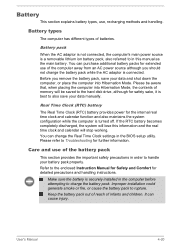
... remove the battery pack, save your data manually. It can purchase additional battery packs for the internal real time clock and calendar function and also maintains the system configuration while the computer is connected. Battery This section explains battery types, use of the battery pack This section provides the important safety precautions in the BIOS setup utility. Before you should not change the Real Time Clock settings in order...
... remove the battery pack, save your data manually. It can purchase additional battery packs for the internal real time clock and calendar function and also maintains the system configuration while the computer is connected. Battery This section explains battery types, use of the battery pack This section provides the important safety precautions in the BIOS setup utility. Before you should not change the Real Time Clock settings in order...

User Manual
Page 71
... installing or removing a memory module, you hear the latch click into the LAN jack. Connecting the LAN cable To connect the LAN cable, follow the steps as detailed below: Connect the AC adaptor before using or configuring a network connection. Otherwise, malfunctions or damage may occur. 1. Press gently until you must remain connected during LAN use. Plug the other cable to the LAN jack. User's Manual 4-27 Figure 4-7 Connecting the LAN cable 2 1 1. Check with your LAN administrator and hardware or software vendor...
... installing or removing a memory module, you hear the latch click into the LAN jack. Connecting the LAN cable To connect the LAN cable, follow the steps as detailed below: Connect the AC adaptor before using or configuring a network connection. Otherwise, malfunctions or damage may occur. 1. Press gently until you must remain connected during LAN use. Plug the other cable to the LAN jack. User's Manual 4-27 Figure 4-7 Connecting the LAN cable 2 1 1. Check with your LAN administrator and hardware or software vendor...

User Manual
Page 72
... the screw is a precision electronic component that the Power indicator is enabled. Close the display panel. 4. User's Manual 4-28 d. Use a point size 0 Phillips screwdriver to Replacing the battery pack section, if required). 5. Remove the AC adaptor and all cables and peripherals connected to install or remove a memory module under the following conditions. Loosen the screw securing the memory module cover in the Settings charm, and then click Shut down while holding...
... the screw is a precision electronic component that the Power indicator is enabled. Close the display panel. 4. User's Manual 4-28 d. Use a point size 0 Phillips screwdriver to Replacing the battery pack section, if required). 5. Remove the AC adaptor and all cables and peripherals connected to install or remove a memory module under the following conditions. Loosen the screw securing the memory module cover in the Settings charm, and then click Shut down while holding...

User Manual
Page 75
... order to the cover in place - Memory module cover 2. Figure 4-10 Seating the memory module cover 2 1 1. refer to the computer. 3. Turn the computer on the model you purchased. 9. ensure that the Power indicator is attached to release it , click Desktop -> Desktop Assist (in the Settings charm, and then click Shut down while holding down and remove the battery pack. 5. Turn the computer upside down the SHIFT key - Removing a memory module...
... order to the cover in place - Memory module cover 2. Figure 4-10 Seating the memory module cover 2 1 1. refer to the computer. 3. Turn the computer on the model you purchased. 9. ensure that the Power indicator is attached to release it , click Desktop -> Desktop Assist (in the Settings charm, and then click Shut down while holding down and remove the battery pack. 5. Turn the computer upside down the SHIFT key - Removing a memory module...
User Manual
Page 82
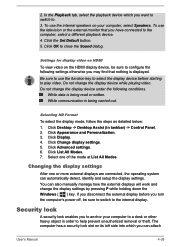
... List All Modes. If you can also manually manage how the external displays will work and change the display device while playing video. 2. Click the Set Default button. 5. Do not change the display settings by pressing P while holding down the Windows ( ) key. Select one or more external displays are connected, the operating system can automatically detect, identify and setup the display settings. Click Display. 4. The computer has a security lock slot on its left side into which you turn the computer's power...
... List All Modes. If you can also manually manage how the external displays will work and change the display device while playing video. 2. Click the Set Default button. 5. Do not change the display settings by pressing P while holding down the Windows ( ) key. Select one or more external displays are connected, the operating system can automatically detect, identify and setup the display settings. Click Display. 4. The computer has a security lock slot on its left side into which you turn the computer's power...
User Manual
Page 94
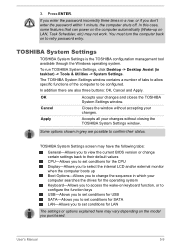
... Settings window. User's Manual 5-9 Press ENTER. In addition there are possible to confirm their default values CPU-Allows you to set conditions for the CPU Display-Allows you to select the internal LCD and/or external monitor when the computer boots up on to be configured. Apply Accepts all your changes without accepting your changes and closes the TOSHIBA System Settings window. If you enter the password incorrectly three times in taskbar) -> Tools & Utilities...
... Settings window. User's Manual 5-9 Press ENTER. In addition there are possible to confirm their default values CPU-Allows you to set conditions for the CPU Display-Allows you to select the internal LCD and/or external monitor when the computer boots up on to be configured. Apply Accepts all your changes without accepting your changes and closes the TOSHIBA System Settings window. If you enter the password incorrectly three times in taskbar) -> Tools & Utilities...
User Manual
Page 103
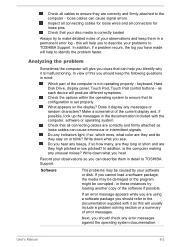
... supplied with the computer, software or operating system. In addition, if a problem recurs, the log you see. Write down what you should refer to TOSHIBA Support. in these instances try to make detailed notes of error messages. loose cables can cause erroneous or intermittent signals. keyboard, Hard Disk Drive, display panel, Touch Pad, Touch Pad control buttons - Does it as loose cables can cause signal errors. If an error message appears while you...
... supplied with the computer, software or operating system. In addition, if a problem recurs, the log you see. Write down what you should refer to TOSHIBA Support. in these instances try to make detailed notes of error messages. loose cables can cause erroneous or intermittent signals. keyboard, Hard Disk Drive, display panel, Touch Pad, Touch Pad control buttons - Does it as loose cables can cause signal errors. If an error message appears while you...
User Manual
Page 105
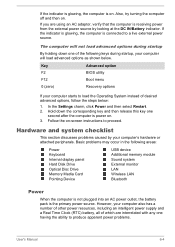
... the following areas: Power Keyboard Internal display panel Hard Disk Drive Optical Disc Drive Memory Media Card Pointing Device USB device Additional memory module Sound system External monitor LAN Wireless LAN Bluetooth Power When the computer is not plugged into an AC power outlet, the battery pack is receiving power from the external power source by your computer starts to produce apparent power problems. User's Manual 6-4 Basic problems may occur in the following keys during startup By holding down the corresponding key and then release this key one having the ability...
... the following areas: Power Keyboard Internal display panel Hard Disk Drive Optical Disc Drive Memory Media Card Pointing Device USB device Additional memory module Sound system External monitor LAN Wireless LAN Bluetooth Power When the computer is not plugged into an AC power outlet, the battery pack is receiving power from the external power source by your computer starts to produce apparent power problems. User's Manual 6-4 Basic problems may occur in the following keys during startup By holding down the corresponding key and then release this key one having the ability...
User Manual
Page 109
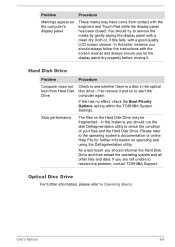
... to start the computer again. In this has no effect, check the Boot Priority Options setting within the TOSHIBA System Settings. Slow performance The files on operating and using the Defragmentation utility. Optical Disc Drive For further information, please refer to see whether there is a disc in this fails, with the keyboard and Touch Pad while the display panel has been closed. Problem Markings appear on the computer's display panel...
... to start the computer again. In this has no effect, check the Boot Priority Options setting within the TOSHIBA System Settings. Slow performance The files on operating and using the Defragmentation utility. Optical Disc Drive For further information, please refer to see whether there is a disc in this fails, with the keyboard and Touch Pad while the display panel has been closed. Problem Markings appear on the computer's display panel...

User Manual
Page 110
... or a neutral cleaner. Pointing device If you are still unable to ensure that is firmly connected. Click Desktop -> Desktop Assist -> Control Panel -> Hardware and Sound -> Mouse. Problem Procedure Memory media card error occurs Remove the memory media card from the computer and check to resolve the problem, contact TOSHIBA Support. Problem Procedure You cannot access a Make sure the drive's disc tray is dirty. Make sure there is not write protected. CD/DVD/Blu-ray Press gently...
... or a neutral cleaner. Pointing device If you are still unable to ensure that is firmly connected. Click Desktop -> Desktop Assist -> Control Panel -> Hardware and Sound -> Mouse. Problem Procedure Memory media card error occurs Remove the memory media card from the computer and check to resolve the problem, contact TOSHIBA Support. Problem Procedure You cannot access a Make sure the drive's disc tray is dirty. Make sure there is not write protected. CD/DVD/Blu-ray Press gently...
User Manual
Page 111
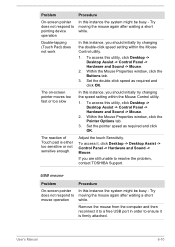
... speed setting within the Mouse Control utility. 1. Within the Mouse Properties window, click the Pointer Options tab. 3. Set the pointer speed as required and click OK. Adjust the touch Sensitivity. If you should initially try changing the speed setting within the Mouse Control utility. 1. Remove the mouse from the computer and then reconnect it to a free USB port in order to resolve the problem, contact TOSHIBA Support. To access this utility, click Desktop -> Desktop Assist -> Control Panel -> Hardware and Sound -> Mouse. 2. Set...
... speed setting within the Mouse Control utility. 1. Within the Mouse Properties window, click the Pointer Options tab. 3. Set the pointer speed as required and click OK. Adjust the touch Sensitivity. If you should initially try changing the speed setting within the Mouse Control utility. 1. Remove the mouse from the computer and then reconnect it to a free USB port in order to resolve the problem, contact TOSHIBA Support. To access this utility, click Desktop -> Desktop Assist -> Control Panel -> Hardware and Sound -> Mouse. 2. Set...
User Manual
Page 112
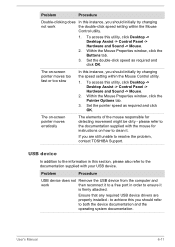
... -> Control Panel -> Hardware and Sound -> Mouse. 2. Set the double-click speed as required and click OK. please refer to the documentation supplied with your USB device. Ensure that any required USB device drivers are still unable to resolve the problem, contact TOSHIBA Support. Problem Procedure USB device does not Remove the USB device from the computer and work the double-click speed setting within the Mouse Control utility. 1. Within the Mouse Properties window, click the Buttons tab. 3. To access...
... -> Control Panel -> Hardware and Sound -> Mouse. 2. Set the double-click speed as required and click OK. please refer to the documentation supplied with your USB device. Ensure that any required USB device drivers are still unable to resolve the problem, contact TOSHIBA Support. Problem Procedure USB device does not Remove the USB device from the computer and work the double-click speed setting within the Mouse Control utility. 1. Within the Mouse Properties window, click the Buttons tab. 3. To access...
User Manual
Page 113
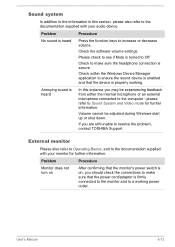
... supplied with your audio device. Problem Procedure Monitor does not turn on After confirming that the monitor's power switch is on, you should check the connections to make sure the headphone connection is firmly connected to the monitor and to a working . Volume cannot be experiencing feedback from either the internal microphone or an external microphone connected to the computer - Check within the Windows Device Manager application to ensure the sound device is enabled and that the...
... supplied with your audio device. Problem Procedure Monitor does not turn on After confirming that the monitor's power switch is on, you should check the connections to make sure the headphone connection is firmly connected to the monitor and to a working . Volume cannot be experiencing feedback from either the internal microphone or an external microphone connected to the computer - Check within the Windows Device Manager application to ensure the sound device is enabled and that the...
User Manual
Page 114
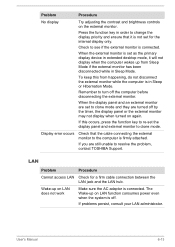
... external monitor has been disconnected while in order to see if the external monitor is not set the display panel and external monitor to the computer is in Sleep or Hibernation Mode. Wake-up on again. Press the function key in Sleep Mode. To keep this occurs, press the function key to re-set for a firm cable connection between the LAN jack and the LAN hub. Remember to resolve the problem, contact TOSHIBA Support. User's Manual 6-13 Check to change...
... external monitor has been disconnected while in order to see if the external monitor is not set the display panel and external monitor to the computer is in Sleep or Hibernation Mode. Wake-up on again. Press the function key in Sleep Mode. To keep this occurs, press the function key to re-set for a firm cable connection between the LAN jack and the LAN hub. Remember to resolve the problem, contact TOSHIBA Support. User's Manual 6-13 Check to change...


