

User Guide
Page 2
...to injury to implanted medical devices, commercial transportation, nuclear facilities or systems or any "critical applications." ACCORDINGLY, TOSHIBA AMERICA INFORMATION SYSTEMS, INC. ("TOSHIBA"), ITS AFFILIATES AND SUPPLIERS DO NOT WARRANT THAT OPERATION OF THE PRODUCT WILL BE UNINTERRUPTED OR ERROR FREE. ... your important data, please make periodic back-up and usage instructions in the applicable user guides and/or manuals enclosed or provided electronically. TOSHIBA DISCLAIMS ANY LIABILITY FOR THE FAILURE TO COPY OR TRANSFER THE DATA CORRECTLY. WHEN COPYING OR TRANSFERRING YOUR ...
...to injury to implanted medical devices, commercial transportation, nuclear facilities or systems or any "critical applications." ACCORDINGLY, TOSHIBA AMERICA INFORMATION SYSTEMS, INC. ("TOSHIBA"), ITS AFFILIATES AND SUPPLIERS DO NOT WARRANT THAT OPERATION OF THE PRODUCT WILL BE UNINTERRUPTED OR ERROR FREE. ... your important data, please make periodic back-up and usage instructions in the applicable user guides and/or manuals enclosed or provided electronically. TOSHIBA DISCLAIMS ANY LIABILITY FOR THE FAILURE TO COPY OR TRANSFER THE DATA CORRECTLY. WHEN COPYING OR TRANSFERRING YOUR ...
User Guide
Page 9
...TECHNICAL OR TYPOGRAPHICAL ERRORS OR OMISSIONS CONTAINED HEREIN OR FOR DISCREPANCIES BETWEEN THE PRODUCT AND THE MANUAL. Export Administration Regulations is copyrighted by Toshiba America Information Systems, Inc. Department of Commerce prior to any form without notice. NOTE ...Notice The information contained in this guide cannot be controlled under the U.S. TOSHIBA CORPORATION AND TOSHIBA AMERICA INFORMATION SYSTEMS, INC. (TOSHIBA) PROVIDES NO WARRANTY WITH REGARD TO THIS MANUAL OR ANY OTHER INFORMATION CONTAINED HEREIN AND HEREBY EXPRESSLY DISCLAIMS ANY IMPLIED WARRANTIES...
...TECHNICAL OR TYPOGRAPHICAL ERRORS OR OMISSIONS CONTAINED HEREIN OR FOR DISCREPANCIES BETWEEN THE PRODUCT AND THE MANUAL. Export Administration Regulations is copyrighted by Toshiba America Information Systems, Inc. Department of Commerce prior to any form without notice. NOTE ...Notice The information contained in this guide cannot be controlled under the U.S. TOSHIBA CORPORATION AND TOSHIBA AMERICA INFORMATION SYSTEMS, INC. (TOSHIBA) PROVIDES NO WARRANTY WITH REGARD TO THIS MANUAL OR ANY OTHER INFORMATION CONTAINED HEREIN AND HEREBY EXPRESSLY DISCLAIMS ANY IMPLIED WARRANTIES...
User Guide
Page 18
Some software may not include user manuals or all your equipment needs, which restricts use technological measures for more information regarding the ENERGY STAR® Program NOTE This computer is compatible with this computer may apply). Toshiba requires its computer component suppliers to meet RoHS requirements and verifies its retail version (if available...
Some software may not include user manuals or all your equipment needs, which restricts use technological measures for more information regarding the ENERGY STAR® Program NOTE This computer is compatible with this computer may apply). Toshiba requires its computer component suppliers to meet RoHS requirements and verifies its retail version (if available...

User Guide
Page 20
... hints and tips. Indicates a potentially hazardous situation which , if not avoided, will result in death or serious injury. 20 Introduction Safety icons Safety icons This manual contains safety instructions that must be observed to your equipment, or loss of data. These safety cautions have been classified according to the seriousness of...
... hints and tips. Indicates a potentially hazardous situation which , if not avoided, will result in death or serious injury. 20 Introduction Safety icons Safety icons This manual contains safety instructions that must be observed to your equipment, or loss of data. These safety cautions have been classified according to the seriousness of...
User Guide
Page 44
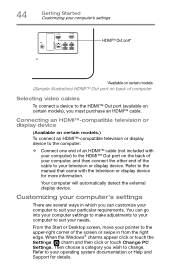
...™ cable. When the Windows® charms appear click or touch the Settings ( ) charm and then click or touch Change PC Settings. Refer to the manual that came with your computer) to the HDMI™ Out port on the back of your computer, and then connect the other end of the...
...™ cable. When the Windows® charms appear click or touch the Settings ( ) charm and then click or touch Change PC Settings. Refer to the manual that came with your computer) to the HDMI™ Out port on the back of your computer, and then connect the other end of the...
User Guide
Page 55
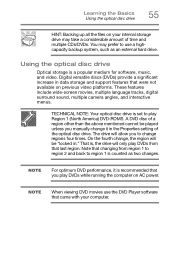
... internal storage drive may prefer to change regions four times. Using the optical disc drive Optical storage is , the drive will be played unless you manually change , the region will only play DVDs from region 1 to region 2 and back to play DVDs while running the computer on AC power.
... internal storage drive may prefer to change regions four times. Using the optical disc drive Optical storage is , the drive will be played unless you manually change , the region will only play DVDs from region 1 to region 2 and back to play DVDs while running the computer on AC power.

User Guide
Page 56
... button. Doing so could cause the drive to press the manual eject button located inside the computer and damage it . Manual eject hole-Use if you need to touch the lens or the area around it . Never use a pencil to release the disc tray. The disc ... disc drive components The optical disc drive is located on . Your optical disc drive may look like this: Drive in-use indicator light Eject button Manual eject hole (Sample Illustration) Optical disc drive Drive in-use indicator light-Indicates when the drive is in -use . Doing so could damage the disc...
... button. Doing so could cause the drive to press the manual eject button located inside the computer and damage it . Manual eject hole-Use if you need to touch the lens or the area around it . Never use a pencil to release the disc tray. The disc ... disc drive components The optical disc drive is located on . Your optical disc drive may look like this: Drive in-use indicator light Eject button Manual eject hole (Sample Illustration) Optical disc drive Drive in-use indicator light-Indicates when the drive is in -use . Doing so could damage the disc...
User Guide
Page 58
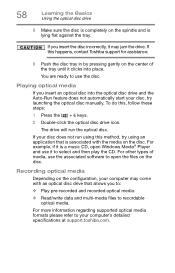
... for assistance. 9 Push the disc tray in by pressing gently on the configuration, your computer's detailed specifications at support.toshiba.com. For more information regarding supported optical media formats please refer to open Windows Media® Player and use it may come with ... media If you insert the disc incorrectly, it to recordable optical media. The drive will run using this method, try launching the optical disc manually. For example, if it is lying flat against the tray. If you insert an optical disc into place. Recording optical media Depending on the...
... for assistance. 9 Push the disc tray in by pressing gently on the configuration, your computer's detailed specifications at support.toshiba.com. For more information regarding supported optical media formats please refer to open Windows Media® Player and use it may come with ... media If you insert the disc incorrectly, it to recordable optical media. The drive will run using this method, try launching the optical disc manually. For example, if it is lying flat against the tray. If you insert an optical disc into place. Recording optical media Depending on the...

User Guide
Page 60
... fully open, remove the disc, and place it . For more information, see "Contacting Toshiba" on page 118. Toshiba's online resources Toshiba maintains a number of the drive. 60 Learning the Basics Toshiba's online resources Removing a disc with the computer off To remove a disc with future upgrades.... These sites provide information about Toshiba products, give help with technical questions and keep you can break off : 1 Insert a slender object, such as a straightened paper clip, into the manual eject hole. Never use a pencil to close it in its ...
... fully open, remove the disc, and place it . For more information, see "Contacting Toshiba" on page 118. Toshiba's online resources Toshiba maintains a number of the drive. 60 Learning the Basics Toshiba's online resources Removing a disc with the computer off To remove a disc with future upgrades.... These sites provide information about Toshiba products, give help with technical questions and keep you can break off : 1 Insert a slender object, such as a straightened paper clip, into the manual eject hole. Never use a pencil to close it in its ...
User Guide
Page 97
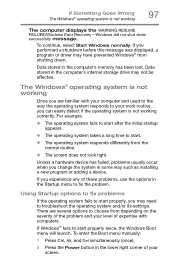
... system is not working Once you performed a shutdown before this message was displayed, a program or driver may not be affected. To enter the Boot menu manually: 1 Press Ctrl, Alt, and Del simultaneously (once). 2 Press the Power button in the lower right corner of expertise with your computer and used to the...
... system is not working Once you performed a shutdown before this message was displayed, a program or driver may not be affected. To enter the Boot menu manually: 1 Press Ctrl, Alt, and Del simultaneously (once). 2 Press the Power button in the lower right corner of expertise with your computer and used to the...

User Guide
Page 98
... the Restart option from the menu. 4 Click or touch Troubleshoot from discs or Web sites are removed. ❖ A list of removed apps is installed ❖ Manually by the user System Image Recovery Windows® will "Recover" the Operating system using a specific image provided by the user. The Operating System will be...
... the Restart option from the menu. 4 Click or touch Troubleshoot from discs or Web sites are removed. ❖ A list of removed apps is installed ❖ Manually by the user System Image Recovery Windows® will "Recover" the Operating system using a specific image provided by the user. The Operating System will be...
User Guide
Page 107
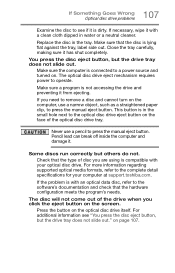
...to a power source and turned on. Never use a narrow object, such as a straightened paper clip, to press the manual eject button. If the problem is compatible with your computer at support.toshiba.com. For additional information see if it with an optical data disc, refer to operate. The optical disc drive... button, but others do not. This button is in the tray. For more information regarding supported optical media formats, refer to press the manual eject button. Replace the disc in the small hole next to the optical disc drive eject button on the face of the drive when you...
...to a power source and turned on. Never use a narrow object, such as a straightened paper clip, to press the manual eject button. If the problem is compatible with your computer at support.toshiba.com. For additional information see if it with an optical data disc, refer to operate. The optical disc drive... button, but others do not. This button is in the tray. For more information regarding supported optical media formats, refer to press the manual eject button. Replace the disc in the small hole next to the optical disc drive eject button on the face of the drive when you...
User Guide
Page 113
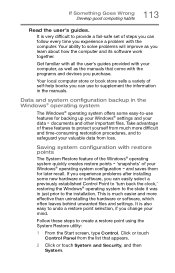
.... and saves them for backing up your Windows® settings and your mind. Your ability to the state it was in the manuals. Your local computer store or book store sells a variety of your valuable data from much more effective than uninstalling the hardware or software... select a previously established Control Point to 'turn back the clock,' restoring the Windows® operating system to solve problems will improve as the manuals that appears. 2 Click or touch System and Security, and then System. 113 If Something Goes Wrong Develop good computing habits Read the user...
.... and saves them for backing up your Windows® settings and your mind. Your ability to the state it was in the manuals. Your local computer store or book store sells a variety of your valuable data from much more effective than uninstalling the hardware or software... select a previously established Control Point to 'turn back the clock,' restoring the Windows® operating system to solve problems will improve as the manuals that appears. 2 Click or touch System and Security, and then System. 113 If Something Goes Wrong Develop good computing habits Read the user...
User Guide
Page 144
... 71 moving the computer 45 N network accessing 71 connecting your computer 70 networking wireless 70 Notification area 69 notifications 69 O online resources Toshiba 60 optical disc Auto-Run feature 58 handling 57 inserting 56 playing optical media 58 positioning 57 recording optical media 58 removing with computer ... optical disc drive components 56 drive in-use indicator light 56 eject button 56 handling an optical disc 57 inserting an optical disc 56 manual eject hole 56 playing optical media 58 problems 106 recording optical media 58 removing a disc 59, 60 troubleshooting 106 using 55, 56 ...
... 71 moving the computer 45 N network accessing 71 connecting your computer 70 networking wireless 70 Notification area 69 notifications 69 O online resources Toshiba 60 optical disc Auto-Run feature 58 handling 57 inserting 56 playing optical media 58 positioning 57 recording optical media 58 removing with computer ... optical disc drive components 56 drive in-use indicator light 56 eject button 56 handling an optical disc 57 inserting an optical disc 56 manual eject hole 56 playing optical media 58 problems 106 recording optical media 58 removing a disc 59, 60 troubleshooting 106 using 55, 56 ...

