User Manual
Page 10
... 8-9 x User's Manual F9 5-2 Soft keys: FN key combinations 5-2 Windows special keys 5-4 Generating ASCII characters 5-5 Chapter 6 Power and Power-up Modes Power conditions 6-1 Power indicators 6-2 Battery types 6-3 Real Time Clock battery 6-4 Care and use of a HD DVD Player 4-15 Writing CD/DVDs on DVD Super Multi (± R DL) drive/ HD DVD-ROM drive 4-17 Important message (DVD Super Multi (± R DL) drive/ HD DVD-ROM drive 4-17 TOSHIBA Disc Creator 4-21 Video 4-22 Media care 4-25 Using the web camera 4-25 Modem 4-27 Wireless communications 4-30 LAN...
... 8-9 x User's Manual F9 5-2 Soft keys: FN key combinations 5-2 Windows special keys 5-4 Generating ASCII characters 5-5 Chapter 6 Power and Power-up Modes Power conditions 6-1 Power indicators 6-2 Battery types 6-3 Real Time Clock battery 6-4 Care and use of a HD DVD Player 4-15 Writing CD/DVDs on DVD Super Multi (± R DL) drive/ HD DVD-ROM drive 4-17 Important message (DVD Super Multi (± R DL) drive/ HD DVD-ROM drive 4-17 TOSHIBA Disc Creator 4-21 Video 4-22 Media care 4-25 Using the web camera 4-25 Modem 4-27 Wireless communications 4-30 LAN...
User Manual
Page 13
..., using the touchpad, optical disc drive, external diskette drive, Wireless LAN, LANs, Audio/Video controls, and internal modem. Chapter 4, Operating Basics, includes tips on care of the Introduction, to learn about features that are uncommon or unique to the computers and carefully read over the Introduction and The Grand Tour chapters to learn how this manual is designed to set up your computer. This powerful, lightweight notebook computer...
..., using the touchpad, optical disc drive, external diskette drive, Wireless LAN, LANs, Audio/Video controls, and internal modem. Chapter 4, Operating Basics, includes tips on care of the Introduction, to learn about features that are uncommon or unique to the computers and carefully read over the Introduction and The Grand Tour chapters to learn how this manual is designed to set up your computer. This powerful, lightweight notebook computer...
User Manual
Page 26
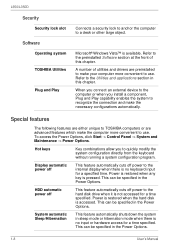
... make the computer more convenient to the internal display when there is accessed. Microsoft® Windows Vista™ is pressed. To access the Power Options, click Start -> Control Panel -> System and Maintenance -> Power Options. This can be specified in the Power Options. 1-8 User's Manual This can be specified in this chapter. Power is restored when the hard disk is no input or hardware access for a time specified. This feature automatically cuts off power to use . Hot keys Display automatic power off HDD...
... make the computer more convenient to the internal display when there is accessed. Microsoft® Windows Vista™ is pressed. To access the Power Options, click Start -> Control Panel -> System and Maintenance -> Power Options. This can be specified in the Power Options. 1-8 User's Manual This can be specified in this chapter. Power is restored when the hard disk is no input or hardware access for a time specified. This feature automatically cuts off power to use . Hot keys Display automatic power off HDD...
User Manual
Page 30
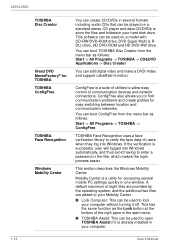
... turning it is a utility for accessing several formats including audio CDs that can be used on a standard stereo CD player and data CD/DVDs to find communication problems and create profiles for easy switching between location and communication networks. This software can be played on a model with CD-RW/DVD-ROM drive, DVD Super Multi (± R DL) drive, HD DVD-ROM and HD DVD-RW drive. You can edit digital video and make a DVD-Video and support Labelflash function...
... turning it is a utility for accessing several formats including audio CDs that can be used on a standard stereo CD player and data CD/DVDs to find communication problems and create profiles for easy switching between location and communication networks. This software can be played on a model with CD-RW/DVD-ROM drive, DVD Super Multi (± R DL) drive, HD DVD-ROM and HD DVD-RW drive. You can edit digital video and make a DVD-Video and support Labelflash function...
User Manual
Page 35
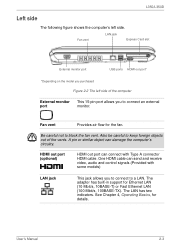
Fan vent LAN jack Express Card slot External monitor port USB ports HDMI out port* *Depending on the model you purchased Figure 2-2 The left side. The LAN has two indicators. HDMI out port (optional) HDMI out port can damage the computer's circuitry. User's Manual 2-3 Fan vent Provides air flow for Ethernet LAN (10 Mbit/s, 10BASE-T) or Fast Ethernet LAN (100 Mbit/s, 100BASE-TX). A pin or similar object can connect with some models) LAN jack This jack allows you to connect an external port monitor. The...
Fan vent LAN jack Express Card slot External monitor port USB ports HDMI out port* *Depending on the model you purchased Figure 2-2 The left side. The LAN has two indicators. HDMI out port (optional) HDMI out port can damage the computer's circuitry. User's Manual 2-3 Fan vent Provides air flow for Ethernet LAN (10 Mbit/s, 10BASE-T) or Fast Ethernet LAN (100 Mbit/s, 100BASE-TX). A pin or similar object can connect with some models) LAN jack This jack allows you to connect an external port monitor. The...
User Manual
Page 52
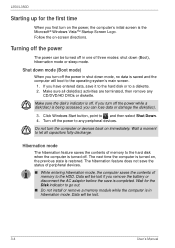
...; Windows Vista™ Startup Screen Logo. Wait for the first time When you first turn the computer or devices back on , the previous state is restored. Turn off in shut down (Boot), hibernation mode or sleep mode. Wait a moment to let all disk(disc) activities are terminated, then remove any peripheral devices. Data will be lost . 3-4 User's Manual Hibernation mode The hibernation feature saves the contents of memory to the hard disk when...
...; Windows Vista™ Startup Screen Logo. Wait for the first time When you first turn the computer or devices back on , the previous state is restored. Turn off in shut down (Boot), hibernation mode or sleep mode. Wait a moment to let all disk(disc) activities are terminated, then remove any peripheral devices. Data will be lost . 3-4 User's Manual Hibernation mode The hibernation feature saves the contents of memory to the hard disk when...
User Manual
Page 56
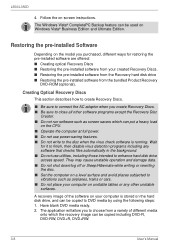
... copied including DVD-R, DVD-RW, DVD+R, DVD+RW. 3-8 User's Manual Restoring the pre-installed Software Depending on the CPU. ■ Operate the computer at full power. ■ Do not use utilities, including those intended to DVD media by using the following steps: 1. The application will allow you create Recovery Discs. ■ Be sure to choose from a variety of the software on your created Recovery Discs. ■ Restoring the pre-installed software from the Recovery hard disk drive ■ Restoring the pre-installed software from...
... copied including DVD-R, DVD-RW, DVD+R, DVD+RW. 3-8 User's Manual Restoring the pre-installed Software Depending on the CPU. ■ Operate the computer at full power. ■ Do not use utilities, including those intended to DVD media by using the following steps: 1. The application will allow you create Recovery Discs. ■ Be sure to choose from a variety of the software on your created Recovery Discs. ■ Restoring the pre-installed software from the Recovery hard disk drive ■ Restoring the pre-installed software from...
User Manual
Page 69
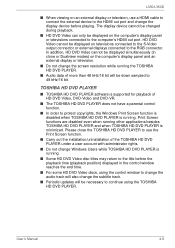
... HD DVD Video, DVD-Video and DVD-VR. ■ The TOSHIBA HD DVD PLAYER does not have a parental control function. ■ In order to the RGB connector. TOSHIBA HD DVD PLAYER ■ TOSHIBA HD DVD PLAYER software is supported for playback of the TOSHIBA HD DVD PLAYER under a user account with administrator rights. ■ Do not change Windows Users while TOSHIBA HD DVD PLAYER is running . User's Manual 4-9 Please close the TOSHIBA HD DVD PLAYER to use a HDMI cable to connect the external device...
... HD DVD Video, DVD-Video and DVD-VR. ■ The TOSHIBA HD DVD PLAYER does not have a parental control function. ■ In order to the RGB connector. TOSHIBA HD DVD PLAYER ■ TOSHIBA HD DVD PLAYER software is supported for playback of the TOSHIBA HD DVD PLAYER under a user account with administrator rights. ■ Do not change Windows Users while TOSHIBA HD DVD PLAYER is running . User's Manual 4-9 Please close the TOSHIBA HD DVD PLAYER to use a HDMI cable to connect the external device...
User Manual
Page 76
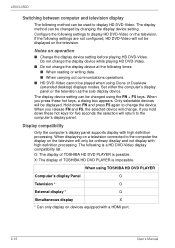
... operations. ■ HD DVD-Video cannot be played when using Clone or Dualview (extended desktop) displays modes. The display device setting can be ordinary display and not display with a HDMI port. 4-16 User's Manual When using the FN + F5 keys. L350/L350D Switching between computer and television display The following is a HD DVD-Video display compatibility list. Set either the computer's display panel or the television as the sole display device. The display method can be changed using TOSHIBA HD DVD PLAYER Computer's display Panel...
... operations. ■ HD DVD-Video cannot be played when using Clone or Dualview (extended desktop) displays modes. The display device setting can be ordinary display and not display with a HDMI port. 4-16 User's Manual When using the FN + F5 keys. L350/L350D Switching between computer and television display The following is a HD DVD-Video display compatibility list. Set either the computer's display panel or the television as the sole display device. The display method can be changed using TOSHIBA HD DVD PLAYER Computer's display Panel...
User Manual
Page 84
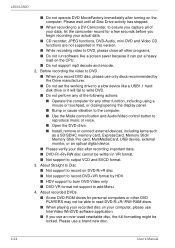
... actions: ■ Operate the computer for personal computers or other function, including using a mouse or touchpad, or closing/opening the display panel. ■ Bump or cause vibration to the computer. ■ Use the Mode control button and Audio/Video control button to reproduce music or voice. ■ Open the DVD drive. ■ Install, remove or connect external devices, including items such as a SD/SDHC memory card, ExpressCard, Memory Stick/ Memory Stick Pro card, MultiMediaCard, USB device, external monitor, or an optical digital device. ■ Please...
... actions: ■ Operate the computer for personal computers or other function, including using a mouse or touchpad, or closing/opening the display panel. ■ Bump or cause vibration to the computer. ■ Use the Mode control button and Audio/Video control button to reproduce music or voice. ■ Open the DVD drive. ■ Install, remove or connect external devices, including items such as a SD/SDHC memory card, ExpressCard, Memory Stick/ Memory Stick Pro card, MultiMediaCard, USB device, external monitor, or an optical digital device. ■ Please...
User Manual
Page 96
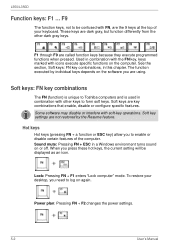
... keys: FN key combinations, in a Windows environment turns sound on the computer. To restore your keyboard. Power plan: Pressing FN + F2 changes the power settings. 5-2 User's Manual F1 through F9 are key combinations that enable, disable or configure specific features. Soft keys are called function keys because they execute programmed functions when pressed. Some software may disable or interfere with other dark gray keys. Soft keys: FN key combinations The FN (function) is unique to Toshiba computers and is used...
... keys: FN key combinations, in a Windows environment turns sound on the computer. To restore your keyboard. Power plan: Pressing FN + F2 changes the power settings. 5-2 User's Manual F1 through F9 are key combinations that enable, disable or configure specific features. Soft keys are called function keys because they execute programmed functions when pressed. Some software may disable or interfere with other dark gray keys. Soft keys: FN key combinations The FN (function) is unique to Toshiba computers and is used...
User Manual
Page 126
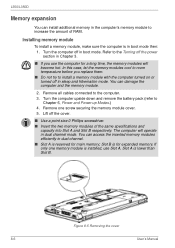
... memory module cover. 5. In this case, let the memory modules cool to room temperature before you use Slot A. Lift off in boot mode. Slot A is for expanded memory. Installing memory module To install a memory module, make sure the computer is installed, use the computer for main memory; Figure 8-5 Removing the cover 8-6 User's Manual Turn the computer upside down and remove the battery pack (refer to install a memory module with the computer turned on or turned off the power section in Chapter 3. ■ If you replace...
... memory module cover. 5. In this case, let the memory modules cool to room temperature before you use Slot A. Lift off in boot mode. Slot A is for expanded memory. Installing memory module To install a memory module, make sure the computer is installed, use the computer for main memory; Figure 8-5 Removing the cover 8-6 User's Manual Turn the computer upside down and remove the battery pack (refer to install a memory module with the computer turned on or turned off the power section in Chapter 3. ■ If you replace...
User Manual
Page 128
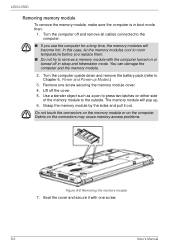
... memory access problems. Figure 8-8 Removing the memory module 7. Debris on the computer. Grasp the memory module by the sides and pull it with the computer turned on either side of the memory module to Chapter 6, Power and Power-up . 6. Turn the computer off and remove all cables connected to remove a memory module with one screw securing the memory module cover. 4. L350/L350D Removing memory module To remove the memory module, make sure the computer is in sleep and hibernation mode. Remove one screw. 8-8 User's Manual Use...
... memory access problems. Figure 8-8 Removing the memory module 7. Debris on the computer. Grasp the memory module by the sides and pull it with the computer turned on either side of the memory module to Chapter 6, Power and Power-up . 6. Turn the computer off and remove all cables connected to remove a memory module with one screw securing the memory module cover. 4. L350/L350D Removing memory module To remove the memory module, make sure the computer is in sleep and hibernation mode. Remove one screw. 8-8 User's Manual Use...
User Manual
Page 135
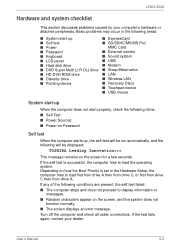
... is set in the following areas: ■ System start-up ■ Self test ■ Power ■ Password ■ Keyboard ■ LCD panel ■ Hard disk drive ■ DVD Super Multi (± R DL) drive ■ HD-DVD ROM drive ■ Diskette drive ■ Pointing device ■ ExpressCard ■ SD/SDHC/MS/MS Pro/ MMC Card ■ External monitor ■ Sound system ■ USB ■ Modem ■ Sleep/Hibernation ■ LAN ■ Wireless LAN ■ Recovery Discs ■ Touchpad device ■ USB mouse System start-up...
... is set in the following areas: ■ System start-up ■ Self test ■ Power ■ Password ■ Keyboard ■ LCD panel ■ Hard disk drive ■ DVD Super Multi (± R DL) drive ■ HD-DVD ROM drive ■ Diskette drive ■ Pointing device ■ ExpressCard ■ SD/SDHC/MS/MS Pro/ MMC Card ■ External monitor ■ Sound system ■ USB ■ Modem ■ Sleep/Hibernation ■ LAN ■ Wireless LAN ■ Recovery Discs ■ Touchpad device ■ USB mouse System start-up...
User Manual
Page 137
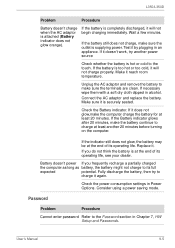
... the battery is at the end of its operating life. Password Problem Procedure Cannot enter password Refer to charge it will not charge properly. Replace it will not begin charging immediately. Check the power consumption settings in alcohol. Connect the AC adaptor and replace the battery. Check the Battery indicator. If the battery is completely discharged, it again. If the battery is too hot or too cold, it . Consider using a power saving mode.
... the battery is at the end of its operating life. Password Problem Procedure Cannot enter password Refer to charge it will not charge properly. Replace it will not begin charging immediately. Check the power consumption settings in alcohol. Connect the AC adaptor and replace the battery. Check the Battery indicator. If the battery is completely discharged, it again. If the battery is too hot or too cold, it . Consider using a power saving mode.
User Manual
Page 145
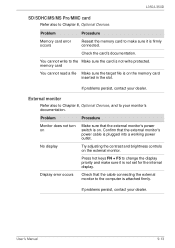
... not set for the internal display. User's Manual 9-13 If problems persist, contact your monitor's documentation. External monitor Refer also to Chapter 8, Optional Devices, and to change the display priority and make sure it is on . No display Try adjusting the contrast and brightness controls on Make sure that the external monitor's power switch is firmly connected. Press hot keys FN + F5 to your dealer. Confirm that the cable connecting the external monitor to Chapter 8, Optional Devices. You cannot write to make sure...
... not set for the internal display. User's Manual 9-13 If problems persist, contact your monitor's documentation. External monitor Refer also to Chapter 8, Optional Devices, and to change the display priority and make sure it is on . No display Try adjusting the contrast and brightness controls on Make sure that the external monitor's power switch is firmly connected. Press hot keys FN + F5 to your dealer. Confirm that the cable connecting the external monitor to Chapter 8, Optional Devices. You cannot write to make sure...
User Manual
Page 172
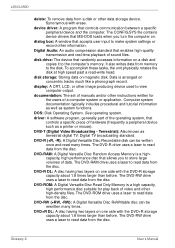
.... DVD-RAM: A Digital Versatile Disc Random Access Memory is a high capacity, high performance disc suitable for the users of sound files. DOS: Disk Operating System. The DVD-RW drive uses a laser to make system settings or record other data storage device. Synonymous with the DVD+R storage capacity about 1.8 times larger than before . device driver: A program that MS-DOS loads when you to read data from the disc. dialog box: A window that controls a specific...
.... DVD-RAM: A Digital Versatile Disc Random Access Memory is a high capacity, high performance disc suitable for the users of sound files. DOS: Disk Operating System. The DVD-RW drive uses a laser to make system settings or record other data storage device. Synonymous with the DVD+R storage capacity about 1.8 times larger than before . device driver: A program that MS-DOS loads when you to read data from the disc. dialog box: A window that controls a specific...
User Manual
Page 174
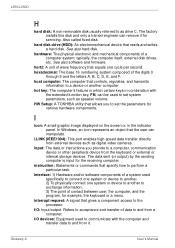
... from external devices such as drive C. Also called fixed disk. L350/L350D H hard disk: A non-removable disk usually referred to a computer, communication device or other peripheral device from the keyboard or external or internal storage devices. HW Setup: A TOSHIBA utility that equals one system or device to another . 2) To physically connect one cycle per second. interface: 1) Hardware and/or software components of wave frequency that allows you provide to as digital video cameras. Glossary-8 User's Manual
... from external devices such as drive C. Also called fixed disk. L350/L350D H hard disk: A non-removable disk usually referred to a computer, communication device or other peripheral device from the keyboard or external or internal storage devices. HW Setup: A TOSHIBA utility that equals one system or device to another . 2) To physically connect one cycle per second. interface: 1) Hardware and/or software components of wave frequency that allows you provide to as digital video cameras. Glossary-8 User's Manual
User Manual
Page 175
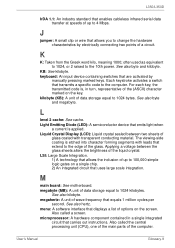
...: See kilobyte. See also byte and megabyte. Light Emitting Diode (LED): A semiconductor device that emits light when a current is , in a single integrated circuit that carries out instructions. M main board: See motherboard. L350/L350D IrDA 1.1: An industry standard that enables cableless infrared serial data transfer at speeds of the glass. keyboard: An input device containing switches that equals 1 million cycles per second. The...
...: See kilobyte. See also byte and megabyte. Light Emitting Diode (LED): A semiconductor device that emits light when a current is , in a single integrated circuit that carries out instructions. M main board: See motherboard. L350/L350D IrDA 1.1: An industry standard that enables cableless infrared serial data transfer at speeds of the glass. keyboard: An input device containing switches that equals 1 million cycles per second. The...
User Manual
Page 183
... lock M Main battery, See Battery pack Memory, 1-2, 10-2 expansion, 1-13, 8-6 installing module, 8-6 removing module, 8-8 Microphone, 1-6 problems, 9-14 using, 4-27 Microprocessor, See Processor Modem, 1-7, 4-27, A-2 connecting, 4-29 disconnecting, 4-30 problems, 9-15 properties menu, 4-28 region selection, 4-27 Moving the computer, 4-33 Multiple digital media card slot using, 8-3 O Optical disc drives using, 4-2 P Password power on, 1-9 problems, 9-5 starting the computer with, 6-13 user, 7-2 PC card location of slots, 2-3 Pointing device touchpad, 4-1 Ports DC IN 19V, 2-5 external monitor...
... lock M Main battery, See Battery pack Memory, 1-2, 10-2 expansion, 1-13, 8-6 installing module, 8-6 removing module, 8-8 Microphone, 1-6 problems, 9-14 using, 4-27 Microprocessor, See Processor Modem, 1-7, 4-27, A-2 connecting, 4-29 disconnecting, 4-30 problems, 9-15 properties menu, 4-28 region selection, 4-27 Moving the computer, 4-33 Multiple digital media card slot using, 8-3 O Optical disc drives using, 4-2 P Password power on, 1-9 problems, 9-5 starting the computer with, 6-13 user, 7-2 PC card location of slots, 2-3 Pointing device touchpad, 4-1 Ports DC IN 19V, 2-5 external monitor...


