

User Guide
Page 2
...can be determined by turning the equipment OFF and ON, the user is encouraged to try to correct the interference by TOSHIBA could void the user's authority to operate the equipment. Changes or modifications made to this equipment does cause harmful interference...guarantee that may cause harmful interference to radio communications. 2 Regulatory Information FCC Information FCC Information Product Name: Camcorder Model number: CAMILEO® AIR10 FCC notice "Declaration of Conformity Information" This equipment has been tested and found to comply with the instructions, may cause ...
...can be determined by turning the equipment OFF and ON, the user is encouraged to try to correct the interference by TOSHIBA could void the user's authority to operate the equipment. Changes or modifications made to this equipment does cause harmful interference...guarantee that may cause harmful interference to radio communications. 2 Regulatory Information FCC Information FCC Information Product Name: Camcorder Model number: CAMILEO® AIR10 FCC notice "Declaration of Conformity Information" This equipment has been tested and found to comply with the instructions, may cause ...

User Guide
Page 3
...and 104 degrees Fahrenheit (-10 and 40 degrees Celsius). Doing so may affect the functionality of different specifications. 3 Contact Address: Telephone: TOSHIBA America Information Systems, Inc. 9740 Irvine Boulevard Irvine, California 92618-1697 (949) 583-3000 Safety Instructions 1 Do not drop, puncture or... the manufacturer. 10 Keep the camcorder out of the reach of infants. 11 Risk of explosion if battery is replaced by TOSHIBA as replacements. Otherwise, the electrolyte solution might leak, battery performance might deteriorate and the battery life might be shortened. ❖...
...and 104 degrees Fahrenheit (-10 and 40 degrees Celsius). Doing so may affect the functionality of different specifications. 3 Contact Address: Telephone: TOSHIBA America Information Systems, Inc. 9740 Irvine Boulevard Irvine, California 92618-1697 (949) 583-3000 Safety Instructions 1 Do not drop, puncture or... the manufacturer. 10 Keep the camcorder out of the reach of infants. 11 Risk of explosion if battery is replaced by TOSHIBA as replacements. Otherwise, the electrolyte solution might leak, battery performance might deteriorate and the battery life might be shortened. ❖...
User Guide
Page 4
... be observed to avoid potential hazards that could result in death or serious injury. Additional Information © Copyright 2012 TOSHIBA CORPORATION. TOSHIBA reserves the right to the seriousness of data. Indicates a potentially hazardous situation which, if not avoided, may result in...instructions as follows: Indicates an imminently hazardous situation which , if not avoided, may result in death or serious injury. TOSHIBA assumes no liability for damages incurred directly or indirectly from errors, omissions or discrepancies between this product and the documentation....
... be observed to avoid potential hazards that could result in death or serious injury. Additional Information © Copyright 2012 TOSHIBA CORPORATION. TOSHIBA reserves the right to the seriousness of data. Indicates a potentially hazardous situation which, if not avoided, may result in...instructions as follows: Indicates an imminently hazardous situation which , if not avoided, may result in death or serious injury. TOSHIBA assumes no liability for damages incurred directly or indirectly from errors, omissions or discrepancies between this product and the documentation....
User Guide
Page 5
... of SD Card Association. Secure Digital and SD are trademarks or registered trademarks of Adobe Systems Incorporated in the United States and other countries. 5 Trademarks CAMILEO is a registered trademark of the Wi-Fi Alliance. Intel, Intel Core, Celeron, Centrino and Pentium are trademarks of Google Inc. Wi-Fi is a registered trademark of Toshiba America Information...
... of SD Card Association. Secure Digital and SD are trademarks or registered trademarks of Adobe Systems Incorporated in the United States and other countries. 5 Trademarks CAMILEO is a registered trademark of the Wi-Fi Alliance. Intel, Intel Core, Celeron, Centrino and Pentium are trademarks of Google Inc. Wi-Fi is a registered trademark of Toshiba America Information...

User Guide
Page 6
Contents Chapter 1: Getting to Know Your Camcorder 9 Overview 9 Check the Components 10 System Requirements 11 Front view 12 Underside view 12 Rear view 13 Chapter 2: Getting Started 14 Charging the battery 14 Charging the battery 16 Inserting and removing an SD™ Card (optional).....21 Protecting data on an SD™ Card 22 Turning the camcorder on and getting started ........22 Turning off the camcorder 22 Chapter 3: Record Mode 23 Button functions 23 LCD screen information 24 Notification icons 25 Video recording 26 6
Contents Chapter 1: Getting to Know Your Camcorder 9 Overview 9 Check the Components 10 System Requirements 11 Front view 12 Underside view 12 Rear view 13 Chapter 2: Getting Started 14 Charging the battery 14 Charging the battery 16 Inserting and removing an SD™ Card (optional).....21 Protecting data on an SD™ Card 22 Turning the camcorder on and getting started ........22 Turning off the camcorder 22 Chapter 3: Record Mode 23 Button functions 23 LCD screen information 24 Notification icons 25 Video recording 26 6
User Guide
Page 7
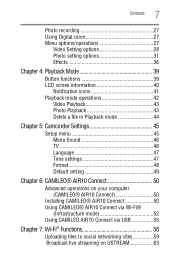
... 46 Language 47 Time settings 47 Format 48 Default setting 49 Chapter 6: CAMILEO® AIR10 Connect 50 Advanced operations on your computer (CAMILEO® AIR10 Connect 50 Installing CAMILEO® AIR10 Connect 50 Using CAMILEO® AIR10 Connect via Wi-Fi® (Infrastructure mode 52 Using CAMILEO AIR10 Connect via USB 55 Chapter 7: Wi-Fi® Functions 58 Uploading files...
... 46 Language 47 Time settings 47 Format 48 Default setting 49 Chapter 6: CAMILEO® AIR10 Connect 50 Advanced operations on your computer (CAMILEO® AIR10 Connect 50 Installing CAMILEO® AIR10 Connect 50 Using CAMILEO® AIR10 Connect via Wi-Fi® (Infrastructure mode 52 Using CAMILEO AIR10 Connect via USB 55 Chapter 7: Wi-Fi® Functions 58 Uploading files...

User Guide
Page 8
8 Contents Chapter 8: Viewing Photos and Videos on TV 65 Connecting to a high-definition 16:9 (wide) TV.......65 Installing bundled software 66 Chapter 9: Viewing Photos and Videos on a Computer 67 Transferring photos or videos to a computer..........67 Chapter 10: Specifications 68 Operating Environment Conditions 69 Chapter 11: Troubleshooting 70 Chapter 12: Other Information 73 Toshiba Support 73 Before you call 73 Contacting Toshiba 74 Toshiba's technical support Web site 74 Toshiba voice contact 74 Warranty 74 Online Warranty Information 74 Warranty Service 74
8 Contents Chapter 8: Viewing Photos and Videos on TV 65 Connecting to a high-definition 16:9 (wide) TV.......65 Installing bundled software 66 Chapter 9: Viewing Photos and Videos on a Computer 67 Transferring photos or videos to a computer..........67 Chapter 10: Specifications 68 Operating Environment Conditions 69 Chapter 11: Troubleshooting 70 Chapter 12: Other Information 73 Toshiba Support 73 Before you call 73 Contacting Toshiba 74 Toshiba's technical support Web site 74 Toshiba voice contact 74 Warranty 74 Online Warranty Information 74 Warranty Service 74
User Guide
Page 9
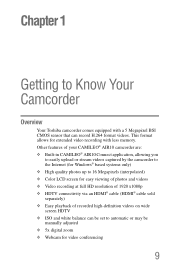
Chapter 1 Getting to Know Your Camcorder Overview Your Toshiba camcorder comes equipped with a 5 Megapixel BSI CMOS sensor that can be set to 16 Megapixels (interpolated) ❖ Color LCD screen for easy viewing of photos ... of 1920 x1080p ❖ HDTV connectivity via an HDMI® cable (HDMI® cable sold separately) ❖ Easy playback of your CAMILEO® AIR10 camcorder are: ❖ Built-in CAMILEO® AIR10 Connect application, allowing you to easily upload or stream videos captured by the camcorder to the Internet (for Windows® based systems...
Chapter 1 Getting to Know Your Camcorder Overview Your Toshiba camcorder comes equipped with a 5 Megapixel BSI CMOS sensor that can be set to 16 Megapixels (interpolated) ❖ Color LCD screen for easy viewing of photos ... of 1920 x1080p ❖ HDTV connectivity via an HDMI® cable (HDMI® cable sold separately) ❖ Easy playback of your CAMILEO® AIR10 camcorder are: ❖ Built-in CAMILEO® AIR10 Connect application, allowing you to easily upload or stream videos captured by the camcorder to the Internet (for Windows® based systems...
User Guide
Page 10
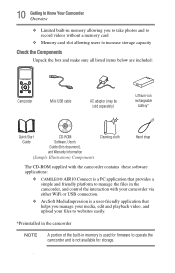
...Your Camcorder Overview ❖ Limited built-in memory allowing you to take photos and to record videos without a memory card ❖ Memory card slot allowing users to increase storage capacity Check the Components Unpack the box and make sure all listed items below are...Warranty information (Sample Illustration) Components Cleaning cloth Hand strap The CD-ROM supplied with the camcorder contains these software applications: ❖ CAMILEO® AIR10 Connect is a PC application that provides a simple and friendly platform to manage the files in the camcorder, and control the ...
...Your Camcorder Overview ❖ Limited built-in memory allowing you to take photos and to record videos without a memory card ❖ Memory card slot allowing users to increase storage capacity Check the Components Unpack the box and make sure all listed items below are...Warranty information (Sample Illustration) Components Cleaning cloth Hand strap The CD-ROM supplied with the camcorder contains these software applications: ❖ CAMILEO® AIR10 Connect is a PC application that provides a simple and friendly platform to manage the files in the camcorder, and control the ...

User Guide
Page 11
11 Getting to Know Your Camcorder Overview System Requirements ❖ Microsoft® Windows® XP/Windows Vista®/Windows® 7 ❖ Intel/AMD Dual-Core CPU or above ❖ 1 GB system memory ❖ 2 GB free HDD space ❖ 4x CD-ROM Drive ❖ Available USB 2.0 port ❖ 16-bit color display ❖ Wi-Fi® capability NOTE The LCD screen is manufactured using extremely high-precision technology. These dots are a normal result of the manufacturing process, and do not affect the recording. However, some tiny black and/or bright dots (white, red, blue ...
11 Getting to Know Your Camcorder Overview System Requirements ❖ Microsoft® Windows® XP/Windows Vista®/Windows® 7 ❖ Intel/AMD Dual-Core CPU or above ❖ 1 GB system memory ❖ 2 GB free HDD space ❖ 4x CD-ROM Drive ❖ Available USB 2.0 port ❖ 16-bit color display ❖ Wi-Fi® capability NOTE The LCD screen is manufactured using extremely high-precision technology. These dots are a normal result of the manufacturing process, and do not affect the recording. However, some tiny black and/or bright dots (white, red, blue ...
User Guide
Page 12
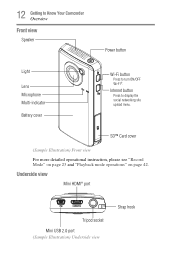
Underside view Mini HDMI® port Tripod socket Mini USB 2.0 port (Sample Illustration) Underside view Strap hook SD™ Card cover (Sample Illustration) Front view For more detailed operational instruction, please see "Record Mode" on page 23 and "Playback mode operations" on page 42. Internet button Press to turn ON/OFF Wi-Fi®. 12 Getting to Know Your Camcorder Overview Front view Speaker Power button Light Lens Microphone Multi-indicator Battery cover Wi-Fi button Press to display the social networking site upload menu.
Underside view Mini HDMI® port Tripod socket Mini USB 2.0 port (Sample Illustration) Underside view Strap hook SD™ Card cover (Sample Illustration) Front view For more detailed operational instruction, please see "Record Mode" on page 23 and "Playback mode operations" on page 42. Internet button Press to turn ON/OFF Wi-Fi®. 12 Getting to Know Your Camcorder Overview Front view Speaker Power button Light Lens Microphone Multi-indicator Battery cover Wi-Fi button Press to display the social networking site upload menu.

User Guide
Page 13
... setting. To stop recording, press it again. (Up) Zoom in/Thumbnail button In Record mode: Zoom in. Return/Exit button Return to the previous screen. CAMILEO AIR10 Menu/OK button Menu ON.
... setting. To stop recording, press it again. (Up) Zoom in/Thumbnail button In Record mode: Zoom in. Return/Exit button Return to the previous screen. CAMILEO AIR10 Menu/OK button Menu ON.

User Guide
Page 14
Chapter 2 Getting Started Charging the battery The battery comes pre-installed in the camcorder, and must be charged before use, however you must remove the protective film on the battery. 1 Slide the battery cover off. (Sample Illustration) Front view 2 Remove the battery. 14
Chapter 2 Getting Started Charging the battery The battery comes pre-installed in the camcorder, and must be charged before use, however you must remove the protective film on the battery. 1 Slide the battery cover off. (Sample Illustration) Front view 2 Remove the battery. 14
User Guide
Page 15
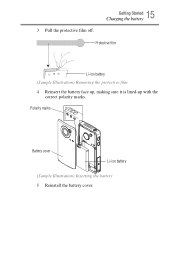
Polarity marks Battery cover Li-ion battery (Sample Illustration) Inserting the battery 5 Reinstall the battery cover. 3 Pull the protective film off. 15 Getting Started Charging the battery Protective film Li-ion battery (Sample Illustration) Removing the protective film 4 Reinsert the battery face up, making sure it is lined-up with the correct polarity marks.
Polarity marks Battery cover Li-ion battery (Sample Illustration) Inserting the battery 5 Reinstall the battery cover. 3 Pull the protective film off. 15 Getting Started Charging the battery Protective film Li-ion battery (Sample Illustration) Removing the protective film 4 Reinsert the battery face up, making sure it is lined-up with the correct polarity marks.

User Guide
Page 16
Turn OFF the camcorder before connecting the cable. It may take up to 8.5 hours to charge the battery via USB and up to 4 hours via AC adaptor. (Actual time may be sold separately) to remove the protective film on the lens before using. A blinking light indicates active charging and a solid light indicates that charging is complete. In AC charging mode, the solid light will turn off automatically after a few minutes. 16 Getting Started Charging the battery Charging the battery You must use the supplied Mini USB cable or AC adaptor (AC adaptor may vary.) (Sample Illustration) Charging ...
Turn OFF the camcorder before connecting the cable. It may take up to 8.5 hours to charge the battery via USB and up to 4 hours via AC adaptor. (Actual time may be sold separately) to remove the protective film on the lens before using. A blinking light indicates active charging and a solid light indicates that charging is complete. In AC charging mode, the solid light will turn off automatically after a few minutes. 16 Getting Started Charging the battery Charging the battery You must use the supplied Mini USB cable or AC adaptor (AC adaptor may vary.) (Sample Illustration) Charging ...
User Guide
Page 17
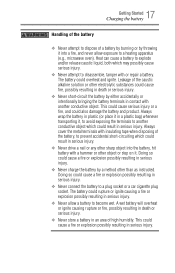
Always cover the metal terminals with a hammer or other object or step on it. 17 Getting Started Charging the battery Handling of the battery ❖ Never attempt to dispose of a battery by burning or by throwing it into the battery, hit battery with insulating tape when disposing of the battery, to prevent accidental short-circuiting which could rupture or ignite causing a fire or explosion possibly resulting in serious injury. ❖ Never allow exposure to a heating apparatus (e.g., microwave oven). The battery could result in serious injury. ❖ Never drive a nail or ...
Always cover the metal terminals with a hammer or other object or step on it. 17 Getting Started Charging the battery Handling of the battery ❖ Never attempt to dispose of a battery by burning or by throwing it into the battery, hit battery with insulating tape when disposing of the battery, to prevent accidental short-circuiting which could rupture or ignite causing a fire or explosion possibly resulting in serious injury. ❖ Never allow exposure to a heating apparatus (e.g., microwave oven). The battery could result in serious injury. ❖ Never drive a nail or ...
User Guide
Page 18
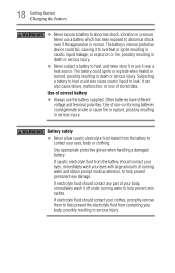
The battery could generate smoke or cause fire or rupture, possibly resulting in death or serious injury. ❖ Never subject a battery to heat, and never store it or use a battery which has been exposed to contact your body, immediately wash it near a heat source. It can also cause failure, malfunction, or loss of non-conforming batteries could ignite or explode when heated or burned, possibly resulting in serious injury. Use appropriate protective gloves when handling a damaged battery. If electrolyte fluid should contact any part of your eyes, body or clothing. Use of ...
The battery could generate smoke or cause fire or rupture, possibly resulting in death or serious injury. ❖ Never subject a battery to heat, and never store it or use a battery which has been exposed to contact your body, immediately wash it near a heat source. It can also cause failure, malfunction, or loss of non-conforming batteries could ignite or explode when heated or burned, possibly resulting in serious injury. Use appropriate protective gloves when handling a damaged battery. If electrolyte fluid should contact any part of your eyes, body or clothing. Use of ...
User Guide
Page 19
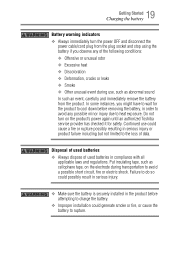
Continued use , such as cellophane tape, on the product's power again until an authorized Toshiba service provider has checked it for the product to cool down before attempting to charge the battery. ❖ Improper installation could generate smoke or fire, ...
Continued use , such as cellophane tape, on the product's power again until an authorized Toshiba service provider has checked it for the product to cool down before attempting to charge the battery. ❖ Improper installation could generate smoke or fire, ...
User Guide
Page 20
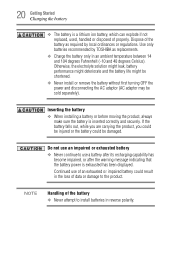
Use only batteries recommended by TOSHIBA as required by local ordinances or regulations. Do not use an impaired or exhausted battery ❖ Never continue to use of an exhausted or impaired ...
Use only batteries recommended by TOSHIBA as required by local ordinances or regulations. Do not use an impaired or exhausted battery ❖ Never continue to use of an exhausted or impaired ...
User Guide
Page 21
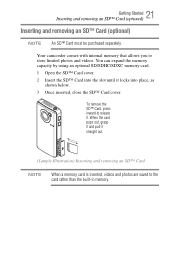
You can expand the memory capacity by using an optional SD/SDHC/SDXC memory card. 1 Open the SD™ Card cover. 2 Insert the SD™ Card into place, as shown below. 3 Once inserted, close the SD™ Card cover. When the card pops out, grasp it and pull it locks into the slot until it straight out. (Sample Illustration) Inserting...
You can expand the memory capacity by using an optional SD/SDHC/SDXC memory card. 1 Open the SD™ Card cover. 2 Insert the SD™ Card into place, as shown below. 3 Once inserted, close the SD™ Card cover. When the card pops out, grasp it and pull it locks into the slot until it straight out. (Sample Illustration) Inserting...