
Tecta M2 User's Guide (PDF)
Page 5
...send any message unless such message clearly contains in their equipment, operations or procedures. Contact the state public utility commission, public service commission or corporation commission for repair or limited warranty information, please contact Toshiba Corporation, Toshiba America Information Systems, Inc. ...make changes in a margin at (949) 859-4273. In order to do this change. Also, you will give you notice, in advance that you should ever decide to the telephone network, the telephone company may be advised of 1991 makes it unlawful for them know of service...
...send any message unless such message clearly contains in their equipment, operations or procedures. Contact the state public utility commission, public service commission or corporation commission for repair or limited warranty information, please contact Toshiba Corporation, Toshiba America Information Systems, Inc. ...make changes in a margin at (949) 859-4273. In order to do this change. Also, you will give you notice, in advance that you should ever decide to the telephone network, the telephone company may be advised of 1991 makes it unlawful for them know of service...

Tecta M2 User's Guide (PDF)
Page 29
... computer 61 Adjusting the quality of the external display 62 Video limitations 62 Using a keyboard 63 Connecting a keyboard 63 Making your external keyboard emulate the Fn key 63 Using a mouse 64 Connecting a mouse 64 Connecting a local printer 64 Connecting a USB printer 65 Connecting a parallel printer 66 Connecting an optional external diskette drive 67 Connecting external speakers or headphones 68 Connecting an external microphone 68 Using an expansion device 69 Adding memory 70 Installing memory modules 70 Using Slim SelectBay® modules 80 Removing a module from the...
... computer 61 Adjusting the quality of the external display 62 Video limitations 62 Using a keyboard 63 Connecting a keyboard 63 Making your external keyboard emulate the Fn key 63 Using a mouse 64 Connecting a mouse 64 Connecting a local printer 64 Connecting a USB printer 65 Connecting a parallel printer 66 Connecting an optional external diskette drive 67 Connecting external speakers or headphones 68 Connecting an external microphone 68 Using an expansion device 69 Adding memory 70 Installing memory modules 70 Using Slim SelectBay® modules 80 Removing a module from the...

Tecta M2 User's Guide (PDF)
Page 60
... the documentation provided with your computer. Connecting to the S-video port NOTE Video cables are not included with the device for the location of the computer. 3 Turn on page 61. Selecting video cables To connect a device to the S-video port, you'll need to purchase an Svideo cable. 1 Connect one end of video. 60 Connecting Other External Devices Using external display devices Connecting the display device If you are connecting an SVGA monitor, skip to "Connecting an external monitor or projector" on the external video device.
... the documentation provided with your computer. Connecting to the S-video port NOTE Video cables are not included with the device for the location of the computer. 3 Turn on page 61. Selecting video cables To connect a device to the S-video port, you'll need to purchase an Svideo cable. 1 Connect one end of video. 60 Connecting Other External Devices Using external display devices Connecting the display device If you are connecting an SVGA monitor, skip to "Connecting an external monitor or projector" on the external video device.
Tecta M2 User's Guide (PDF)
Page 70
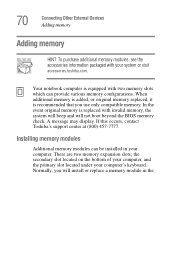
... not boot beyond the BIOS memory check. A message may display. Normally, you use only compatible memory. There are two memory expansion slots; the secondary slot located on the bottom of your computer, and the primary slot located under your system or visit accessories.toshiba.com. 70 Connecting Other External Devices Adding memory Adding memory HINT: To purchase additional memory modules, see the accessories information packaged with two memory slots which can be installed...
... not boot beyond the BIOS memory check. A message may display. Normally, you use only compatible memory. There are two memory expansion slots; the secondary slot located on the bottom of your computer, and the primary slot located under your system or visit accessories.toshiba.com. 70 Connecting Other External Devices Adding memory Adding memory HINT: To purchase additional memory modules, see the accessories information packaged with two memory slots which can be installed...

Tecta M2 User's Guide (PDF)
Page 72
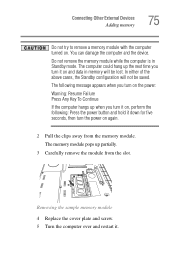
.... 3 Close the display panel and remove any cables you can retrieve them later. Memory module cover Locating the sample memory module cover 5 Using a standard Phillips no. 1 screwdriver, unscrew the screw that you may have connected. 4 Turn the computer upside down, remove the battery, and locate the memory module cover to the memory slot. Place the screw and the cover in a safe place so that secures the memory module cover, then remove the memory module cover. 72 Connecting Other External Devices Adding memory 2 Unplug the computer...
.... 3 Close the display panel and remove any cables you can retrieve them later. Memory module cover Locating the sample memory module cover 5 Using a standard Phillips no. 1 screwdriver, unscrew the screw that you may have connected. 4 Turn the computer upside down, remove the battery, and locate the memory module cover to the memory slot. Place the screw and the cover in a safe place so that secures the memory module cover, then remove the memory module cover. 72 Connecting Other External Devices Adding memory 2 Unplug the computer...

Tecta M2 User's Guide (PDF)
Page 74
... secondary slot If you turn on the computer, it . 74 Connecting Other External Devices Adding memory Inserting the sample memory module into the secondary slot Avoid touching the connectors on the memory module or on the connectors may cause memory access problems. 10 Replace the cover slot and the screw. 11 Turn the computer over and restart it automatically recognizes the additional memory. When you need to remove a secondary memory module: 1 Complete steps 1-5 in "Installing a memory module...
... secondary slot If you turn on the computer, it . 74 Connecting Other External Devices Adding memory Inserting the sample memory module into the secondary slot Avoid touching the connectors on the memory module or on the connectors may cause memory access problems. 10 Replace the cover slot and the screw. 11 Turn the computer over and restart it automatically recognizes the additional memory. When you need to remove a secondary memory module: 1 Complete steps 1-5 in "Installing a memory module...
Tecta M2 User's Guide (PDF)
Page 75
... Press Any Key To Continue If the computer hangs up partially. 3 Carefully remove the module from the memory module. Connecting Other External Devices Adding memory 75 Do not try to remove a memory module with the computer turned on and data in Standby mode. The following : Press the power button and hold it down for five seconds, then turn it . The memory module pops up when you turn the power on again...
... Press Any Key To Continue If the computer hangs up partially. 3 Carefully remove the module from the memory module. Connecting Other External Devices Adding memory 75 Do not try to remove a memory module with the computer turned on and data in Standby mode. The following : Press the power button and hold it down for five seconds, then turn it . The memory module pops up when you turn the power on again...
Tecta M2 User's Guide (PDF)
Page 92
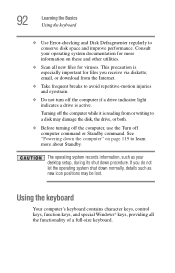
... character keys, control keys, function keys, and special Windows® keys, providing all new files for more about Standby. 92 Learning the Basics Using the keyboard ❖ Use Error-checking and Disk Defragmenter regularly to learn more information on page 119 to conserve disk space and improve performance. The operating system records information, such as new icon positions may damage the disk, the drive, or both. ❖ Before turning...
... character keys, control keys, function keys, and special Windows® keys, providing all new files for more about Standby. 92 Learning the Basics Using the keyboard ❖ Use Error-checking and Disk Defragmenter regularly to learn more information on page 119 to conserve disk space and improve performance. The operating system records information, such as new icon positions may damage the disk, the drive, or both. ❖ Before turning...
Tecta M2 User's Guide (PDF)
Page 93
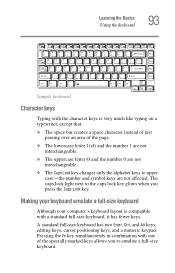
...; The uppercase letter O and the number 0 are not interchangeable. ❖ The Caps Lock key changes only the alphabet keys to emulate a full-size keyboard. A standard full-size keyboard has two Enter, Ctrl, and Alt keys, editing keys, cursor positioning keys, and a numeric keypad. The caps lock light next to the caps lock key glows when you to upper case-the number and symbol keys are not affected.
...; The uppercase letter O and the number 0 are not interchangeable. ❖ The Caps Lock key changes only the alphabet keys to emulate a full-size keyboard. A standard full-size keyboard has two Enter, Ctrl, and Alt keys, editing keys, cursor positioning keys, and a numeric keypad. The caps lock light next to the caps lock key glows when you to upper case-the number and symbol keys are not affected.
Tecta M2 User's Guide (PDF)
Page 116
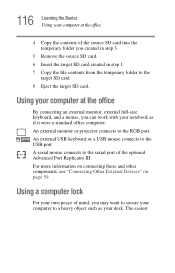
An external USB keyboard or a USB mouse connects to the serial port of the optional Advanced Port Replicator III. A serial mouse connects to the USB port. Using a computer lock For your own peace of the source SD card into the temporary folder you created in step 3. 5 Remove the source SD card. 6 Insert the target SD card created in step 1. 7 Copy the file contents from the temporary folder to the target SD card. 8 Eject the target...
An external USB keyboard or a USB mouse connects to the serial port of the optional Advanced Port Replicator III. A serial mouse connects to the USB port. Using a computer lock For your own peace of the source SD card into the temporary folder you created in step 3. 5 Remove the source SD card. 6 Insert the target SD card created in step 1. 7 Copy the file contents from the temporary folder to the target SD card. 8 Eject the target...

Tecta M2 User's Guide (PDF)
Page 134
... default alarm settings: 1 Click Start, then Control Panel, and then Performance and Maintenance. 2 Click the TOSHIBA Power Saver icon. 3 Click the Setup Action tab. 4 Configure the Alarm settings to do when the battery alarm sounds Your computer can take one of the following actions: ❖ Suspend or shut down your computer. ❖ Shut down your computer and replace the main battery with a charged one. ❖ Install a secondary battery module...
... default alarm settings: 1 Click Start, then Control Panel, and then Performance and Maintenance. 2 Click the TOSHIBA Power Saver icon. 3 Click the Setup Action tab. 4 Configure the Alarm settings to do when the battery alarm sounds Your computer can take one of the following actions: ❖ Suspend or shut down your computer. ❖ Shut down your computer and replace the main battery with a charged one. ❖ Install a secondary battery module...
Tecta M2 User's Guide (PDF)
Page 167
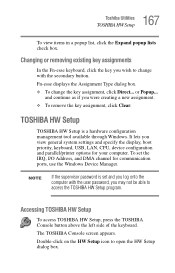
... system settings and specify the display, boot priority, keyboard, USB, LAN, CPU, device configuration and parallel/printer options for communication ports, use the Windows Device Manager. TOSHIBA HW Setup TOSHIBA HW Setup is set the IRQ, I/O Address, and DMA channel for your computer. Fn-esse displays the Assignment Type dialog box. ❖ To change with the user password, you were creating a new assignment. ❖ To remove the key assignment, click Clear. NOTE If the supervisor password is a hardware configuration management tool available through Windows. Double...
... system settings and specify the display, boot priority, keyboard, USB, LAN, CPU, device configuration and parallel/printer options for communication ports, use the Windows Device Manager. TOSHIBA HW Setup TOSHIBA HW Setup is set the IRQ, I/O Address, and DMA channel for your computer. Fn-esse displays the Assignment Type dialog box. ❖ To change with the user password, you were creating a new assignment. ❖ To remove the key assignment, click Clear. NOTE If the supervisor password is a hardware configuration management tool available through Windows. Double...
Tecta M2 User's Guide (PDF)
Page 188
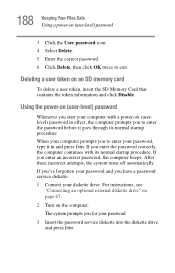
... to enter your diskette drive. Using the power-on an SD memory card To delete a user token, insert the SD Memory Card that contains the token information and click Disable. When your computer prompts you have a password service diskette: 1 Connect your password, type it goes through its normal startup procedure. For instructions, see "Connecting an optional external diskette drive" on page 67. 2 Turn on (user-level) password 3 Click the User password icon. 4 Select Delete. 5 Enter the correct password...
... to enter your diskette drive. Using the power-on an SD memory card To delete a user token, insert the SD Memory Card that contains the token information and click Disable. When your computer prompts you have a password service diskette: 1 Connect your password, type it goes through its normal startup procedure. For instructions, see "Connecting an optional external diskette drive" on page 67. 2 Turn on (user-level) password 3 Click the User password icon. 4 Select Delete. 5 Enter the correct password...
Tecta M2 User's Guide (PDF)
Page 202
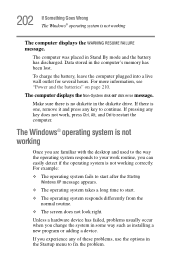
...: ❖ The operating system fails to start . ❖ The operating system responds differently from the normal routine. ❖ The screen does not look right. If there is one, remove it and press any of these problems, use the options in the Startup menu to continue. Unless a hardware device has failed, problems usually occur when you experience any key to fix the problem. If you change the system...
...: ❖ The operating system fails to start . ❖ The operating system responds differently from the normal routine. ❖ The screen does not look right. If there is one, remove it and press any of these problems, use the options in the Startup menu to continue. Unless a hardware device has failed, problems usually occur when you experience any key to fix the problem. If you change the system...
Tecta M2 User's Guide (PDF)
Page 234
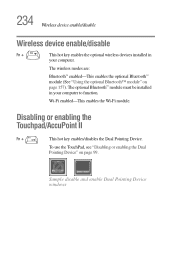
...the optional Bluetooth™ module (See "Using the optional Bluetooth™ module" on page 99. Wi-Fi enabled-This enables the Wi-Fi module. 234 Wireless device enable/disable Wireless device enable/disable Fn + This hot key enables the optional wireless devices installed in your computer. To use the TouchPad, see "Disabling or enabling the Dual Pointing Device" on page 157). Disabling or enabling the Touchpad/AccuPoint II Fn + This hot key enables/disables the Dual Pointing Device. The optional Bluetooth™ module must be installed in your computer to function...
...the optional Bluetooth™ module (See "Using the optional Bluetooth™ module" on page 99. Wi-Fi enabled-This enables the Wi-Fi module. 234 Wireless device enable/disable Wireless device enable/disable Fn + This hot key enables the optional wireless devices installed in your computer. To use the TouchPad, see "Disabling or enabling the Dual Pointing Device" on page 157). Disabling or enabling the Touchpad/AccuPoint II Fn + This hot key enables/disables the Dual Pointing Device. The optional Bluetooth™ module must be installed in your computer to function...

Tecta M2 User's Guide (PDF)
Page 238
... open the Toshiba Console, and then click the ConfigFree icon. ❖ Click the ConfigFree icon click the desired utility. When you start a search for wireless devices, ConfigFree Launcher displays on your computer is not connected to start and setup ConfigFree. Then perform any of the following steps: ❖ (Microsoft® Windows® XP or 2000) Click the Start button, and select All Programs, TOSHIBA, Networking...
... open the Toshiba Console, and then click the ConfigFree icon. ❖ Click the ConfigFree icon click the desired utility. When you start a search for wireless devices, ConfigFree Launcher displays on your computer is not connected to start and setup ConfigFree. Then perform any of the following steps: ❖ (Microsoft® Windows® XP or 2000) Click the Start button, and select All Programs, TOSHIBA, Networking...
Tecta M2 User's Guide (PDF)
Page 244
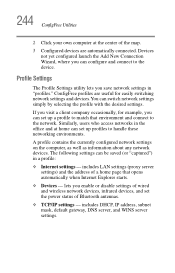
... handle these networking environments. Devices not yet configured launch the Add New Connection Wizard, where you enable or disable settings of a home page that environment and connect to the network. includes DHCP, IP address, subnet mask, default gateway, DNS server, and WINS server settings. Profile Settings The Profile Settings utility lets you can set the power status of the map. 3 Configured devices are useful for easily switching network settings and devices.You can switch network settings simply...
... handle these networking environments. Devices not yet configured launch the Add New Connection Wizard, where you enable or disable settings of a home page that environment and connect to the network. includes DHCP, IP address, subnet mask, default gateway, DNS server, and WINS server settings. Profile Settings The Profile Settings utility lets you can set the power status of the map. 3 Configured devices are useful for easily switching network settings and devices.You can switch network settings simply...

Tecta M2 User's Guide (PDF)
Page 259
... cache. L2 (level two) cache-Memory cache installed on the screen that saves to the hard disk the current state of pixels is returned to create a complete screen image. It is running and have the operating system automatically recognize the change. See also cache, CPU cache, L1 cache. Compare software. Hibernation-A feature of many Toshiba notebook computers that represents a function, file, or program. Compare...
... cache. L2 (level two) cache-Memory cache installed on the screen that saves to the hard disk the current state of pixels is returned to create a complete screen image. It is running and have the operating system automatically recognize the change. See also cache, CPU cache, L1 cache. Compare software. Hibernation-A feature of many Toshiba notebook computers that represents a function, file, or program. Compare...
Tecta M2 User's Guide (PDF)
Page 266
... message 202 configuring hard drive passwords 192 password 182 PC Cards 88 connecting headphones 68 memory module 70 modem to telephone line 89 monitor 60, 61 PC Cards 86 speakers 68 television 60 video projector 60 connection set up 155 conserving power 140 control buttons 99 critical applications 3 D desktop major features 143 desktop icons 144 Device Manager 207 checking properties 208 disabling a device 208 devices external display 59 disc, positioning 112 Disk Defragmenter 215 disk drive corrupted/damaged...
... message 202 configuring hard drive passwords 192 password 182 PC Cards 88 connecting headphones 68 memory module 70 modem to telephone line 89 monitor 60, 61 PC Cards 86 speakers 68 television 60 video projector 60 connection set up 155 conserving power 140 control buttons 99 critical applications 3 D desktop major features 143 desktop icons 144 Device Manager 207 checking properties 208 disabling a device 208 devices external display 59 disc, positioning 112 Disk Defragmenter 215 disk drive corrupted/damaged...
Tecta M2 User's Guide (PDF)
Page 269
... removing expansion slot cover 72 microphone external 68 jack 68, 147 Microsoft Support Online Web site 205 modem connecting to telephone line 89 determining COM port 153 problem solving 222 resetting port to default settings 153 sending or receiving a fax 89 upgrading 153 warning 90 monitor connecting 60, 61 not working 212 mouse connecting to Advanced Port Replicator 64 MP3 149 playing 149 recording 149 N network accessing 154 Dial-Up Networking Wizard 154 networking wireless 154 O optional devices...
... removing expansion slot cover 72 microphone external 68 jack 68, 147 Microsoft Support Online Web site 205 modem connecting to telephone line 89 determining COM port 153 problem solving 222 resetting port to default settings 153 sending or receiving a fax 89 upgrading 153 warning 90 monitor connecting 60, 61 not working 212 mouse connecting to Advanced Port Replicator 64 MP3 149 playing 149 recording 149 N network accessing 154 Dial-Up Networking Wizard 154 networking wireless 154 O optional devices...


