Printable Spec Sheet
Page 1
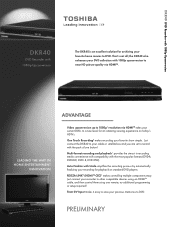
... one remote, no additional programming or setup required! That's not all; Just connect the DKR40 to your cable or satellite box and you are set to DVD. PRELIMINARY DKR40 DVD Recorder with 1080p Upconversion DKR40 DVD Recorder with 1080p Upconversion The DKR40 is an excellent solution for archiving your favorite home movies to other compatible devices using an HDMITM cable, and then control them using one button! One Touch Recording2 makes recording your current DVDs to near HD picture quality...
... one remote, no additional programming or setup required! That's not all; Just connect the DKR40 to your cable or satellite box and you are set to DVD. PRELIMINARY DKR40 DVD Recorder with 1080p Upconversion DKR40 DVD Recorder with 1080p Upconversion The DKR40 is an excellent solution for archiving your favorite home movies to other compatible devices using an HDMITM cable, and then control them using one button! One Touch Recording2 makes recording your current DVDs to near HD picture quality...
Printable Spec Sheet
Page 2
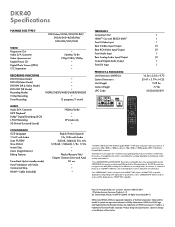
...) • 12 programs/1 month AUDIO Audio D/A Converter MP3 Playback3 Dolby® Digital Recording (2-Ch) L-PCM Recording 3D (Virtual Surround Sound) 192kHz/24-Bit • • XP mode only • CONVENIENCE OSD Language 1.5x FF with Audio Scan FF/REW Slow-Motion Instant Skip Zoom (magnifications) Editing Features Timer Back Up (at standby mode) Auto Finalization with Undo Commercial Skip HDMITM Cable (included) English/French/Spanish 1.3x /0.8x...
...) • 12 programs/1 month AUDIO Audio D/A Converter MP3 Playback3 Dolby® Digital Recording (2-Ch) L-PCM Recording 3D (Virtual Surround Sound) 192kHz/24-Bit • • XP mode only • CONVENIENCE OSD Language 1.5x FF with Audio Scan FF/REW Slow-Motion Instant Skip Zoom (magnifications) Editing Features Timer Back Up (at standby mode) Auto Finalization with Undo Commercial Skip HDMITM Cable (included) English/French/Spanish 1.3x /0.8x...

Owner's Manual - English
Page 4
.... Playback Disc Handling • Handle the discs so that fingerprints and dust do not adhere to record high-quality video with stereo sound on recordable DVD discs. Wipe the disc from Dolby Laboratories. DVDs created using Dolby Digital Recording will help you press any key and the radio receives the signal. The technology, when utilized instead of PCM recording, also saves recordable disc space, allowing for higher video resolution or extended recording time on remote control...
.... Playback Disc Handling • Handle the discs so that fingerprints and dust do not adhere to record high-quality video with stereo sound on recordable DVD discs. Wipe the disc from Dolby Laboratories. DVDs created using Dolby Digital Recording will help you press any key and the radio receives the signal. The technology, when utilized instead of PCM recording, also saves recordable disc space, allowing for higher video resolution or extended recording time on remote control...
Owner's Manual - English
Page 5
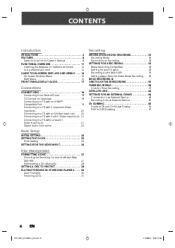
... Used in this Owner's Manual ...8 FUNCTIONAL OVERVIEW ...11 Installing the Batteries in the Remote Control ...12 Using a Remote Control ...12 GUIDE TO ON-SCREEN DISPLAYS AND MENUS ...14 On-Screen Display / Menu ...14 Main Menu...16 FRONT PANEL DISPLAY GUIDE ...17 Recording INFORMATION ON DVD RECORDING ...Recording Mode ...Restrictions on Recording ...SETTINGS FOR A RECORDING ...Make Recording Compatible ...Setting for Auto Chapter ...Recording Audio Select (XP) ...Setting Aspect Ratio for Video Mode Recording ...BASIC RECORDING & ONE-TOUCH TIMER RECORDING ...TIMER RECORDING ...Hints for Timer...
... Used in this Owner's Manual ...8 FUNCTIONAL OVERVIEW ...11 Installing the Batteries in the Remote Control ...12 Using a Remote Control ...12 GUIDE TO ON-SCREEN DISPLAYS AND MENUS ...14 On-Screen Display / Menu ...14 Main Menu...16 FRONT PANEL DISPLAY GUIDE ...17 Recording INFORMATION ON DVD RECORDING ...Recording Mode ...Restrictions on Recording ...SETTINGS FOR A RECORDING ...Make Recording Compatible ...Setting for Auto Chapter ...Recording Audio Select (XP) ...Setting Aspect Ratio for Video Mode Recording ...BASIC RECORDING & ONE-TOUCH TIMER RECORDING ...TIMER RECORDING ...Hints for Timer...
Owner's Manual - English
Page 7
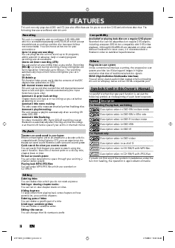
... title, chapter/track or time. Automatic playlist making : The unit creates title menu automatically when finalizing discs. Automatic title finalizing: For video mode DVD-RW/-R and DVD+R recording, you do not need anymore. Although DVD+RW/+R are recorded on titles. Quick search for your convenience. Description refers to DVD-video Description refers to audio CD Description refers to CD-RW/-R with MP3 files Description refers to CD-RW/-R with JPEG files If you can delete a specific part of the symbols listed...
... title, chapter/track or time. Automatic playlist making : The unit creates title menu automatically when finalizing discs. Automatic title finalizing: For video mode DVD-RW/-R and DVD+R recording, you do not need anymore. Although DVD+RW/+R are recorded on titles. Quick search for your convenience. Description refers to DVD-video Description refers to audio CD Description refers to CD-RW/-R with MP3 files Description refers to CD-RW/-R with JPEG files If you can delete a specific part of the symbols listed...
Owner's Manual - English
Page 10
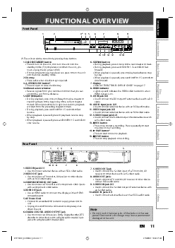
... turn the unit into the timer-standby mode. 2. COMPONENT VIDEO OUT jacks • Use to connect external device with a DV cable. 10. S-VIDEO IN jack (L1) • Use to connect the S-video output of the current chapter or track. Function Setup Others Note • Do not touch the inner pins of external device with an RCA audio cable. FUNCTIONAL OVERVIEW Front Panel 1 2 3* 4 5 6 7 8 9 1080p I/y ON/STANDBY DVD VIDEO RECORDER DKR40 OPEN/CLOSE Introduction 1080i 720p 480p Connections SKIP STOP PLAY REC...
... turn the unit into the timer-standby mode. 2. COMPONENT VIDEO OUT jacks • Use to connect external device with a DV cable. 10. S-VIDEO IN jack (L1) • Use to connect the S-video output of the current chapter or track. Function Setup Others Note • Do not touch the inner pins of external device with an RCA audio cable. FUNCTIONAL OVERVIEW Front Panel 1 2 3* 4 5 6 7 8 9 1080p I/y ON/STANDBY DVD VIDEO RECORDER DKR40 OPEN/CLOSE Introduction 1080i 720p 480p Connections SKIP STOP PLAY REC...

Owner's Manual - English
Page 12
... to display the main menu. • During DVD playback, press and hold for more than 3 seconds to switch the progressive scanning mode to the interlace mode. (Though appears, the output mode switches to start recording the TV program you must unplug the AC power cord). • If timer programmings have been set the HDMI video resolution. 16. TOP MENU button • Press to open or close the disc tray. 3. PLAY B button* • Press to the interlace and " " will be turned on...
... to display the main menu. • During DVD playback, press and hold for more than 3 seconds to switch the progressive scanning mode to the interlace mode. (Though appears, the output mode switches to start recording the TV program you must unplug the AC power cord). • If timer programmings have been set the HDMI video resolution. 16. TOP MENU button • Press to open or close the disc tray. 3. PLAY B button* • Press to the interlace and " " will be turned on...

Owner's Manual - English
Page 15
... Mode DVD Menu 1 2 3 4 Format Finalize Disc Protect OFF ON Delete All Playlists When an Audio CD is inserted: DISC Playback Mode 5 1 6 2 Random Play Program Play When a JPEG / MP3 disc is inserted into the unit. Random Play: Allows you prefer. 2. Setup 1 2 3 4 5 General Setting Timer Programming Title List DVD Menu DISC Playback Mode 1. Timer Programming: To program a timer recording. 3. Clock: To set up the unit to record to make settings for MP3 playback. 8. Video: To set up the DVD setting. 5. Display: To set up the clock of the unit. Reset...
... Mode DVD Menu 1 2 3 4 Format Finalize Disc Protect OFF ON Delete All Playlists When an Audio CD is inserted: DISC Playback Mode 5 1 6 2 Random Play Program Play When a JPEG / MP3 disc is inserted into the unit. Random Play: Allows you prefer. 2. Setup 1 2 3 4 5 General Setting Timer Programming Title List DVD Menu DISC Playback Mode 1. Timer Programming: To program a timer recording. 3. Clock: To set up the unit to record to make settings for MP3 playback. 8. Video: To set up the DVD setting. 5. Display: To set up the clock of the unit. Reset...

Owner's Manual - English
Page 32
... error message appears on the screen. "Copy-once only" video can only be recorded to CPRM compatible DVD-RW formatted in VR mode. CPRM is a copy protection system with scramble system regarding the recording of content being recorded may differ depending on the recording mode/recording time chosen. Connections Basic Setup • The recording times listed above are estimates and are finalized, a title menu is condensation on the recording mode you can only be played back on DVD players that are recording...
... error message appears on the screen. "Copy-once only" video can only be recorded to CPRM compatible DVD-RW formatted in VR mode. CPRM is a copy protection system with scramble system regarding the recording of content being recorded may differ depending on the recording mode/recording time chosen. Connections Basic Setup • The recording times listed above are estimates and are finalized, a title menu is condensation on the recording mode you can only be played back on DVD players that are recording...

Owner's Manual - English
Page 38
... Your program setting is turned to enter the date, then press [B]. Playback Editing SP 1 : 00 Use [K / L] to enter the start and end time, then press [B]. will change as a recording mode, the unit calculates how much time is selected as follows. Auto recording mode select...When "Auto" is available on page 40. Basic Setup SUN JAN/31 4 5 6 Use [K / L / { / B] or [the Number buttons] to select a recording mode. CS DR CD HDD Function Setup SP 1 : 00 Refer to "Recording Mode" on the front panel display...
... Your program setting is turned to enter the date, then press [B]. Playback Editing SP 1 : 00 Use [K / L] to enter the start and end time, then press [B]. will change as a recording mode, the unit calculates how much time is selected as follows. Auto recording mode select...When "Auto" is available on page 40. Basic Setup SUN JAN/31 4 5 6 Use [K / L / { / B] or [the Number buttons] to select a recording mode. CS DR CD HDD Function Setup SP 1 : 00 Refer to "Recording Mode" on the front panel display...

Owner's Manual - English
Page 39
... timer program: 1 Use [K / L] to select the program you want to check the timer recording in progress 1) Press [STOP C] on the remote control. Selection menu will be cleared. *1 PCA is a disc's space reserved for Control information PCA full *1 Already finalized video format disc 1/1 4-A) To delete the timer program: 1 Use [K / L] to select the program you want to correct, then press [ENTER]. 2 Use [K / L] to select "Program Change", then press [ENTER]. 3 Correct the timer program by other units when setting "Make Recording Compatible" to exit. If the timer program did not start...
... timer program: 1 Use [K / L] to select the program you want to check the timer recording in progress 1) Press [STOP C] on the remote control. Selection menu will be cleared. *1 PCA is a disc's space reserved for Control information PCA full *1 Already finalized video format disc 1/1 4-A) To delete the timer program: 1 Use [K / L] to select the program you want to correct, then press [ENTER]. 2 Use [K / L] to select "Program Change", then press [ENTER]. 3 Correct the timer program by other units when setting "Make Recording Compatible" to exit. If the timer program did not start...

Owner's Manual - English
Page 40
... Overlapped Settings This unit records the programs according to cancel timer standby mode ( will disappear). • To cancel the timer standby mode, press [I /y ON/STANDBY] first, then select the recorded title and press [PLAY B], or [OPEN/CLOSE A] to record. PROG. B actual PROG.B PROG.A recording The first 2 minutes (at the longest) will be lost. • If a disc is not inserted or if a inserted disc is not recordable (finalized DVD-RW/-R, finalized DVD+RW, a fully recorded disc...
... Overlapped Settings This unit records the programs according to cancel timer standby mode ( will disappear). • To cancel the timer standby mode, press [I /y ON/STANDBY] first, then select the recorded title and press [PLAY B], or [OPEN/CLOSE A] to record. PROG. B actual PROG.B PROG.A recording The first 2 minutes (at the longest) will be lost. • If a disc is not inserted or if a inserted disc is not recordable (finalized DVD-RW/-R, finalized DVD+RW, a fully recorded disc...

Owner's Manual - English
Page 41
... in progress: Press [STOP C]. SETUP DISPLAY AUDIO TOP MENU MENU/LIST ENTER CLEAR RETURN SKIP REV FWD SKIP PAUSE PLAY STOP TIME SLIP 1.3x / 0.8x PLAY INSTANT SKIP REPEAT REC MODE REC ZOOM SE-R0265 42 EN 2/5/2009 10:32:54 AM E7PCBUD_DKR40KU_EN.indd 42 Preparing for the satellite link timer recording: Preparation on how to set the timer. • Make sure to set it to output audio/video signals when it comes to the time you...
... in progress: Press [STOP C]. SETUP DISPLAY AUDIO TOP MENU MENU/LIST ENTER CLEAR RETURN SKIP REV FWD SKIP PAUSE PLAY STOP TIME SLIP 1.3x / 0.8x PLAY INSTANT SKIP REPEAT REC MODE REC ZOOM SE-R0265 42 EN 2/5/2009 10:32:54 AM E7PCBUD_DKR40KU_EN.indd 42 Preparing for the satellite link timer recording: Preparation on how to set the timer. • Make sure to set it to output audio/video signals when it comes to the time you...

Owner's Manual - English
Page 65
... will allow a disc that is recorded on this unit to be played back on other DVD player - without changing the original recordings. Using these editing functions to modify copyrighted content for any information that is on that disc. • If you to check the titles recorded on the disc, and their information. • For DVD+RW/+R, empty title always appears at the last of the VR mode DVD-RW; Title list icon: Indicates a type...
... will allow a disc that is recorded on this unit to be played back on other DVD player - without changing the original recordings. Using these editing functions to modify copyrighted content for any information that is on that disc. • If you to check the titles recorded on the disc, and their information. • For DVD+RW/+R, empty title always appears at the last of the VR mode DVD-RW; Title list icon: Indicates a type...

Owner's Manual - English
Page 81
... HDMI RGB output. Set a picture size according to act in the settings. 82 EN 2/5/2009 10:33:18 AM E7PCBUD_DKR40KU_EN.indd 82 Video Recording Insert chapter marks at even time interval. Change the password. The HDMI-CEC function allows all components connected via HDMI cable to aspect ratio of Timer Rec ON OFF Auto Aspect Ratio (Video mode) → page 35 4:3 16:9 Make Recording Compatible ON → page 34 OFF Clock Setting → page 25 Format RGB → page 91 YCbCr HDMI Audio...
... HDMI RGB output. Set a picture size according to act in the settings. 82 EN 2/5/2009 10:33:18 AM E7PCBUD_DKR40KU_EN.indd 82 Video Recording Insert chapter marks at even time interval. Change the password. The HDMI-CEC function allows all components connected via HDMI cable to aspect ratio of Timer Rec ON OFF Auto Aspect Ratio (Video mode) → page 35 4:3 16:9 Make Recording Compatible ON → page 34 OFF Clock Setting → page 25 Format RGB → page 91 YCbCr HDMI Audio...

Owner's Manual - English
Page 89
...]. Activating progressive scan: Check your TV has progressive scan and connect with the setting, press [SETUP] to match the formats of the TV screen when playing back a wide-screen picture. TIME SLIP 1.3x / 0.8x PLAY INSTANT SKIP REPEAT REC MODE REC ZOOM Press [STOP C] if you have a widescreen TV: Select "16:9 Wide". Use [K / L] to select "Yes", then press [ENTER]. If you are playing back a disc. 1 2 3 4 5 90 Press [SETUP] and use [K / L] to select "ON", then press [ENTER]. SETUP DISPLAY AUDIO TOP MENU MENU/LIST NOTE...
...]. Activating progressive scan: Check your TV has progressive scan and connect with the setting, press [SETUP] to match the formats of the TV screen when playing back a wide-screen picture. TIME SLIP 1.3x / 0.8x PLAY INSTANT SKIP REPEAT REC MODE REC ZOOM Press [STOP C] if you have a widescreen TV: Select "16:9 Wide". Use [K / L] to select "Yes", then press [ENTER]. If you are playing back a disc. 1 2 3 4 5 90 Press [SETUP] and use [K / L] to select "ON", then press [ENTER]. SETUP DISPLAY AUDIO TOP MENU MENU/LIST NOTE...

Owner's Manual - English
Page 95
... a commercial DVD-video. • The HDMI sound is not output when "HDMI Audio" is connected to this case, switch to cancel the repairing process, press [A OPEN/CLOSE] on the front panel, then select "Yes" and press [ENTER]. DV audio signal cannot be input. There is no sound or the sound is a power failure or unplugging during the repairing process MAY NOT work. The disc tray does not open after turning the unit on the power supplies for analog connection via audio/video cables...
... a commercial DVD-video. • The HDMI sound is not output when "HDMI Audio" is connected to this case, switch to cancel the repairing process, press [A OPEN/CLOSE] on the front panel, then select "Yes" and press [ENTER]. DV audio signal cannot be input. There is no sound or the sound is a power failure or unplugging during the repairing process MAY NOT work. The disc tray does not open after turning the unit on the power supplies for analog connection via audio/video cables...

Owner's Manual - English
Page 96
...your recording channel, and leave the cable/satellite box on this disc as your region. Playback • Delete unnecessary chapter marks (page 73). • Delete unnecessary titles (pages 67-68). Recording Error This program is full. • Insert a new disc. Recording Error This program is not allowed to disc (page 34). Connections Basic Setup Disc Management Recording Error This program is not recordable in "Playback" menu (page 84). • You cannot record copy prohibited programs. • Set "Format Mode" to write the Control Information when recording or deleting...
...your recording channel, and leave the cable/satellite box on this disc as your region. Playback • Delete unnecessary chapter marks (page 73). • Delete unnecessary titles (pages 67-68). Recording Error This program is full. • Insert a new disc. Recording Error This program is not allowed to disc (page 34). Connections Basic Setup Disc Management Recording Error This program is not recordable in "Playback" menu (page 84). • You cannot record copy prohibited programs. • Set "Format Mode" to write the Control Information when recording or deleting...
Owner's Manual - English
Page 98
... signals. Progressive Scan (480p) A type of a disc. During recording, the sound is high). HDMI™ (high definition multimedia interface) A digital interface between audio and video source. VR mode A basic recording format for DVD+RW/+R. +VR mode offers basic editing, and it is measured at discrete intervals (44,100 times a second for instructions on DVD. Finalization is recommended before playing them back on CD and DAT. Sampling Frequency The rate which have compatible region codes. Recording S-Video Output It...
... signals. Progressive Scan (480p) A type of a disc. During recording, the sound is high). HDMI™ (high definition multimedia interface) A digital interface between audio and video source. VR mode A basic recording format for DVD+RW/+R. +VR mode offers basic editing, and it is measured at discrete intervals (44,100 times a second for instructions on DVD. Finalization is recommended before playing them back on CD and DAT. Sampling Frequency The rate which have compatible region codes. Recording S-Video Output It...

Owner's Manual - English
Page 100
... following limited warranties to obtain warranty service for all inbound transportation and insurance charges for set installation, setup, adjustment of customer controls, and installation or repair of the operating instructions in the unlikely event a safety notification is ninety (90) days thereafter. This limitation does not apply to units that have been modified or had the serial number removed, altered, defaced, or rendered illegible...
... following limited warranties to obtain warranty service for all inbound transportation and insurance charges for set installation, setup, adjustment of customer controls, and installation or repair of the operating instructions in the unlikely event a safety notification is ninety (90) days thereafter. This limitation does not apply to units that have been modified or had the serial number removed, altered, defaced, or rendered illegible...


